
This guide shows you how to draw Whis face in eight steps, from a plain head oval to finished black line art. Whis is the angel of Universe 7 in Dragon Ball. He serves Beerus, the God of Destruction, as his attendant and also teaches him martial arts, and later he trains Goku and Vegeta too.
Two shapes make him easy to spot: the tall column of white hair that stands straight up from his head, and the large ring that floats around his neck. Add calm, half-closed eyes and a faint smile, and the drawing already reads as Whis. All you need is a pencil, an eraser and a little time.
Materials Needed
- HB or 2B pencil for the light construction lines
- Kneaded or soft eraser
- Fine black liner, 0.3 mm and 0.5 mm, or a dark 4B pencil
- Smooth drawing paper, or a tablet with a sketch brush and an ink brush
How to Draw Whis Face: Step-by-Step Drawing Guide
Sketch lightly until Step 8. In Steps 1 to 4 the guidelines are light grey. In every picture, grey lines come from earlier steps and black lines are the new ones for that step.
Step 1: Draw the Head Oval and Guidelines
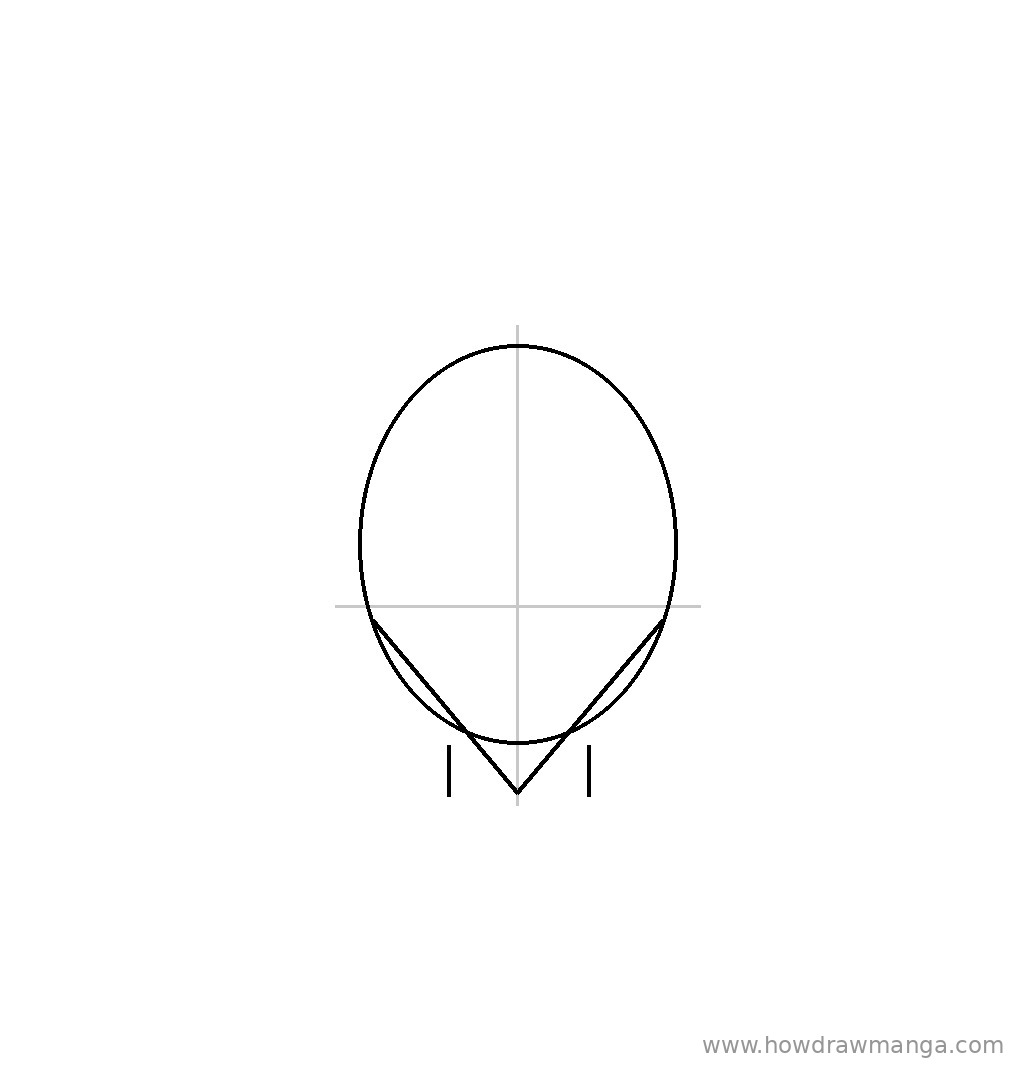
Draw an upright oval in the middle of the page, about one-third of the page width. Split it with a light vertical center line from top to bottom, then cross it with a light horizontal eye line a little below mid-height. From the sides of the oval on that line, draw two light slanted lines that form a V and meet in a chin point just below the oval. Under the chin, add two short vertical neck lines, set a little less than half the head width apart.
Step 2: Shape the Skull, Chin and Ears
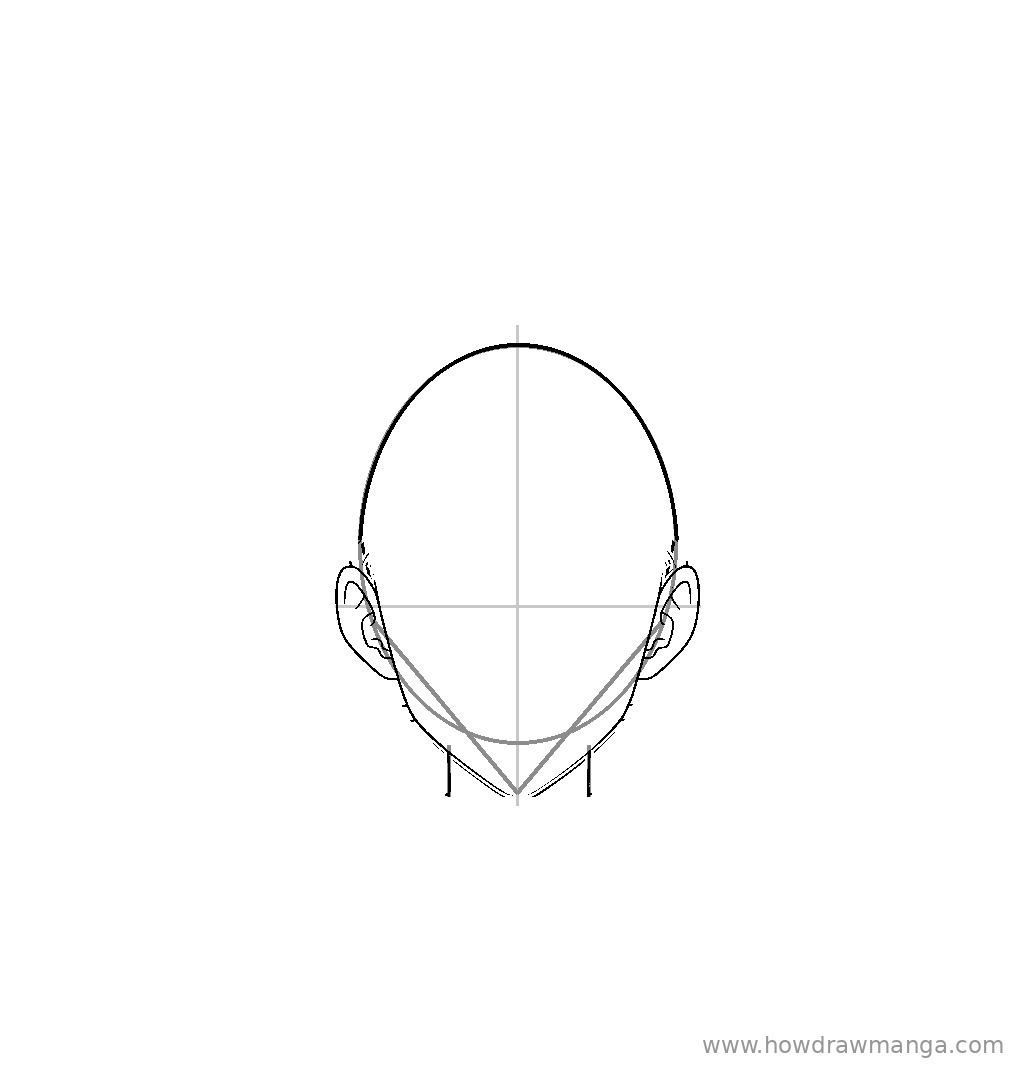
Go over the top of the oval to set the round skull, keeping it smooth and even. Follow the V guides to draw a narrow jaw that tapers into a small pointed chin on the center line. Add a C-shaped ear on each side: the top lines up with the brow area just above the eye line, and the bottom ends at about nose level, roughly a third of the way from the eye line to the chin. Firm up the two neck lines. Your Step 1 lines turn grey in the picture; the new contours are black.
Step 3: Sketch the Slicked-Back Hair Cap
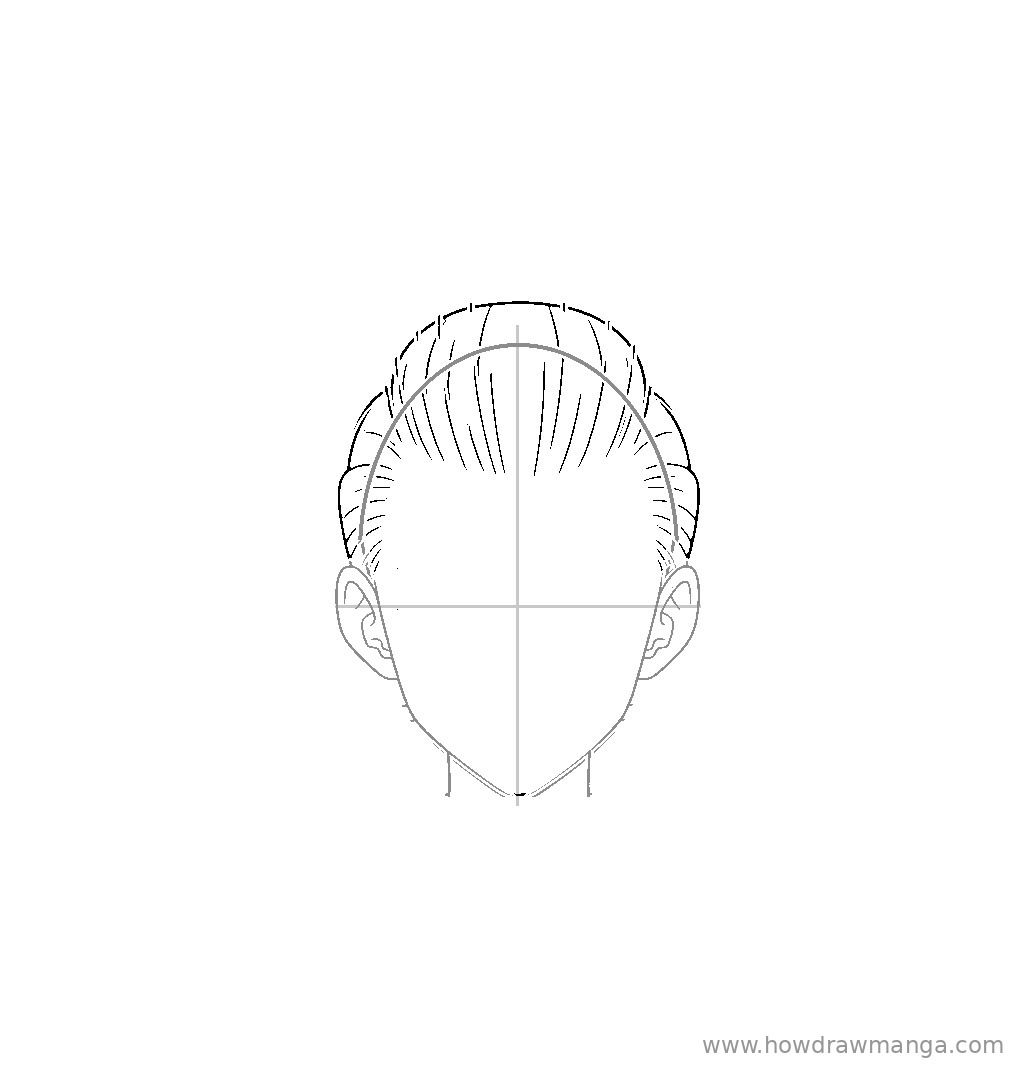
Draw a smooth, rounded hair cap over the skull, rising only slightly above the Step 2 head line. Keep the hairline high and simple so the whole forehead stays clear. Fill the cap with long strand lines that start at the hairline and sweep up and back over the head. At the sides, let the hair curve back and down until it just meets the tops of the ears.
Step 4: Add the Tall Upright Hair Crest
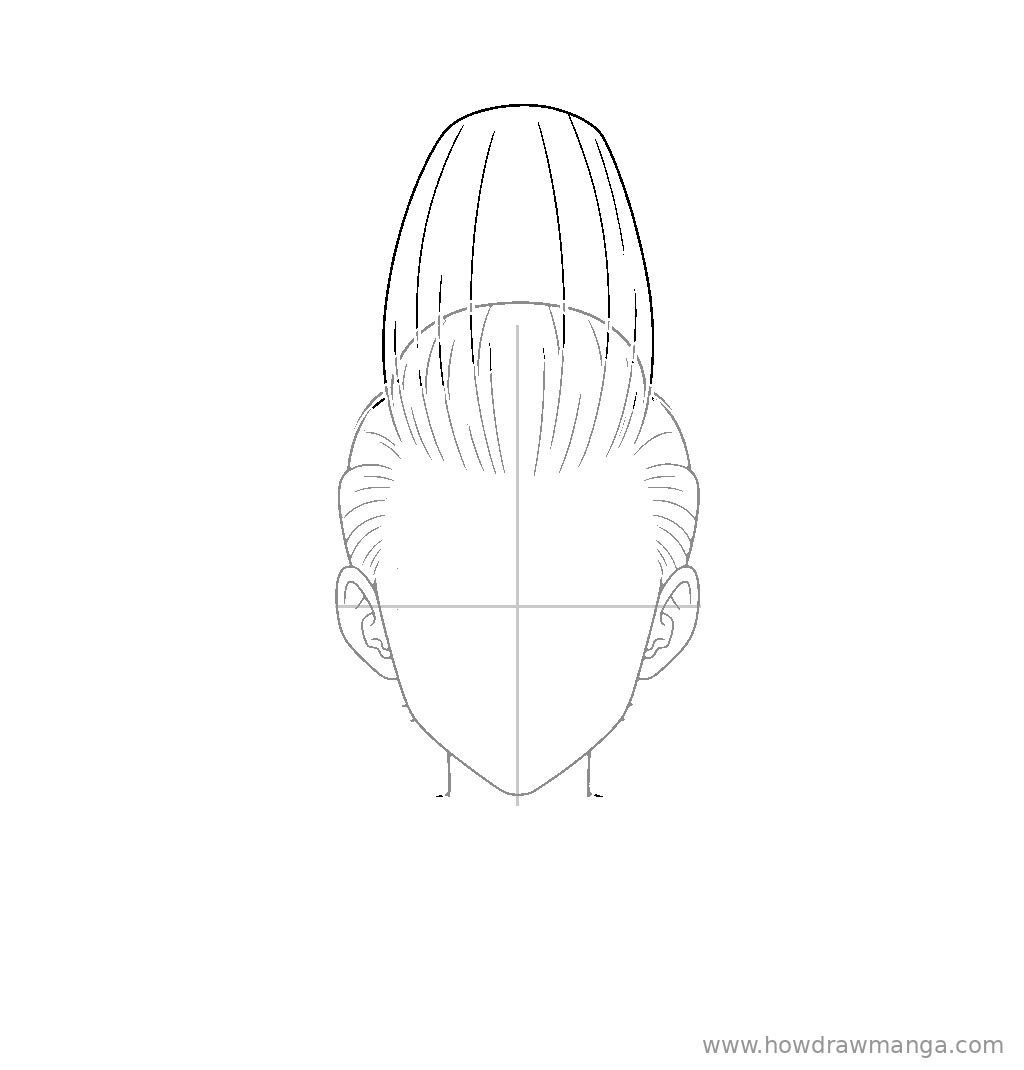
From the top of the cap, raise a tall rounded column of hair, a little taller than the face from hairline to chin. Make it narrower than the head, about three-quarters of the head width, and let it swell slightly in its upper half before closing in a rounded top. Draw long vertical strand lines from the cap up to the top so the crest reads as combed straight up. Keep the outline smooth, with no spikes.
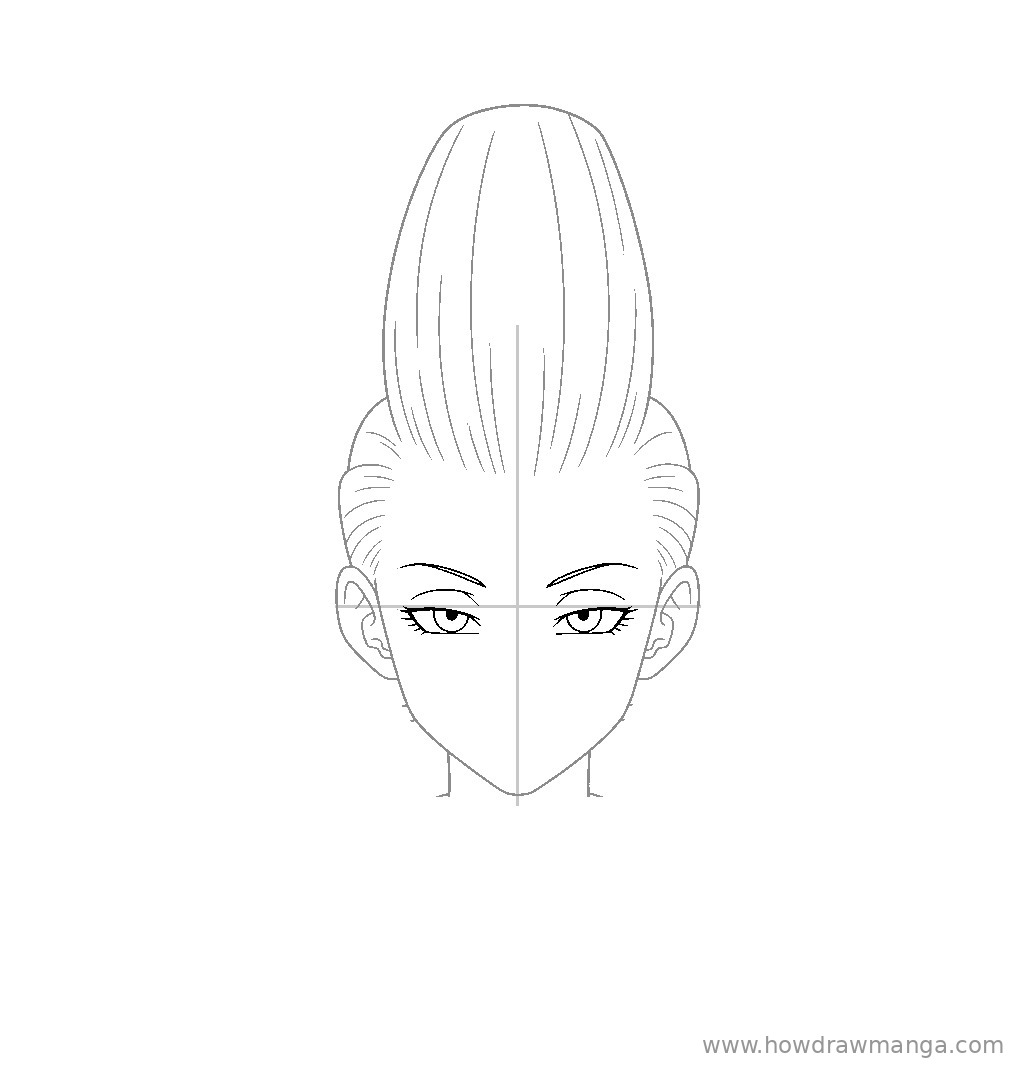
Step 5: Draw the Calm Eyes and Thin Brows
Place two almond-shaped eyes right on the eye line, one on each side of the center line, with a gap of about one eye width between them. Draw each upper lid as a firm, almost straight line that covers the top of the iris, so the eyes look half-closed and relaxed. Add a round iris with a small pupil under each lid. Above each eye, draw a thin, slightly arched brow that sits high on the forehead, about one eye height above the lid.
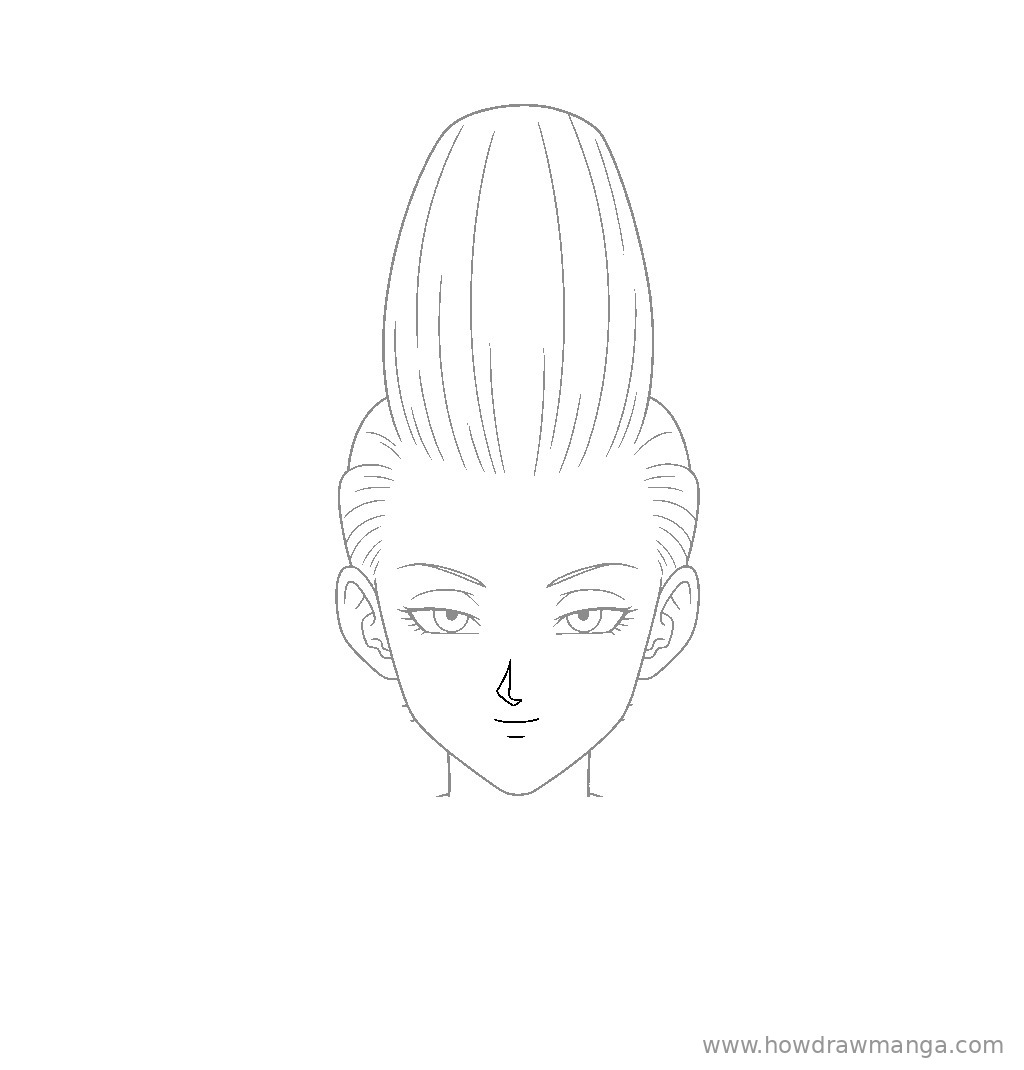
Step 6: Add the Nose and Soft Smile, Then Erase the Guides
Erase the center line, the eye line and the V-shaped jaw guides now. About halfway between the eyes and the chin, draw a small nose mark: one short angled stroke with a tiny tick at its base. Below it, close to the chin, add a short, gently curved mouth line for a slight, calm smile, with a tiny lip line underneath. Keep the mouth narrow, no wider than the gap between the eyes.
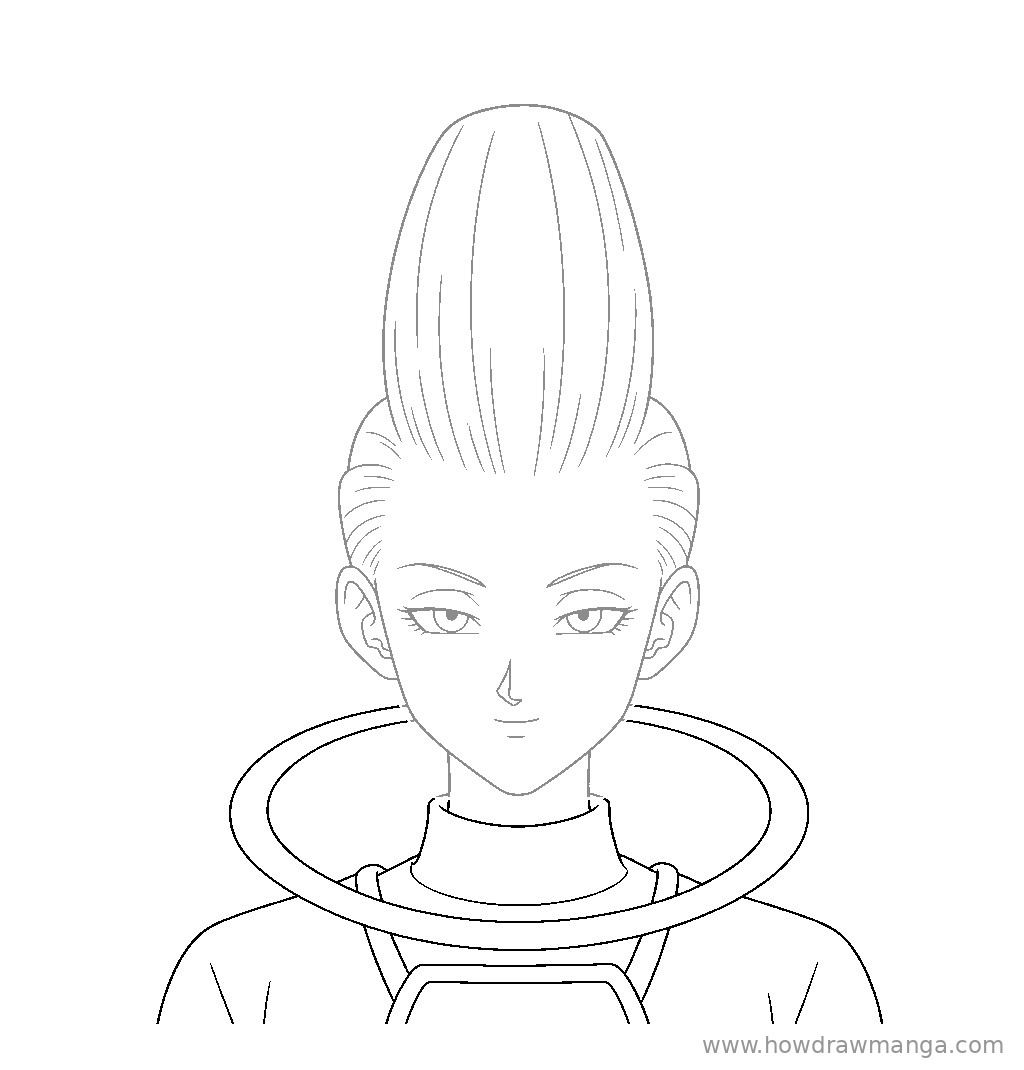
Step 7: Draw the Halo Ring, Collar and Robe
Draw a large flat ring, the halo, around the neck at collar height. Shape it as a wide, tilted ellipse with a double outline, about twice the width of the face, so it sticks out well past the jaw on both sides. Inside the ring, add a short turtleneck collar around the neck. Below it, sketch the robe shoulders sloping out to the edges of the page and the top edge of the chest plate in the middle of the chest.
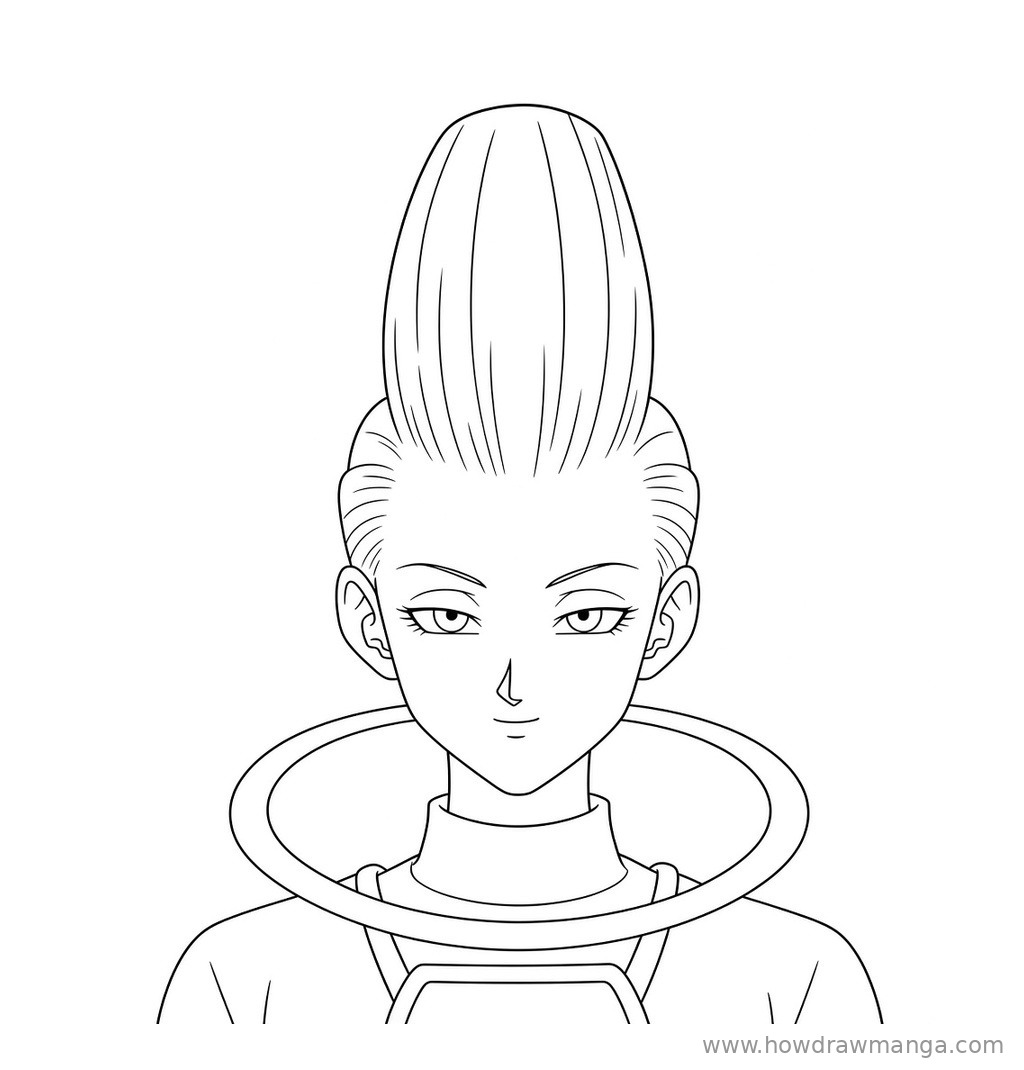
Step 8: Ink the Final Line Art
Trace every line you want to keep with a fine liner or a dark pencil so that all of it turns solid black. Use a thicker line for the outer contours: the hair crest and cap, the jaw, the ears, the halo ring and the robe. Switch to a thinner line for the hair strands, the eyes, the brows, the nose and the mouth. Erase any leftover pencil once the ink is dry. Nothing new is drawn in this step.
Key Pro Tips for Drawing Whis
- Build the hair in two parts. A low, smooth cap first and the tall crest second. If you draw the crest straight onto the skull, the head looks too long.
- Check the crest height. It should be a little taller than the face. Much shorter and it looks like a bun; much taller and it starts to tip over.
- Keep the face relaxed. Whis stays calm even when Beerus loses his temper, so avoid frowns or wide-open eyes. Flat upper lids and a small smile carry that mood.
- Draw the ring flat and wide. The halo is a thin ellipse, not a thick tube. Make it about twice the width of the face so it frames the neck and collar.
- Colour from a reference. He has pale blue skin, white hair and violet eyes, a light blue ring, a burgundy robe and a black chest plate. Pick one official image and match it.
FAQ
Can I add his staff?
Yes. Whis carries a long staff with a gem floating above its tip, usually in his right hand. In a face drawing, a short vertical piece of the staff beside one shoulder is enough.
Draw More Dragon Ball Characters
- How to Draw Beerus Face: draw the God of Destruction that Whis looks after.
- How to Draw Vegeta Face: one of the Saiyans Whis trains, with a very different hairline.
- How to Draw Trunks Face: practise another Dragon Ball face built on the same guidelines.