
Learning how to draw Frieren face is a calm, rewarding exercise in clean shapes. Frieren is the elf mage at the centre of Frieren: Beyond Journey’s End, the manga written by Kanehito Yamada and illustrated by Tsukasa Abe. Her look is easy to recognise once you know the key parts: long pointed elf ears, long hair parted in the middle and tied into two high twin tails, large half-lidded eyes, teardrop earrings, and a high collar fastened with a round gem.
This guide breaks her face into seven steps. Each step tells you which shape to draw, where it sits and how big it should be. Keep your pencil light for the first six steps and save the ink for the last one.
Materials Needed
- HB or 2B pencil for light construction lines
- Kneaded eraser for lifting guidelines without smudging
- Fine-liner pens, 0.3 mm for hair strands and 0.5 mm for outer contours
- Smooth drawing paper, or a tablet if you work digitally
Step-by-Step Frieren Face Drawing Guide
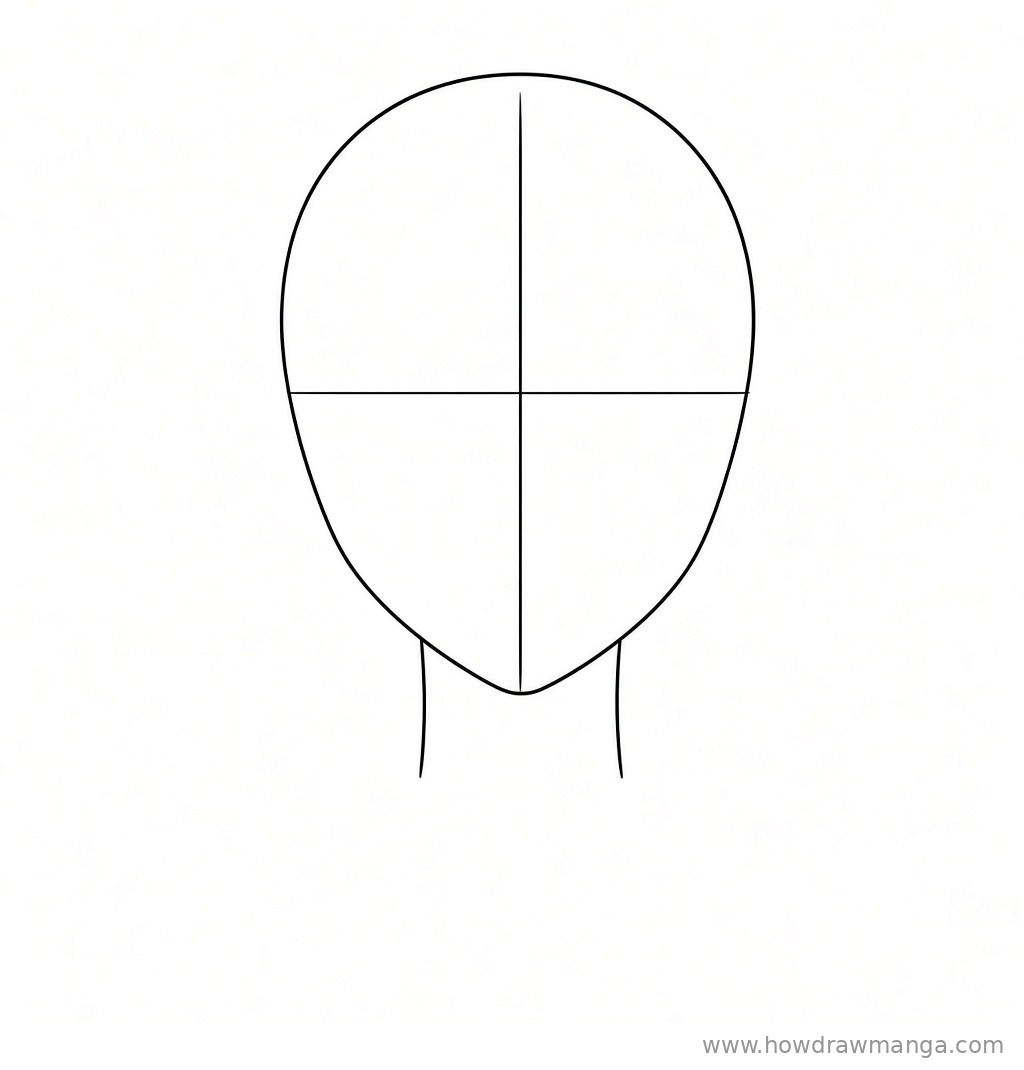
Step 1: Sketch the Head Shape and Guidelines
Draw an oval that is round at the top and narrows into a small, pointed chin. Run a vertical centre line from the top of the head down to the chin. Cross it with a horizontal eye guideline at the halfway point of the head. Then drop two short neck lines from under the jaw, set slightly inside the cheeks, so the neck looks slim.
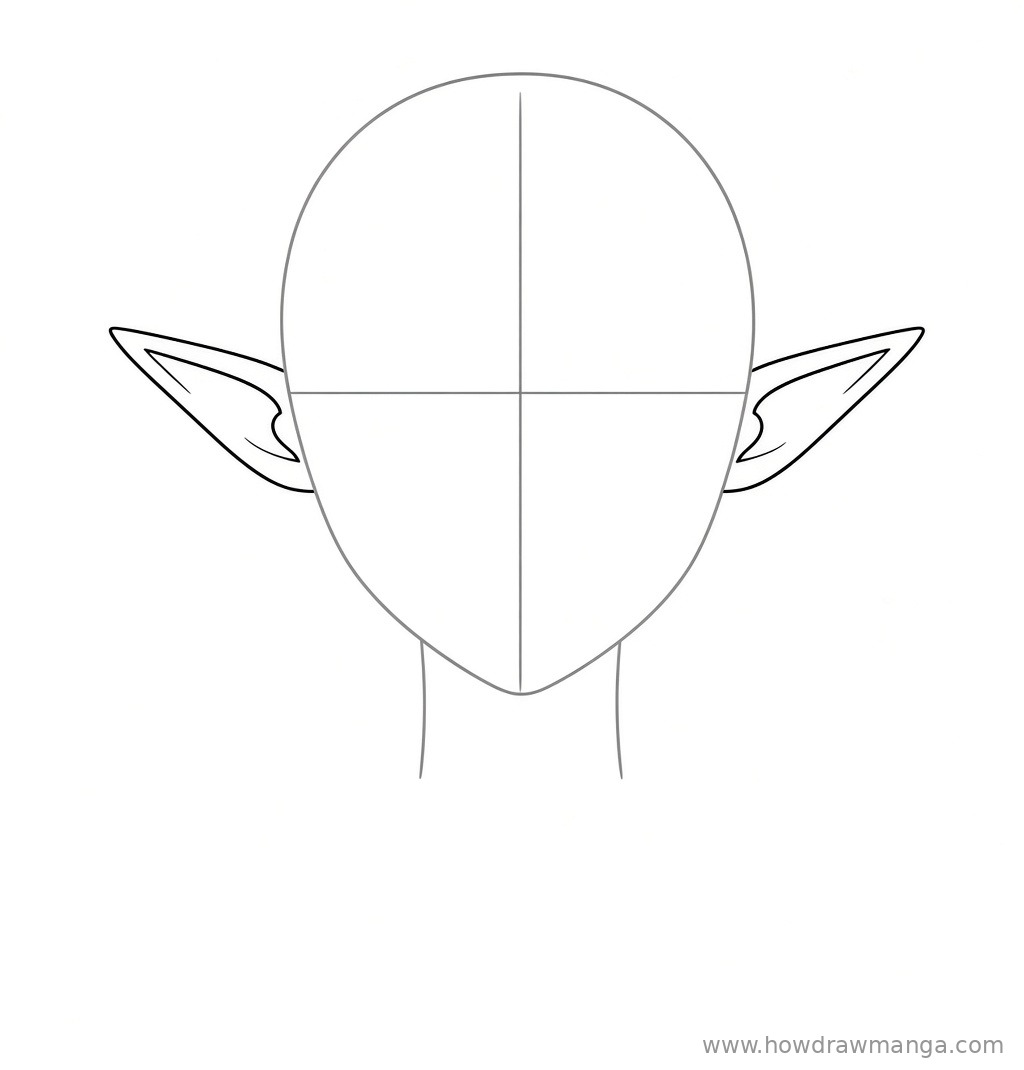
Step 2: Add the Pointed Elf Ears
Attach one long, pointed ear to each side of the head, starting around the eye guideline. Each ear points outward and a little upward, and its tip reaches about one third of the head width past the side of the face. Draw a second, smaller curve inside each ear to show the inner fold. These wide ears are the first thing that tells viewers she is an elf.
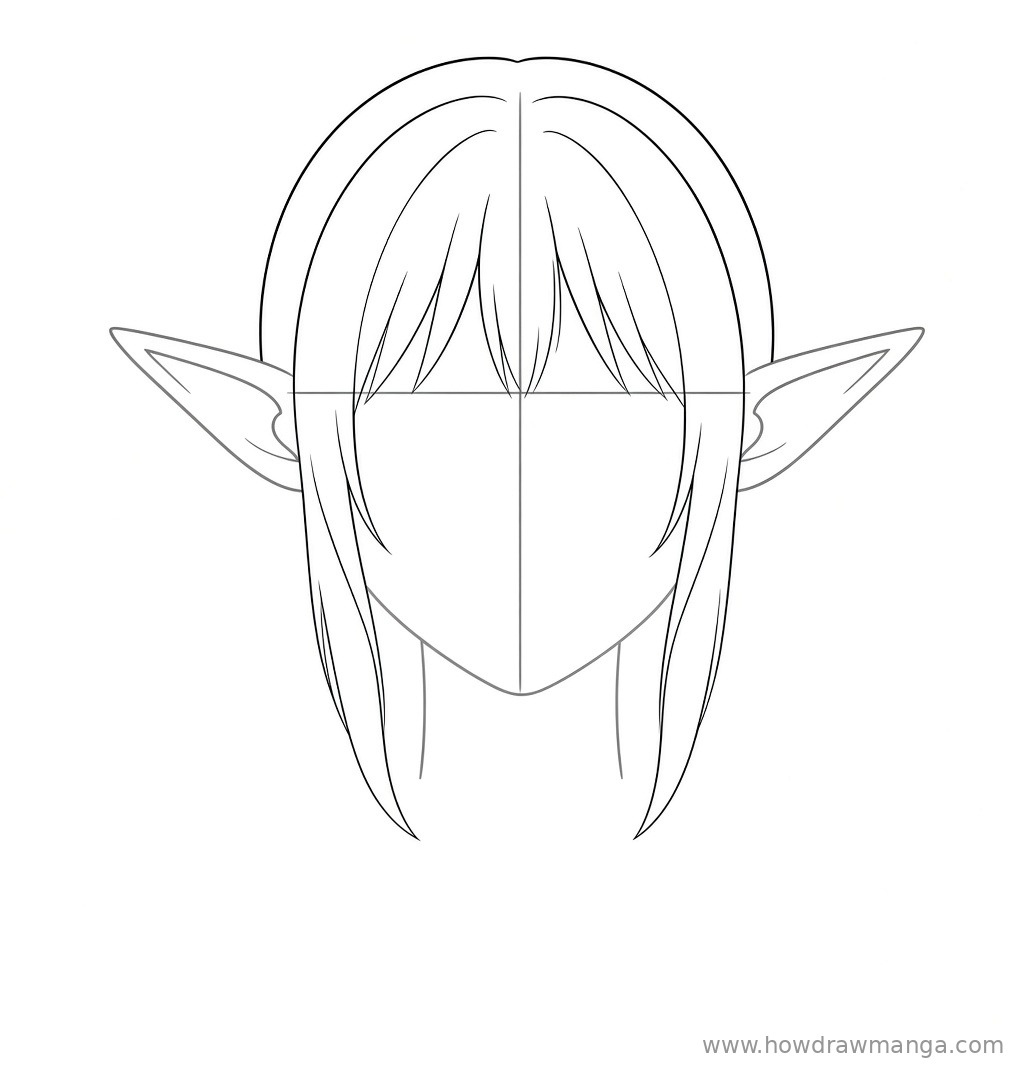
Step 3: Draw the Hair Outline, Bangs and Side Locks
Draw the outline of the hair a little above the top of the skull so the hair has volume. Mark a parting in the middle, then draw long, pointed bangs that fall from the parting and stop around the eye guideline. On each side of the face, add a long side lock that frames the cheek, passes in front of the ear base and ends below the chin.
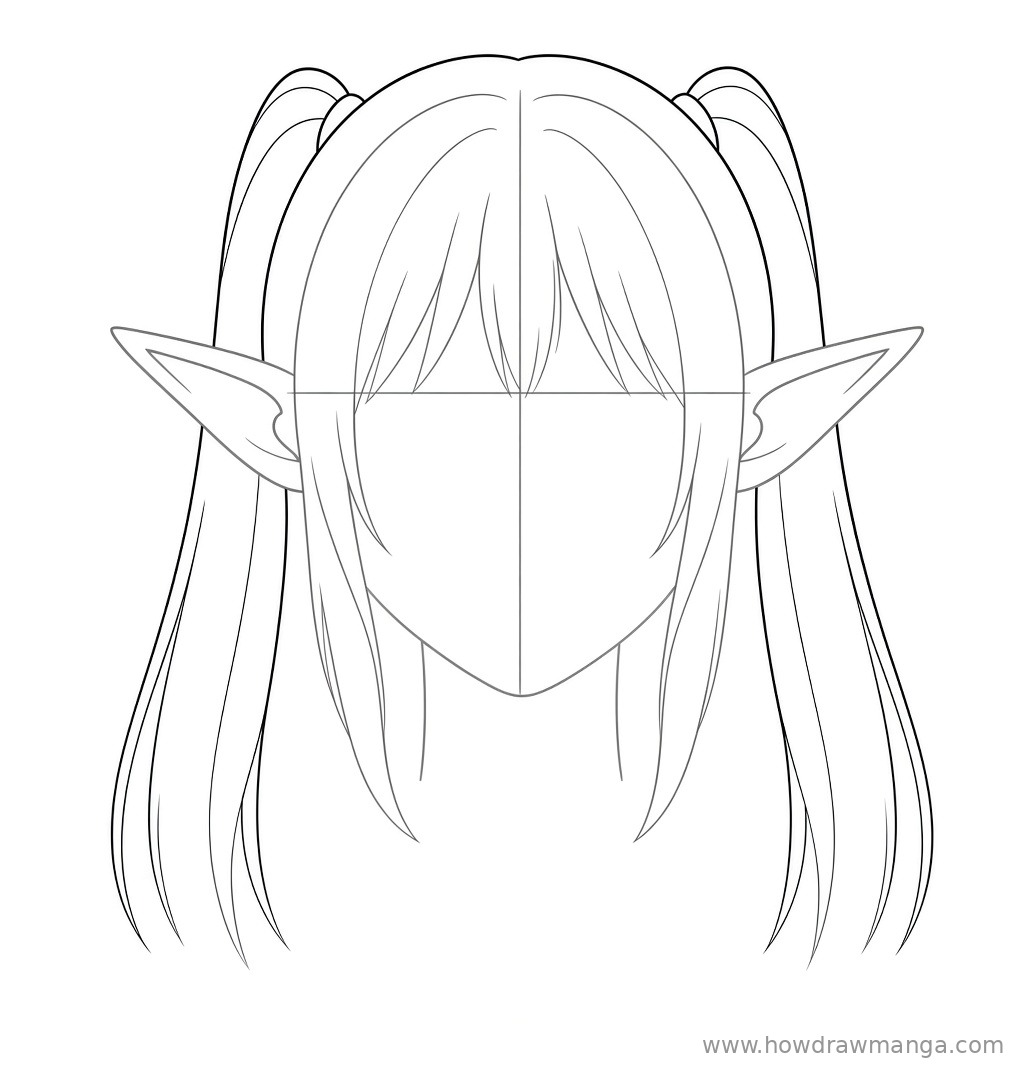
Step 4: Add the Two High Twin Tails
Tie a twin tail at each upper corner of the head, with a small bump to show the hair tie. Let each tail rise slightly above the top of the head, then fall straight down behind the ears in long strands that reach close to the bottom of the page. Keep both tails the same width and length so the outline stays balanced.
Step 5: Draw the Eyes and Eyebrows
Place two large, almond-shaped eyes just under the eye guideline, about one eye width apart. Give each eye a heavy upper lash line that flicks outward at the outer corner, and lower that line over the iris for her calm, half-lidded look. Add a round iris with a small pupil and a light highlight, plus a thin lower lid line. Then draw a slanted eyebrow above each eye, partly showing through the bangs. Once the eyes are placed, erase the centre and eye guidelines.
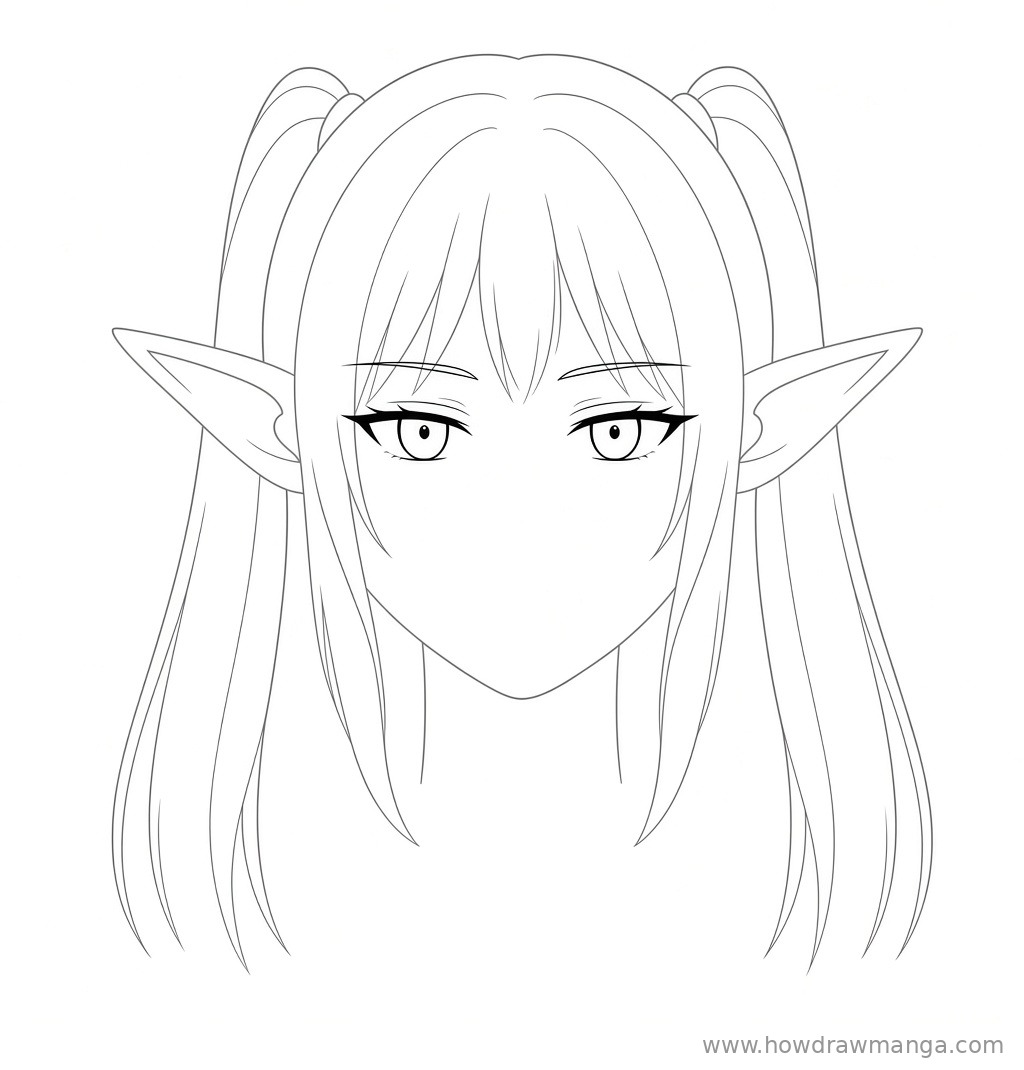
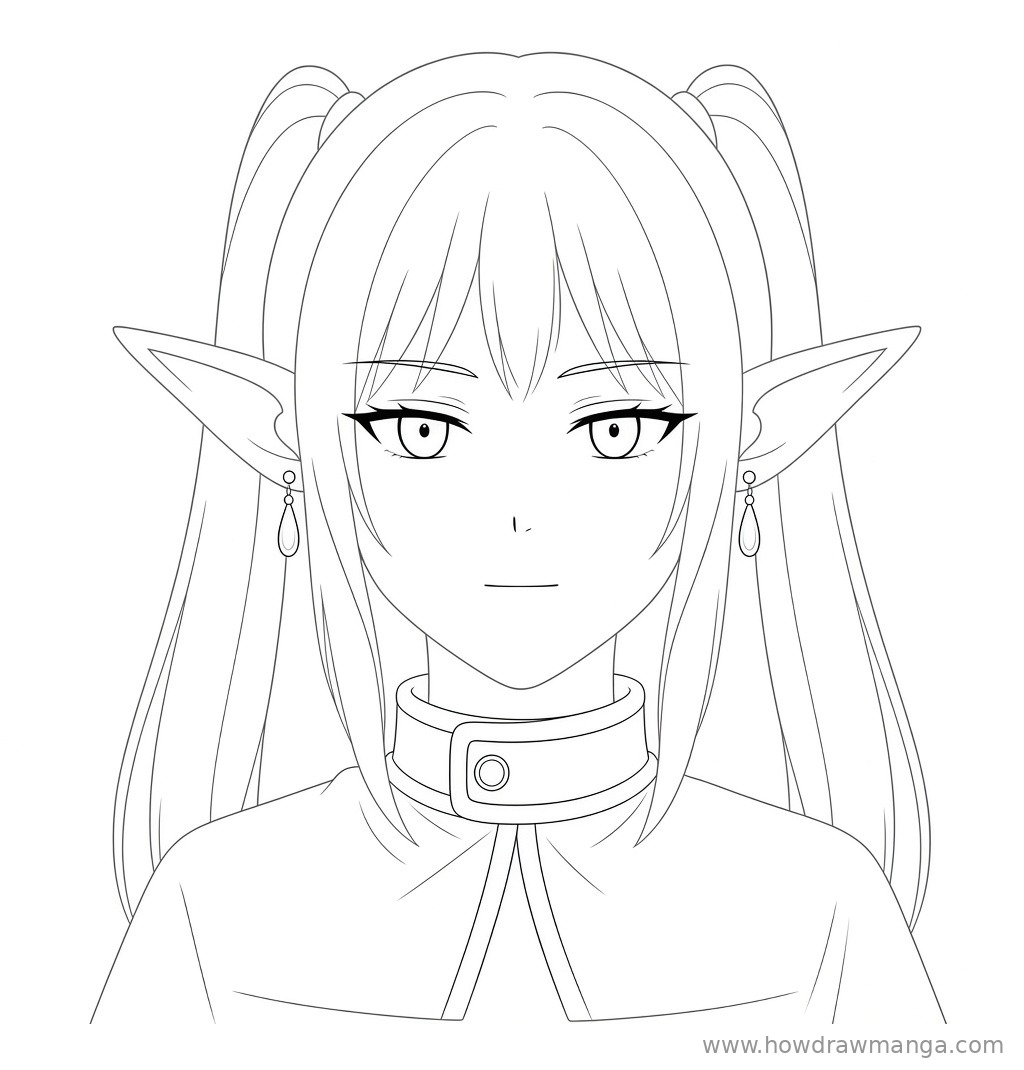
Step 6: Add the Nose, Mouth, Earrings, Collar and Capelet
Mark a tiny nose halfway between the eyes and the chin, and a short, straight mouth line below it to keep her expression neutral. Under the base of each ear, draw a small round stud with a teardrop earring hanging from it. Wrap a tall, stand-up collar around the neck just under the chin, and fasten it at the front with one round gem. Below the collar, draw the top of a short capelet that spreads over both shoulders and opens with a split at the centre front.
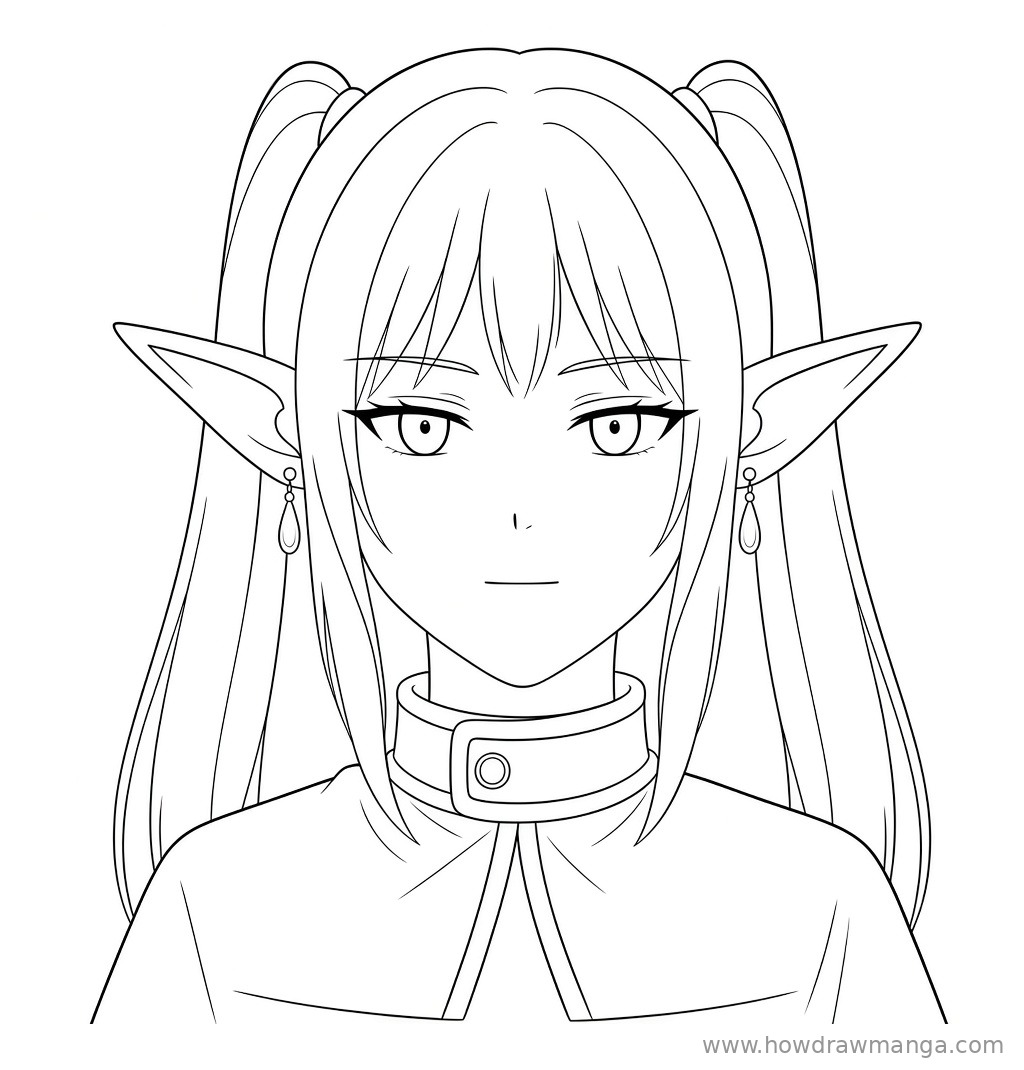
Step 7: Ink the Final Clean Line Art
Trace over every pencil line with your fine-liners without changing any shapes. Use the thicker 0.5 mm pen for the face outline, the hair silhouette, the ears and the capelet edges, and the thinner 0.3 mm pen for the strands inside the hair and the eye details. Keep the double lines along the collar band and the capelet opening. Erase any remaining pencil once the ink is dry, and you have clean Frieren line art ready for colour.
Key Pro Tips
- Make the ears long. Short ears turn her into a regular human girl. Let each tip reach well past the side of the face.
- Keep the eyes calm. A low, heavy upper lid and a straight mouth give Frieren her relaxed, slightly sleepy expression. A big smile or wide-open eyes changes her personality.
- Tie the tails high. The hair ties sit at the top corners of the head, not behind the ears. Placing them lower makes the hairstyle look like a different character.
- Use long, smooth strands. Her hair is straight, so draw each strand in one confident stroke instead of short, sketchy lines.
- Colour tip: her hair is silver-white, her eyes are green, the gems on her earrings and collar are red, and her white capelet has gold trim.
Frequently Asked Questions
Why does Frieren have pointed ears?
Frieren is an elf, and in the series all elves have large, pointed ears. That is why the ears are drawn so early in this guide.
Can beginners follow this tutorial?
Yes. Every step builds on simple shapes, and the guidelines from Step 1 keep the eyes, ears and hair in the right place.