
Vegeta, the proud Saiyan prince of Dragon Ball, has one of the sharpest and most recognisable faces in anime. In this guide you will learn how to draw Vegeta face in seven steps, starting with a plain circle and finishing with clean ink lines that keep his stern look.
Three things make him read as Vegeta and not Goku: a deep M-shaped widow’s peak, black hair that stands straight up in one tall flame-like mass, and brows locked in a permanent scowl. Get those three right and even a rough sketch will look like him. Keep your early lines light so you can adjust them later.
Materials Needed
- Pencil (HB for guidelines, 2B for darker lines)
- Kneaded or plastic eraser
- Smooth drawing paper or a sketchbook
- Black fine liners (0.3 mm and 0.5 mm) or a digital inking brush
- Optional: black, light tan and blue markers or coloured pencils
Step-by-Step Guide: How to Draw Vegeta Face
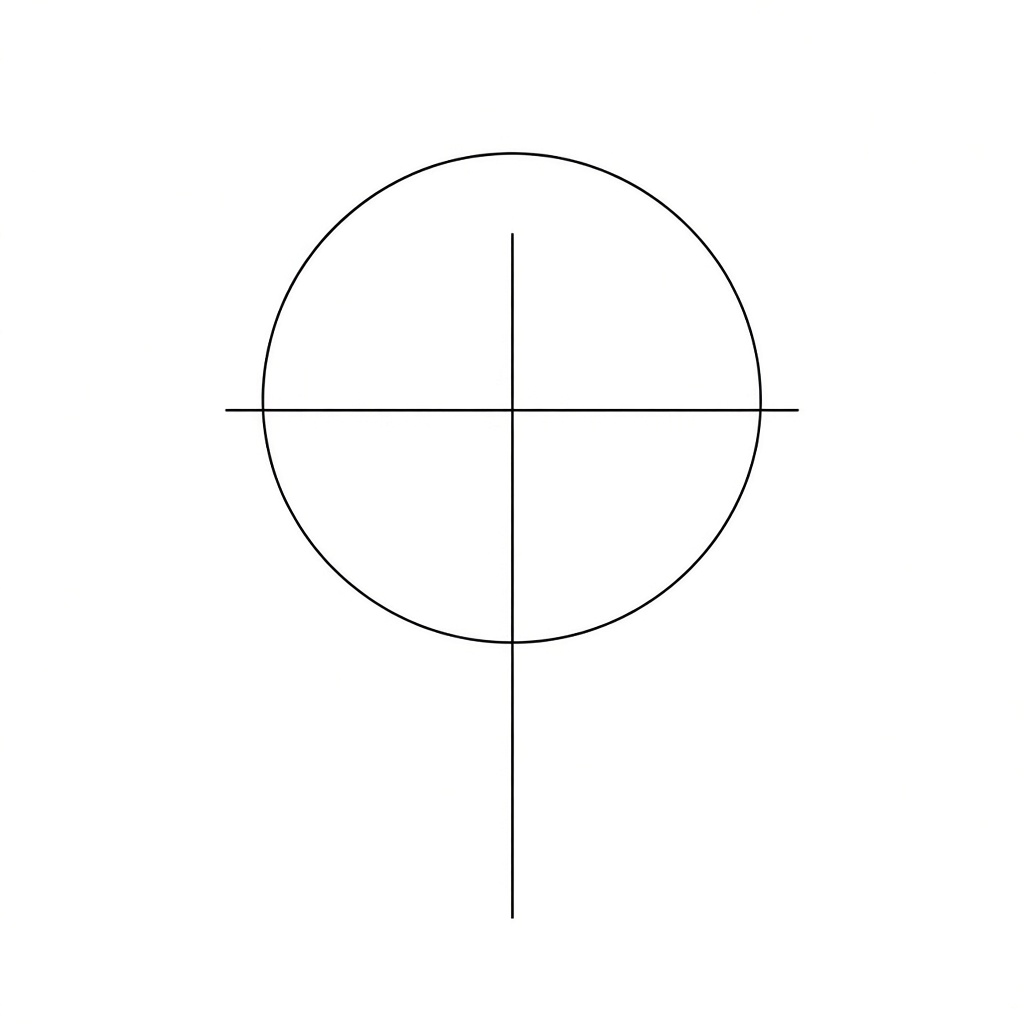
Step 1: Draw the head circle and guidelines
Draw a circle in the lower half of your page, about the width of your palm, so there is plenty of room above it for the tall hair. Add a vertical centre line through the circle that runs well below it, by about half of the circle’s height. Then draw a horizontal line across the circle near its middle. This is the eye line.
Step 2: Shape the angular jaw and chin
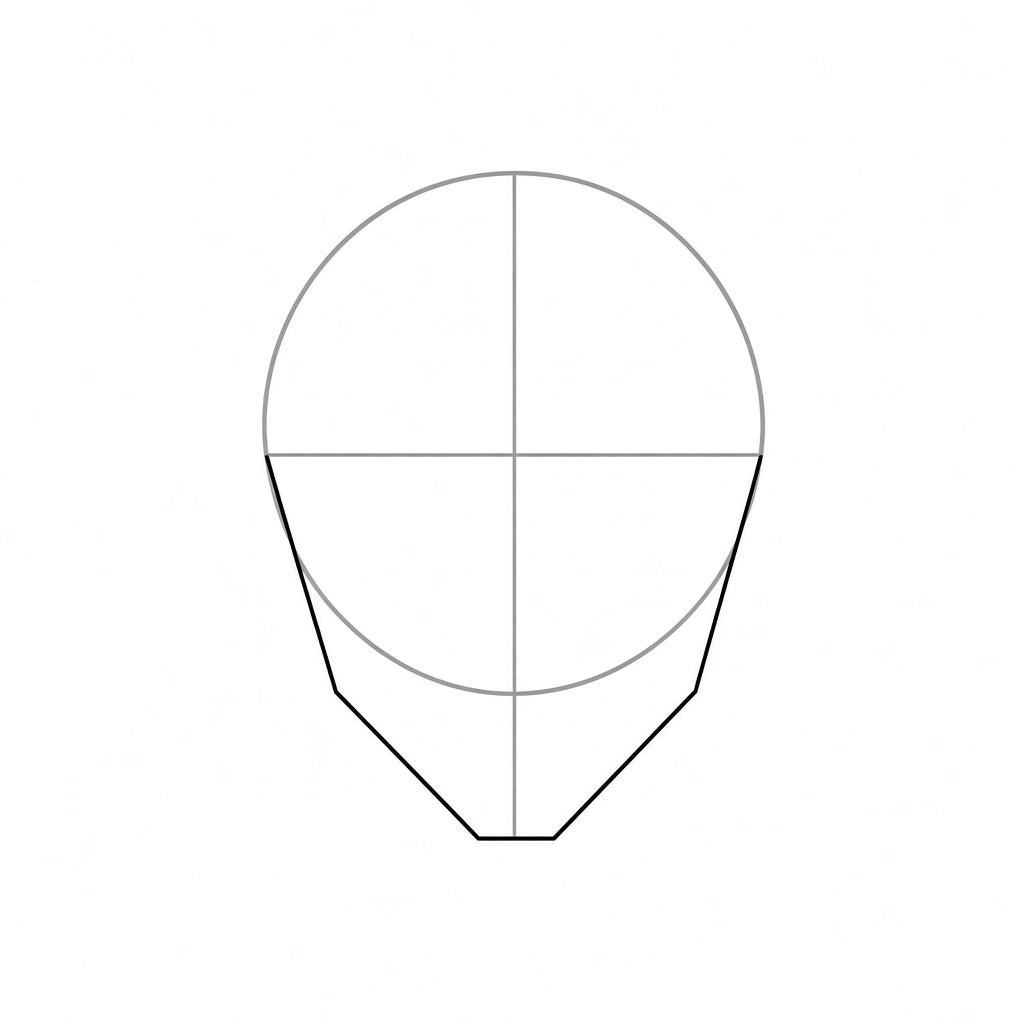
Start at each side of the circle on the eye line and draw a straight line angling down and inward. Stop each line at a small, flat chin that sits on the end of the centre line. Make the jaw about two-thirds as wide as the circle at its widest point. Keep the corners sharp rather than round, because Vegeta’s adult face is drawn with firm, defined angles.
Step 3: Mark the widow’s peak hairline
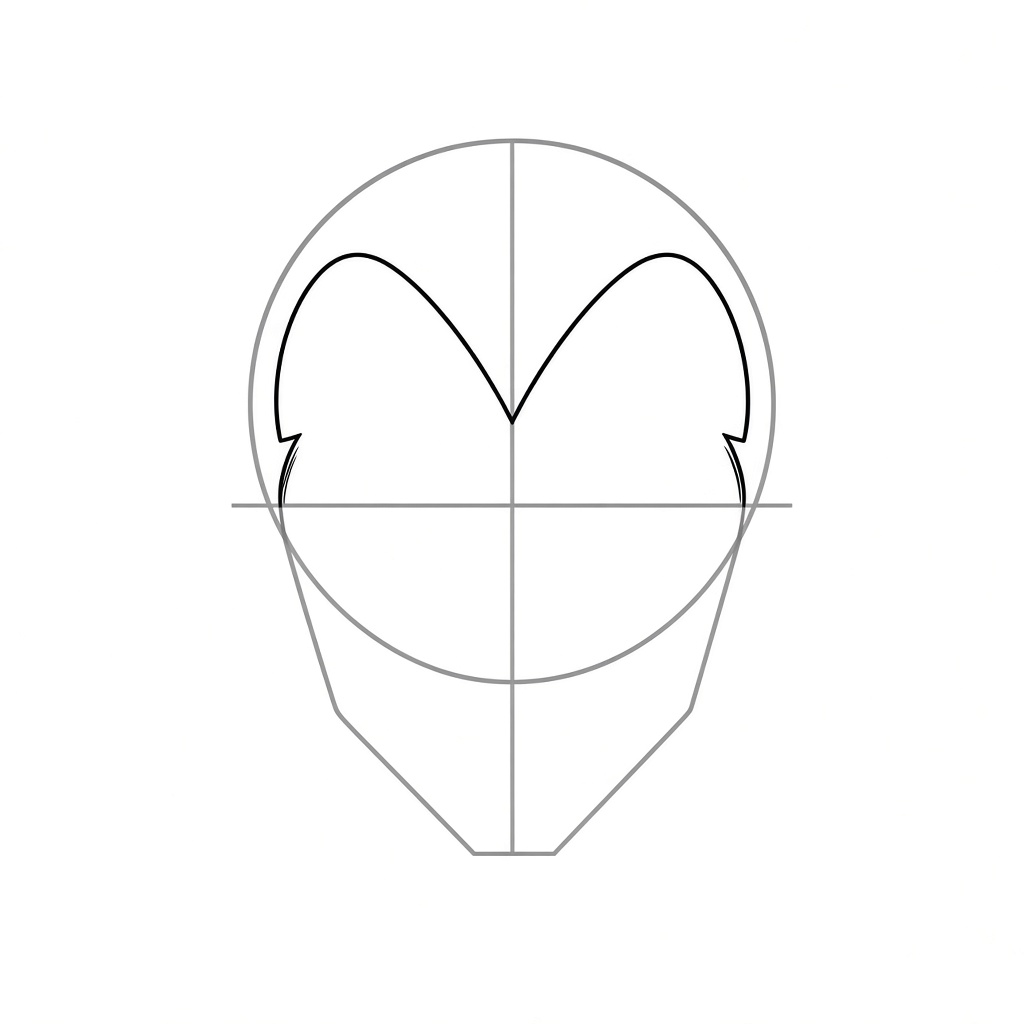
Draw the hairline as a wide letter M across the top of the circle. The centre point dips down toward the forehead, ending about halfway between the top of the circle and the eye line. From that point, each side climbs back up and out in a short curve, then drops down toward the temple just above each end of the eye line. This deep V in the middle is the single most important shape in his face.
Step 4: Draw the tall upswept hair
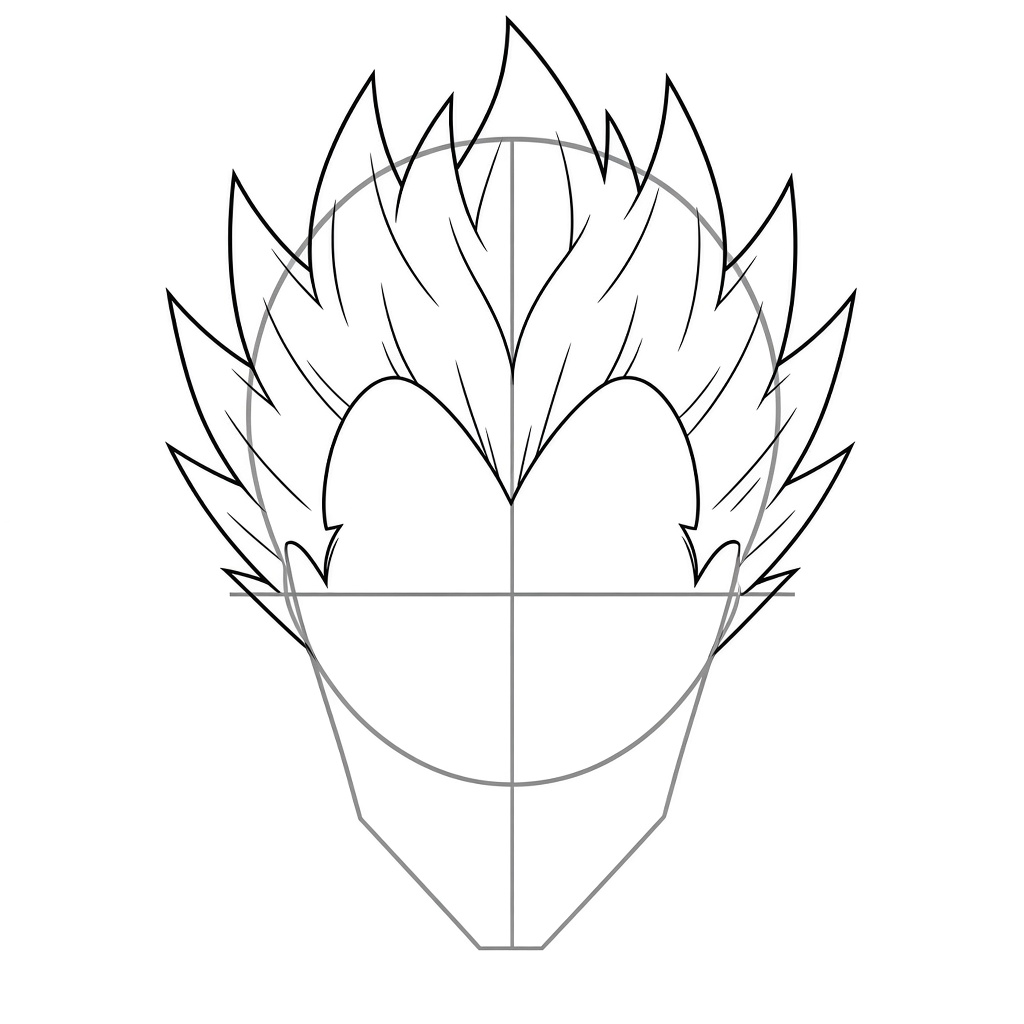
From the outer ends of the hairline, draw two long lines that sweep up and slightly outward, like the sides of a flame. Let the hair rise roughly one full head height above the top of the circle. Join the two sides with five or six sharp spikes along the top edge, all pointing upward, with the tallest spikes near the middle. Leave the forehead clear, because his hair has no bangs falling over it.
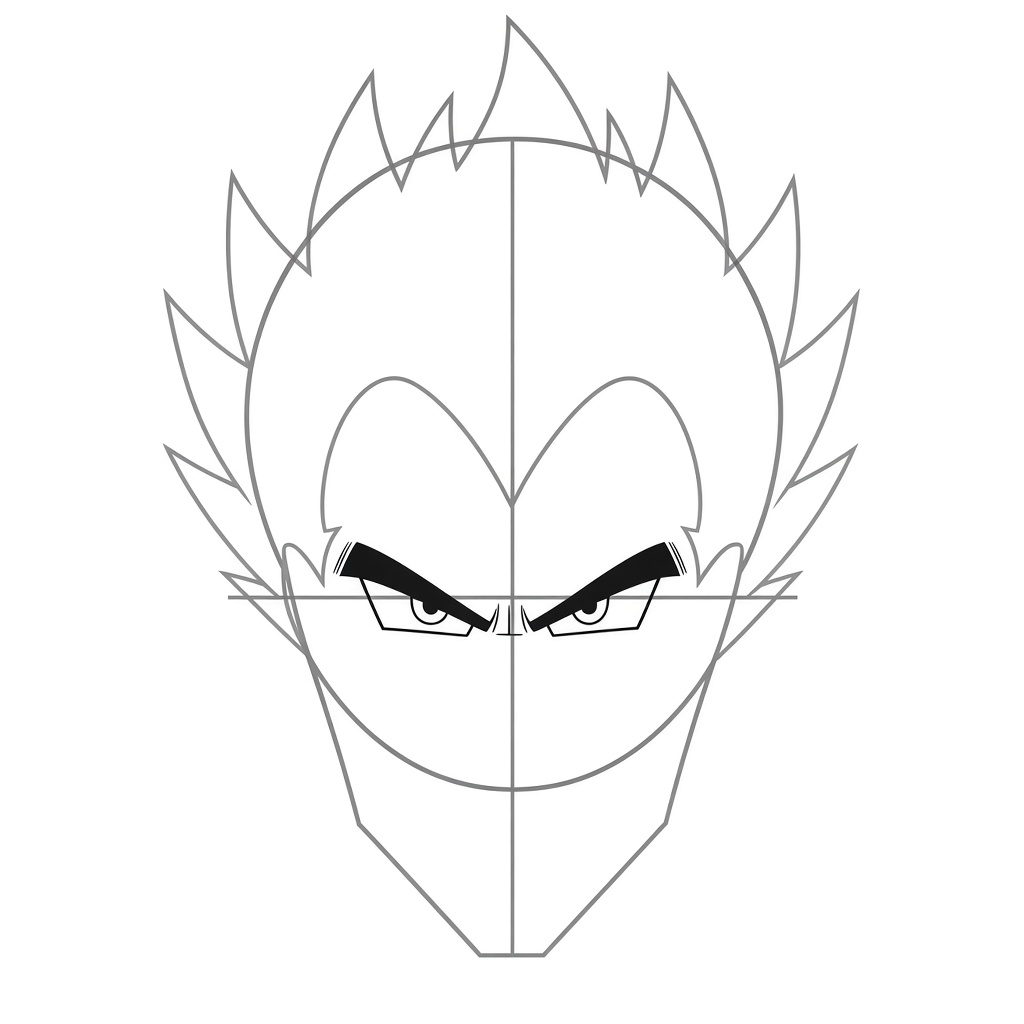
Step 5: Add the scowling brows and narrow eyes
Draw each eyebrow as a thick wedge, filled in solid black, that starts high at the outer edge and slopes down toward the centre line, so the inner ends nearly meet above the nose. Under each brow, sit a narrow eye on the eye line, about one-fifth of the face width long. Shape the top lid as a heavy, nearly straight line and the lower lid as a short shallow curve. Place a small dark pupil touching the top lid. Add two short creases between the brows to push the frown.
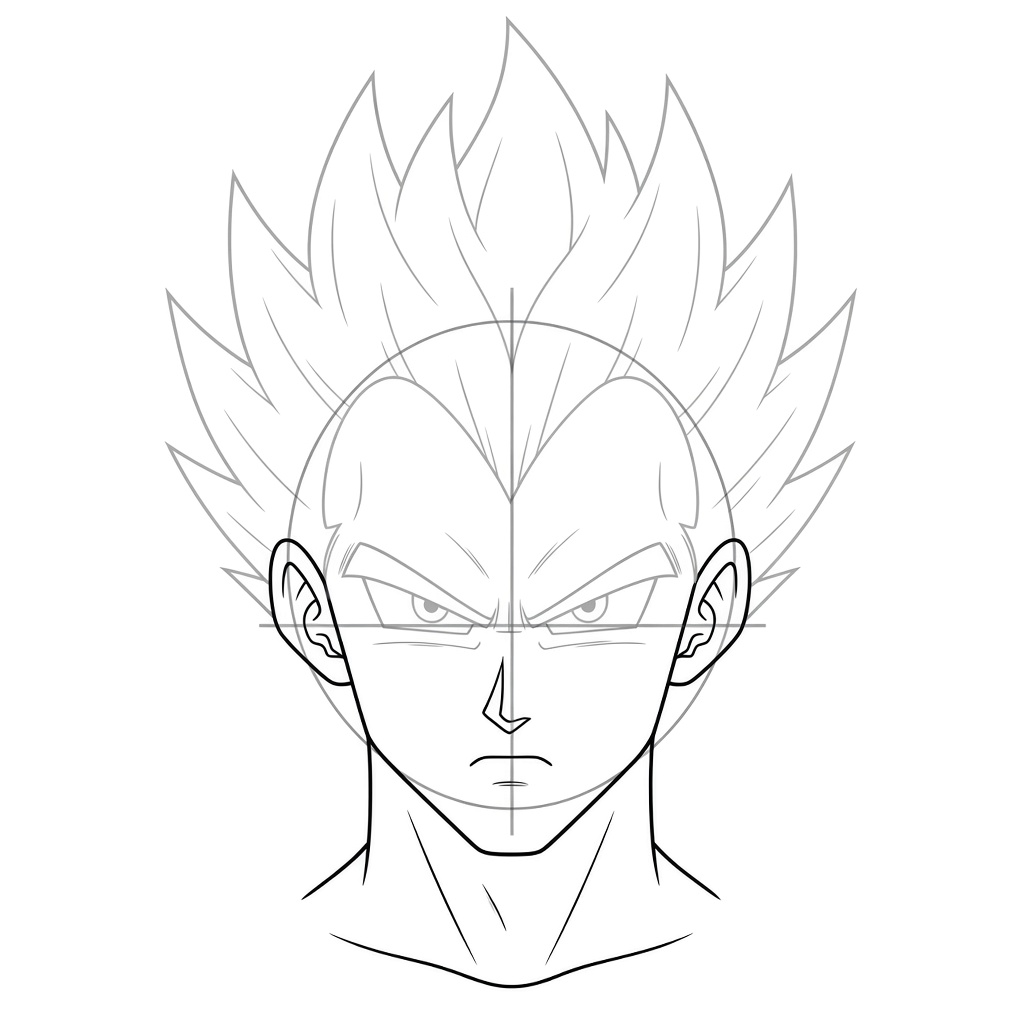
Step 6: Add the nose, mouth, ears and neck
Halfway between the eye line and the chin, draw the nose as a small angled line with a tiny shadow tick underneath. Place the mouth one-third of the way from the nose to the chin as a short straight line that turns down slightly at both ends. Draw a C-shaped ear on each side of the head between the eye line and the nose, since the upswept hair leaves the ears in view. Finish with two vertical neck lines dropping from under the jaw, each about one-quarter of the face width in from the edge.
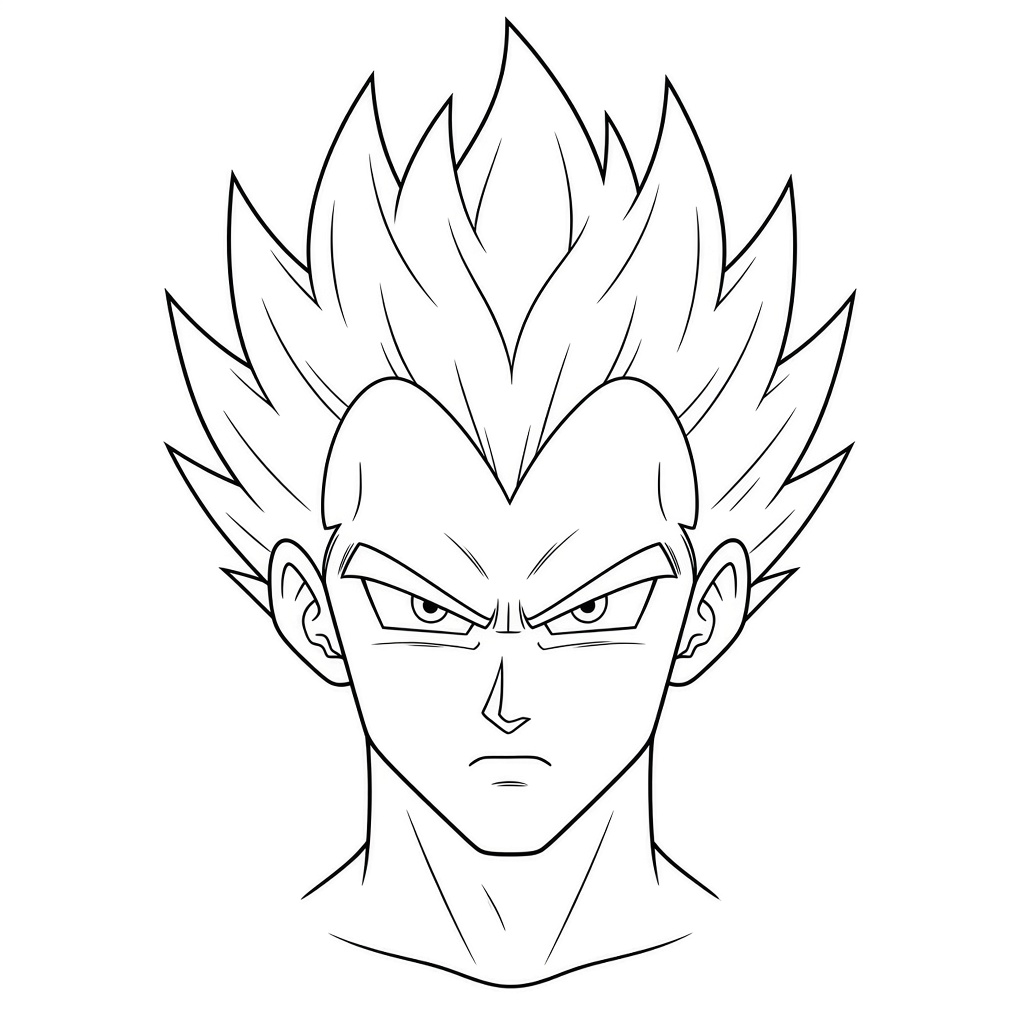
Step 7: Erase the guidelines and ink the face
Erase the circle, centre line and eye line wherever they show through the finished shapes. Trace the outer contours, meaning the hair outline, jaw and neck, with the thicker 0.5 mm pen. Use the thinner pen for the eyes, brows, nose, mouth and the creases inside the ears. Do not add any new shapes here; this step only cleans and strengthens the lines from step 6.
Key Pro Tips for Drawing Vegeta
- Check the widow’s peak first. If the centre point is too shallow, the face starts to look like a generic spiky-haired character.
- Keep the hair as one solid flame shape. Spikes should point up, not out to the sides like Goku’s.
- Angle the brows down toward the nose and keep the mouth turned down. His expression is almost always a stern scowl, so a relaxed face looks off-model.
- Compare with your Goku sketch side by side: Vegeta’s jaw is narrower, and his eyes are thinner and more slanted.
- If you colour the drawing, use black hair, light tan skin and dark eyes, then leave the line art crisp on top.
Related Dragon Ball Drawing Tutorials
Want to keep building your Dragon Ball set? Try our guide on how to draw Son Goku’s face, or practise a softer face shape with the Chi-Chi step-by-step tutorial.