
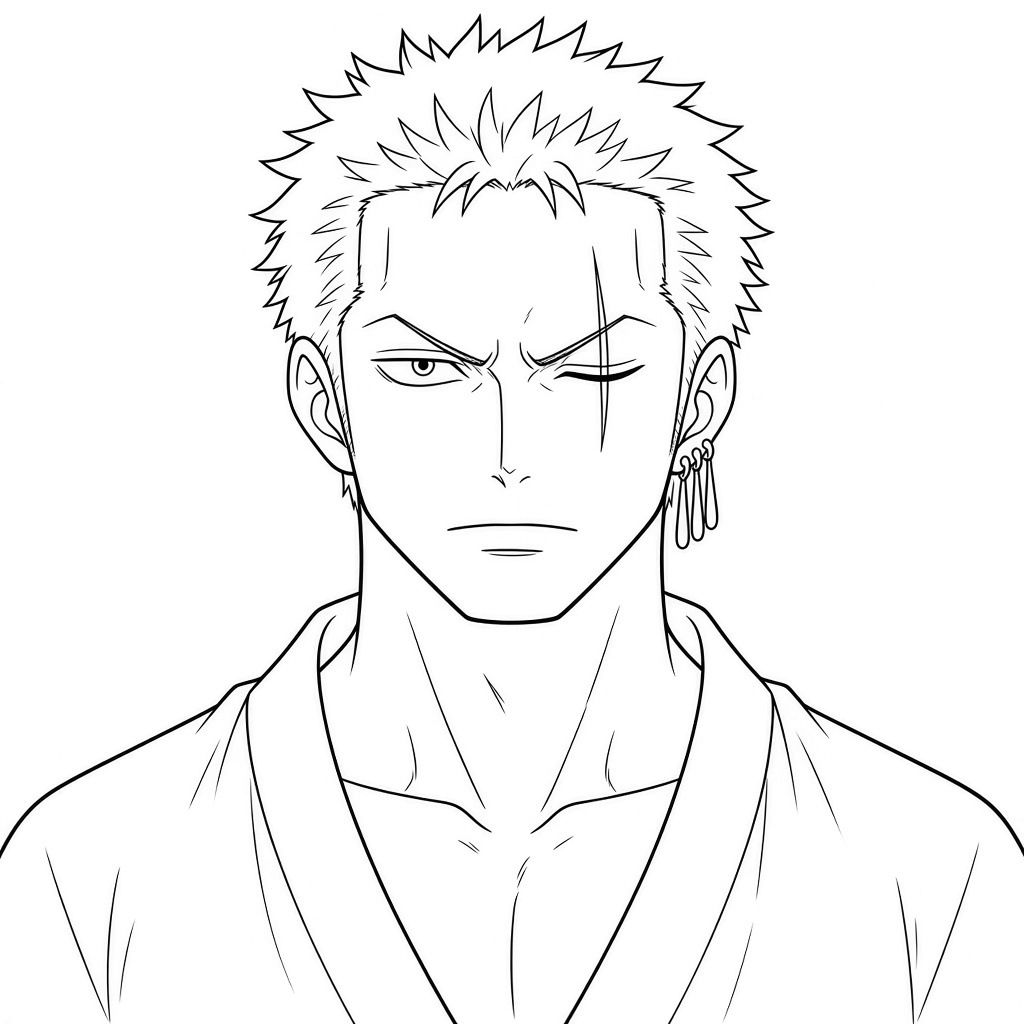
Roronoa Zoro is the swordsman of the Straw Hat Pirates in One Piece and the first crewmate to join Luffy. In this guide you will learn how to draw roronoa zoro face in 9 steps, using his look after the two-year timeskip, from one oval to finished line art.
Zoro is easy to recognise once you know what to look for: short, cropped hair (Sanji teases him that it looks like a moss ball), a scar running down over his left eye, and three identical earrings on his left ear. Add a square jaw and a scowl and he is complete. In each picture below, earlier lines are grey and the lines for that step are black.
Materials Needed
- Paper or a drawing tablet
- A light pencil (HB or 2H) for guidelines
- A darker pencil (2B) or a fine liner for final lines
- An eraser
- Optional: green, gold and skin-tone colour pencils
Step-by-Step Roronoa Zoro Face Drawing Guide
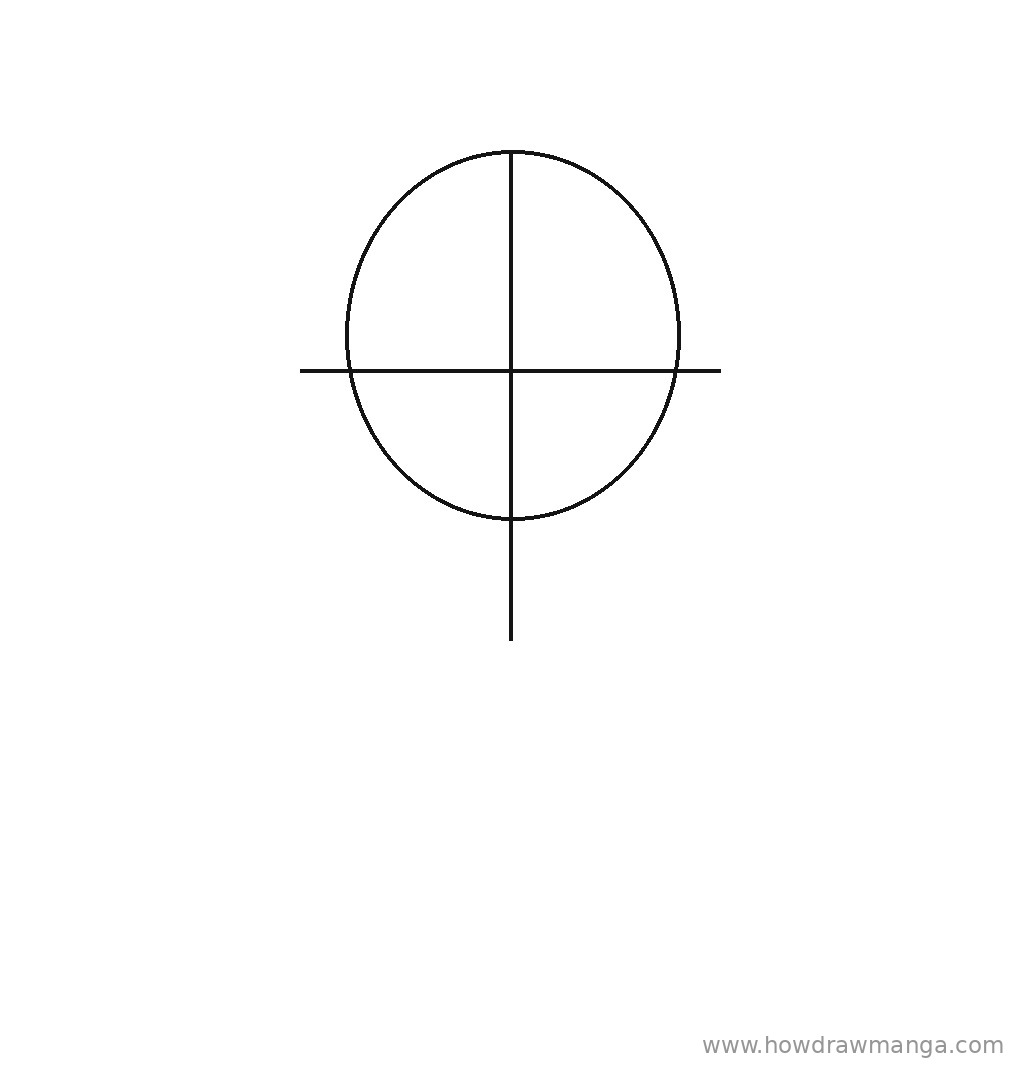
Step 1: Sketch the Head Oval and Guidelines
Draw an oval in the upper middle of the page, about one-third of the page wide and a little taller than it is wide. Draw a vertical centre line through it and extend it below the oval by about one-third of the oval’s height. Add a horizontal eye line slightly below the middle of the oval, reaching a little past both sides. Keep these lines light.
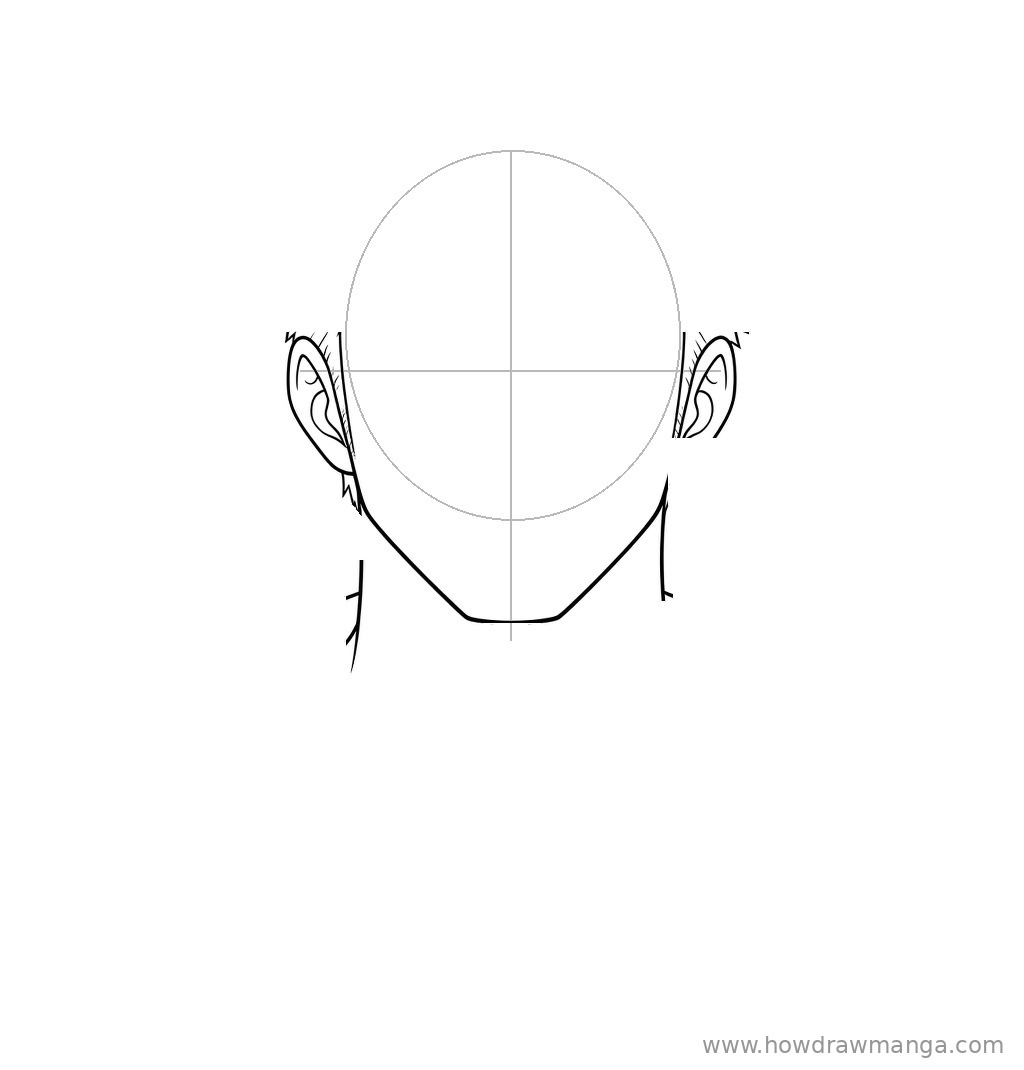
Step 2: Draw the Square Jaw, Ears and Neck
Drop the cheek lines almost straight down from the sides of the oval, starting just above the eye line, so the face stays wide. Below the oval, angle both lines inward to a broad, flat chin on the centre line; the flat part is about a quarter of the face width. Add a large C-shaped ear on each side, from just above the eye line down to about nose level. Run thick, straight neck lines down from under the ears; his neck is nearly as wide as his face.
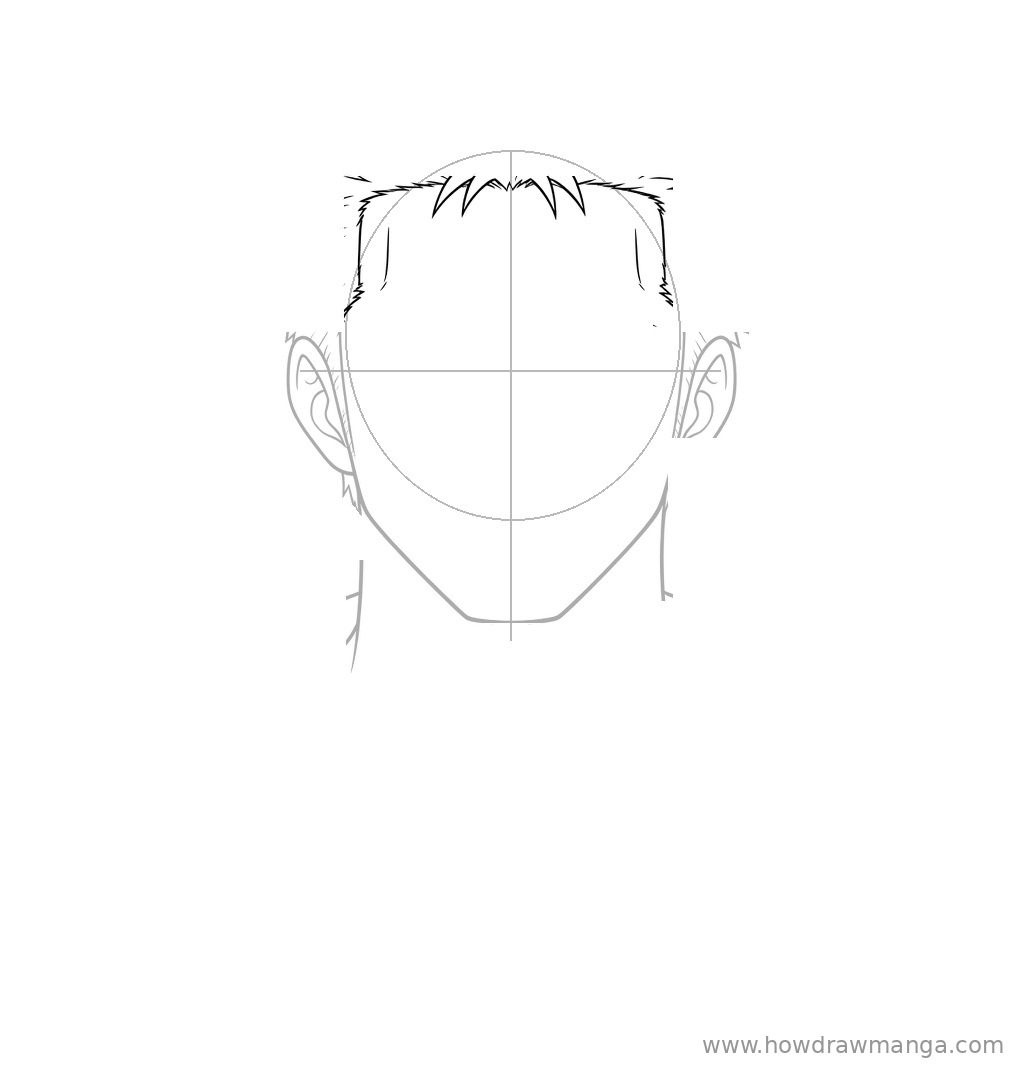
Step 3: Draw the Hairline and Short Forelock
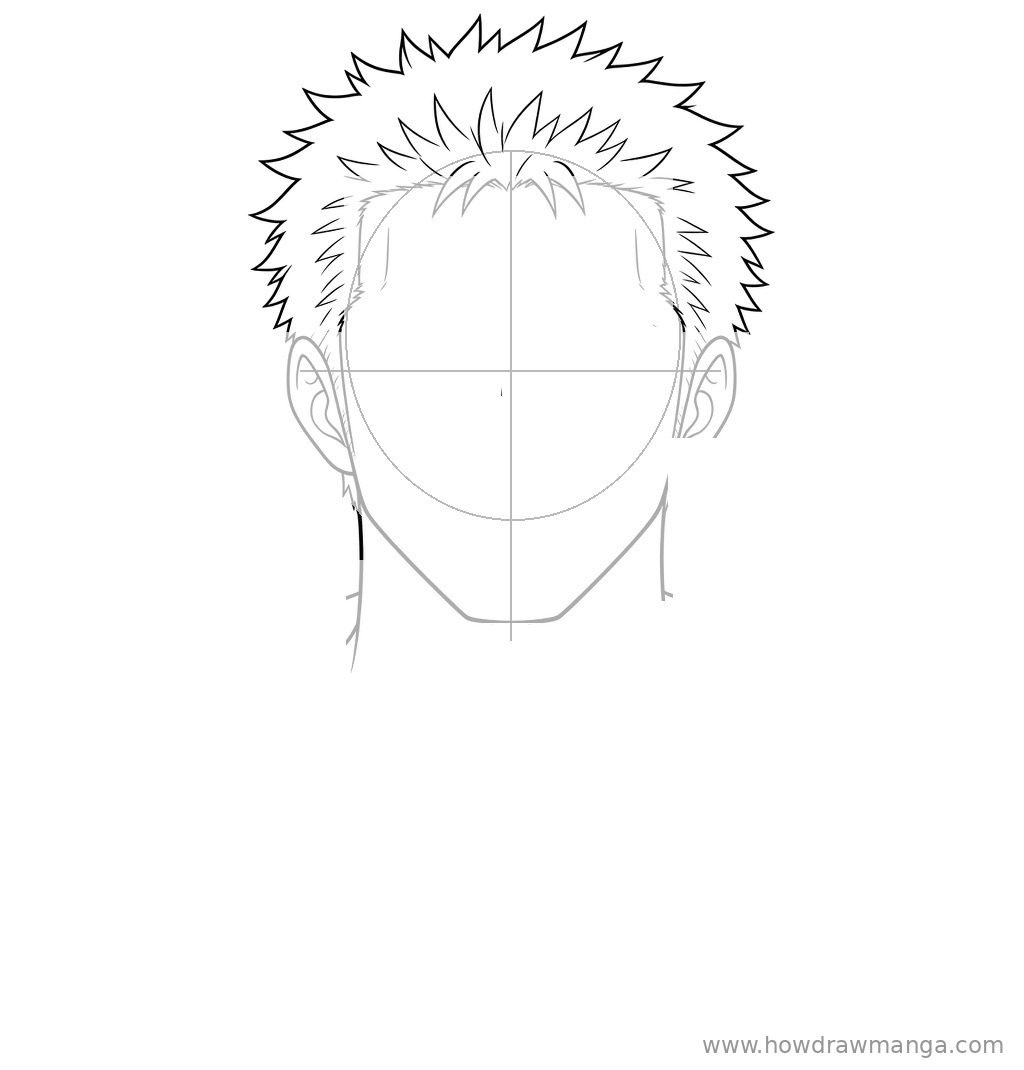
Draw a nearly flat hairline just inside the top of the oval, with square corners at the temples. From each corner, bring a straight vertical line down the side of the head to the top of the ear. In the middle of the hairline, add a small cluster of short, sharp points that flick upward. Leave the forehead high and open; Zoro has no bangs.
Step 4: Add the Spiky Outer Hair
Around the hairline, draw a ring of many short, sharp triangle spikes. Let the tallest spikes rise about one-third of the oval’s height above the top of the oval, and let the side spikes stick out a little past the tops of the ears. Keep every spike short so the hair reads as cropped. Fill the band between the hairline and the outline with small strokes that point up and out to show the texture.
Step 5: Draw the Scowling Brows and Eyes
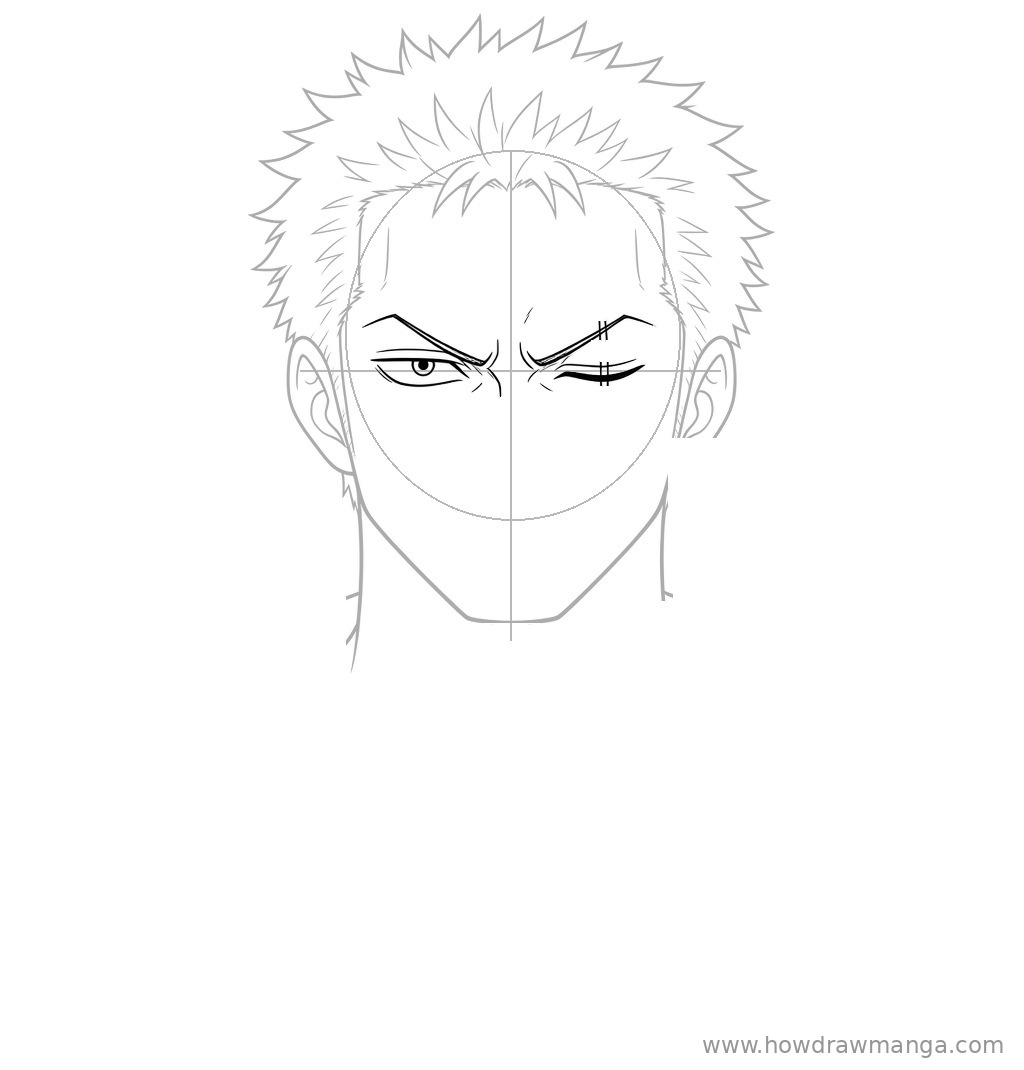
Draw two thick brows that angle sharply down toward the centre, with a few short crease lines between them. On your left side (his right eye), draw a narrow almond-shaped eye on the eye line with a round iris touching the upper lid and a small pupil. On your right side (his left eye), draw the eye closed: one bold curved line with a thinner line above it. Remember that Zoro’s left eye is the one on your right.
Step 6: Add the Nose and Firm Mouth
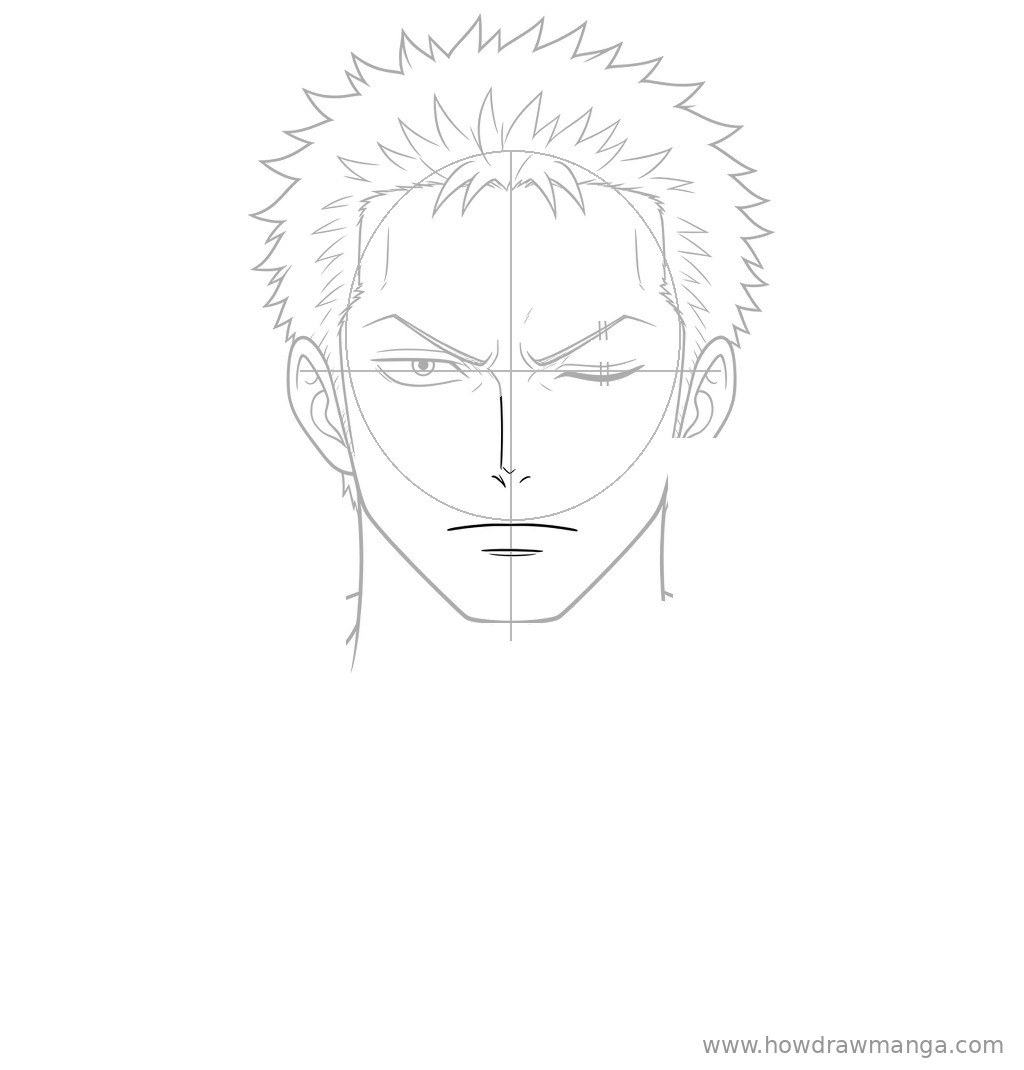
Draw a long, straight nose line from the inner end of the brow on your left down to about two-fifths of the way from the eye line to the chin. Finish it with a small nose tip and two short nostril marks. Lower down, draw a wide, straight mouth line about one-third of the face width, then a short lower-lip line under it.
Step 7: Add the Eye Scar and Three Earrings
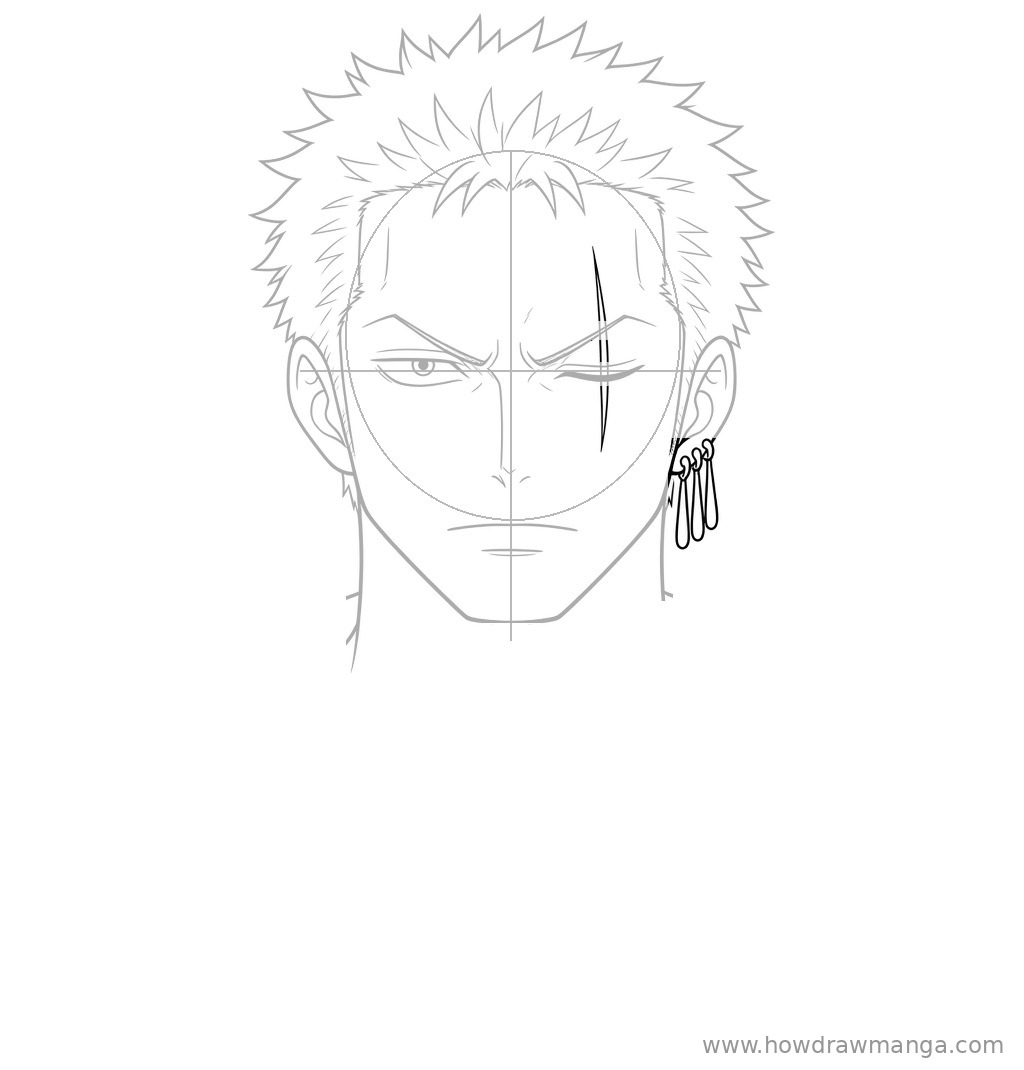
Draw a long, slightly curved vertical scar through his left brow and closed eye, from the middle of the forehead down to the cheek below the eye. Use two close, parallel lines so it looks like a mark, not a crease. On the earlobe on your right, draw three identical earrings side by side, each a small ring with a long, narrow drop hanging from it.
Step 8: Draw the Neck Lines and Robe
Add two neck-muscle lines in a V from below the ears toward the collarbone, and a short curved collarbone line across the chest. Draw a wide robe collar that crosses in a deep V at the chest. Slope the shoulder lines out to the edges of the page, and add a few long fold lines down the sleeves and front.
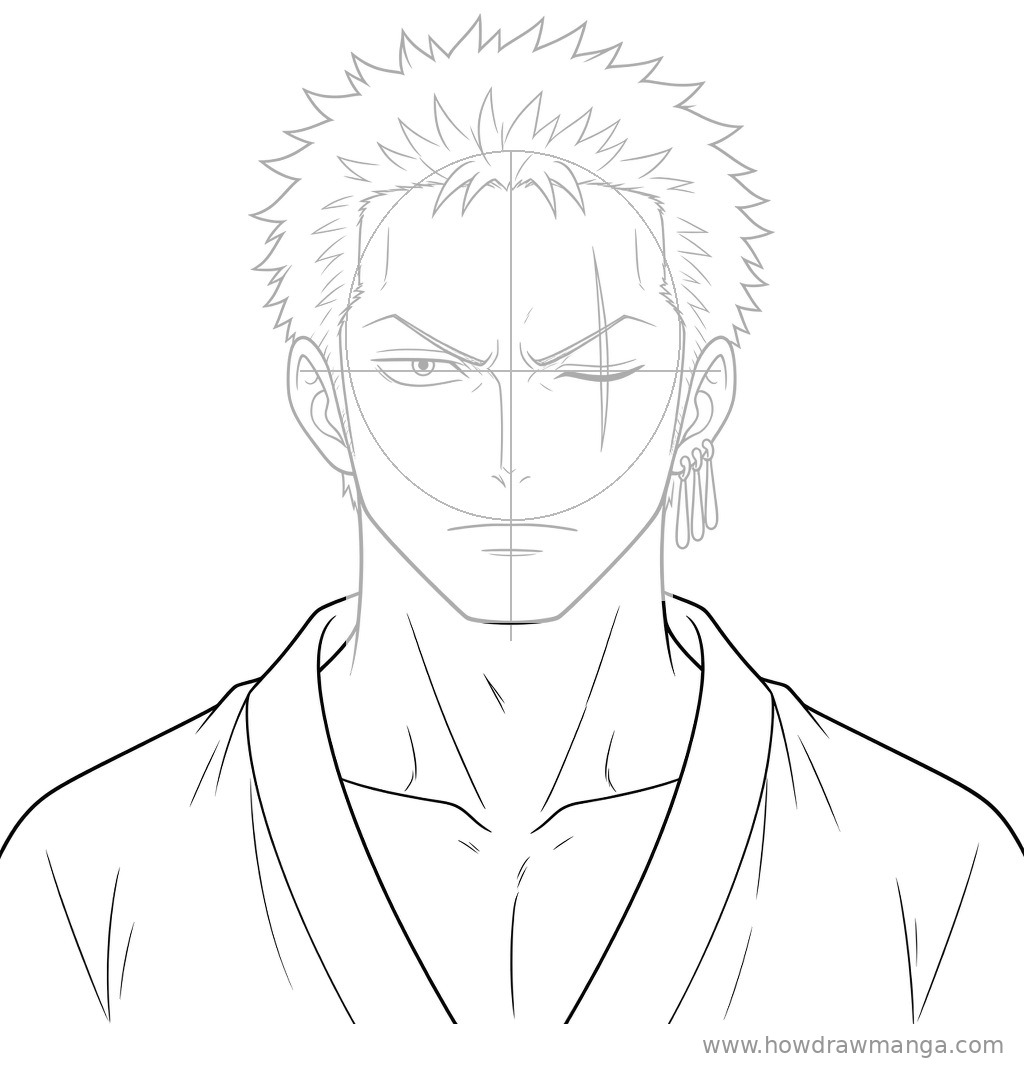
Step 9: Erase the Guidelines and Ink the Final Lines
Erase the oval, the centre line and the eye line. Go over the drawing with a darker pencil or a liner: use thick lines for the face outline, the hair outline and the robe, and thinner lines for the hair texture, the creases and the scar. If you colour him, give him green hair, gold earrings and lightly tanned skin.
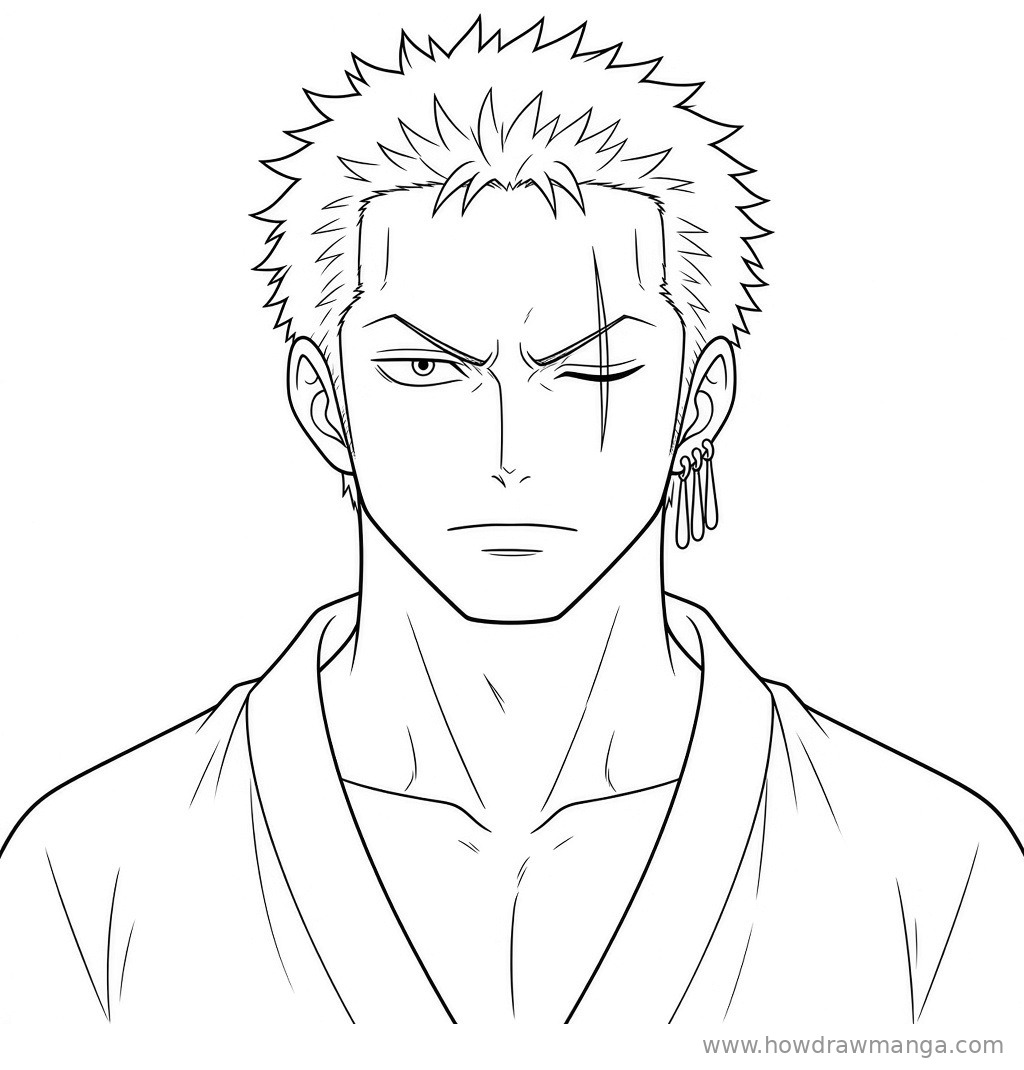
Key Pro Tips for Drawing Roronoa Zoro’s Face
- Check the sides before you ink: the scar, the closed eye and the earrings all belong to his left side, which is on your right.
- Keep the hair spikes short and close together. Long spikes make him look like a Dragon Ball character.
- Draw the jaw with straight lines and a flat chin. A pointed chin softens him too much.
- Angle the brows down hard toward the nose; his scowl carries most of the expression.
- Draw the three earrings the same size and evenly spaced so they read as a set.
FAQ
Which eye has Zoro’s scar?
His left eye. He gained the scar over it during the two-year timeskip, so pre-timeskip Zoro has two open eyes and no eye scar.
Does Zoro always wear a bandana?
No. He keeps a black bandana tied around his left arm and ties it on his head when he fights seriously, so you can leave it off for a calm portrait.