
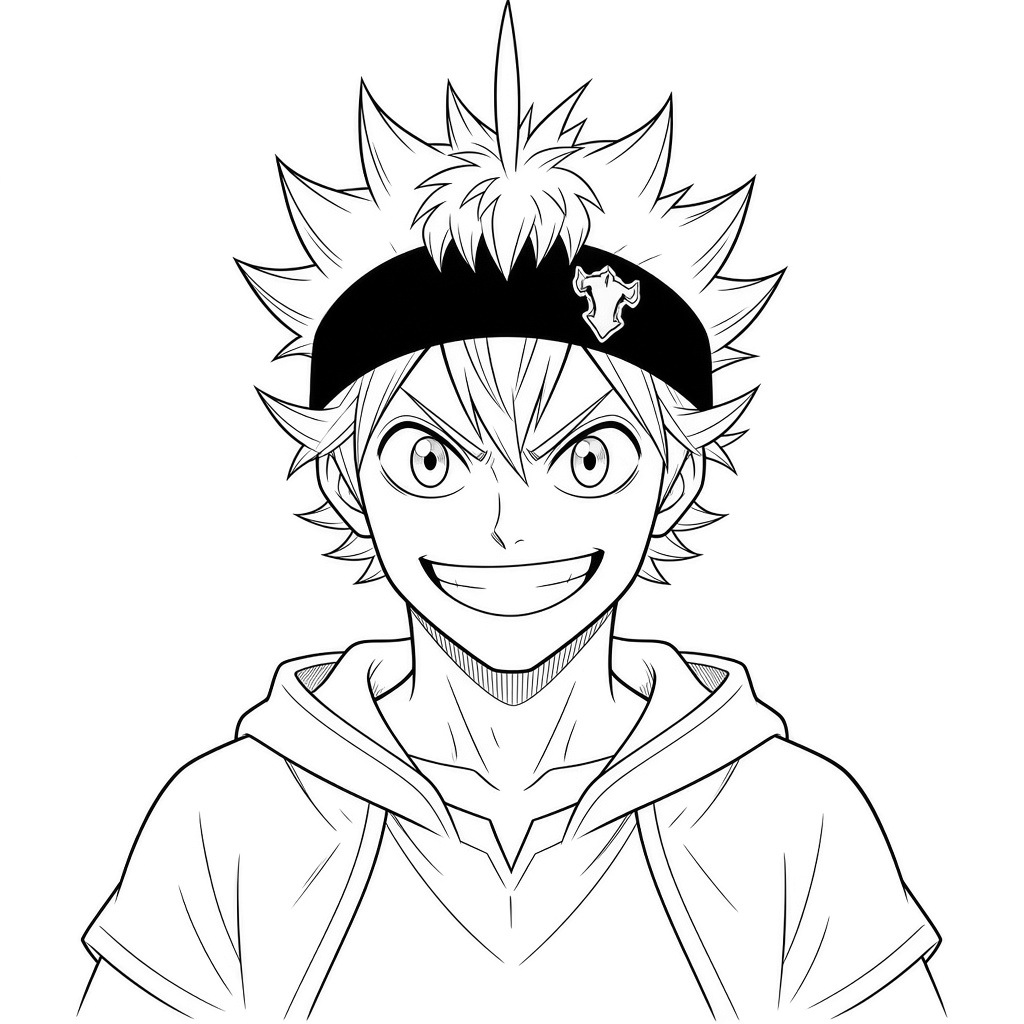
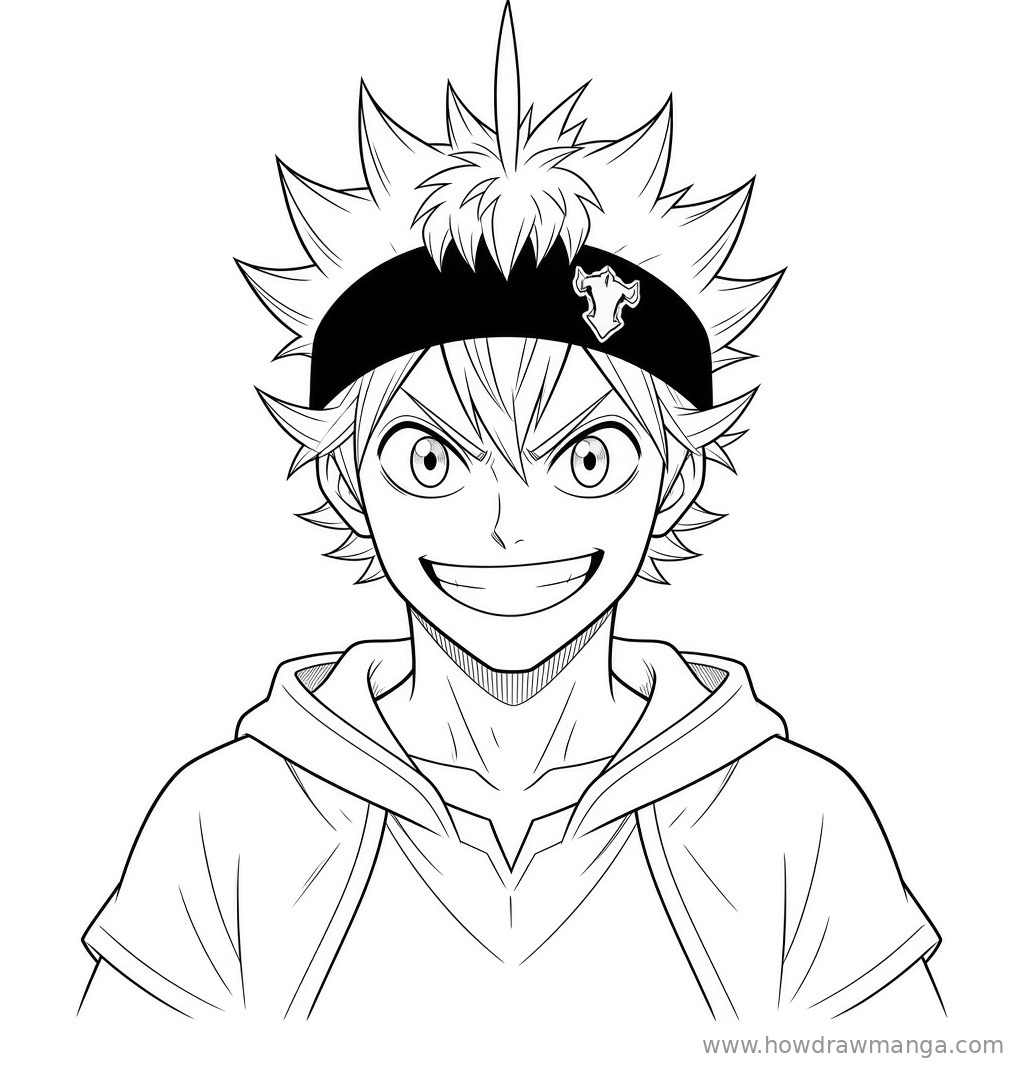
Asta, the hero of Black Clover, is a short but very muscular teenager who refuses to give up, and his face shows it. In this guide you will learn how to draw asta face in 8 clear steps: messy grey hair with one strand sticking straight up, a black headband, big eyes, a huge grin and the hood of his Black Bull robe.
The new lines in each picture are black and lines from earlier steps fade to grey, so it is easy to follow along. Start light with your pencil, since the guidelines are erased before the final ink.
Materials Needed
- Paper or a drawing tablet
- A light pencil (HB or 2H) for the circle and guidelines
- A darker pencil (2B) or a fine liner for the final lines
- A black marker or brush pen for the headband
- An eraser
Step-by-Step Asta Face Drawing Guide
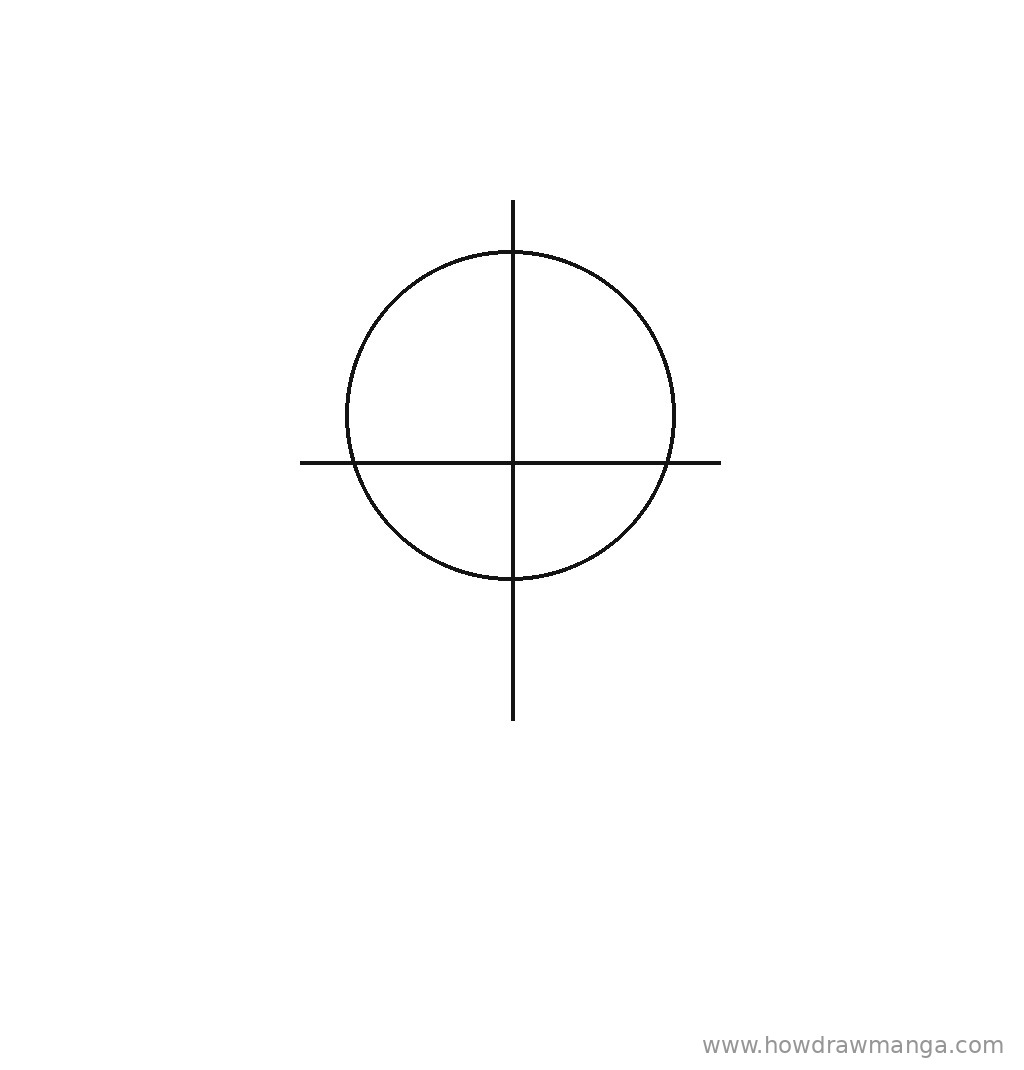
Step 1: Sketch the Head Circle and Guidelines
Draw a medium-sized circle a little above the centre of the page. Pass a vertical centre line through it and let it run below the circle by about one-third of the circle’s height. Add a horizontal eye line slightly below the middle of the circle, a bit wider than the circle itself. Keep these lines faint, because you will erase them in the last step.
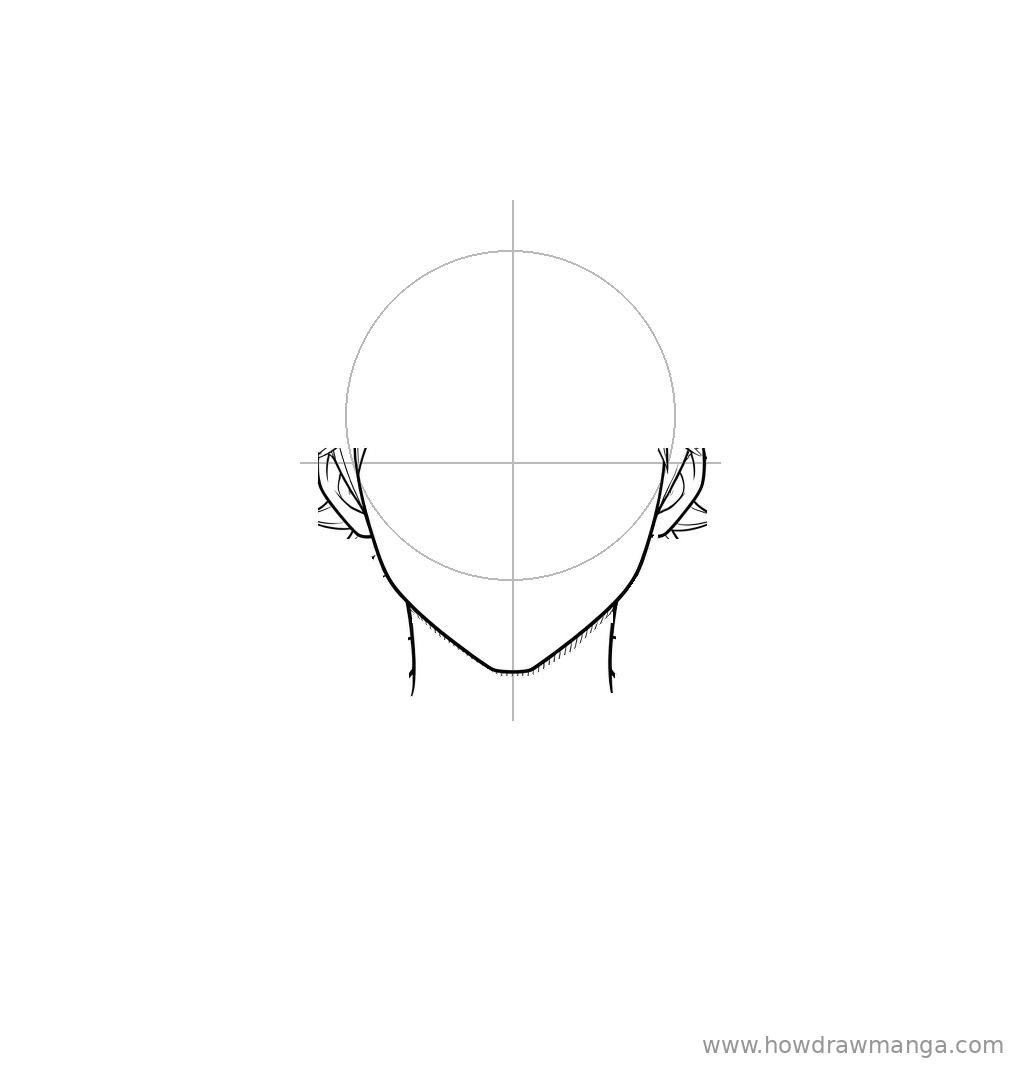
Step 2: Shape the Wide Jaw, Ears and Neck
Start each side of the face on the circle just below the eye line and bring it down almost straight before angling in toward the chin. Join the two sides in a broad chin on the centre line, about a quarter of the circle’s height below it. Add a small C-shaped ear on each side at eye level; spikes of hair will cover most of them. Drop two straight neck lines from the jaw corners, about two-thirds of the circle’s width apart, so the neck looks thick and strong.
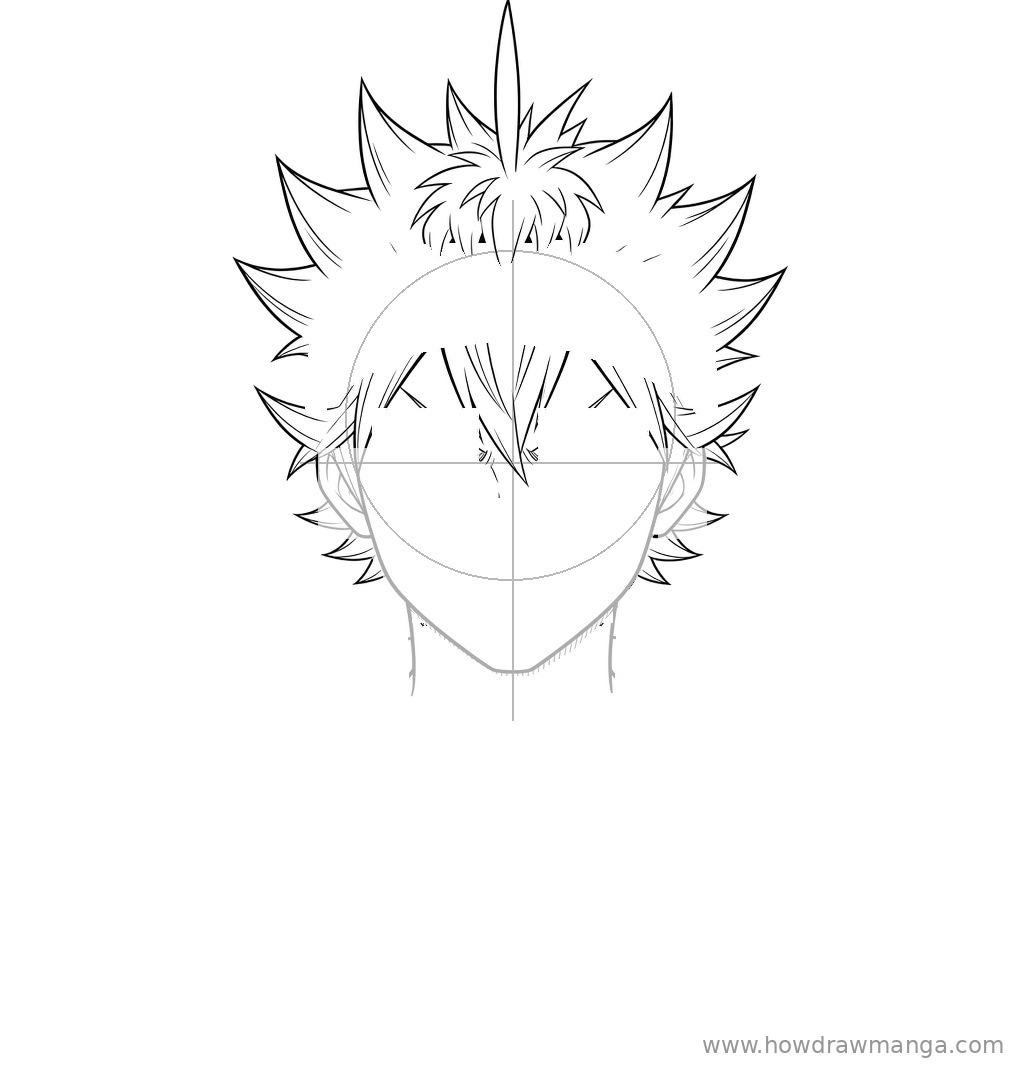
Step 3: Draw the Spiky Hair and Upright Strand
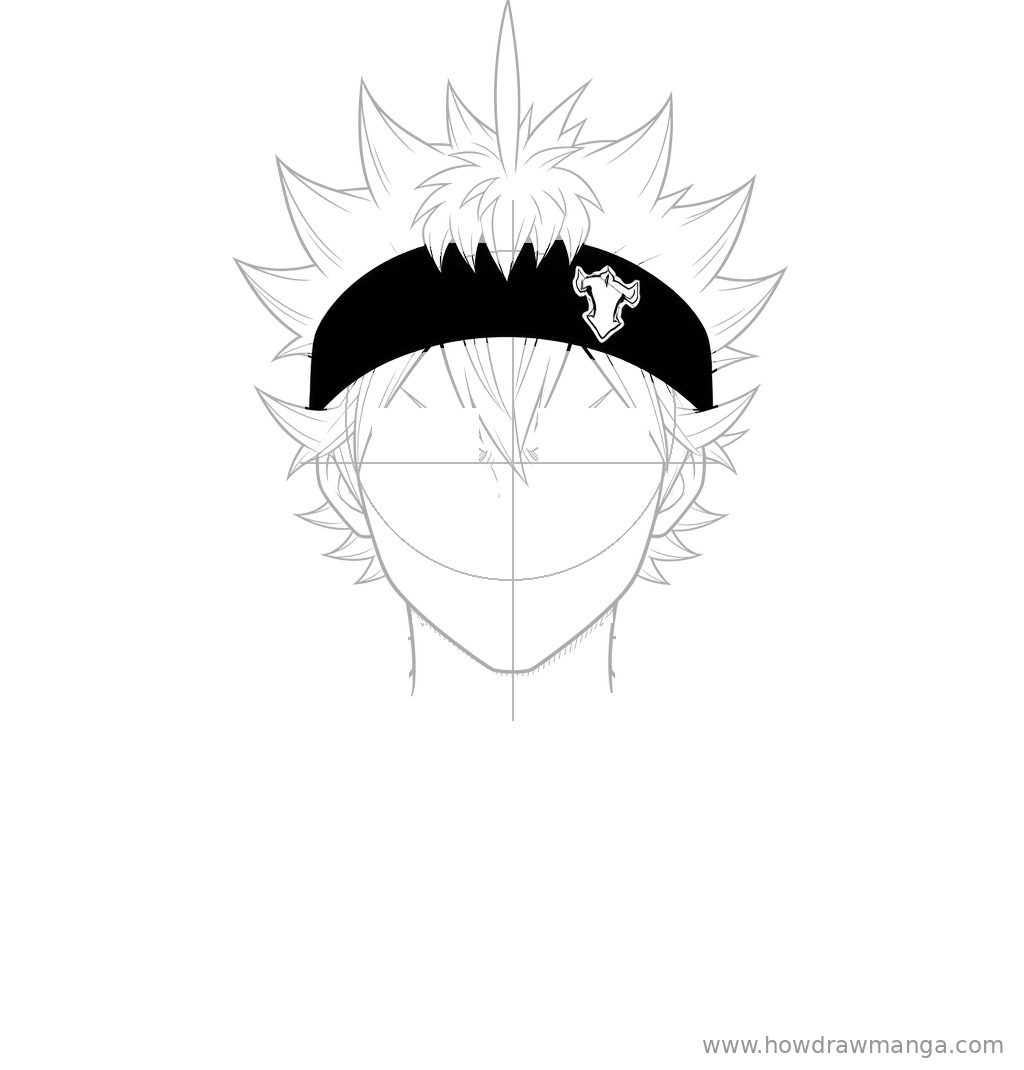
Build a crown of long, pointed spikes that fan out around the top and sides of the head, reaching well past the circle. In the centre, draw one tall, thin strand that points straight up, then a small messy tuft of short spikes at its base. Hang several pointed locks over the forehead and between the eyes. Leave a curved, empty strip across the upper forehead; the headband goes there next.
Step 4: Add the Black Headband
Fill the empty strip with a thick band that arches across the forehead from one side of the hair to the other, about as tall as the eye-to-nose distance in the middle. Shade the band solid black, letting the base of the central tuft overlap its top edge. Near one end, leave a small emblem shape outlined in white; it stands for the gold Black Bull insignia on his headband.
Step 5: Draw the Big Eyes and Determined Brows
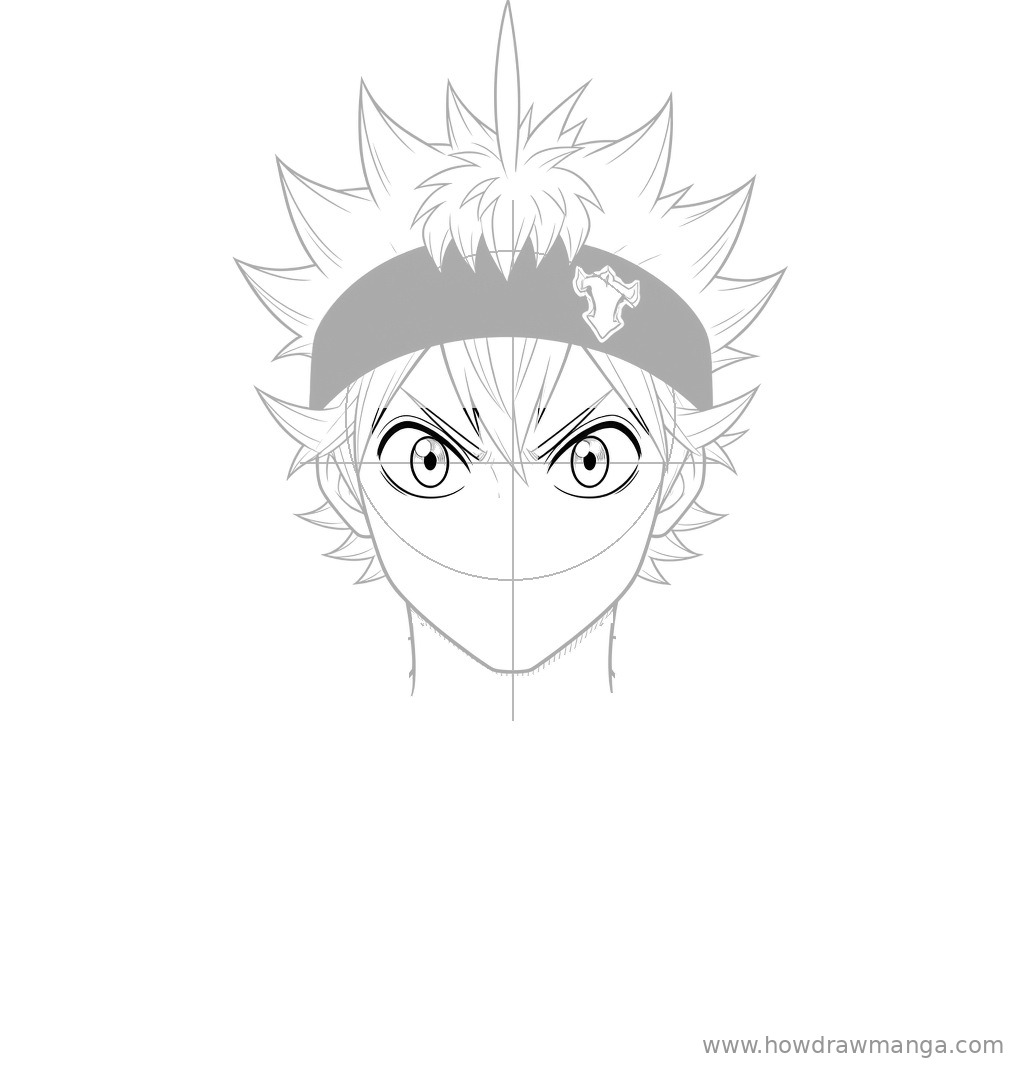
Place two large rounded eyes on the eye line, just under the bangs, with about one eye-width between them. Give each eye a thick upper lid, a round iris with a small dark pupil and a tiny highlight. Above them, draw short, thick eyebrows that slant down toward the centre line, which gives him his fired-up expression.
Step 6: Add the Nose and Wide Grin
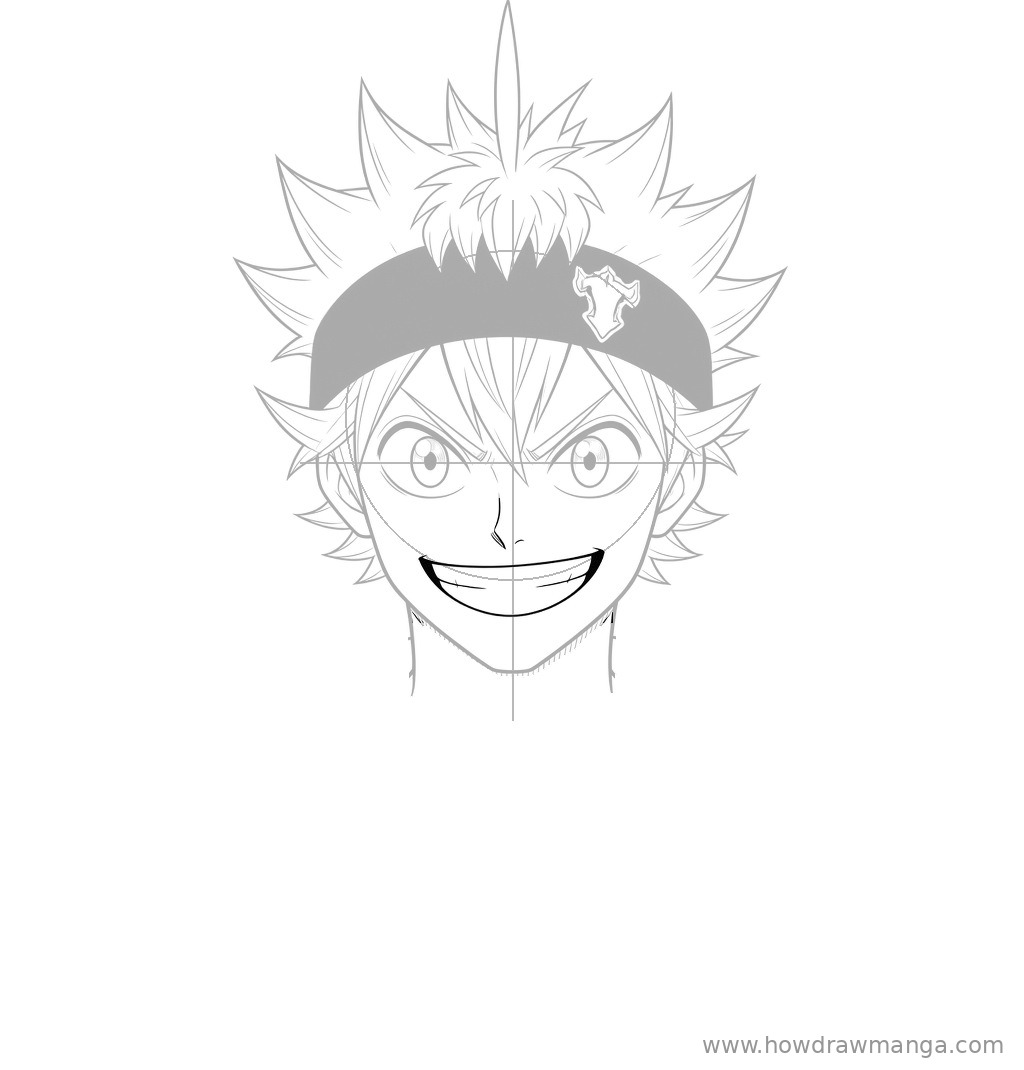
Draw a small, angular nose on the centre line about halfway between the eye line and the bottom of the circle. Below it, draw a very wide open mouth that stretches almost from cheek to cheek, curving up at both corners. Add a straight line across the top for the upper row of teeth and a deep curve underneath for the open jaw.
Step 7: Draw the Neck Shadow, Hood and Collar
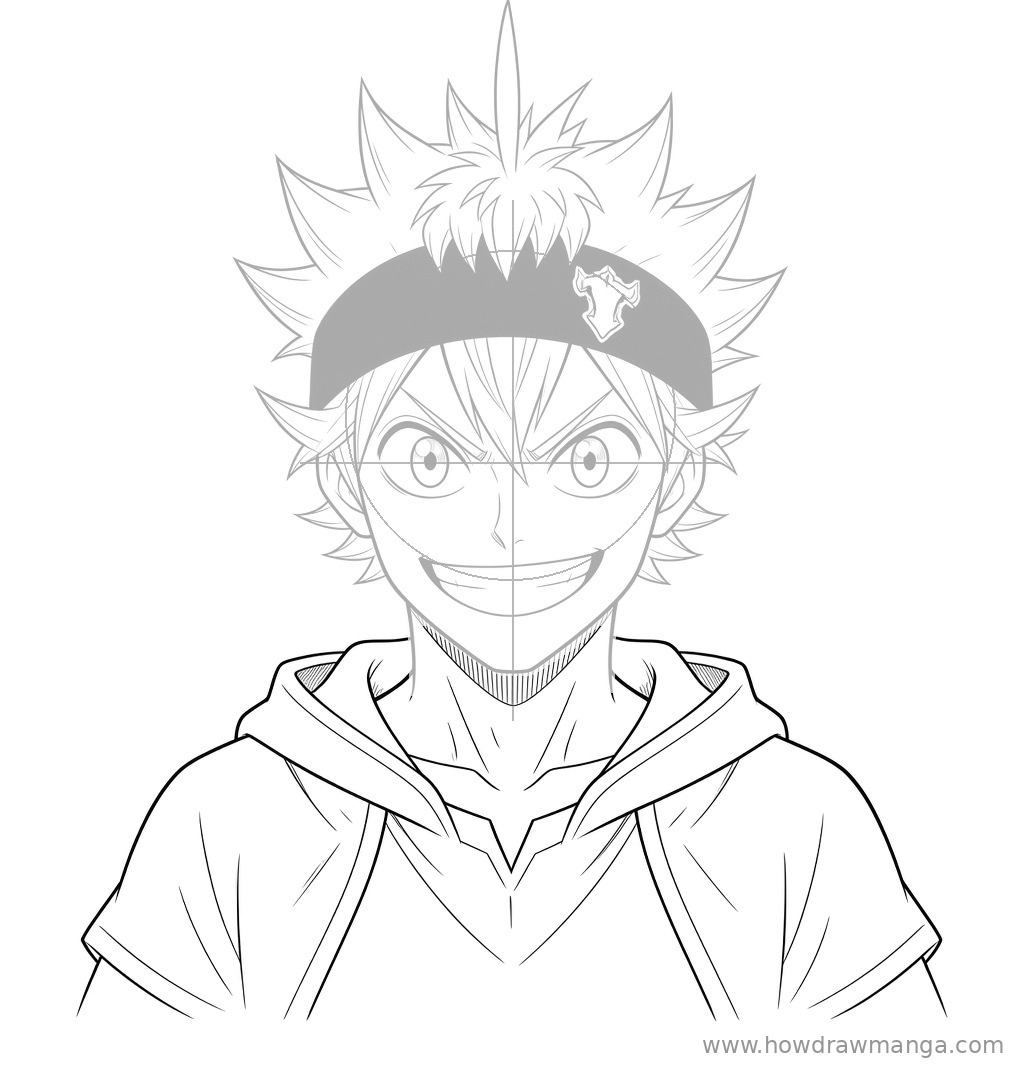
Hatch a band of short parallel lines under the chin to shade the neck. Around the shoulders, draw the folded hood of his short robe: a thick rolled shape that wraps behind the neck and comes forward over each shoulder, with a trim line along its edge. Under the chin, add the V-shaped collar of his tunic, with its point at mid-chest, and finish the shoulder outlines at the edges of the page.
Step 8: Ink the Final Line Art
Go over the lines you want to keep with a fine liner or a dark pencil, and make the headband fully black again. Use bold strokes for the hair silhouette, the jaw and the shoulders, and thinner lines for strands, hatching and fabric folds. When the ink is dry, erase the circle, the centre line and the eye line. This step does not add any new shapes.
Key Pro Tips for Drawing Asta’s Face
- Never skip the upright strand. The single strand rising from the centre of his head is one of his clearest features. Without it, the hair reads as a generic spiky cut.
- Draw a strong, solid build. Asta is short for a Magic Knight but extremely muscular, so give him a wide jaw and a thick neck rather than a slim one.
- Keep the headband simple. The insignia is small compared with the band. A clean outline in white is enough at this size.
- Draw his base form. Horns, a black wing or a red slit eye belong to his Black Asta form. Leave them out for his everyday face.
- Colour guide. His hair is grey (some profiles call it ash blond), his eyes are emerald green, the headband is black with a gold insignia, and the Black Bull robe is black with gold trim.
FAQ
What is on the back of Asta’s headband?
The back of his early headband carries a red four-pointed star with three stitches. It is hidden in a front view, so it does not appear in this drawing.