
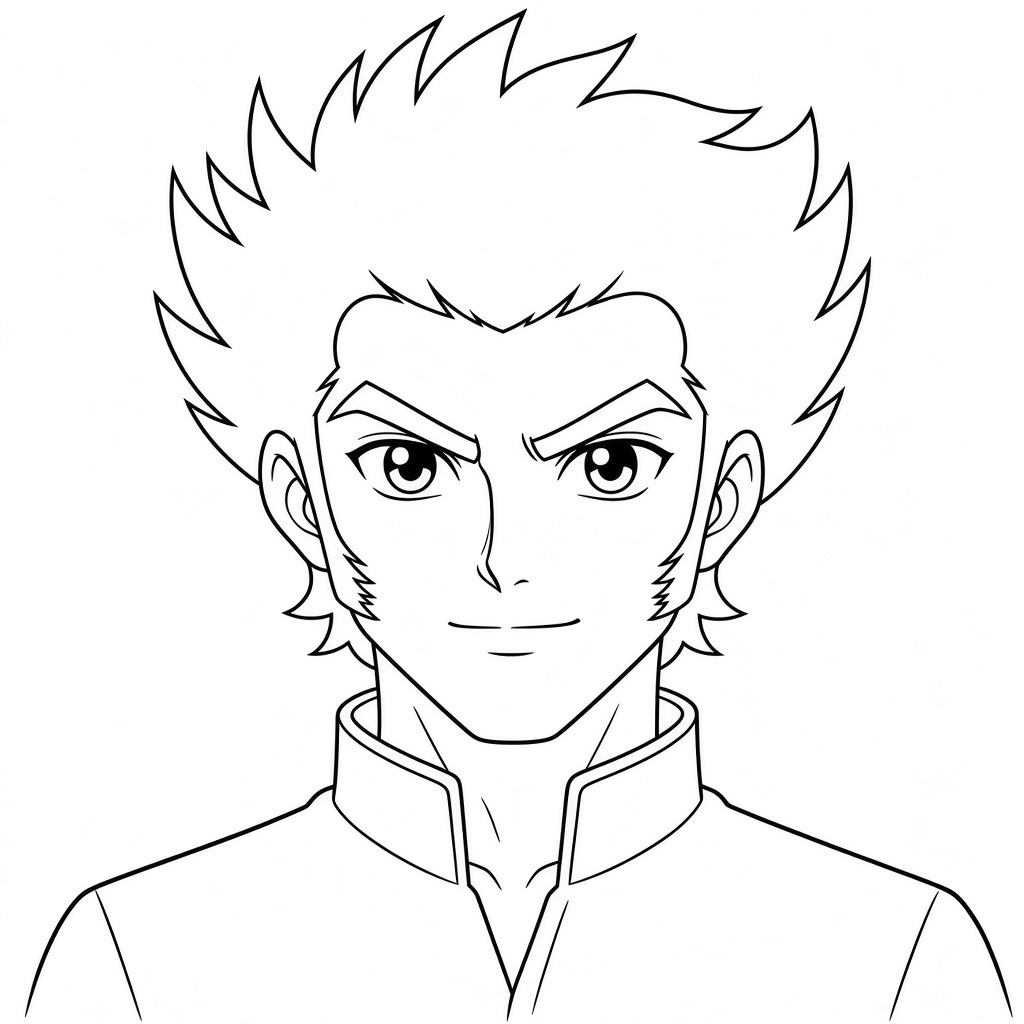
Koji Kabuto is the hot-headed hero of Mazinger Z and the main pilot of its giant robot, and he returns as a supporting lead in Great Mazinger and UFO Robot Grendizer. He is also a fixture of the Super Robot Wars crossover games. In this guide you will learn how to draw koji kabuto face in 8 steps, starting from one circle and finishing with clean line art.
His look is built on three things: spiky hair combed back so the whole forehead shows, pointed sideburns in front of the ears, and broad, fiery eyebrows. Get those three right and he reads as Koji even in a quick sketch. In every picture below, earlier lines are grey and the lines you add in that step are black.
Materials Needed
- Paper or a drawing tablet
- A light pencil (HB or 2H) for guidelines
- A darker pencil (2B) or a fine liner for the final lines
- An eraser
- Optional: black marker or brush pen to fill the hair, plus colour pencils
Step-by-Step Koji Kabuto Face Drawing Guide
Step 1: Sketch the Head Circle and Guidelines
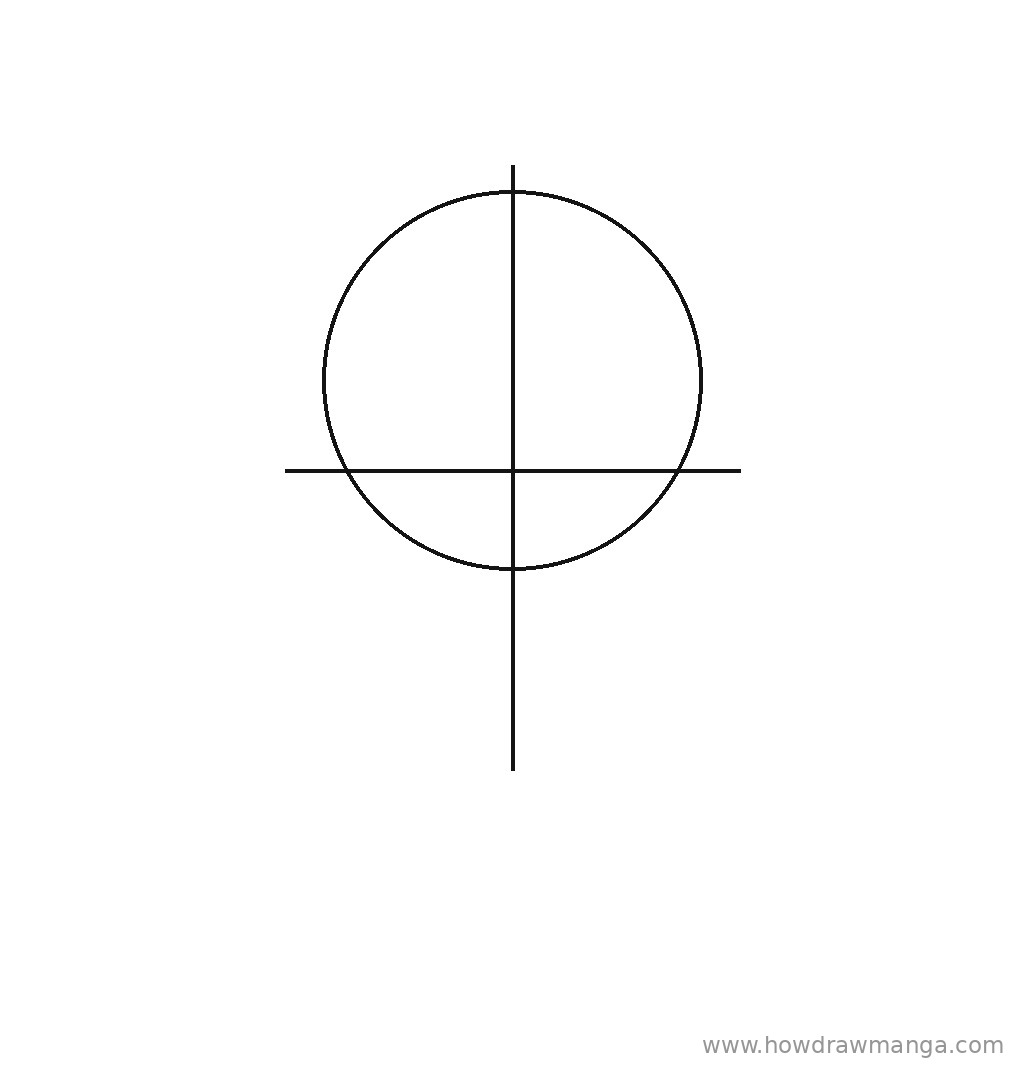
Draw a circle in the upper middle of the page, a little under half the page wide. Run a vertical centre line through it and let it continue below the circle by about half the circle’s height; the lower end marks the chin area. Draw a horizontal eye line about three-quarters of the way down the circle, reaching slightly past both sides. Keep these lines light so they are easy to erase.
Step 2: Draw the Face Shape, Sideburns, Ears and Neck
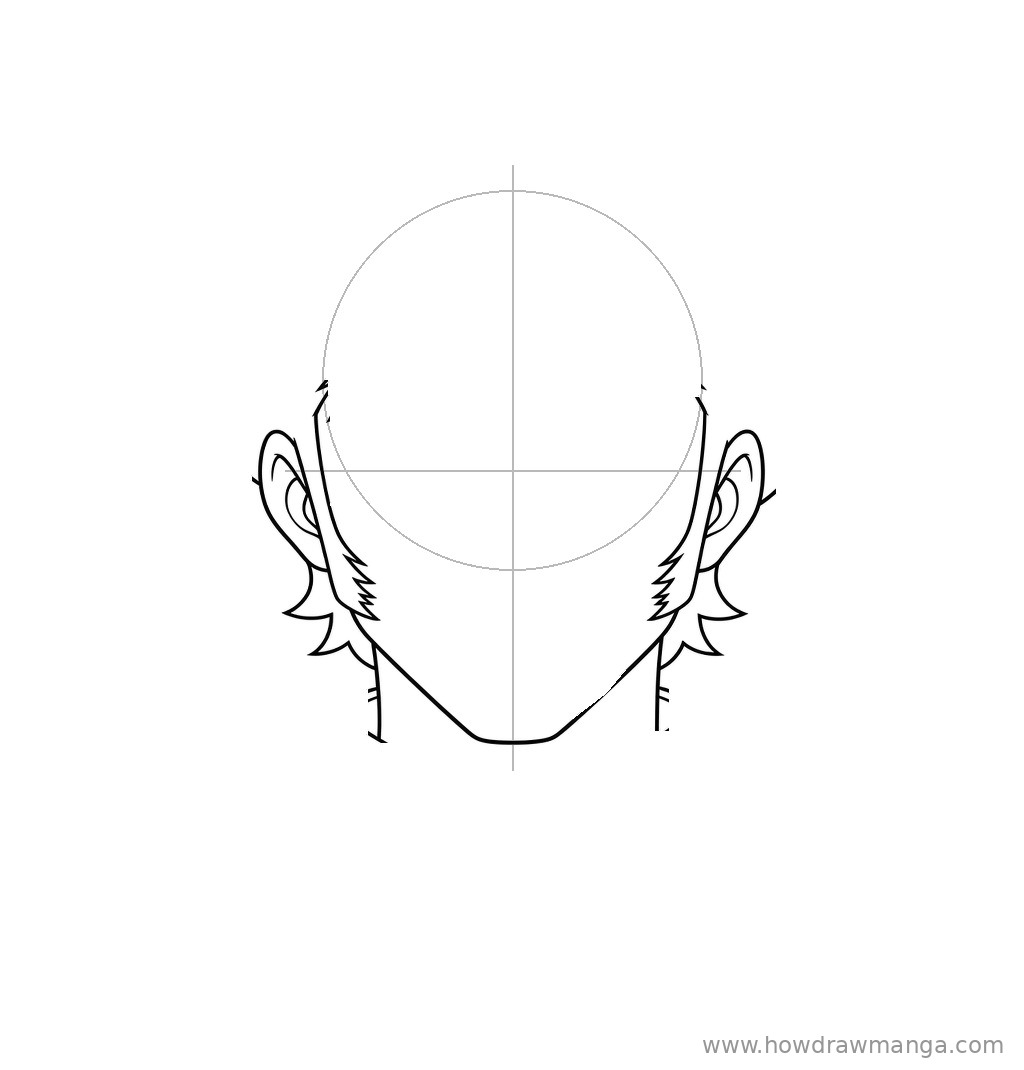
From the middle of each side of the circle, bring the cheek lines almost straight down past the bottom of the circle, then angle them in to a broad, flat chin on the centre line. Along each cheek, draw a long sideburn that ends at mouth level in a cluster of small sharp points; bend those points inward toward the cheek, not outward. Add a C-shaped ear on each side, from just above the eye line down to about nose level. Finish with two short, straight neck lines under the corners of the jaw.
Step 3: Draw the Swept-Back Hairline
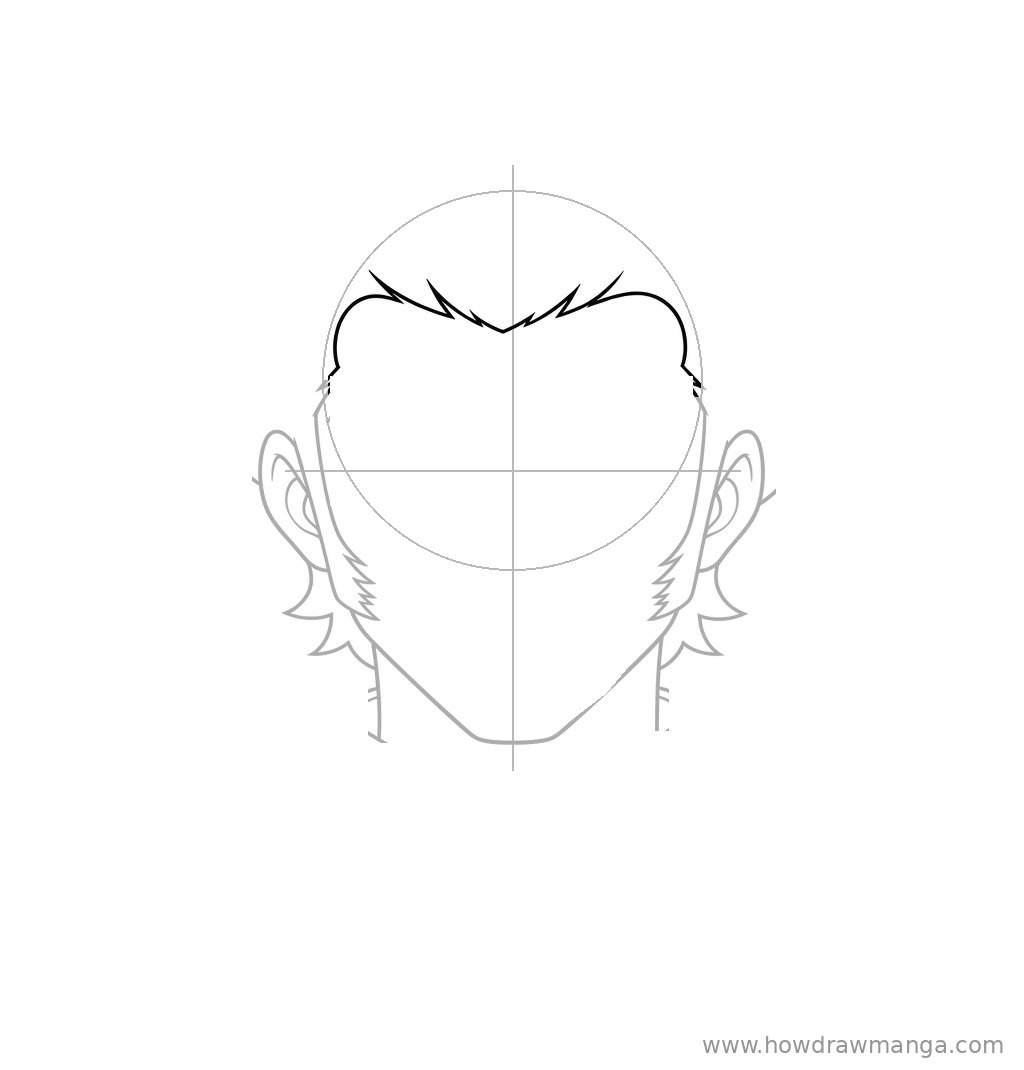
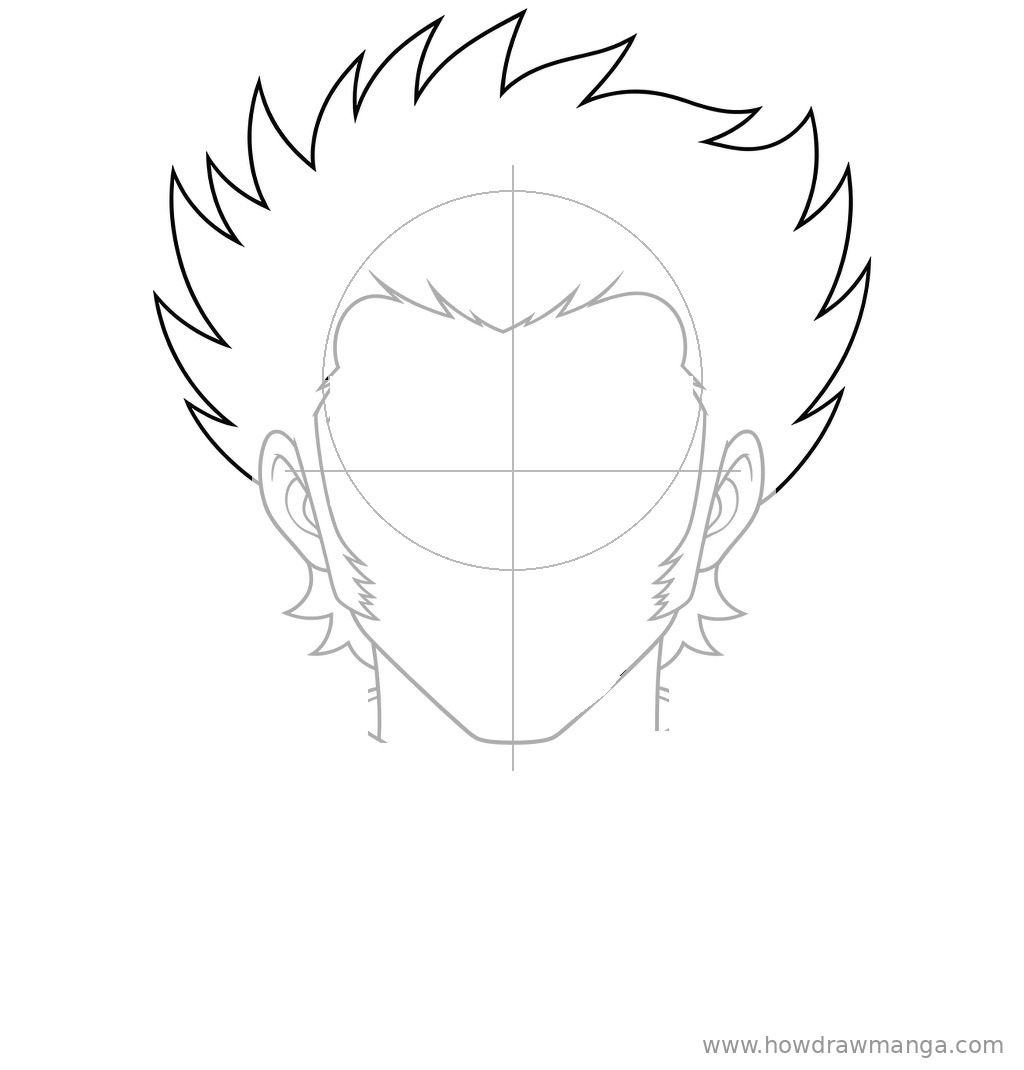
Draw the front edge of the hair across the top of the circle, about one-quarter of the way down from its top. Start at the top of each sideburn, curve up into a rounded bump over each temple, and let the two sides meet in a small point above the centre line. Add a few short, sharp strands along this edge that point up and back. Leave the forehead below this line completely open: Koji’s hair is combed back, with no bangs.
Step 4: Draw the Big Spikes Fanning Up and Back
Now draw the outer outline of the hair. Start above the ears and build a ring of large, pointed spikes that fan up and outward, with the tallest points rising about half a circle-height above the top of the head. Make each spike a long triangle with a slightly curved side, and tilt them so they lean backward rather than forward. Bring the lowest spikes on each side down until they meet the tops of the ears.
Step 5: Draw the Fiery Eyebrows and Eyes
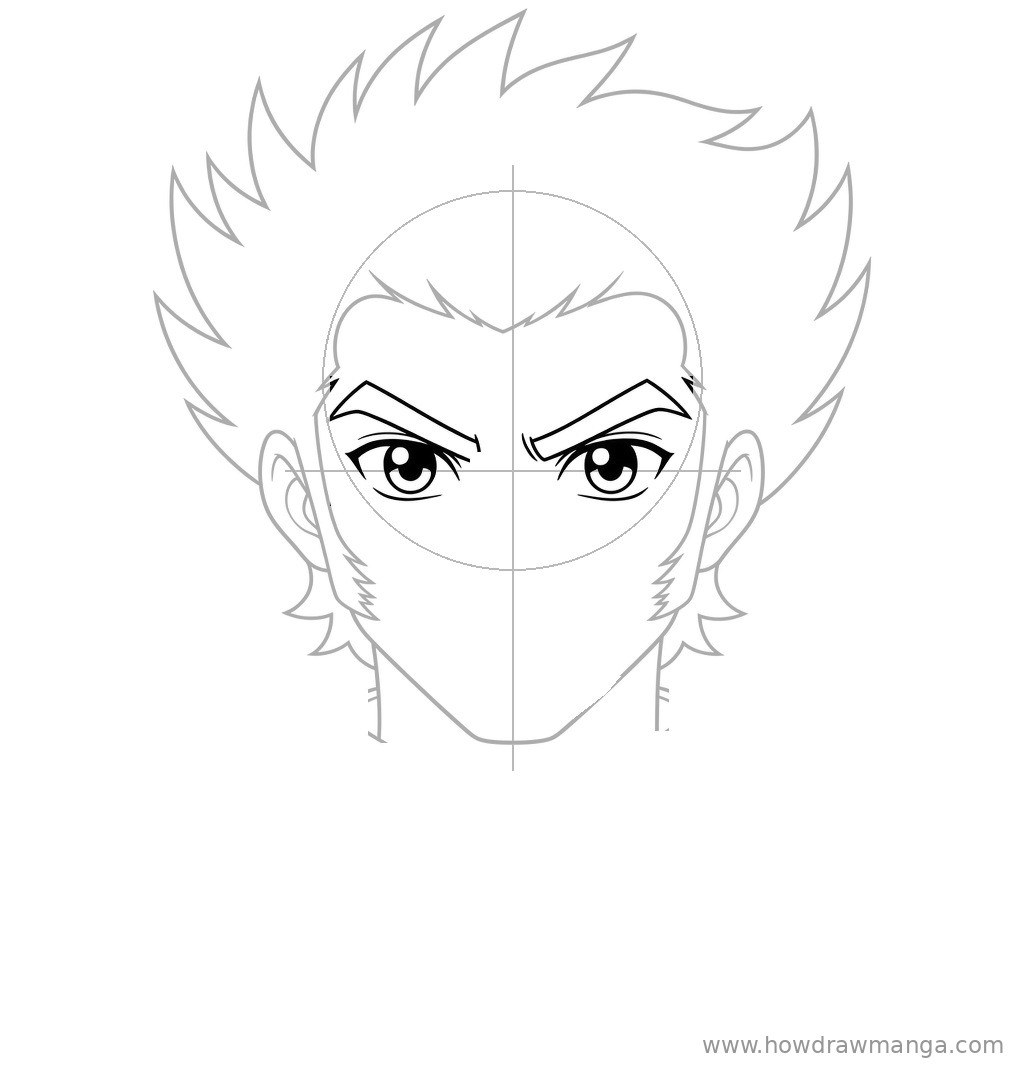
Just above the eye line, draw two broad eyebrows, each nearly as wide as one half of the face. Shape each one as a thick band that rises steeply at the outer end, then slopes down toward the nose, so the inner ends sit lowest and give him a fierce frown. Under them, sit the eyes on the eye line: a heavy, slightly pointed upper lash line, a large round iris with a dark pupil and a small white highlight, and a thin lower lid. Leave a gap of a little more than half an eye-width between the eyes.
Step 6: Add the Nose and Confident Smile
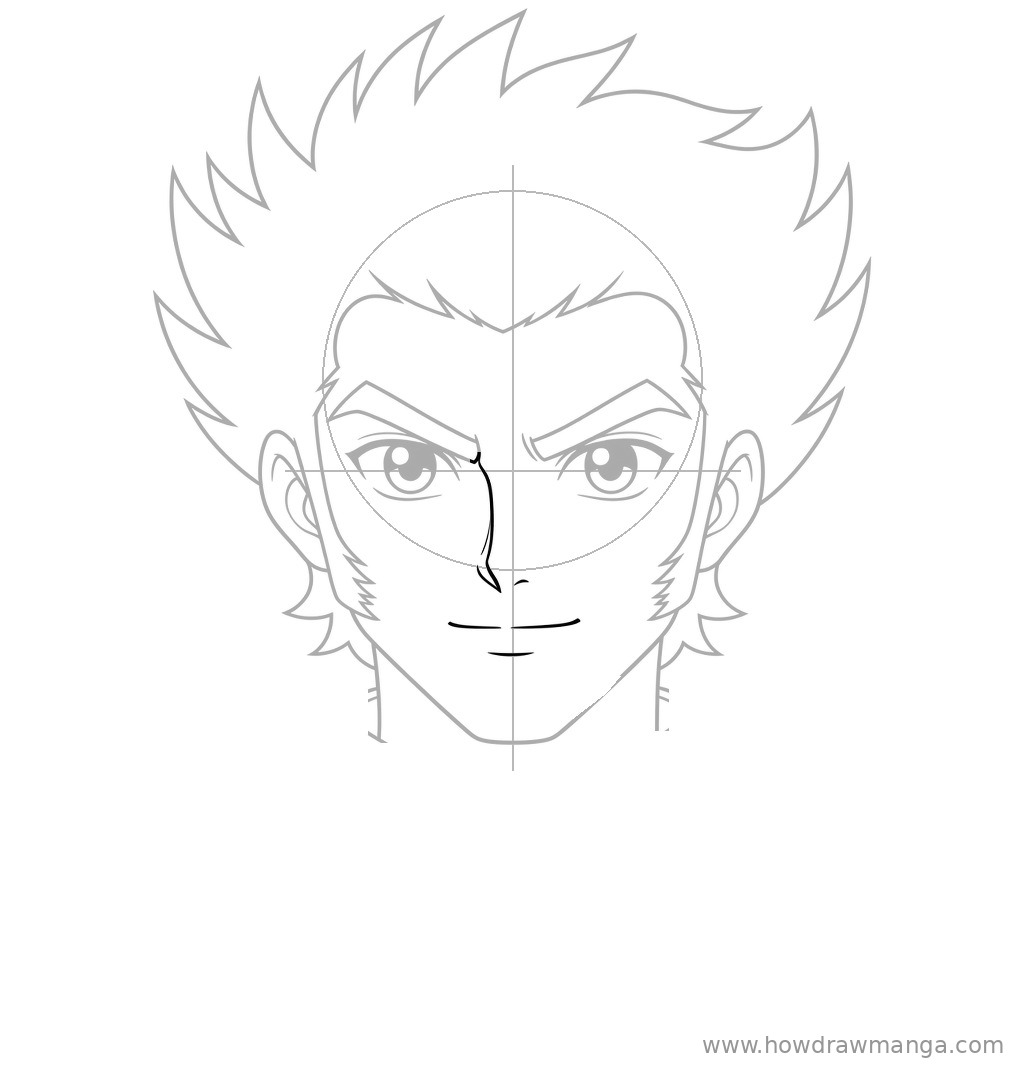
From the inner end of the left eyebrow, draw a thin, slightly wavy nose line down beside the centre line, ending in a small hook about halfway between the eye line and the chin. Add a tiny nostril mark to its right. Below, draw a long mouth line about as wide as one eye, curving up a little at the right end for a cocky half-smile. Finish with a short, flat lower-lip line under the middle of the mouth.
Step 7: Draw the High Collar and Shoulders
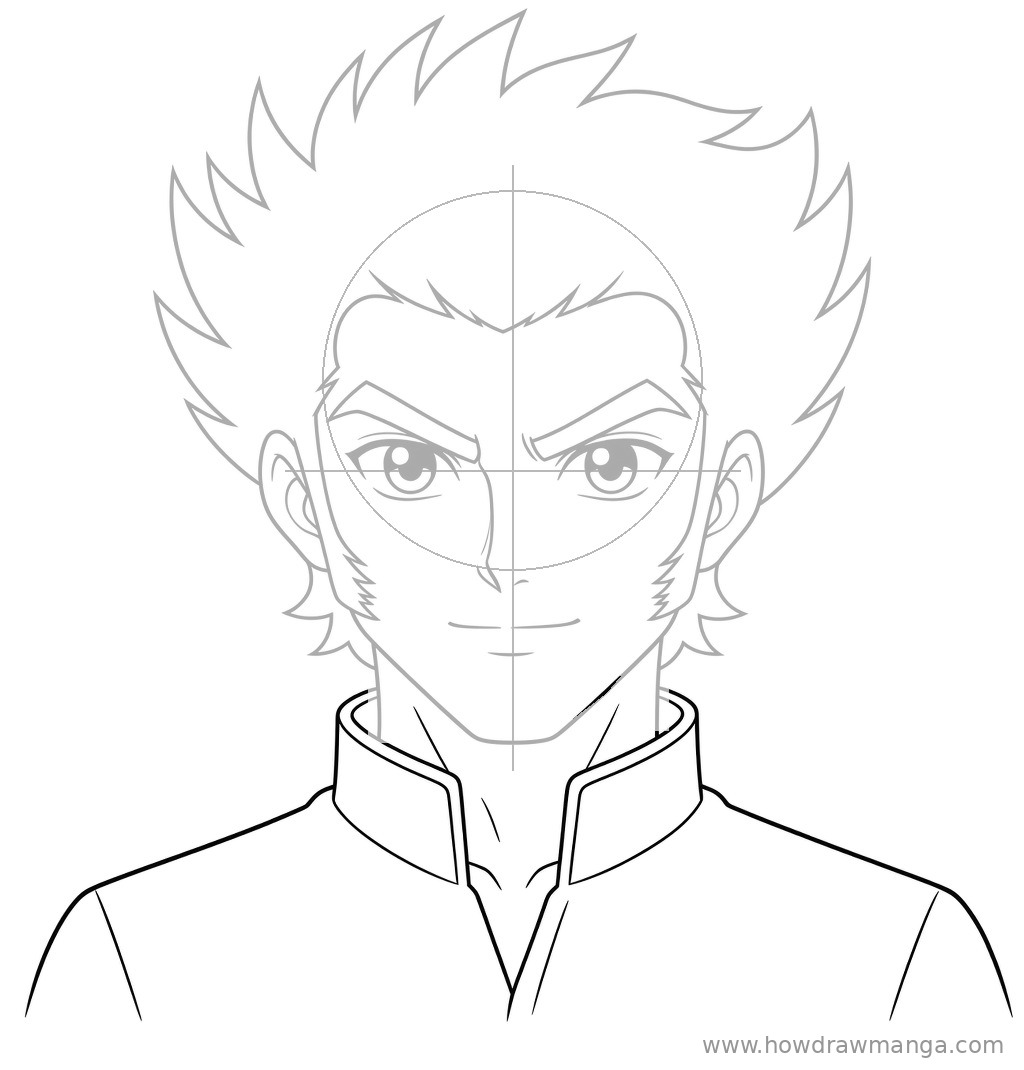
Wrap a tall standing collar around the base of the neck, rising almost to the corners of the jaw. Draw its two front flaps with a second line just inside the outer edge, and let them open into a narrow V at the centre of the chest. Add two faint diagonal lines on the throat. Then draw the shoulders as long lines sloping down to the edges of the page, with a short fold line near each arm.
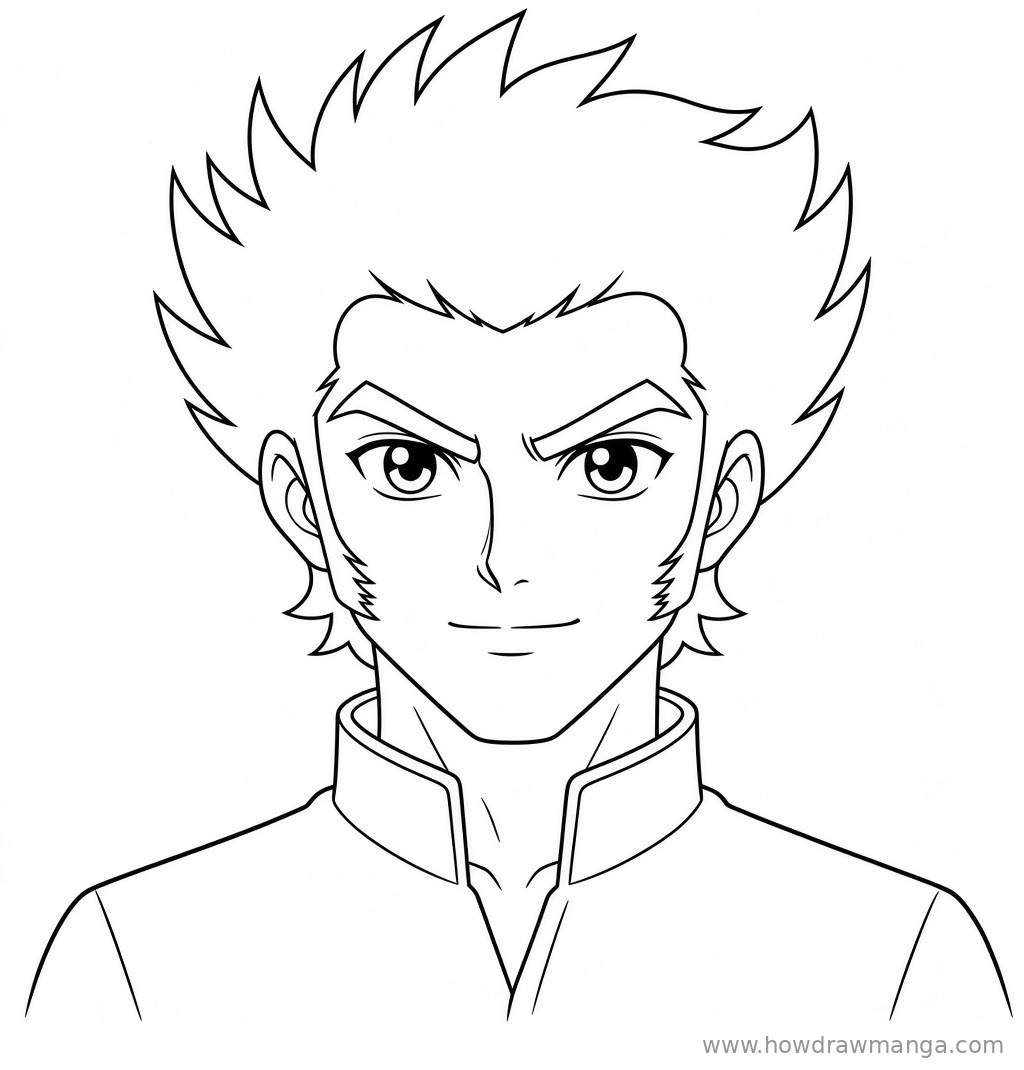
Step 8: Ink the Final Line Art
Trace the lines you want to keep with a fine liner or a soft, dark pencil. Use bold strokes for the hair outline, the jaw and the collar, and thinner strokes for the lashes, the hair strands and the throat lines. Once the ink is dry, erase the circle, the centre line and the eye line. Nothing new is added in this step; it only cleans up the drawing.
Key Pro Tips for Drawing Koji Kabuto’s Face
- Keep the forehead clear. The swept-back hair is his signature. If strands start falling over the brow, he turns into a generic spiky-haired hero.
- Hook the sideburns inward. The small points at the bottom of each sideburn should bend toward the cheek. Pointing them outward makes them look like stray hair.
- Go thick on the eyebrows. Draw each brow as a solid band, not a single line. A thin brow loses most of his attitude.
- Lean the spikes backward. Before inking, check that every big spike tilts back over the head. Forward-pointing spikes contradict the combed-back look.
- Colour tip: his hair and eyes are black, so you can fill the whole hair shape with a black marker for a bold, classic look.
FAQ
Can I draw Koji in his pilot suit instead?
Yes. His pilot outfit is a red, skin-tight suit with striped yellow arm guards and boots, often worn with a white helmet. This guide keeps a plain high collar so you can focus on the face; you can swap the collar for the suit’s neckline once the head is done.