
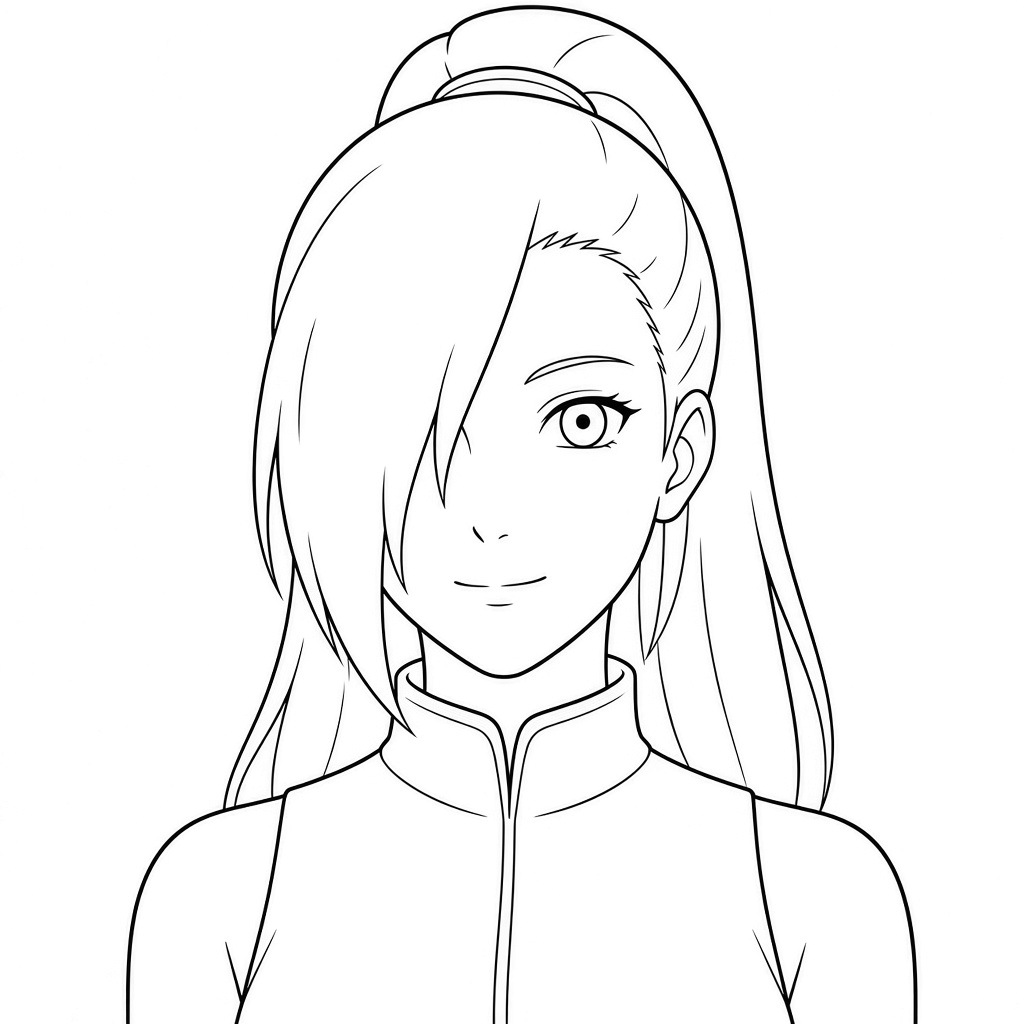
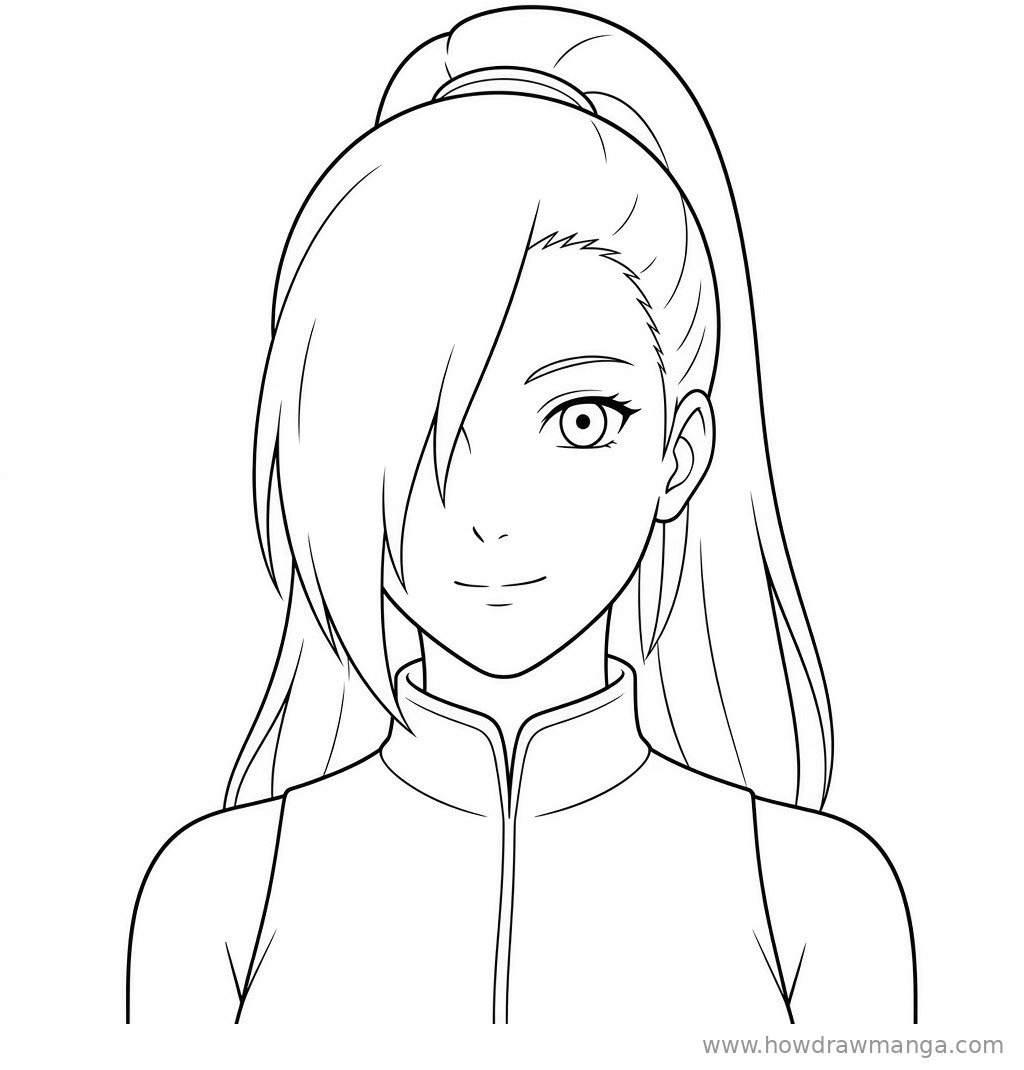
Ino Yamanaka is a kunoichi from Masashi Kishimoto’s Naruto: a member of Team 10 alongside Shikamaru and Choji, and the only daughter of the Yamanaka clan head. In this guide you will learn how to draw ino yamanaka face in 8 steps, starting from one circle and ending with clean line art of her Part II look.
Her design is easy to spot once you know what to look for: long, pale blonde hair tied into a high ponytail, and a heavy curtain of bangs that falls over the right side of her face and hides most of her right eye. Every picture below shows earlier lines in grey and the new lines for that step in black.
Materials Needed
- Paper or a drawing tablet
- A light pencil (HB or 2H) for guidelines
- A darker pencil (2B) or a fine liner for the final lines
- An eraser
- Optional: pale yellow, light blue and purple pencils or markers for colouring
Step-by-Step Ino Yamanaka Face Drawing Guide
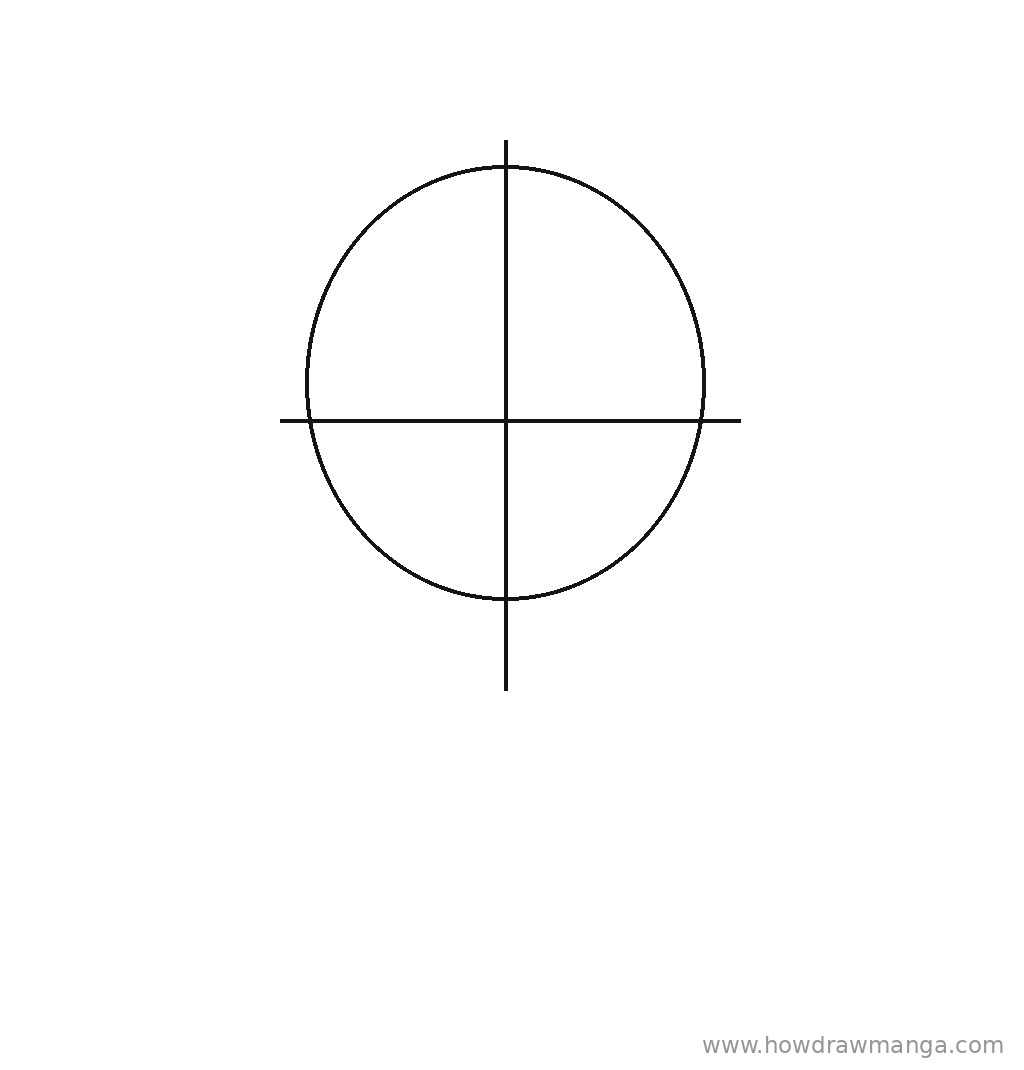
Step 1: Sketch the Head Circle and Guidelines
Draw a circle in the upper middle of the page, about two-fifths of the page wide. Add a vertical centre line that runs from just above the circle to a short distance below it; the bottom end marks the chin. Cross it with a horizontal eye line a little below the middle of the circle, letting it reach slightly past both sides. Keep these lines light so they are easy to erase later.
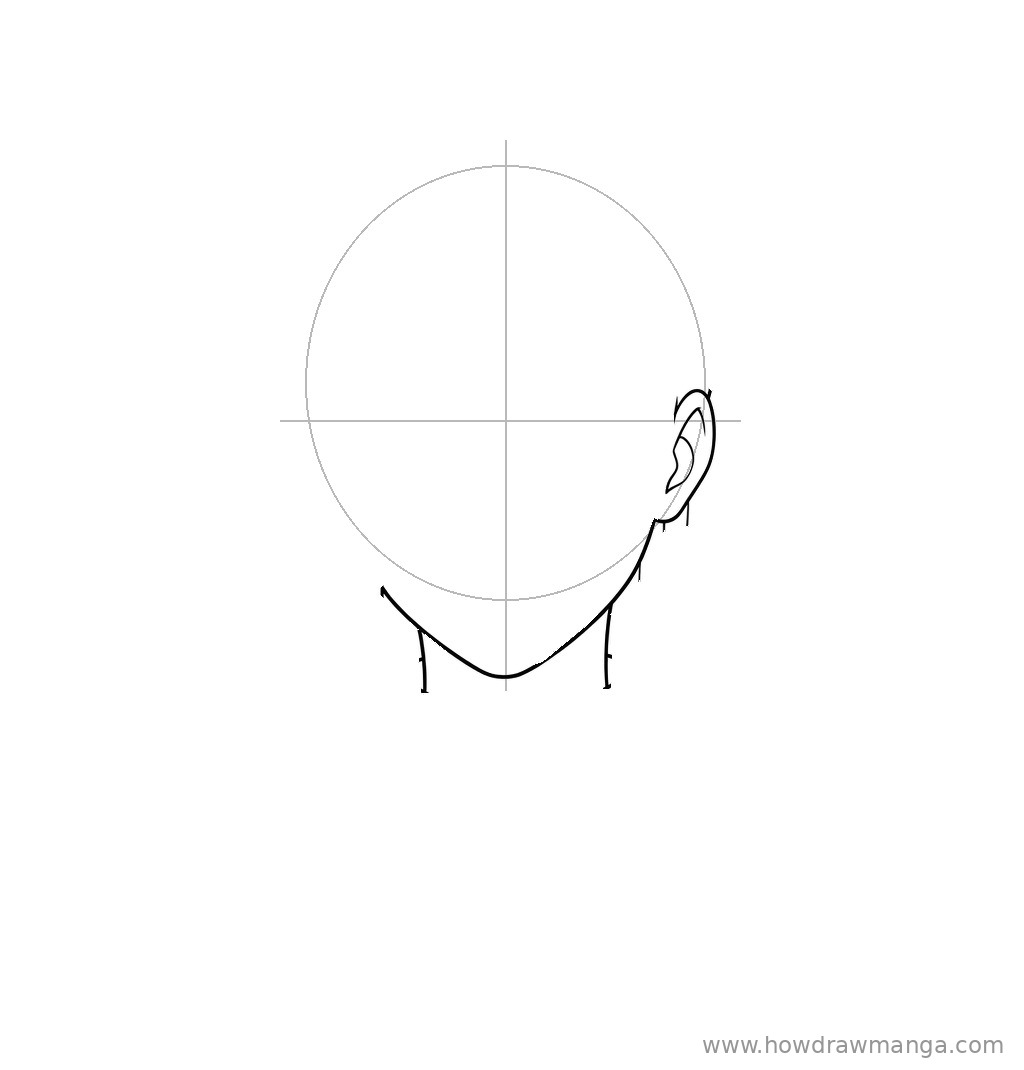
Step 2: Draw the Jaw, Chin, Ear and Neck
Start on the right side of the drawing, just below the eye line, and bring the cheek down in a gentle curve to a soft, slightly pointed chin on the centre line, just below the circle. On the left side, draw only the lower part of the jaw, from below the circle to the chin, because the bangs will cover the rest. Add one ear on the right, sitting on the eye line and about one-third of the circle’s height, with a small curl inside. Finish with two short, nearly vertical neck lines under the jaw.
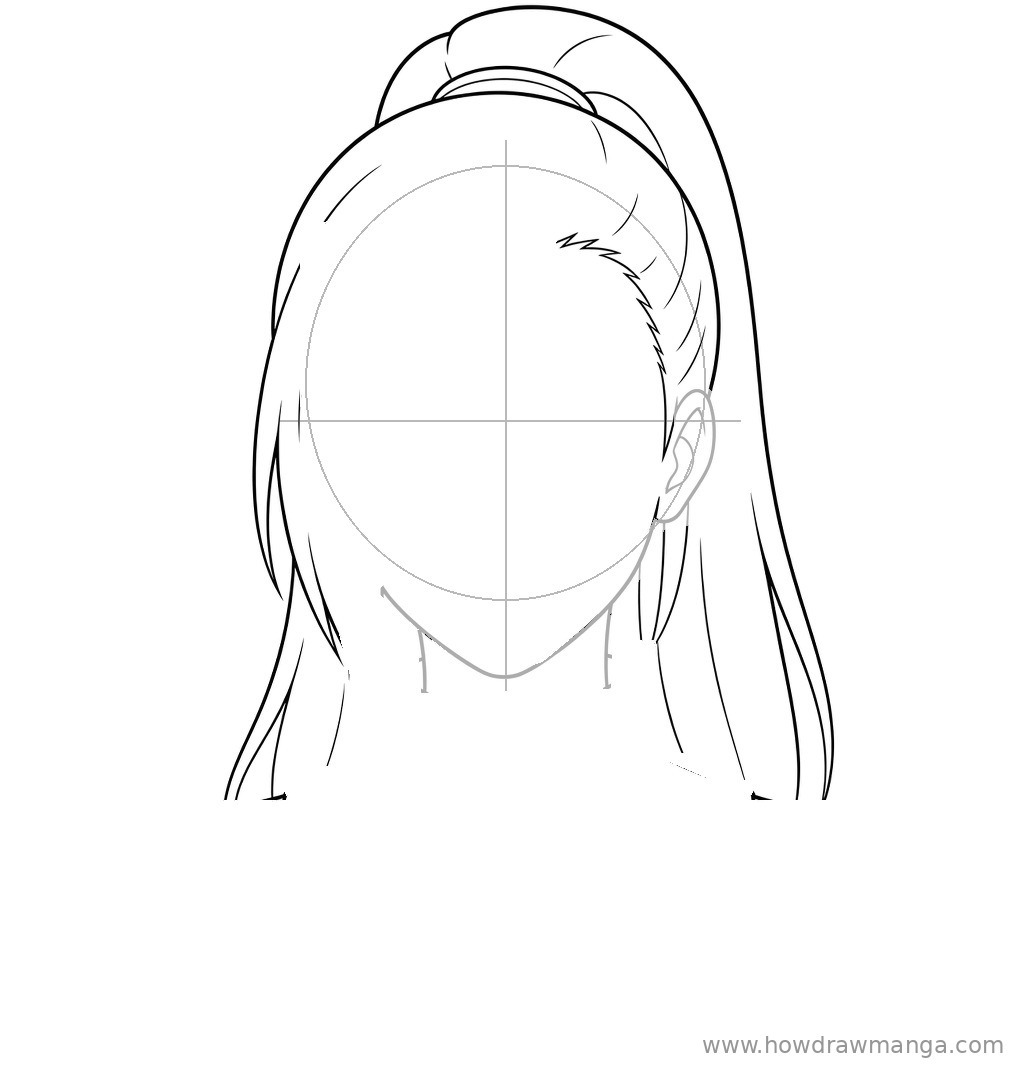
Step 3: Outline the Hair and High Ponytail
Draw the top of the hair well above the circle so the head looks full. At the crown, add a band for the hair tie and a tall loop of hair rising above it; from there, let the ponytail fall down behind the right side of the head as two long, flowing lines. Bring long side strands down both sides of the face past the chin to shoulder level. On the right side of the forehead, add a short, jagged hairline where the hair is pulled back from the face.
Step 4: Add the Long Bangs Over Her Right Eye
From a part near the top of the head, slightly right of the centre line, draw a long lock that sweeps down and to the left across the face. Its inner edge passes over the eye on the left of the picture and ends near the jaw, so that eye is hidden. Add three or four long strand lines inside the lock and let its pointed tips hang down past the chin on the left. This is Ino’s most important feature, so make the lock wide: it should cover roughly half the face.
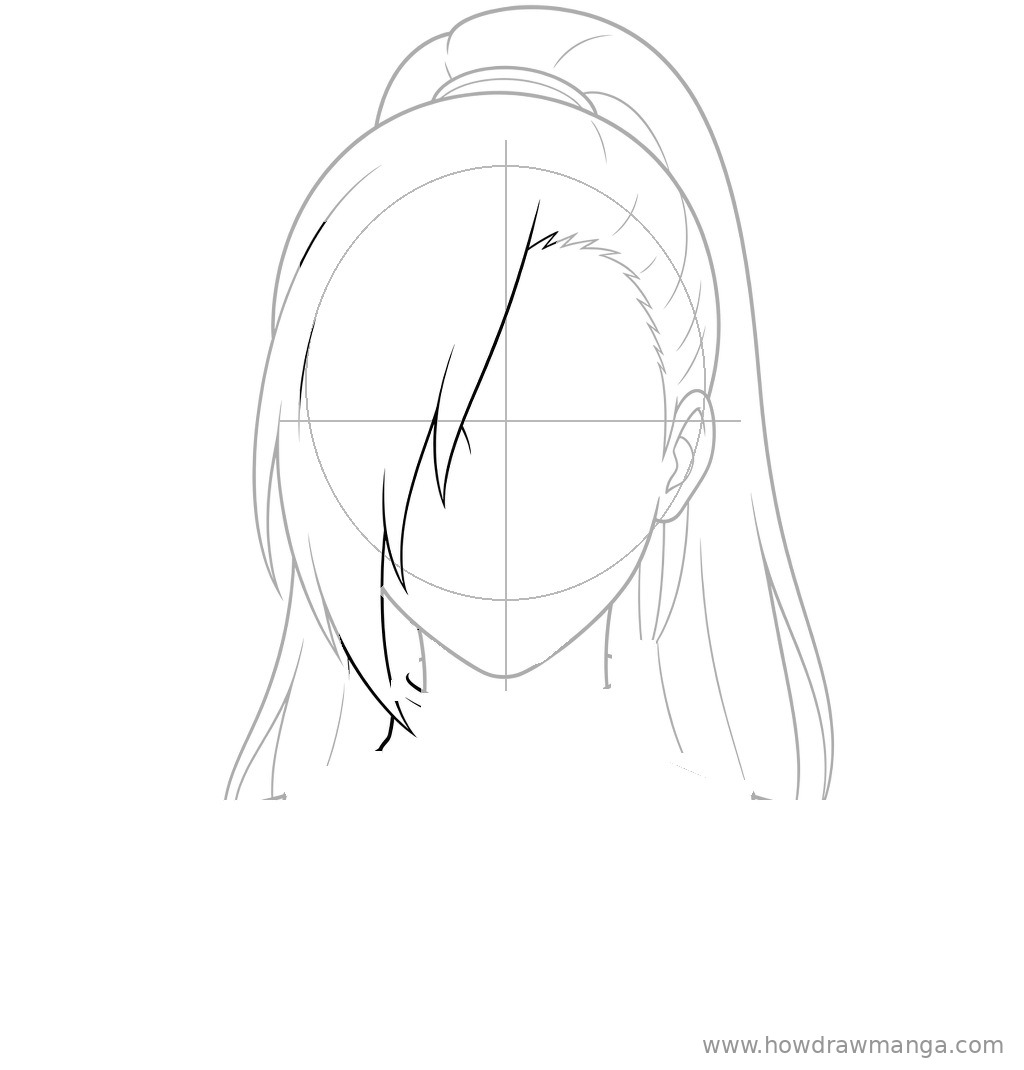
Step 5: Draw the Visible Eye and Eyebrow
On the right side of the face, on the eye line, draw one large almond-shaped eye about one-third of the visible face width. Make the upper lid thick and dark with two or three small lashes flicking out at the outer corner, and keep the lower lid as a short thin line. Place a round iris with a dark pupil in the centre. Above the eye, draw a long, thin, gently arched eyebrow.
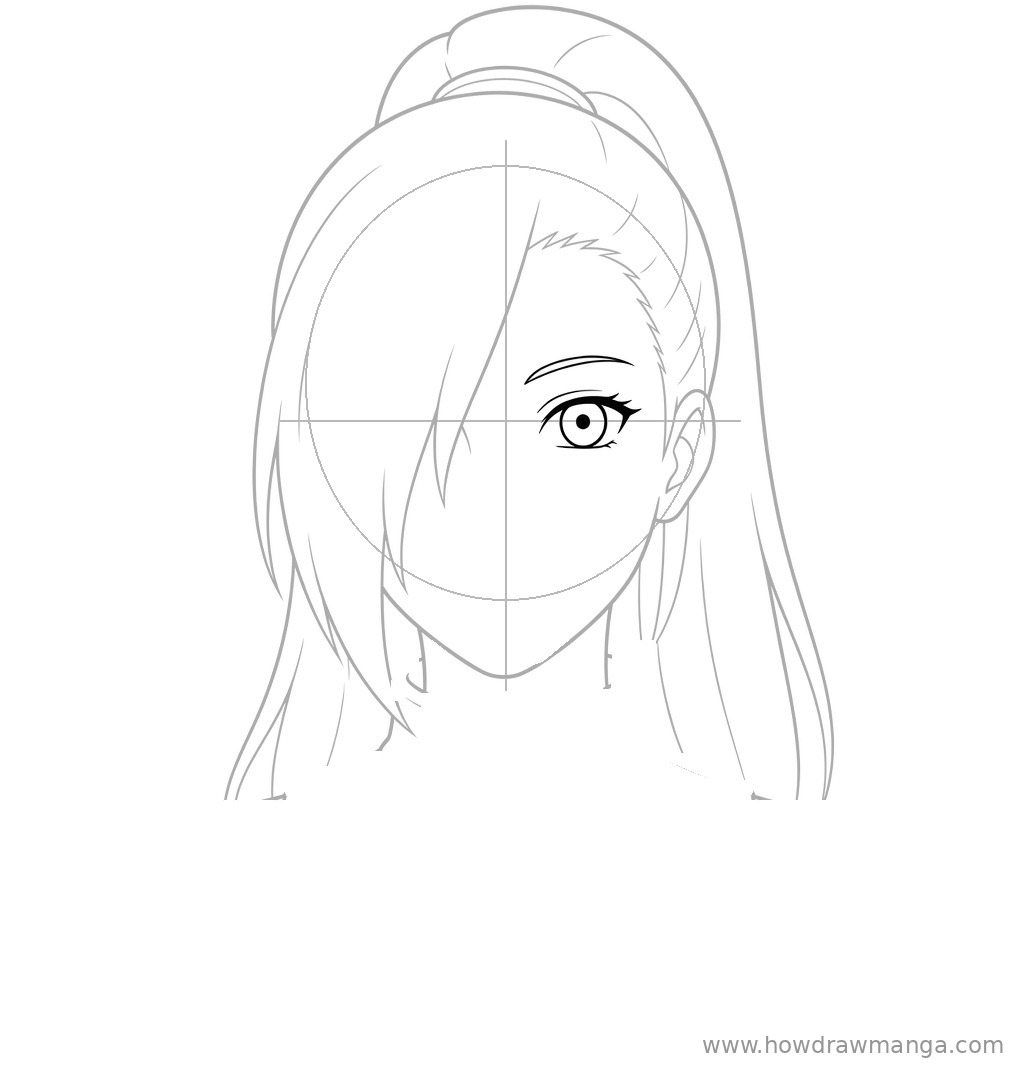
Step 6: Add the Nose and Smile
Halfway between the eye line and the chin, just left of the centre line, draw the nose as two tiny marks: a short angled stroke and a small dot-like line. Below it, about one-third of the way up from the chin, draw a soft, slightly curved smile about as wide as the eye. Add a very short line under the smile for the lower lip.
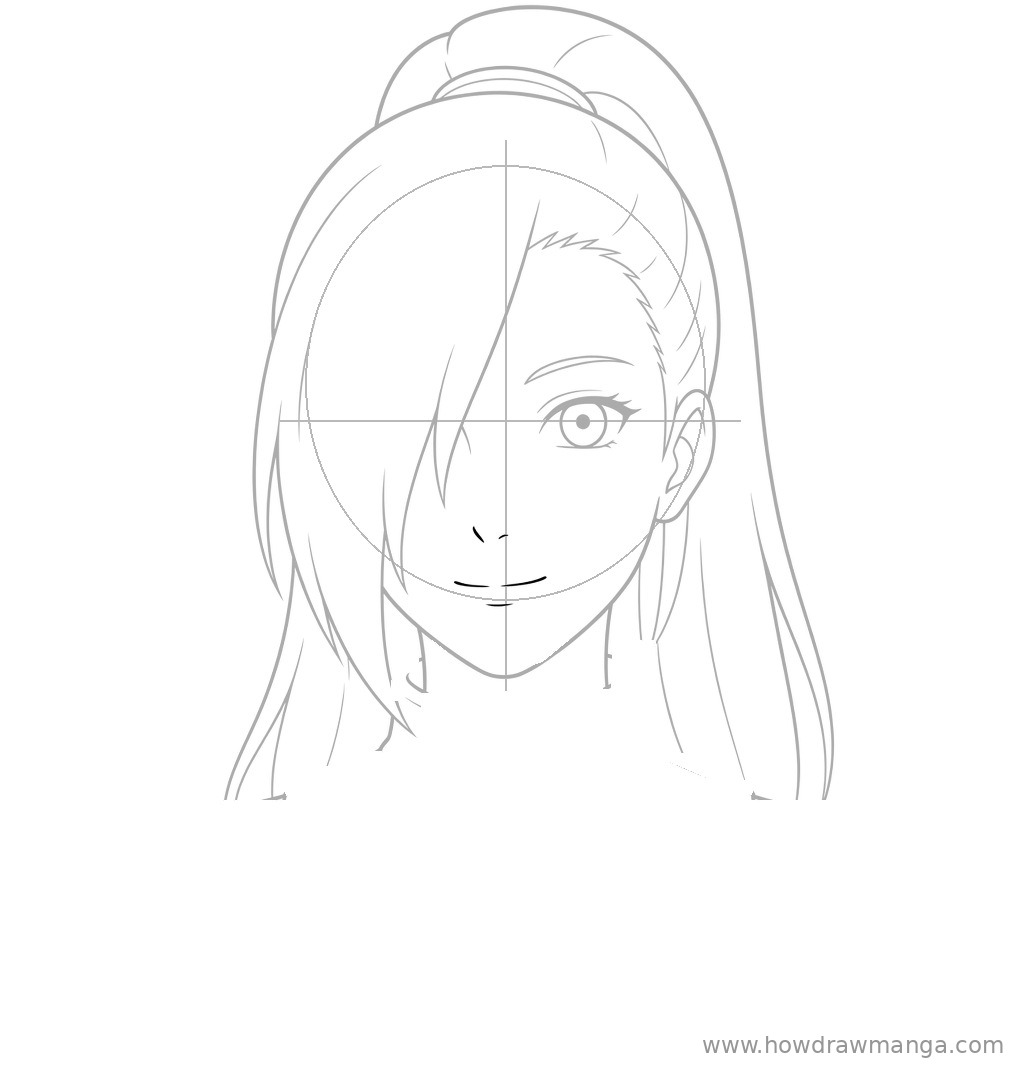
Step 7: Draw the High Collar and Shoulders
Under the neck, draw a tall, rounded collar that wraps around the neck, with a curved seam at its base and a straight zip line running down the centre of the chest. From the base of the collar, draw the shoulder lines sloping outward and down to the edges of the page. Add a long seam on each side running down from the shoulder line, and a small V-shaped fold near the bottom of each seam.
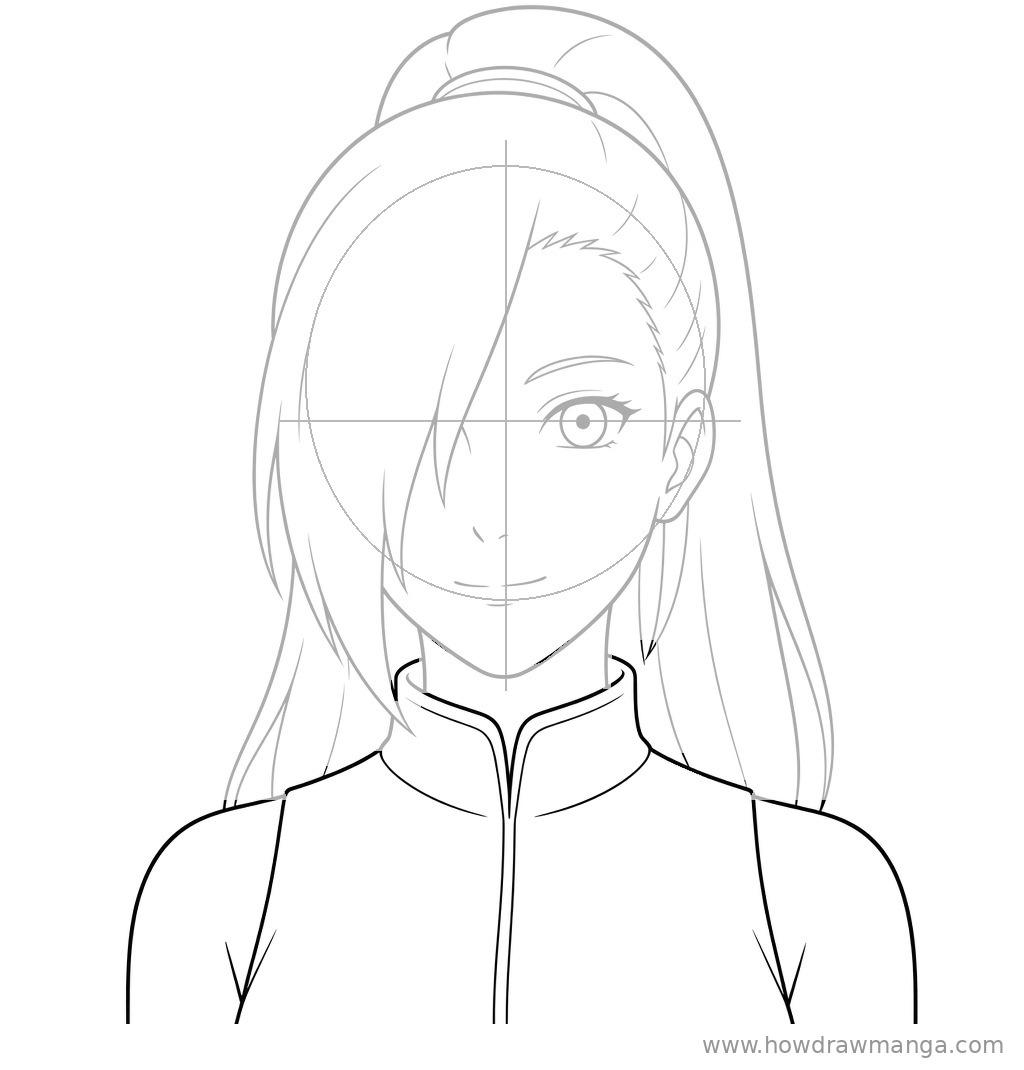
Step 8: Ink the Final Line Art
Go over the lines you want to keep with a fine liner or a soft, dark pencil. Use bolder strokes for the hair outline, the jaw and the collar, and thinner strokes for the strands, the eyebrow and the seams. Once the ink is dry, erase the circle, the centre line and the eye line. Nothing new is added here; this step only cleans up the drawing.
Key Pro Tips for Drawing Ino’s Face
- Put the bangs on the correct side. The lock covers Ino’s right side, which is the left side of the picture when she faces you. Flipping it is the most common mistake.
- Draw the face before the bangs. Sketching the jaw first, then laying the lock on top, keeps the hidden eye in the right place and stops the face from looking lopsided.
- Let the ponytail start high. The tie sits on the crown, not at the back of the neck. A low ponytail makes her look like a different character.
- Keep the visible eye bright and open. With only one eye showing, it carries all the expression. A clean, round iris and a few lashes are enough.
- Colour tip: her hair is pale platinum blonde and her eyes are light blue in the anime (sometimes shown as green in the manga).
FAQ
Which version of Ino is this?
This drawing follows her Part II look, when her bangs grew thicker and cover most of her right eye and her ponytail is long again. In early Part I the bangs frame the face more lightly, and for a while she wore her hair shoulder-length.