
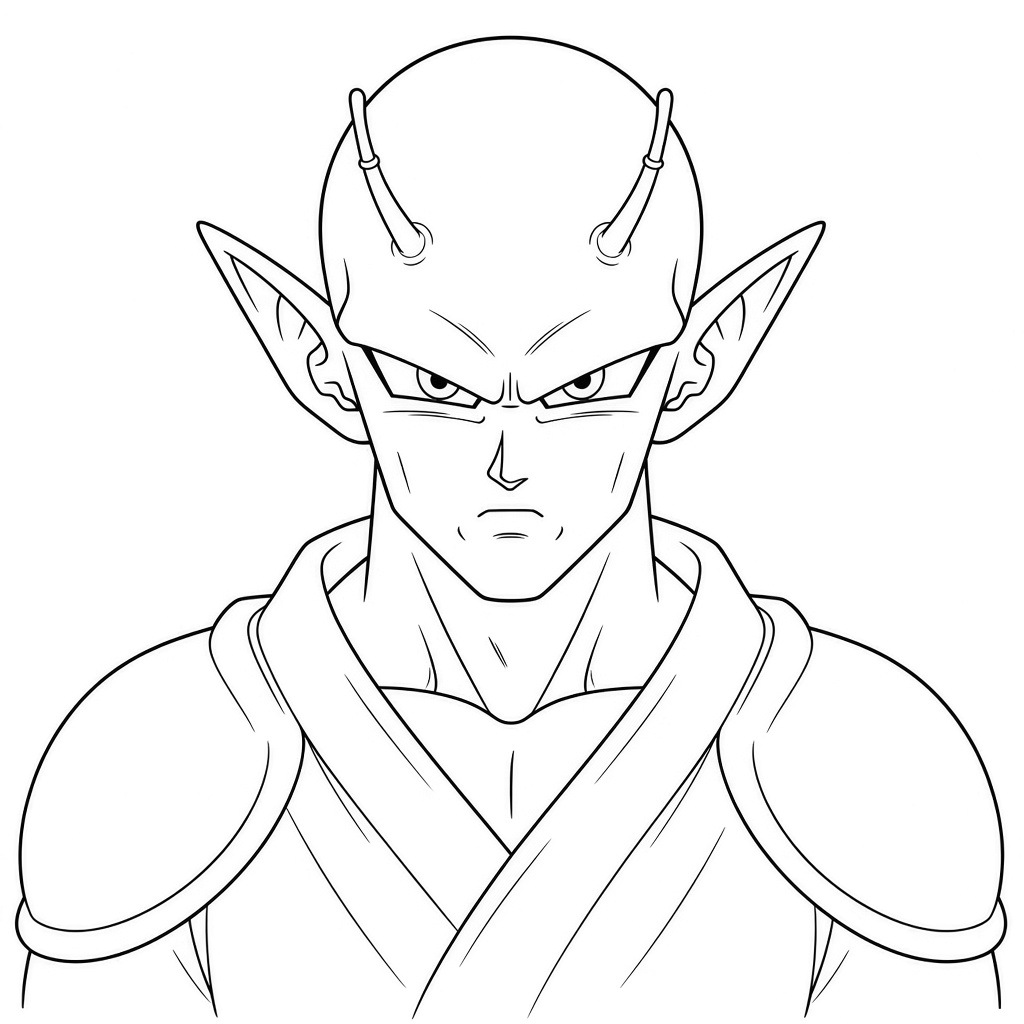
Piccolo first appeared in Akira Toriyama’s Dragon Ball manga in 1988 as an enemy of Goku, and later became Gohan’s mentor and one of the heroes’ most reliable allies. In this guide you will learn how to draw piccolo face in 7 steps, from a single circle to his antennae, pointed ears, sharp brow and caped shoulders.
Piccolo is a Namekian, so he has green skin, no hair, two antennae and long pointed ears. In the series he usually covers his head with a white turban, but this drawing leaves it off so the antennae show. In every picture the new lines are black and earlier lines are grey, so you always know what to add next.
Materials Needed
- Paper or a drawing tablet
- A light pencil (HB or 2H) for guidelines
- A darker pencil (2B) or a fine liner for the final lines
- An eraser
- Optional: green, purple and white markers or pencils for colouring
Step-by-Step Piccolo Face Drawing Guide
Step 1: Sketch the Head Circle and Guidelines
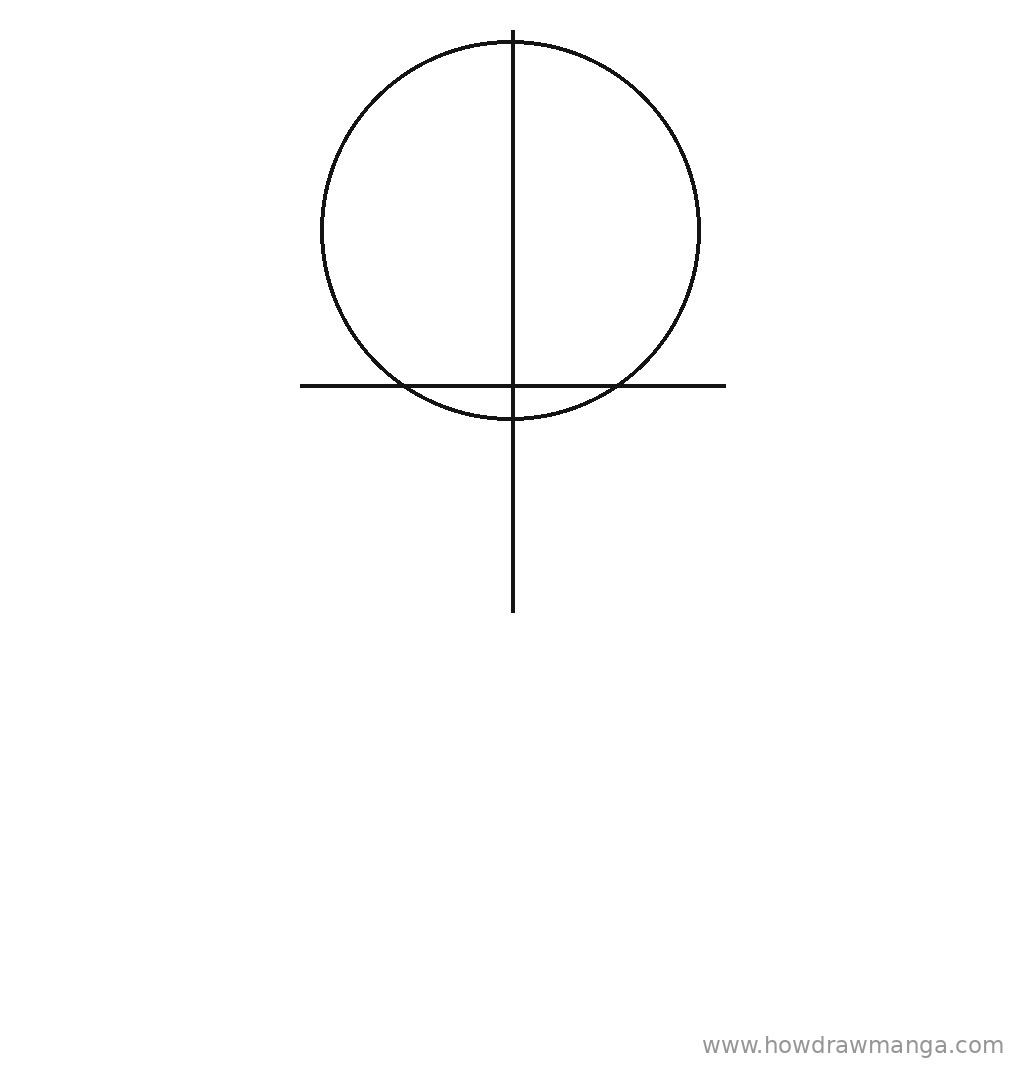
Draw a large circle in the upper half of the page, about two-fifths of the page wide. Run a vertical centre line through it and let the line continue well below the circle, roughly half the circle’s height, to mark where the chin will go. Add a horizontal eye line a little above the bottom of the circle, reaching slightly past both sides. Keep all three lines light.
Step 2: Draw the Bald Head, Jaw and Neck
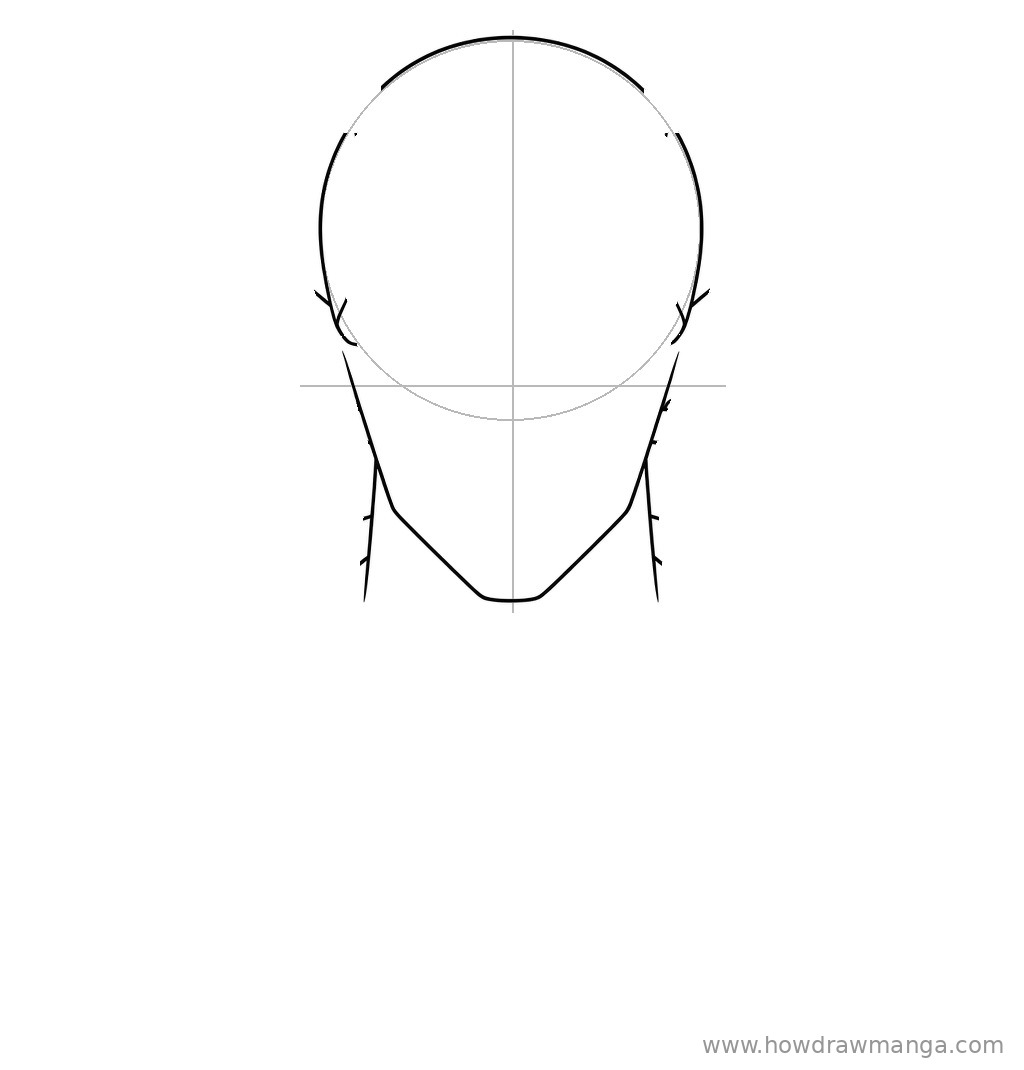
Trace over the top of the circle to make a smooth, hairless dome, leaving a short gap high on each side where the antennae will cross. Below the eye line, bring the sides of the face down and inward to a short, flat chin at the end of the centre line, giving a long, angular jaw. Draw two straight neck lines from just under the cheeks down past the chin; the neck is almost as wide as the jaw.
Step 3: Add the Antennae and Pointed Ears
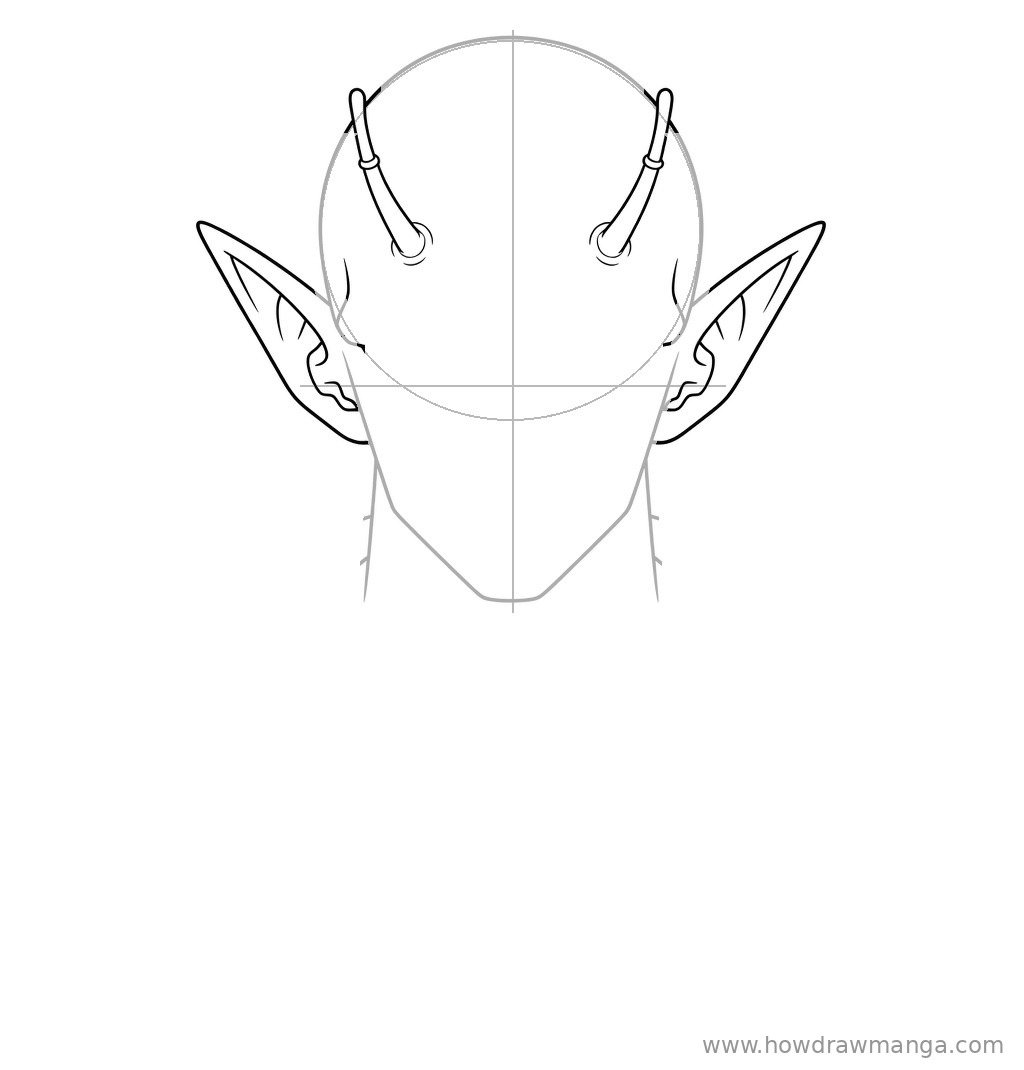
Draw two thin antennae that start just above the eye area, about a quarter of the head width from the centre line, and curve up and outward past the top of the head. Give each one a small ring near the tip and a round socket at its base, and close the head outline where they cross it. On each side, draw a long, triangular ear that points up and out from the side of the head at eye level; each ear is about as tall as half the head. Add a few curved lines inside each ear and a short crease at each temple.
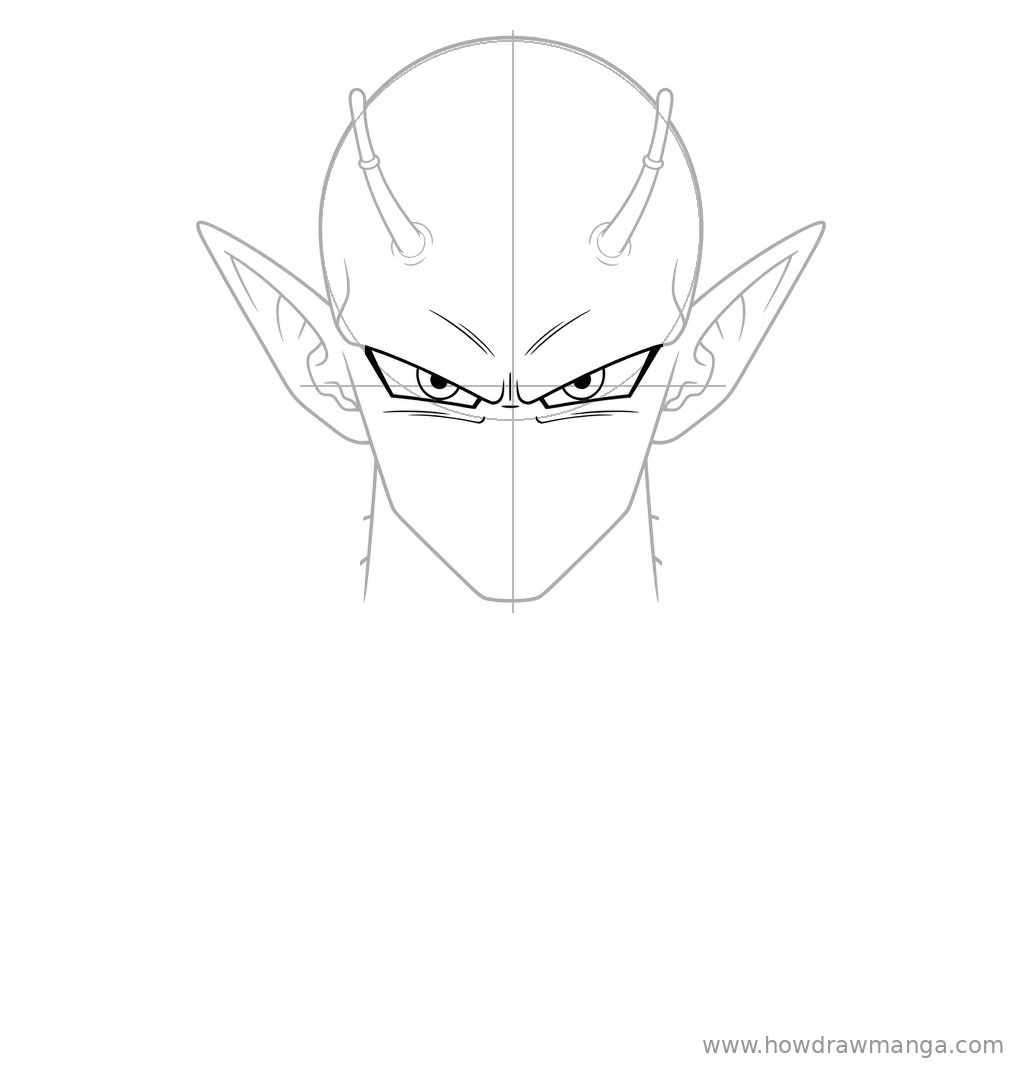
Step 4: Draw the Heavy Brow and Narrow Eyes
Piccolo has no eyebrows, so draw a thick, angled brow line instead: two slanted bands that dip down toward the centre line, sitting right on the eye line. Under each band, draw a narrow, pointed eye with a small round iris and a dark pupil looking forward. Add short vertical creases between the eyes, two curved forehead lines above them, and a thin line under each eye for the cheekbone.
Step 5: Add the Nose, Mouth and Cheek Lines
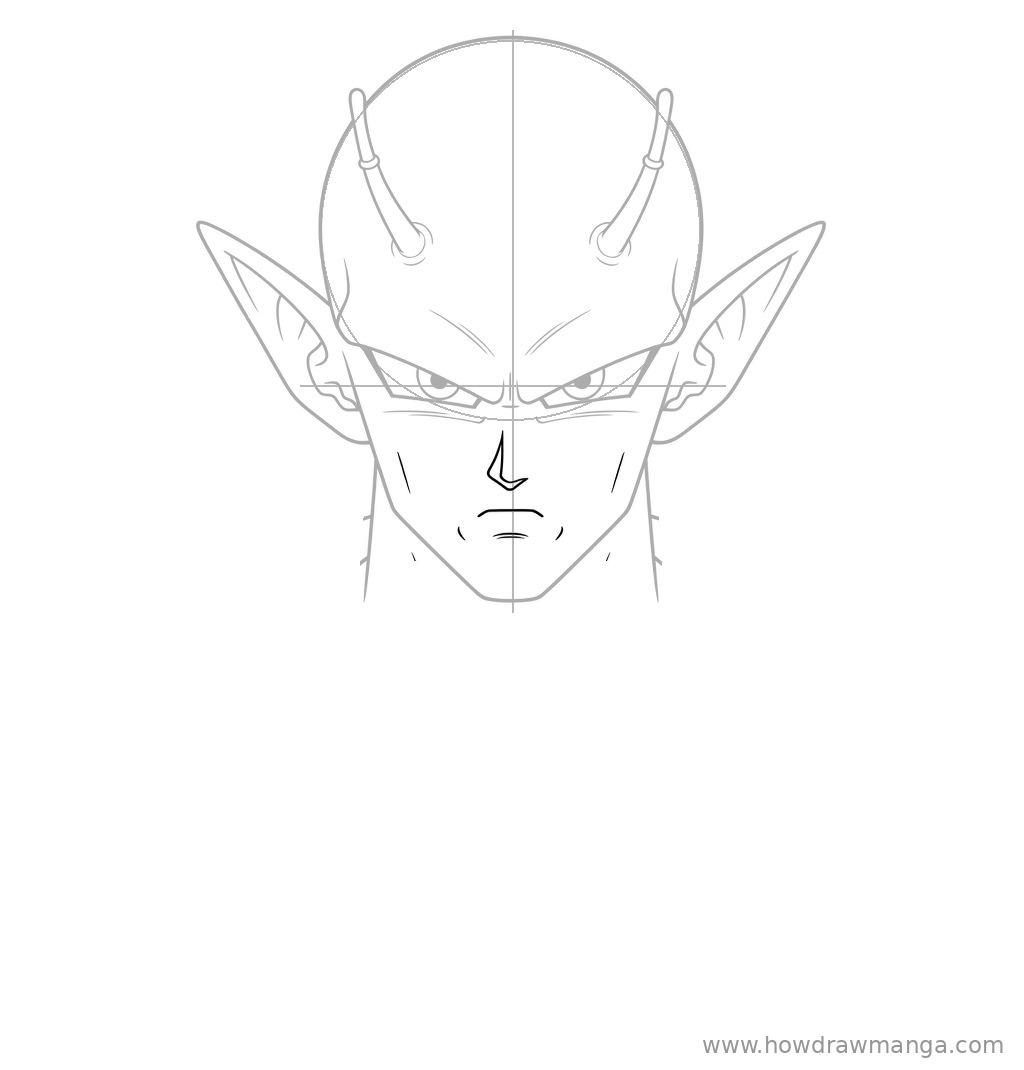
Draw a pointed nose on the centre line, starting just under the brow and ending about one-third of the way to the chin, with a small hooked tip. Below it, draw a short, flat mouth that turns down at the corners, with a thin line under it for the lower lip. Add one short diagonal line on each cheek, running from below the eye toward the jaw, to give his face its hard, lean look.
Step 6: Draw the Gi Collar, Neck Muscles and Cape Shoulders
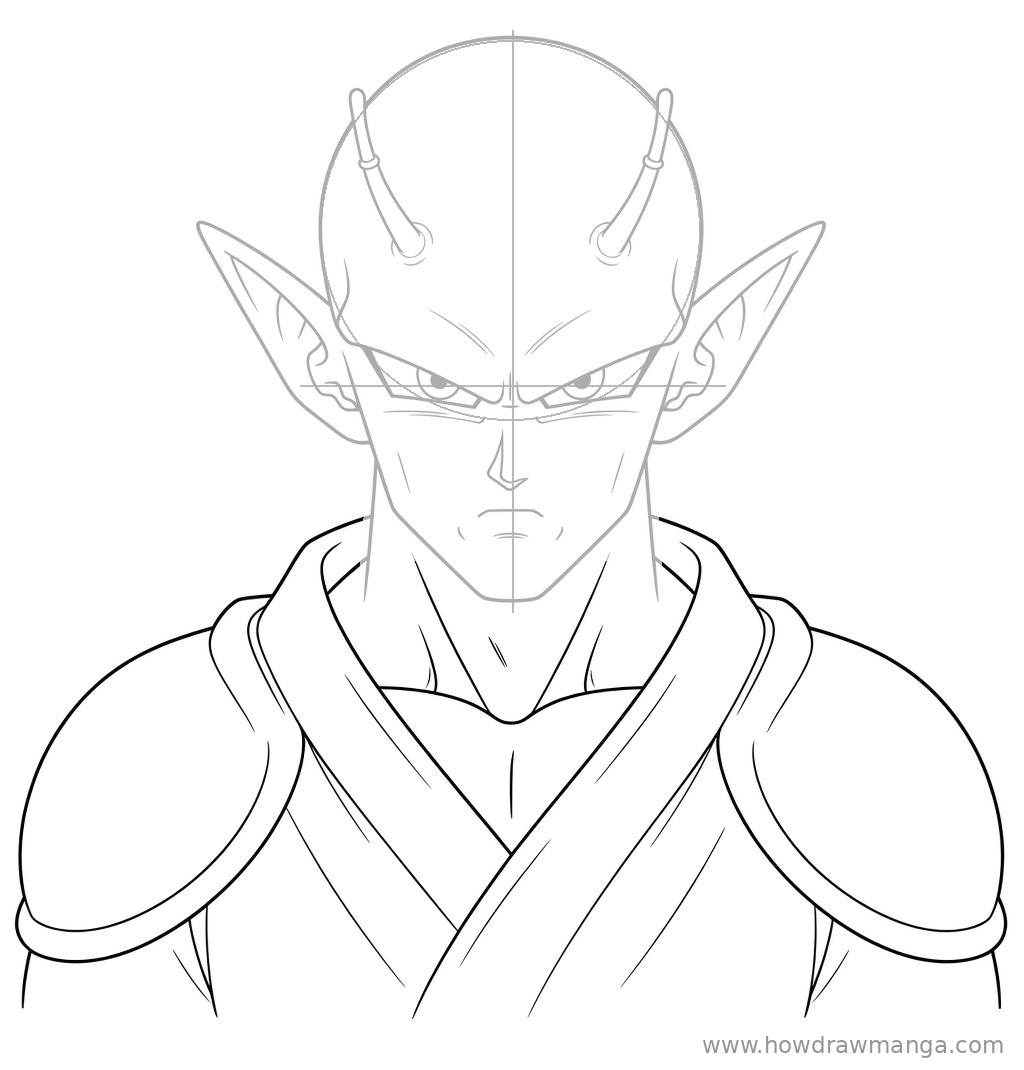
Under the chin, add a few lines for the neck muscles and the top of the chest. Draw the gi as two wide bands that cross in a deep V over the chest, with a raised collar framing the neck. Out on each side, draw the cape’s big rounded shoulder pads, wide arcs that reach almost to the edges of the page, with a thick rim along the lower edge of each pad. Add a few long fold lines inside the gi and the cape.
Step 7: Ink the Final Line Art
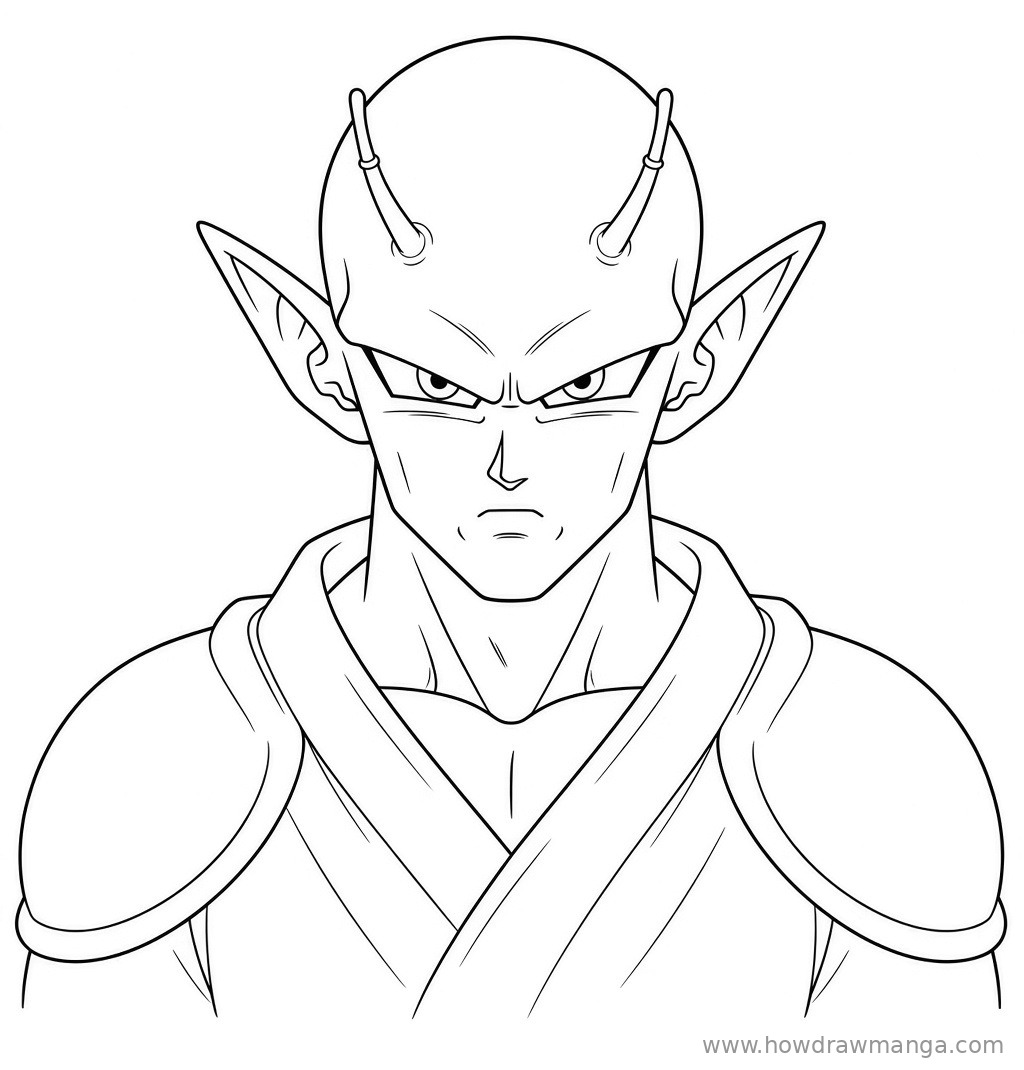
Go over the lines you want to keep with a fine liner or a soft, dark pencil. Use bold strokes for the head, jaw, ears, antennae and shoulder pads, and thinner strokes for the creases, folds and neck muscles. When the ink is dry, erase the circle, the centre line and the eye line. Nothing new is added in this step; it only cleans up the drawing.
Key Pro Tips for Drawing Piccolo’s Face
- Place the antennae before the ears. The antennae sit high on the forehead and the ears sit at eye level. Getting the antennae spacing right first makes it easier to keep the head symmetrical.
- Draw a brow ridge, not eyebrows. Piccolo has no hair at all, so a thick angled band above each eye does the job of eyebrows and gives him his serious look.
- Keep the ears long and sharp. Short or rounded ears make him look like a generic elf. Let each ear reach out past the side of the head by about a third of the face width.
- Make the shoulder pads huge. The cape’s padded shoulders are much wider than his head. Drawing them big frames the face and makes the bust look powerful.
- Want the turban? Draw a rounded cap over the top of the head, covering the antennae, and leave the face, ears and shoulders exactly the same.
FAQ
Why does this drawing leave out Piccolo’s turban?
Piccolo usually wears a white turban and cape, which he weighted after his loss to Goku and often takes off before serious fights. Leaving the turban off shows the antennae, which are one of the clearest signs that he is a Namekian.
What colours should I use for Piccolo?
His skin is green and his gi is a dark purple. His turban and cape are white, and the turban has a dark purple top that matches the gi.