

Johnny Joestar is the main protagonist of Steel Ball Run, Part 7 of Hirohiko Araki’s JoJo’s Bizarre Adventure: a former horse-racing prodigy who joins a cross-country race after an injury leaves him unable to walk. In this guide you will learn how to draw johnny joestar face in 9 steps, from a simple circle to his star-covered cap and wavy hair.
Johnny is recognisable mostly through his headwear. His knit cap is printed with small five-pointed stars, two tufts of hair poke out of holes near the top like short horns, and a horseshoe on the front frames a dark horse-head silhouette. Every picture below shows earlier lines in grey and the new lines for that step in black.
Materials Needed
- Paper or a drawing tablet
- A light pencil (HB or 2H) for guidelines
- A darker pencil (2B) or a fine liner for the final lines
- An eraser
- Optional: a ruler or template for the stars, and colour pencils or markers
Step-by-Step Johnny Joestar Face Drawing Guide
Step 1: Sketch the Head Circle and Guidelines
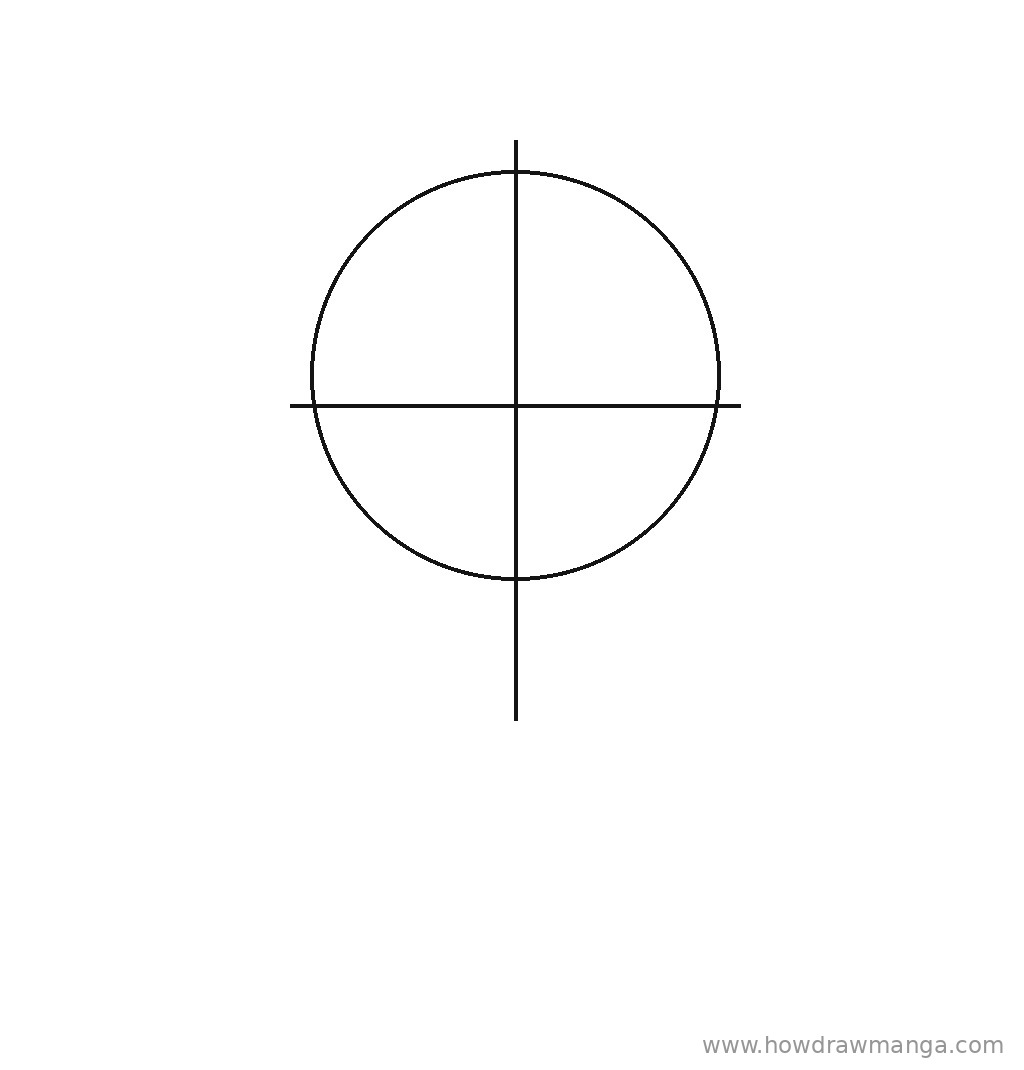
Draw a circle in the upper middle of the page, a little less than half the page wide. Run a vertical centre line through it, extending it below the circle by about one-third of the circle’s height to mark the chin. Add a horizontal eye line just below the middle of the circle, reaching a little past both sides. Keep all three lines light.
Step 2: Draw the Face Shape, Ears and Neck
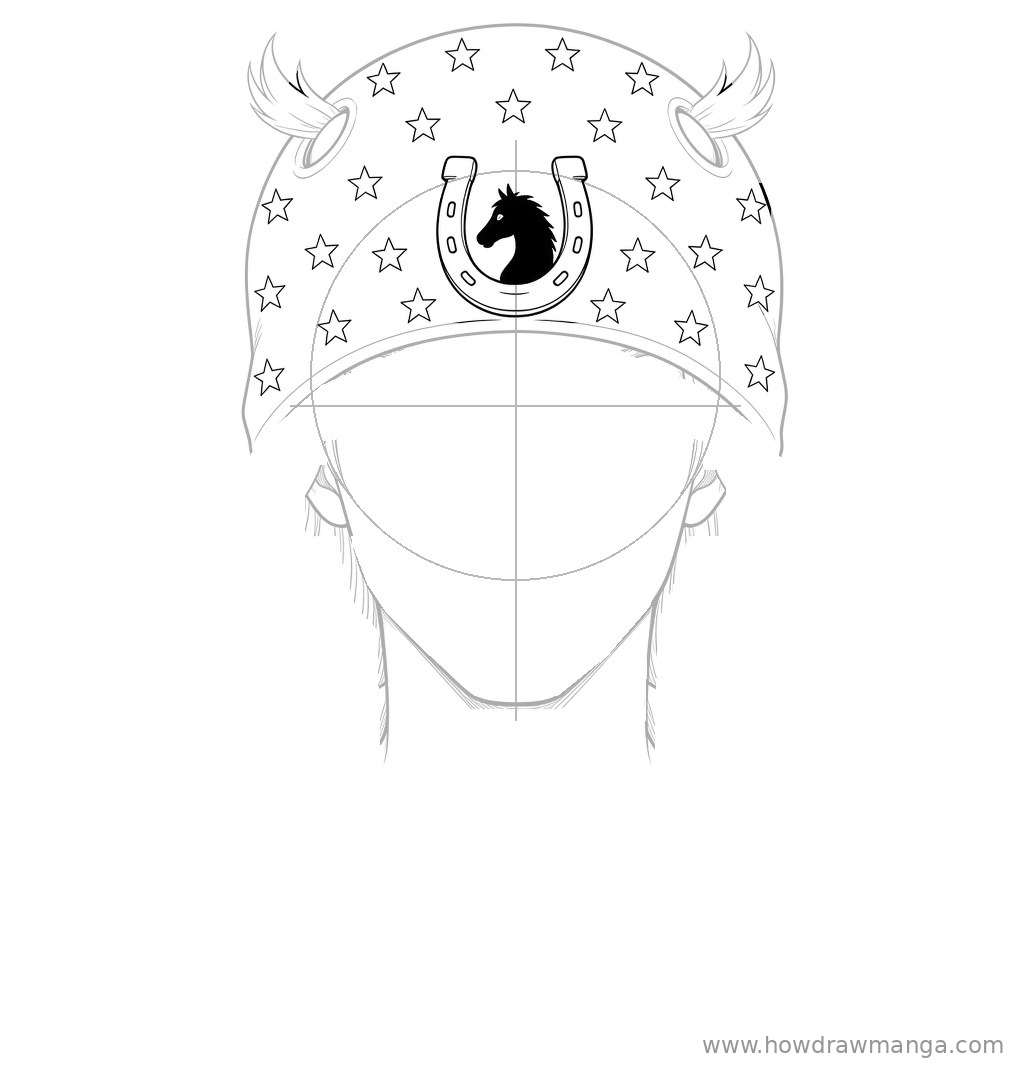
From the sides of the circle just above the eye line, bring the cheeks straight down, then angle them inward to a narrow, slightly flat chin at the end of the centre line. This gives Johnny a long, slim face with a defined jaw. Add a small ear on each side, sitting between the eye line and the nose and about as tall as one-sixth of the face. Draw two long neck lines from under the jaw, set slightly inside the cheeks, running down toward the shoulders.

Step 3: Draw the Knit Cap, Brim Band and Hair Tufts
Draw a tall, rounded dome over the circle for the cap, rising well above it and coming down on both sides to just below the eye line, stopping just above the ears. Across the forehead, draw a wide curved band, two parallel arcs that dip at the sides and sit just above the eyebrows. Near the top corners of the cap, draw a small oval hole on each side and let a tuft of hair curl out of each one, pointing up and outward like a short horn.

Step 4: Add the Horseshoe Emblem and the Stars
In the centre of the cap, above the band, draw a horseshoe about one-third of the cap’s width, with its open ends pointing up and a row of small slots along it for nail holes. Inside it, draw the profile of a horse’s head facing left and fill it in solid black. Then scatter small five-pointed stars over the rest of the cap in loose rows, each about the size of a fingertip at this scale, keeping them clear of the emblem and the band.
Step 5: Draw the Eyes and Eyebrows
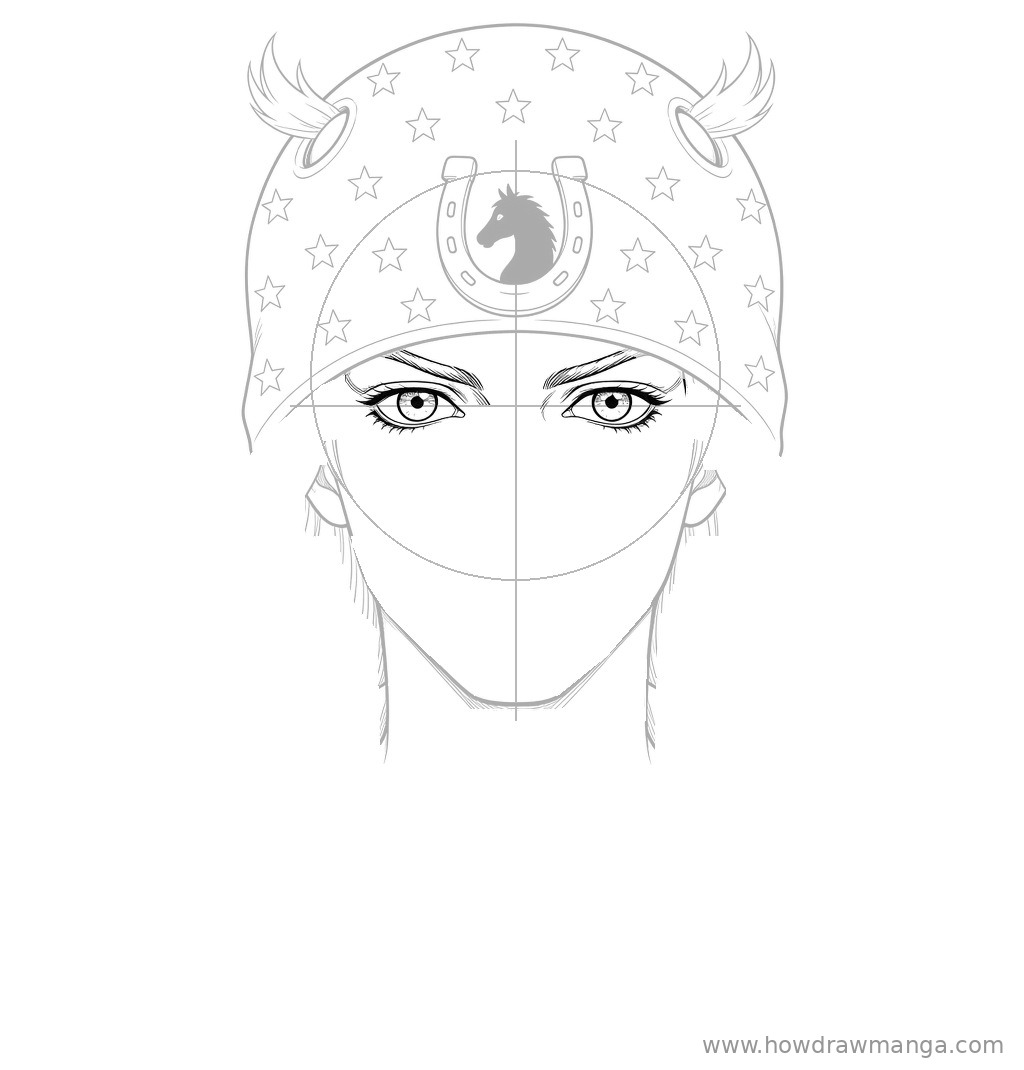
On the eye line, draw two large almond-shaped eyes, each about one-quarter of the face width, with one eye-width of space between them. Give each a thick upper lid with fine lashes along the top and bottom, a round light iris and a small dark pupil. Just under the cap band, draw low, angled eyebrows made of several short strokes; their inner ends dip toward the nose for a focused look.
Step 6: Add the Nose, Lips and Neck Lines
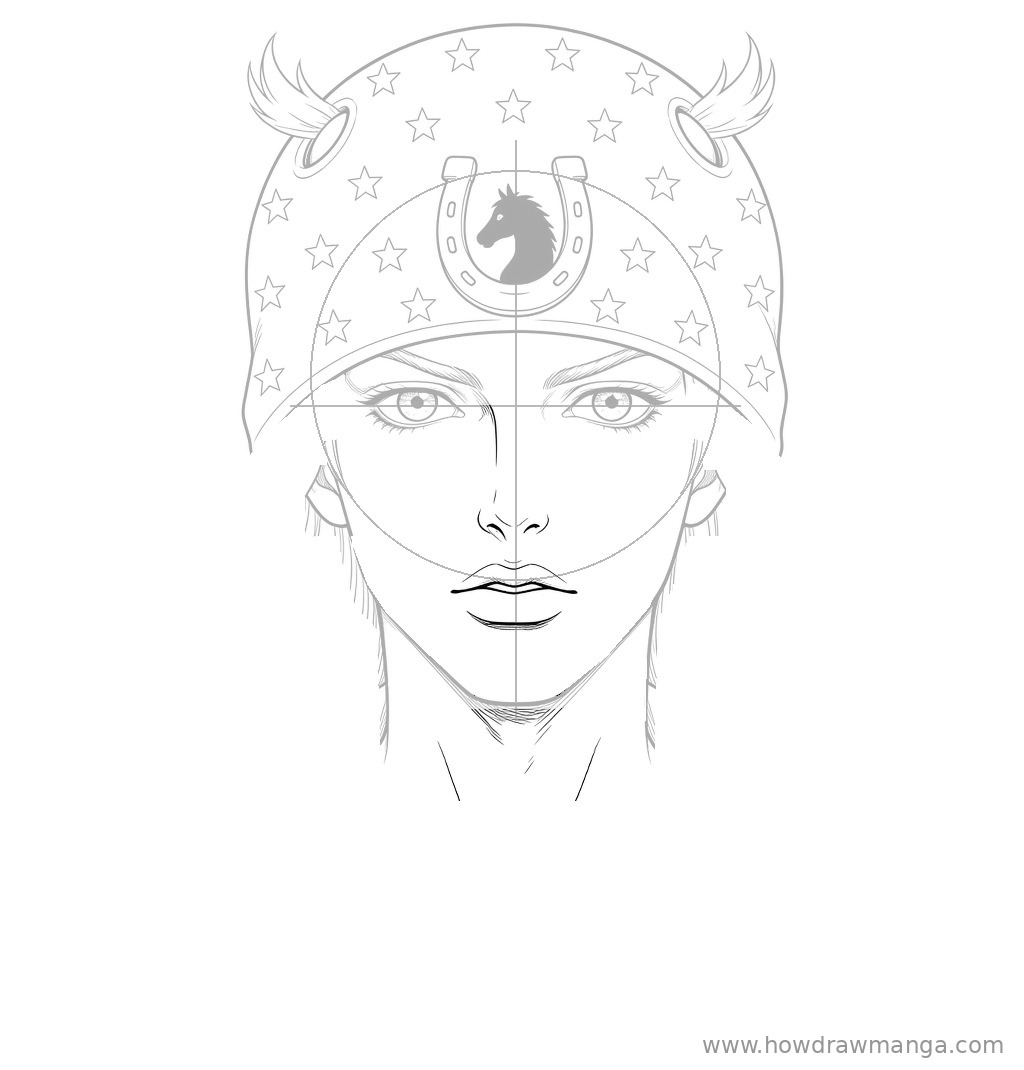
Draw a thin line down from between the eyebrows for the bridge of the nose, ending halfway between the eye line and the chin in a small nose with curved nostrils. Below it, draw full lips: a wavy upper lip, a long mouth line and a curved lower lip, a little wider than the gap between the eyes. Add a few short shading strokes under the chin and two long diagonal lines down the neck for the throat muscles.
Step 7: Draw the Wavy Shoulder-Length Hair
From under the cap on both sides, draw thick, wavy locks of hair that fall past the jaw to shoulder level. Make them flare outward and let many of the ends curl upward and out, which is a key part of Johnny’s look. Break each side into several overlapping S-shaped locks and add long strand lines inside them, keeping the hair behind the ears and the neck.
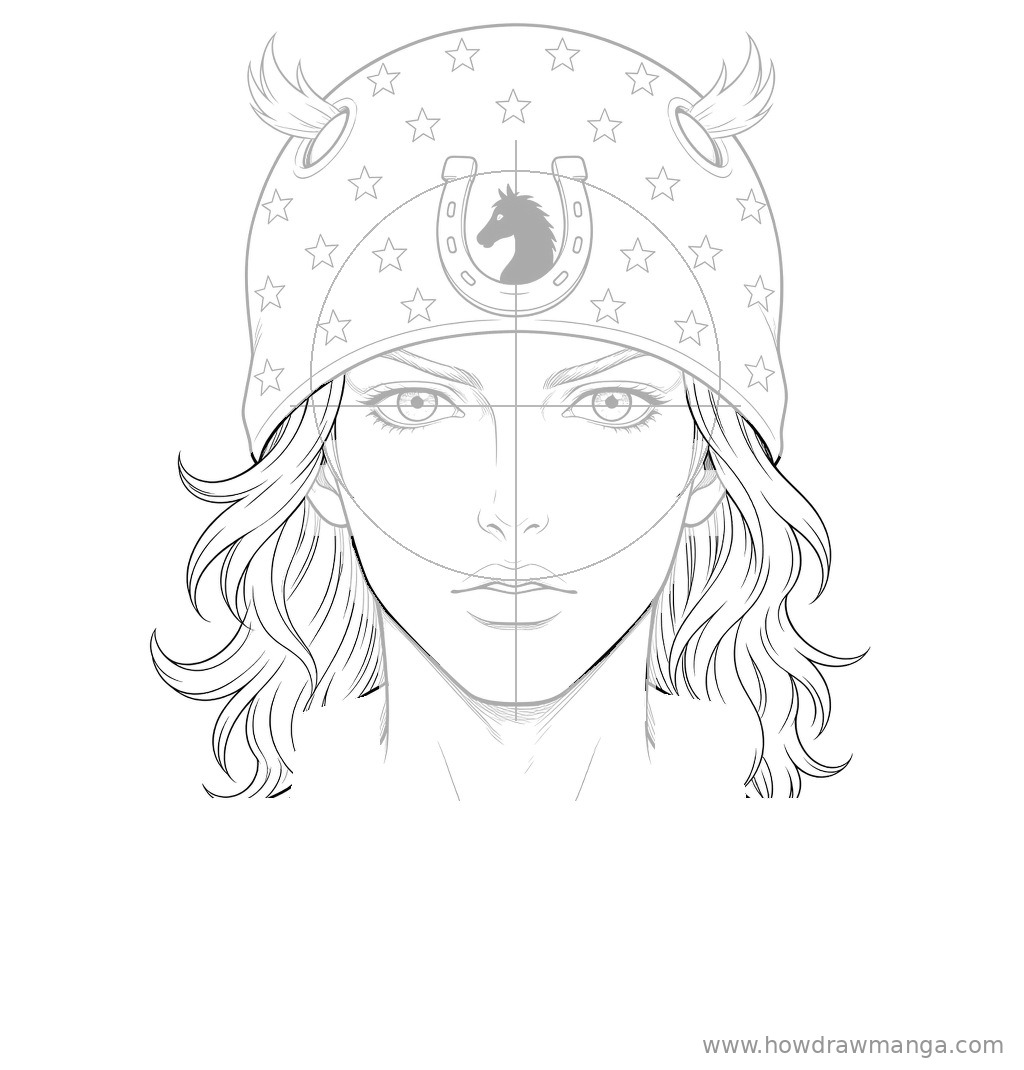
Step 8: Draw the Striped Shirt and Collar
Below the hair, draw the shoulders as long lines sloping outward from the neck to the edges of the page. Add an open shirt collar with two pointed flaps that meet in a V at the centre of the chest. Fill the shirt with evenly spaced horizontal stripes that run from shoulder to shoulder, stopping at the collar and the hair.
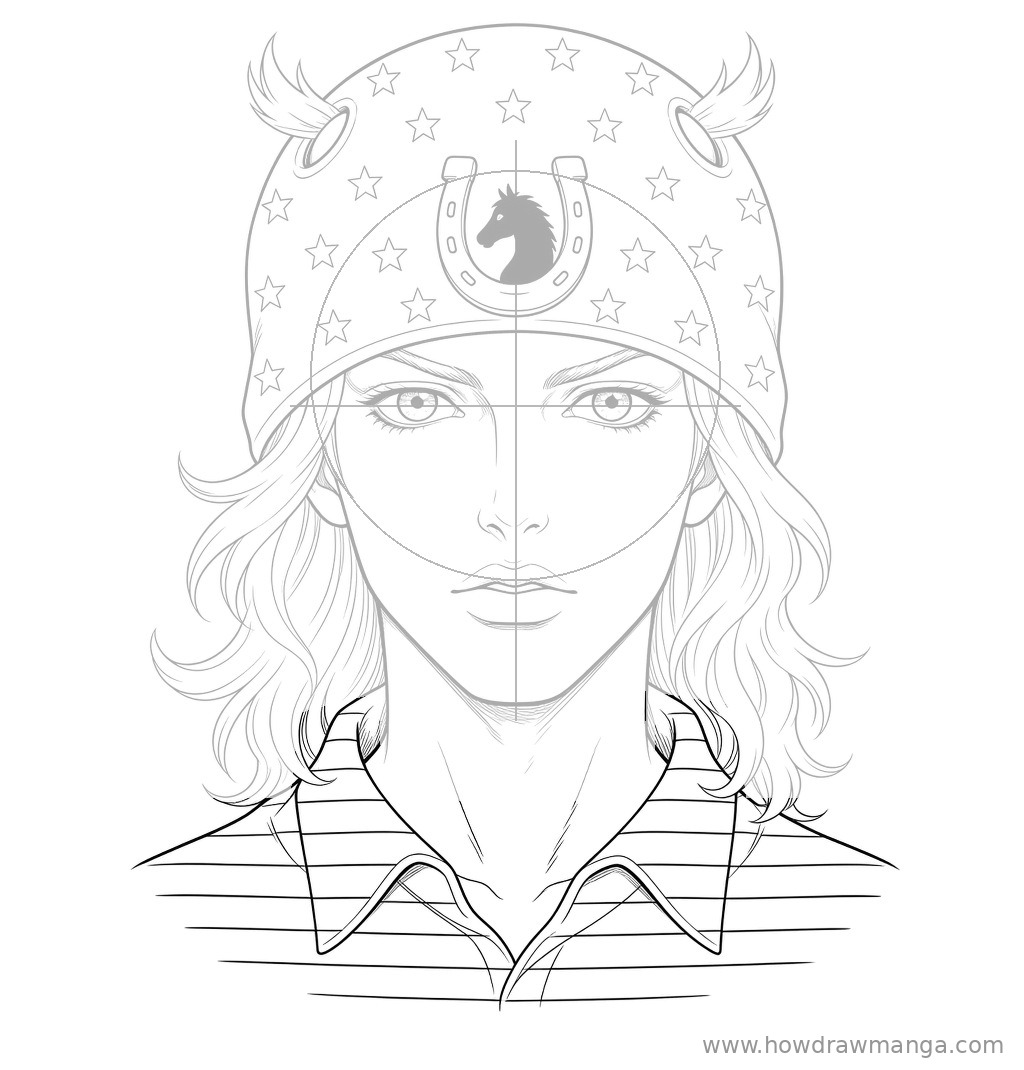
Step 9: Ink the Final Line Art
Trace the lines you want to keep with a fine liner or a soft, dark pencil. Use bold strokes for the cap outline, the jaw and the hair silhouette, and thinner strokes for the stars, lashes, hair strands and stripes. When the ink is dry, erase the circle, the centre line and the eye line. Nothing new is added here; this step only cleans up the drawing.

Key Pro Tips for Drawing Johnny Joestar’s Face
- Draw the cap as a dome first. Get the big rounded shape and the forehead band right before adding any stars. Stars on a lopsided cap only make the problem more visible.
- Keep the tufts small. The hair coming out of the holes should look like short horns, not big wings. A few curved strokes on each side are enough.
- Space the stars loosely. Draw a few stars evenly around the cap first, then fill the gaps. Leave a clear space around the horseshoe so the emblem stays easy to read.
- Let the hair ends curl up. Straight hanging hair loses his look. Flick the end of each lock upward and outward.
- Colour tip: JoJo colour schemes change between the manga colour pages, the games and the anime, so pick one version as your reference. His hair is usually shown as blond and his eyes as blue.
FAQ
Does Johnny always wear this cap?
He wears the star-printed knit cap with the horseshoe emblem through most of Steel Ball Run, and his outfits change with the weather on the race route while keeping the star pattern. The cap is the safest feature to include if you want him to be recognised.