
Satoru Gojo from Jujutsu Kaisen is easily one of the most popular anime characters of all time. Whether it’s his confident smirk or his spiky white hair, his look is instantly recognizable.
Today, we’re going to break down how to draw Gojo’s face with his iconic blindfold step-by-step. Drawing him with a blindfold is actually one of the best exercises for anime beginners because it lets you focus on constructing proper head structure, jawlines, and spiky hair dynamics without worrying about eye symmetry just yet!
📌 Stay Tuned: Tomorrow, I’ll be dropping the second part of this series — How to Draw Gojo Without His Blindfold (featuring his glowing Six Eyes!). Bookmark howdrawmanga.com so you don’t miss it!
Materials Needed
- Pencil: 2B or HB graphite pencil for initial structural guidelines.
- Eraser: Kneaded eraser or precision block eraser.
- Inking Tool: 0.3mm or 0.5mm fineliner / dark charcoal pencil for crisp line art.
- Paper: Standard sketchbook paper.
Step-by-Step Gojo Drawing Guide
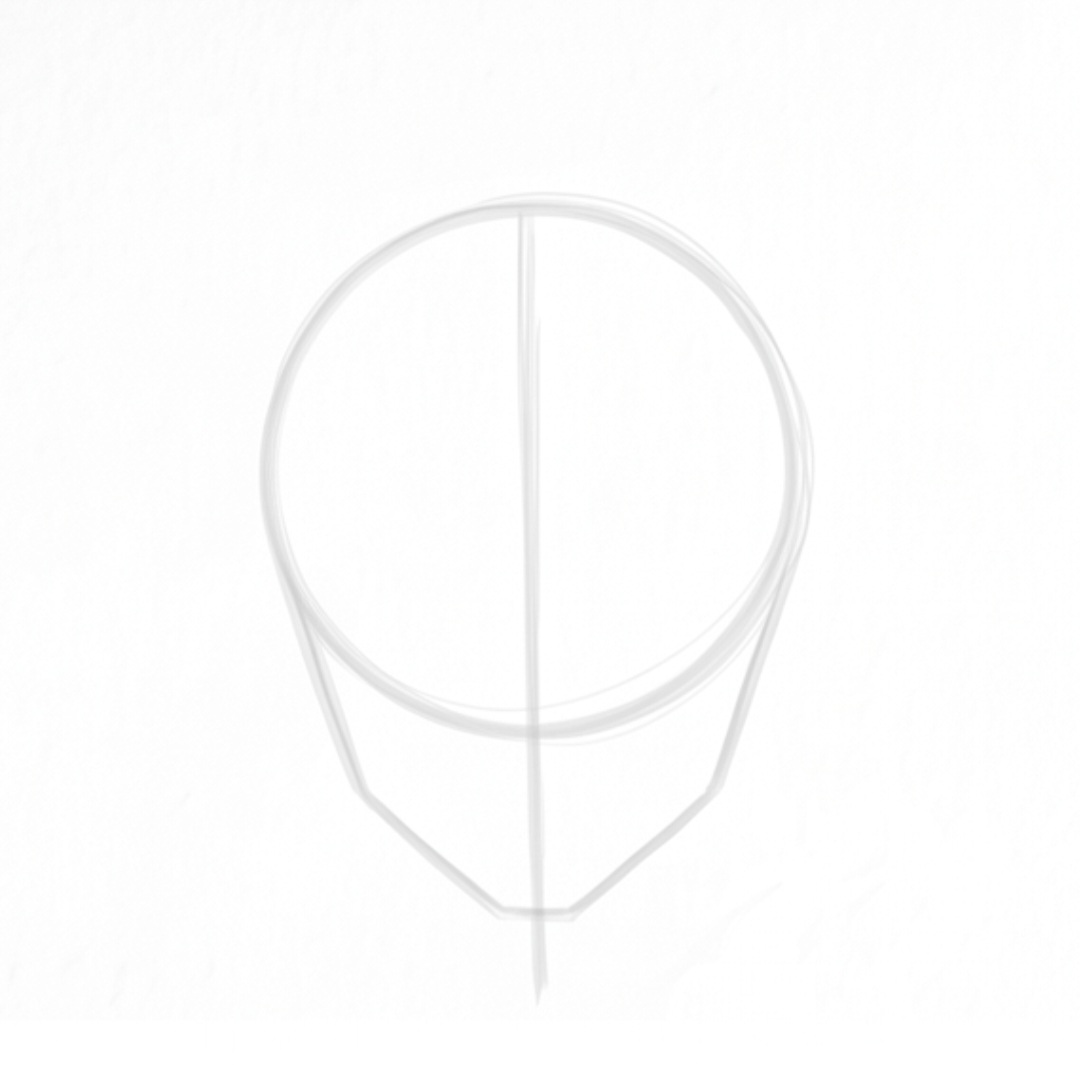
Step 1: Construct the Basic Head Shape and Guideline
Start by drawing a soft circle for the upper skull. Draw a straight vertical line right through the center extending past the bottom of the circle to mark the chin position. Connect two subtle diagonal lines from the sides of the circle down toward the central axis to form the jaw construct.
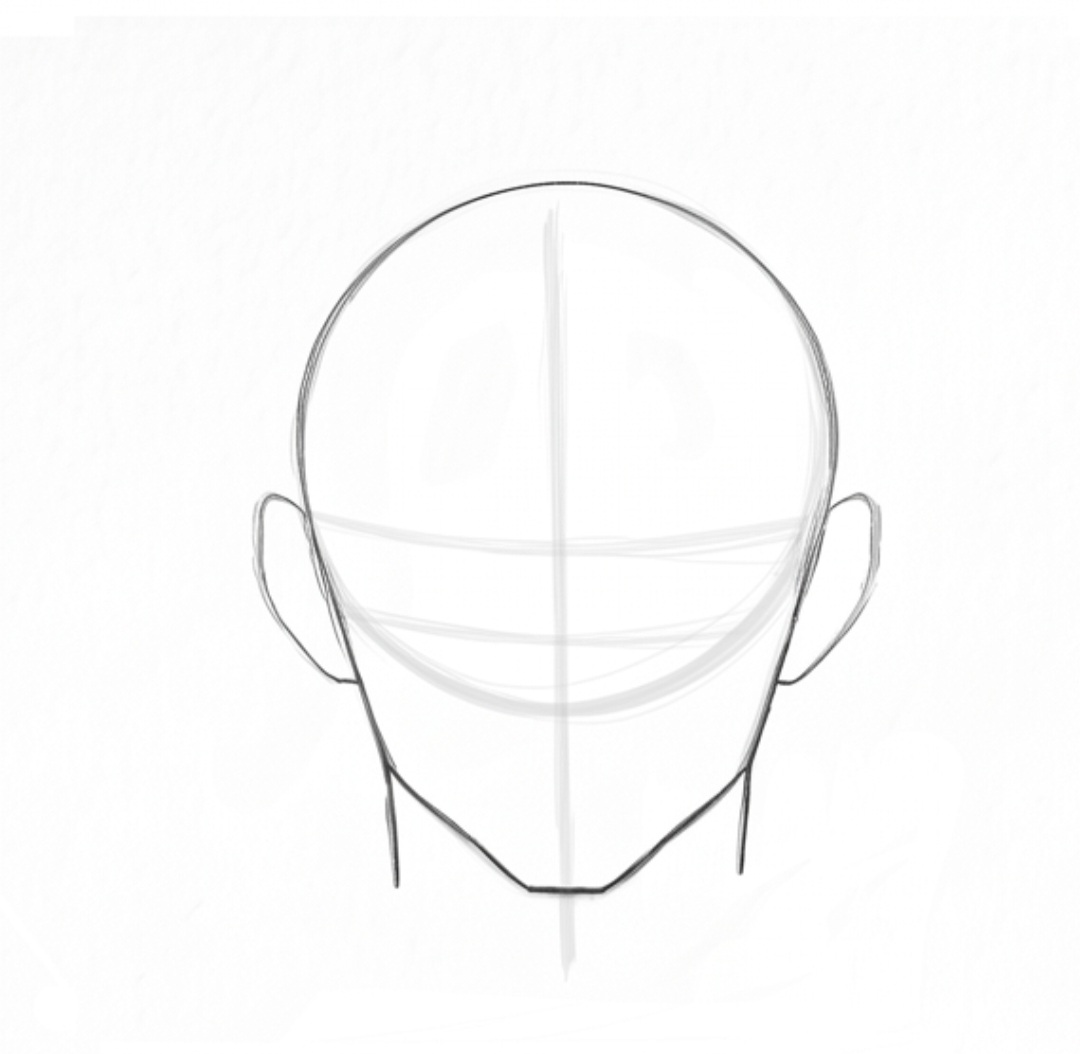
Step 2: Define the Jaw, Ears, and Neck Lines
Refine the jawline by bringing sharp, clean lines down into a flat, masculine chin. Add two vertical lines underneath for a thick, solid neck. Position the outer ear outlines on both sides, aligned horizontally across the lower third of the head structure.
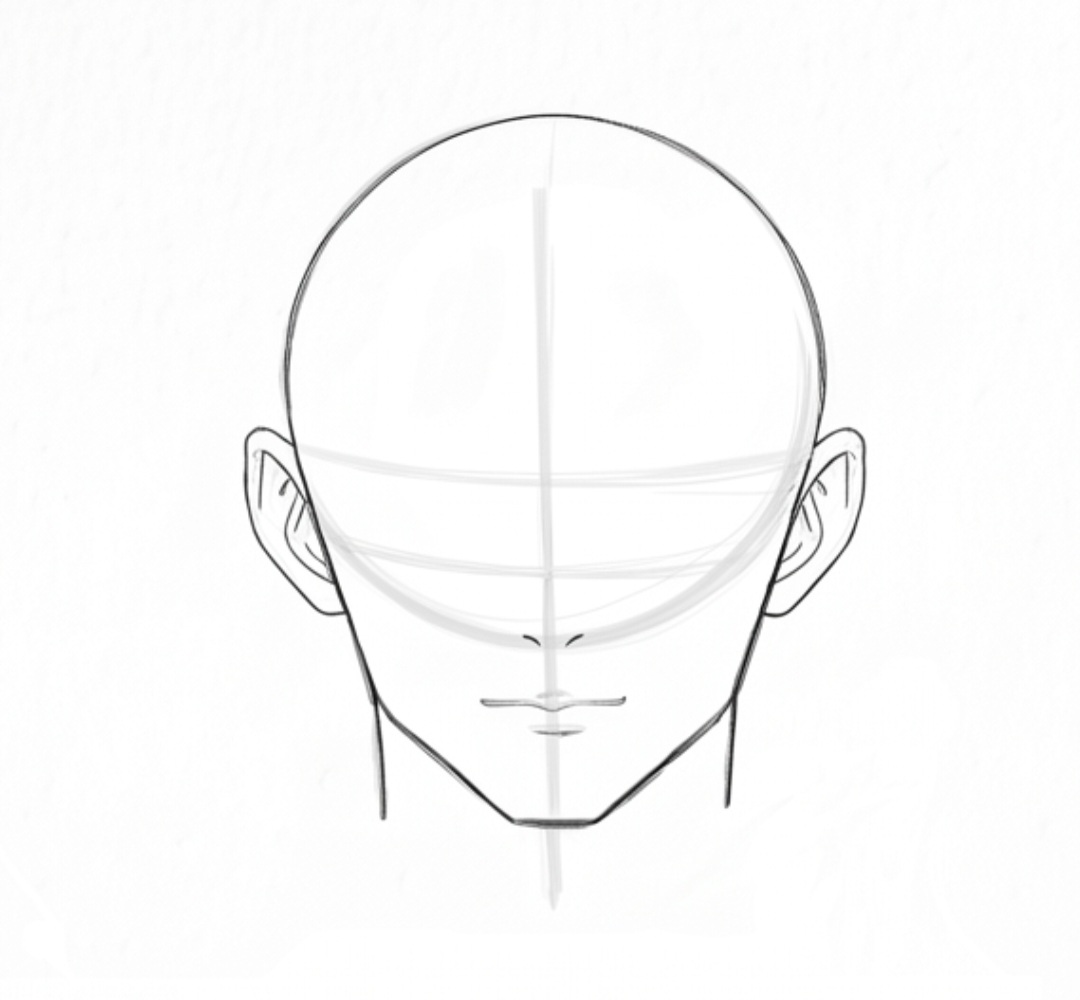
Step 3: Add Ear Details, Nose Tip, and Smirk Line
Detail the inner cartilage folds of both ears. Draw a small, simple nose tick mark right along the center line, just below the ear line. Directly beneath it, draw a relaxed, confident line for Gojo’s mouth with a subtle crease line under his lower lip.
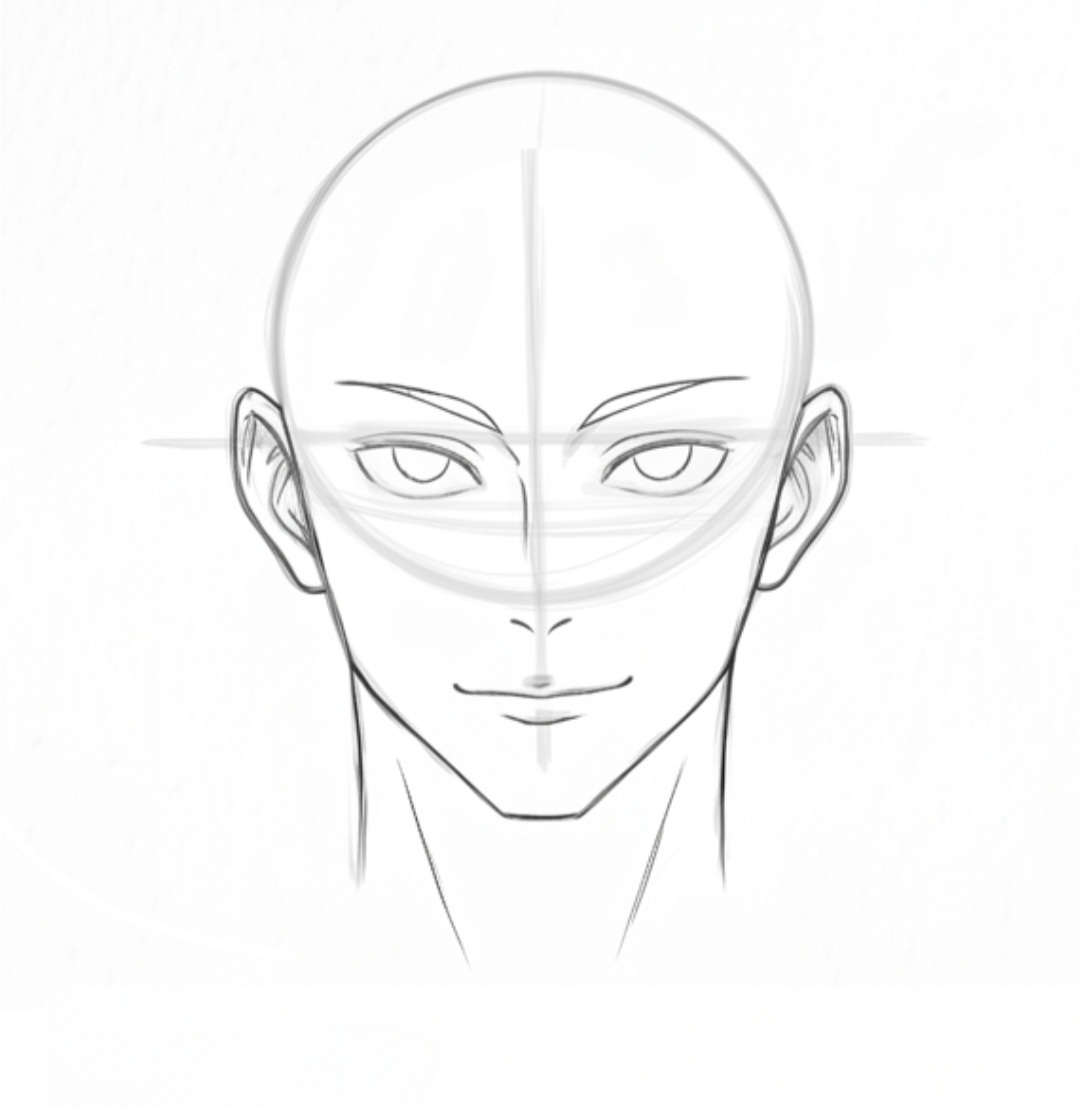
Step 4: Map the Eye Placement (Anatomy Check)
Even though the blindfold will cover his eyes, mapping out sharp anime eyes and eyebrows beneath the brow ridge ensures your facial proportions remain 100% accurate before laying down the fabric wrap.
Step 5: Draw the Iconic Fabric Blindfold Wrap
Draw a thick band wrapping across his head, covering the eye region completely. The blindfold should curve slightly downward over the bridge of his nose in a shallow V-shape, wrapping smoothly past his ears. Add subtle horizontal fold lines to give the fabric a realistic, pulled-tight texture.
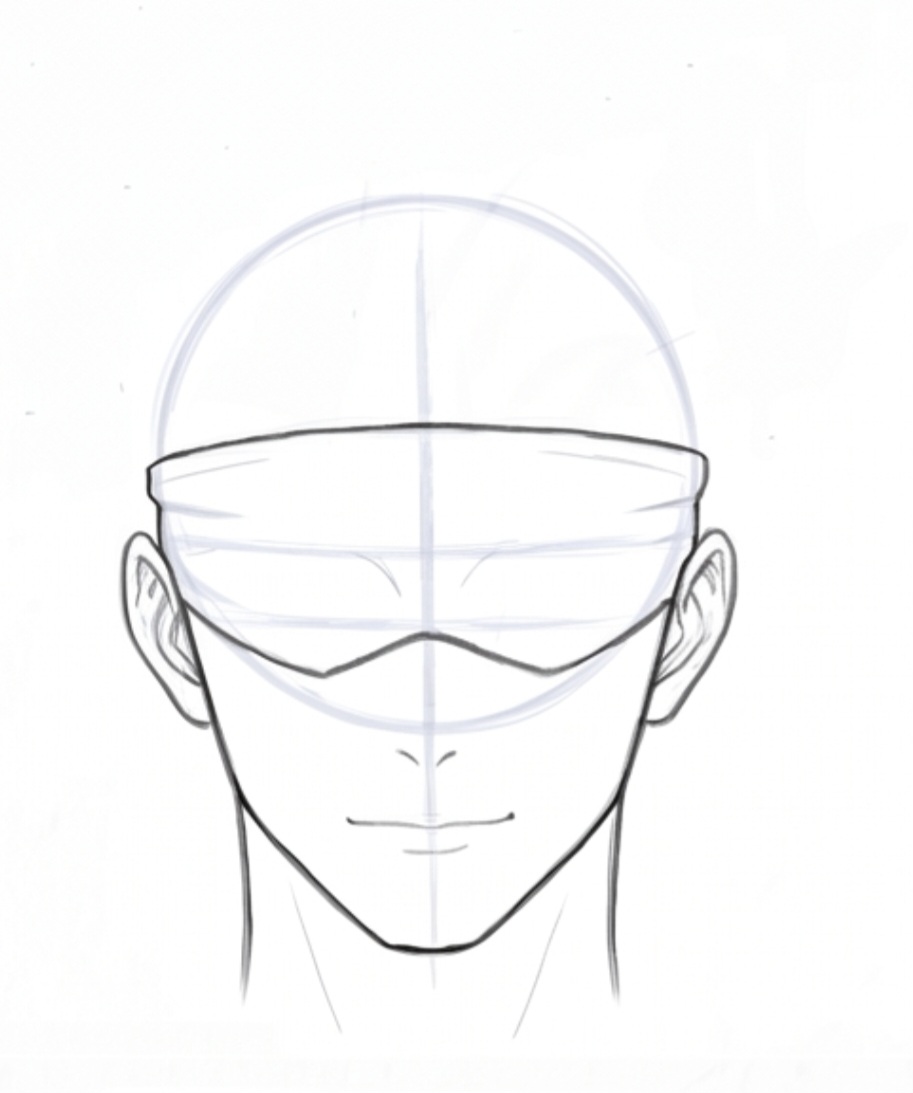
Step 6: Block In Gojo’s Upward Spiky Hair Clusters
Gojo’s hair pushes upward and outward away from the blindfold seam. Draw large, dynamic spikes radiating around his head in clusters. Make sure the spikes vary in size and angle to give his hair natural volume and movement.
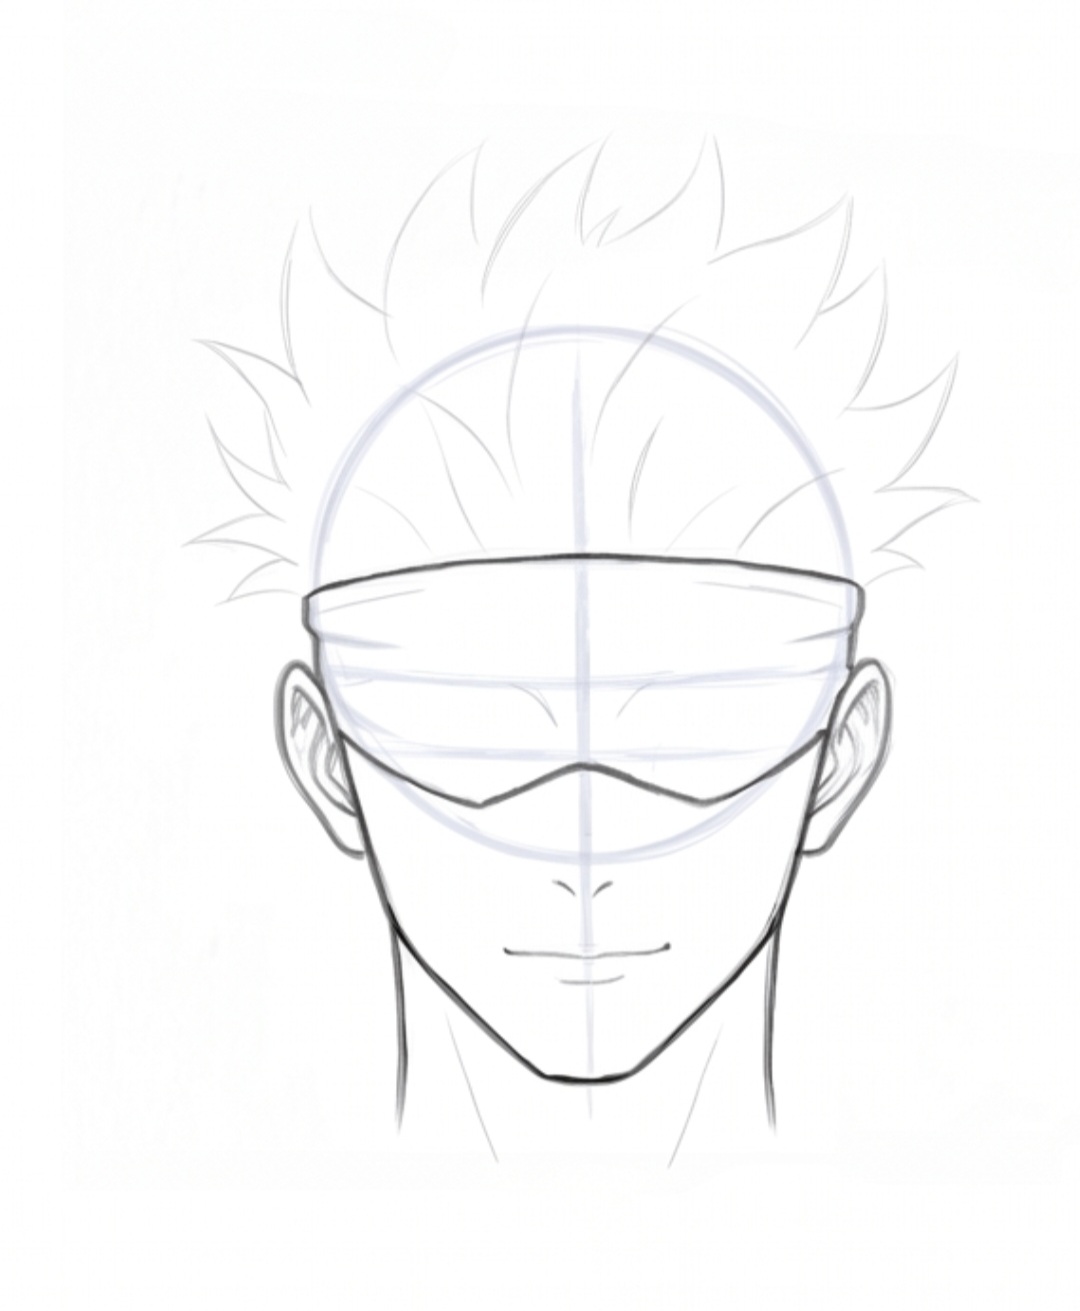
Step 7: Clean Ink, Shading, and Deep Black Blindfold Fill
Erase all under-sketch guidelines. Ink the jawline, ears, and hair strands with sharp, dark lines. Fill in his blindfold with deep black ink or charcoal, leaving thin white highlights along the top edge and fabric folds to create a sleek 3D look. Add fine hatch shading under his chin and along his neck.
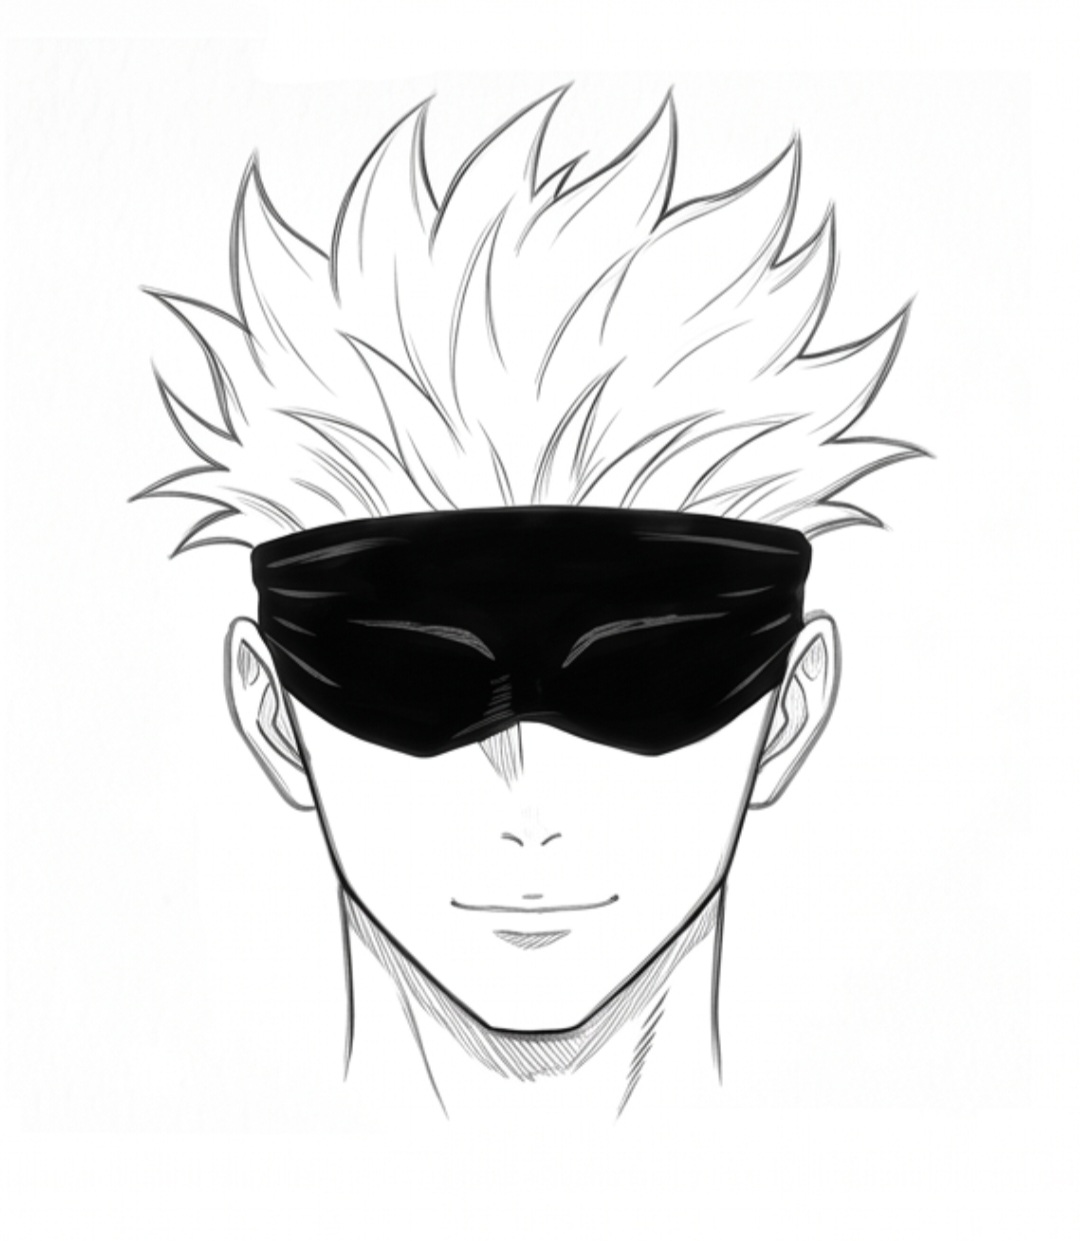
Pro Artist Tips for Drawing Satoru Gojo
- Keep the Blindfold Taut: Gojo’s blindfold isn’t loose; it clings tight around his brow and nose. Keep the bottom center curve angled downward to fit the contour of his nose bridge.
- Hair Volume Over Skull: Always draw the outer hair spikes well past the circle guideline you drew in Step 1. Anime hair requires extra volume to avoid looking flat.
- Firm Chin Contour: Gojo has a distinct, sharp masculine jawline. Avoid rounding the chin too much to keep his characteristic heroic look.