
Learning how to draw Maomao face is a great exercise in drawing a calm, clever expression with very few lines. Maomao is the sharp-tongued apothecary at the heart of The Apothecary Diaries, and her look is easy to recognise: a neat top bun tied with a ribbon, blunt bangs, two long side locks finished with beads, sleepy half-lidded eyes and the freckles she paints on so she looks plain. This guide breaks her face into seven steps, and each one names the shape you draw, where it goes and how big it should be.
Work lightly in pencil for the first six steps. You will ink and clean everything in the last step, so the early guidelines can be loose.
Materials Needed
- HB or 2B pencil for light construction lines
- Kneaded eraser that lifts graphite without smudging
- Fine-liner pens, 0.3 mm for details and 0.5 mm for outer contours
- Smooth drawing paper or a sketchbook
- Optional: a drawing tablet if you prefer to work digitally
Step-by-Step Maomao Face Drawing Guide
Step 1: Sketch the Head Shape and Guidelines
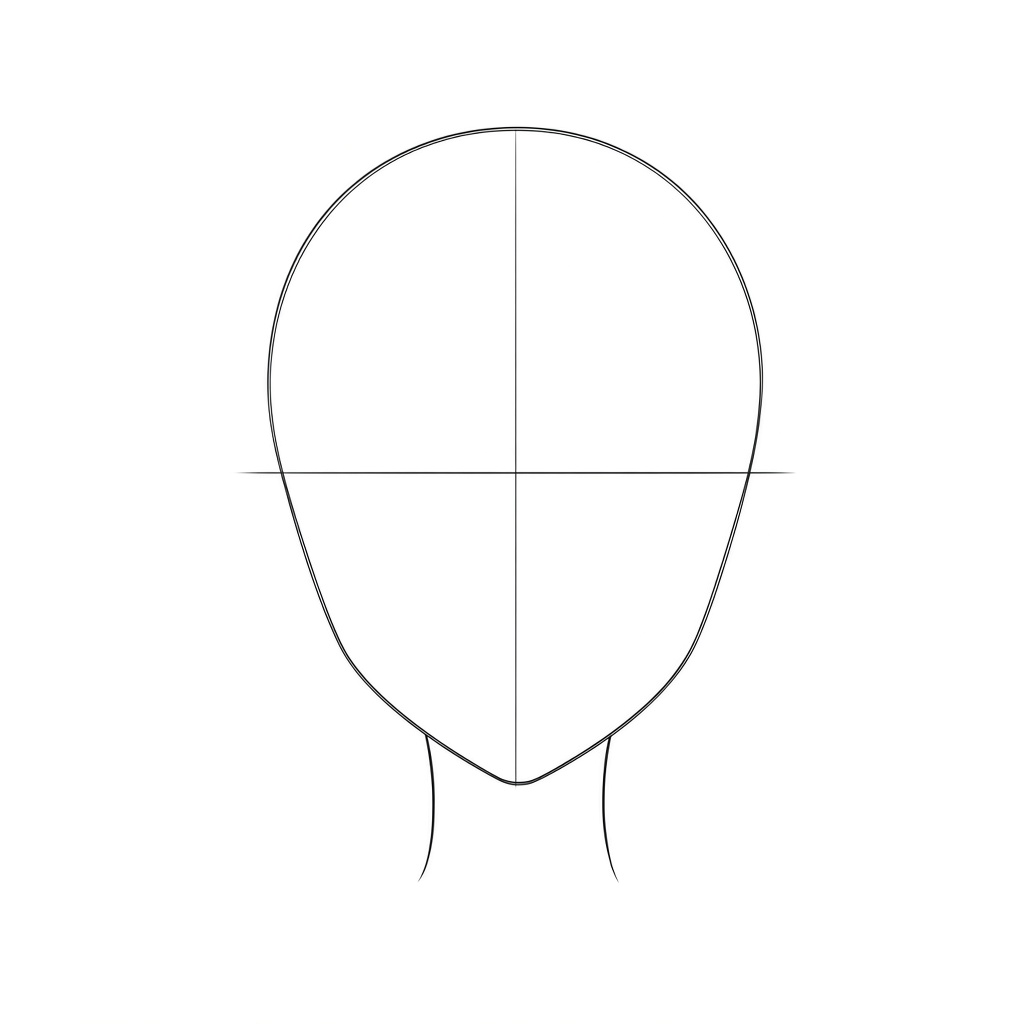
Draw an egg shape in the middle of the page, wider at the top and narrowing to a soft, rounded chin. Run a vertical centre line from the top of the head to the chin. Then draw a horizontal eye guideline a little below the halfway point. Finish with two short, slightly curved neck lines dropping from under the jaw. Keep the neck narrow, about one third of the head width, because Maomao has a small, slight build.
Step 2: Draw the Bangs, Hair Outline and Ears
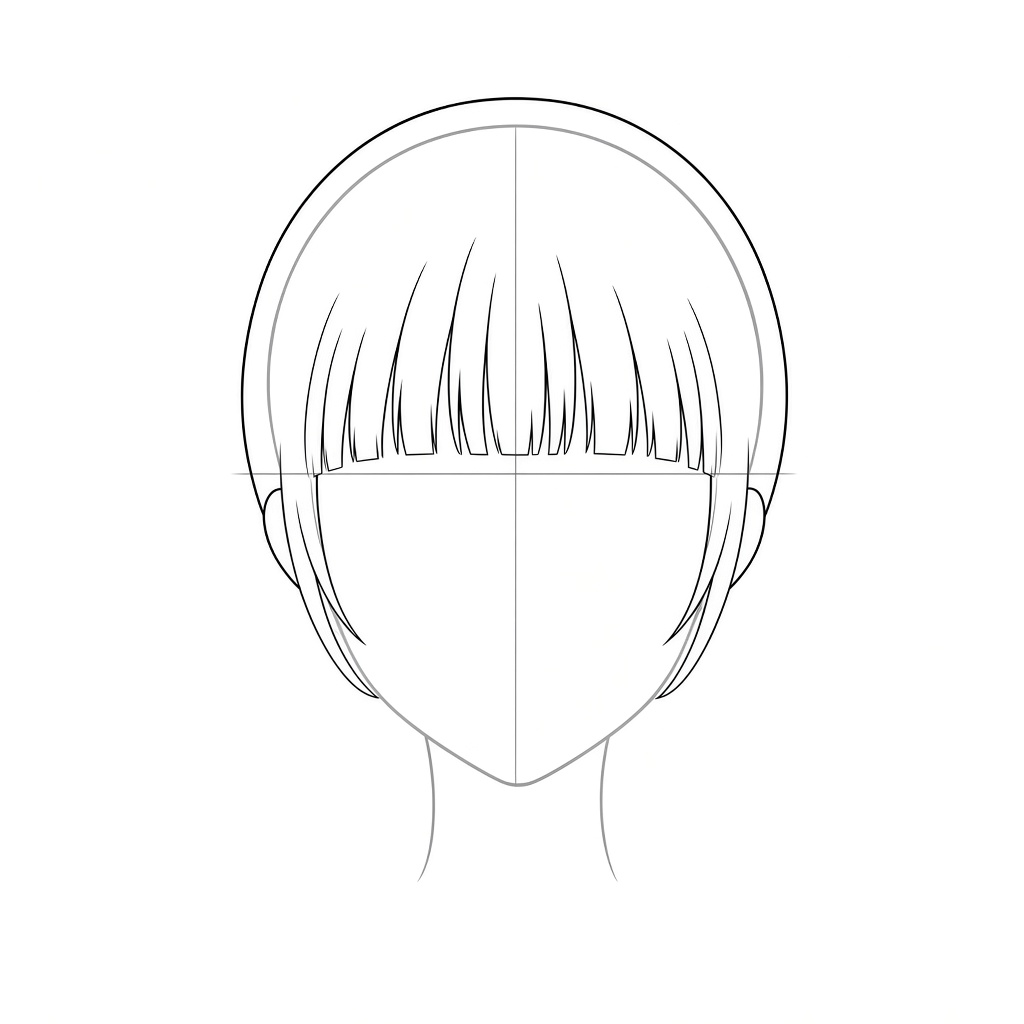
Fill the forehead with blunt bangs made of long, vertical strands. Their bottom edge is almost straight and sits right on the eye guideline. Next, draw the hair outline as an arc just outside the top of the head, so the hair has a little volume. Let the side hair drop straight down to about cheek level on both sides. Add a small C-shaped ear on each side, starting just below the eye guideline and about as tall as the gap between the guideline and the nose area.
Step 3: Add the Bun and Ribbon Bow
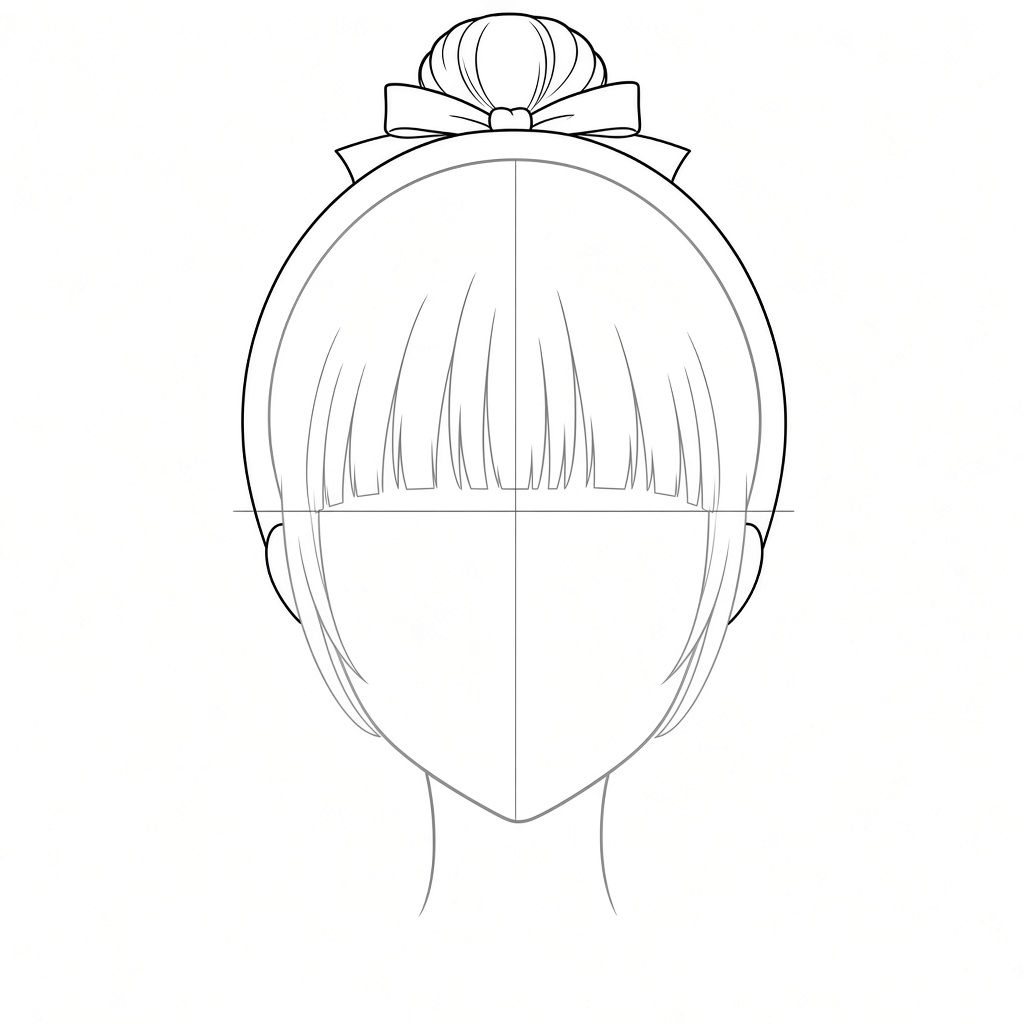
On the very top of the head, centred on the centre line, draw a small round bun about a quarter of the head width. Add a few curved strand lines inside it so it reads as twisted hair. At the base of the bun, draw a ribbon bow with two rounded loops pointing left and right and two short tails hanging below them. Keep the bow about the same width as the bun so it does not overpower the head.
Step 4: Draw the Side Locks With Beads
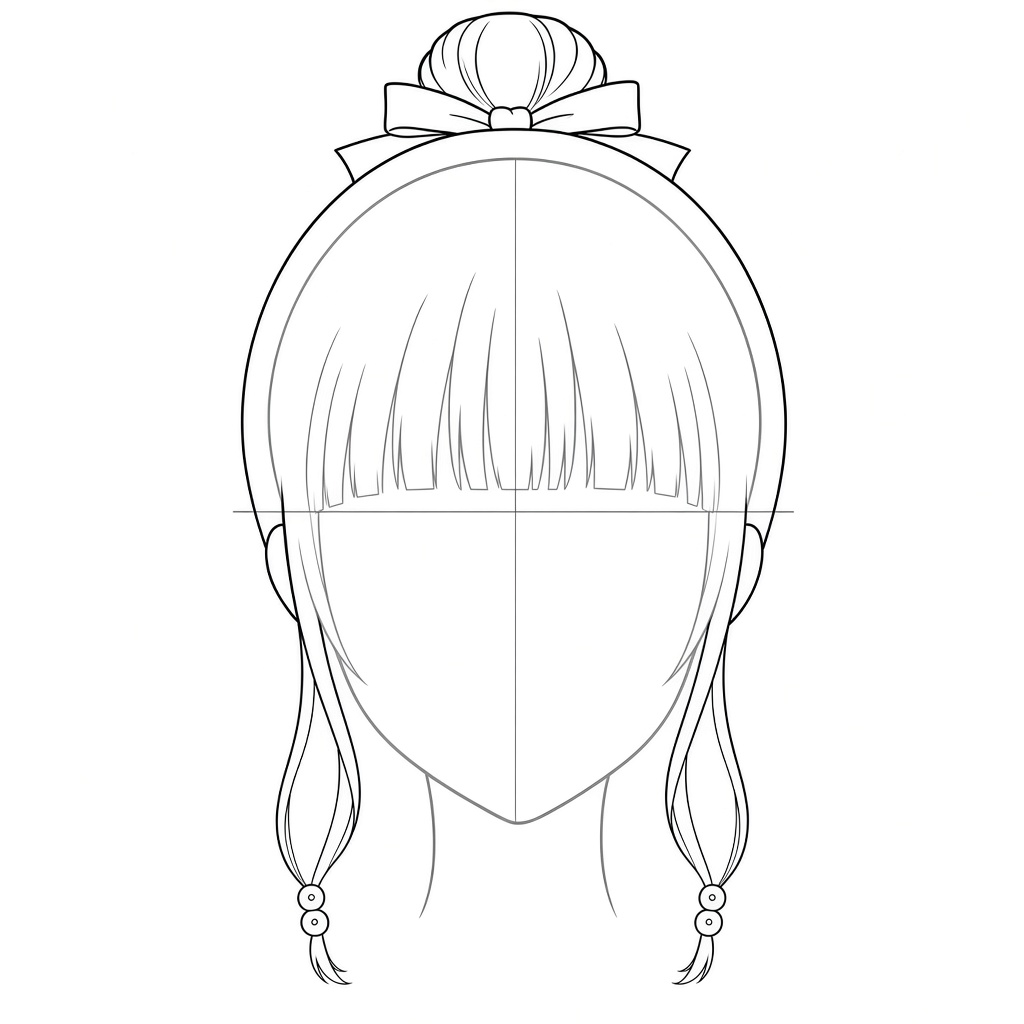
Start each face-framing lock just in front of an ear. Draw it as a long, gently wavy ribbon of hair that falls past the chin and ends at about shoulder level. Keep each lock roughly as wide as an eye. Near the bottom of each lock, stack two small round beads, one directly above the other, then let a short tuft of hair poke out below them. Mirror the two locks so the face stays balanced.
Step 5: Draw the Eyes and Eyebrows
Place two almond-shaped eyes just below the eye guideline, about one eye-width apart. Make the upper lid low and heavy so the eyes look half closed, which gives Maomao her bored, unimpressed look. Thicken the upper lash line and flick it outward at the outer corner. Inside each eye, draw a round iris that touches the upper lid, a small pupil and a tiny circle for the highlight. Add thin, slightly angled eyebrows at the tips of the bangs; letting them overlap the hair a little is a common anime convention.
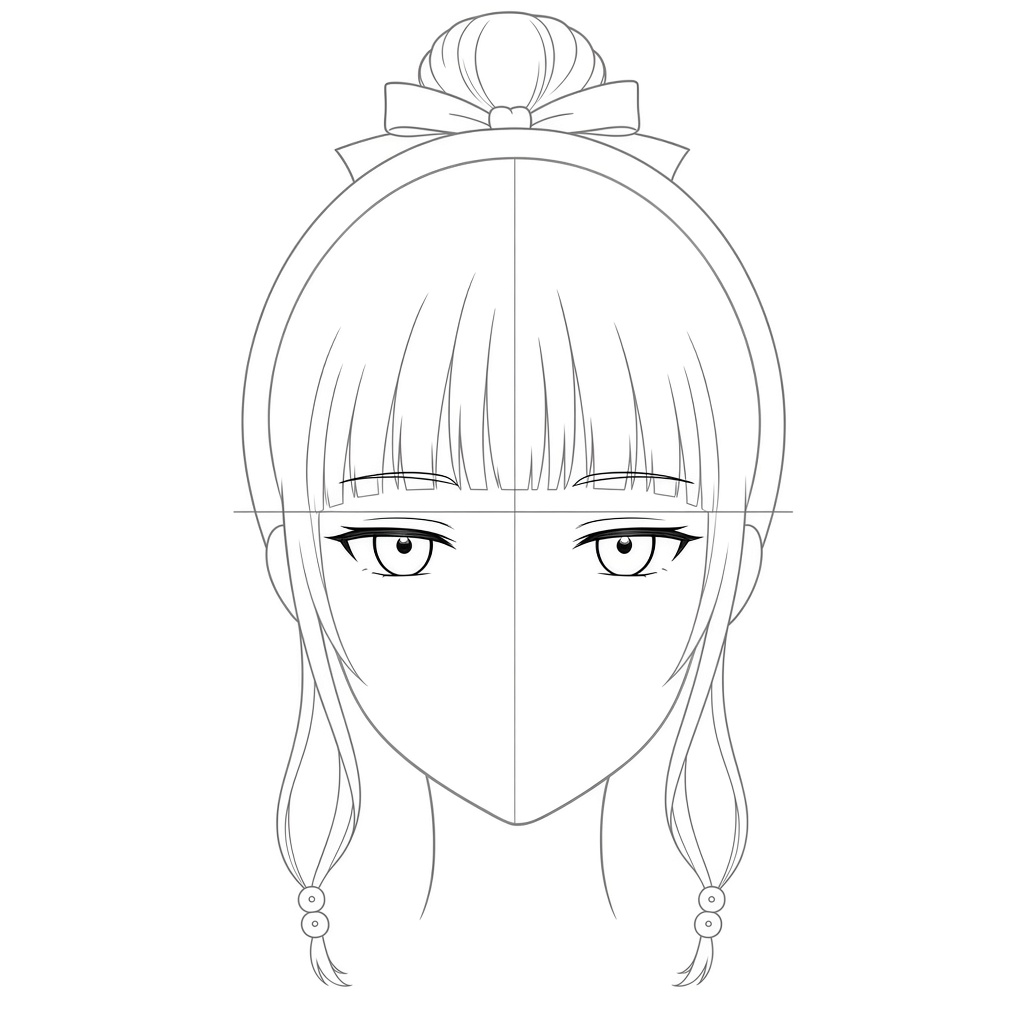
Step 6: Add the Nose, Mouth, Freckles and Collar
On the centre line, roughly halfway between the eyes and the chin, draw a tiny nose mark. Below it, draw a short, flat mouth line to keep the expression neutral. Now add the freckles: about twenty tiny dots spread across the bridge of the nose and the upper cheeks. Keep them small and loosely scattered rather than in neat rows. Finally, draw a high standing collar around the neck with a V-shaped opening at the front, wide enough to reach the side locks.
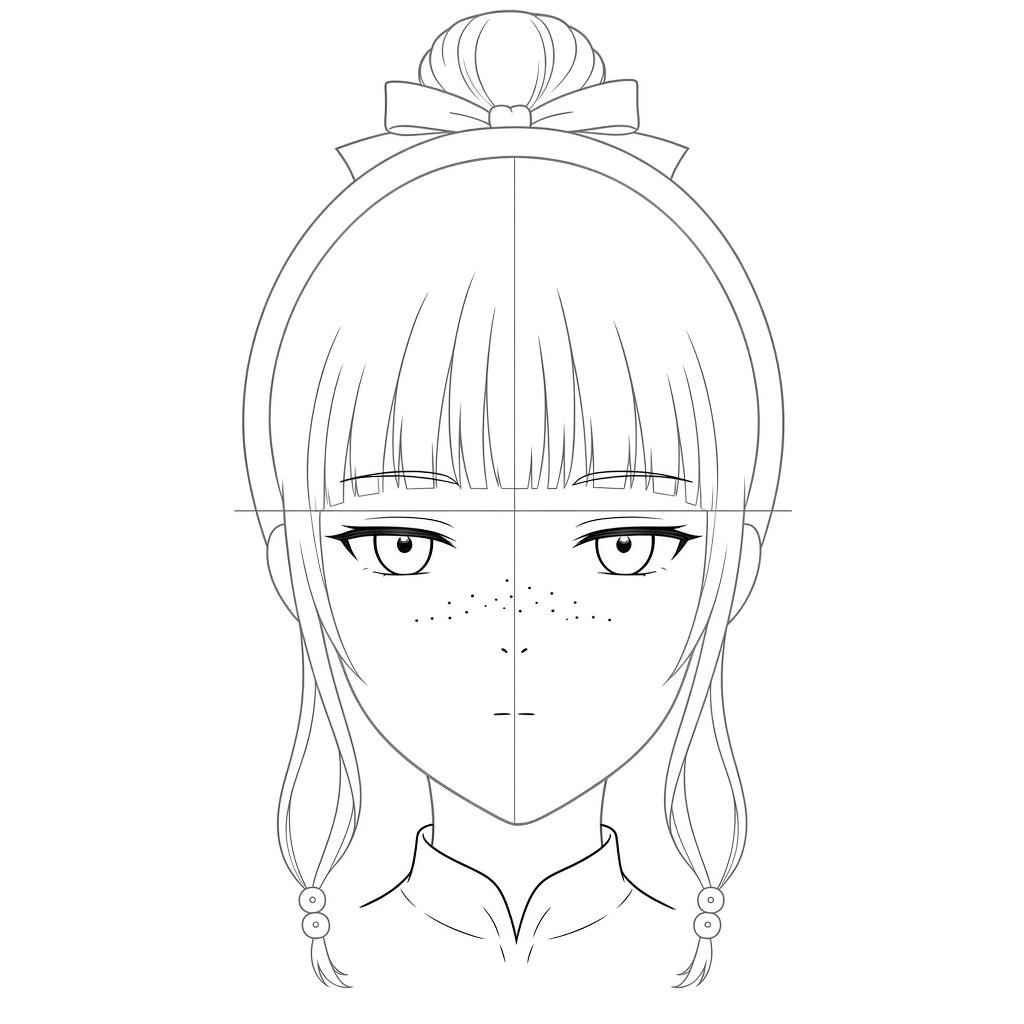
Step 7: Ink the Lines and Erase the Guidelines
Trace over every line you want to keep with a fine-liner. Use the 0.5 mm pen for the outer contours of the hair, face and collar, and the 0.3 mm pen for strands, eyes, freckles and beads. Let the ink dry, then erase the centre line, the eye guideline and the part of the head circle hidden under the hair. What remains is clean line art of Maomao, ready to colour or shade.
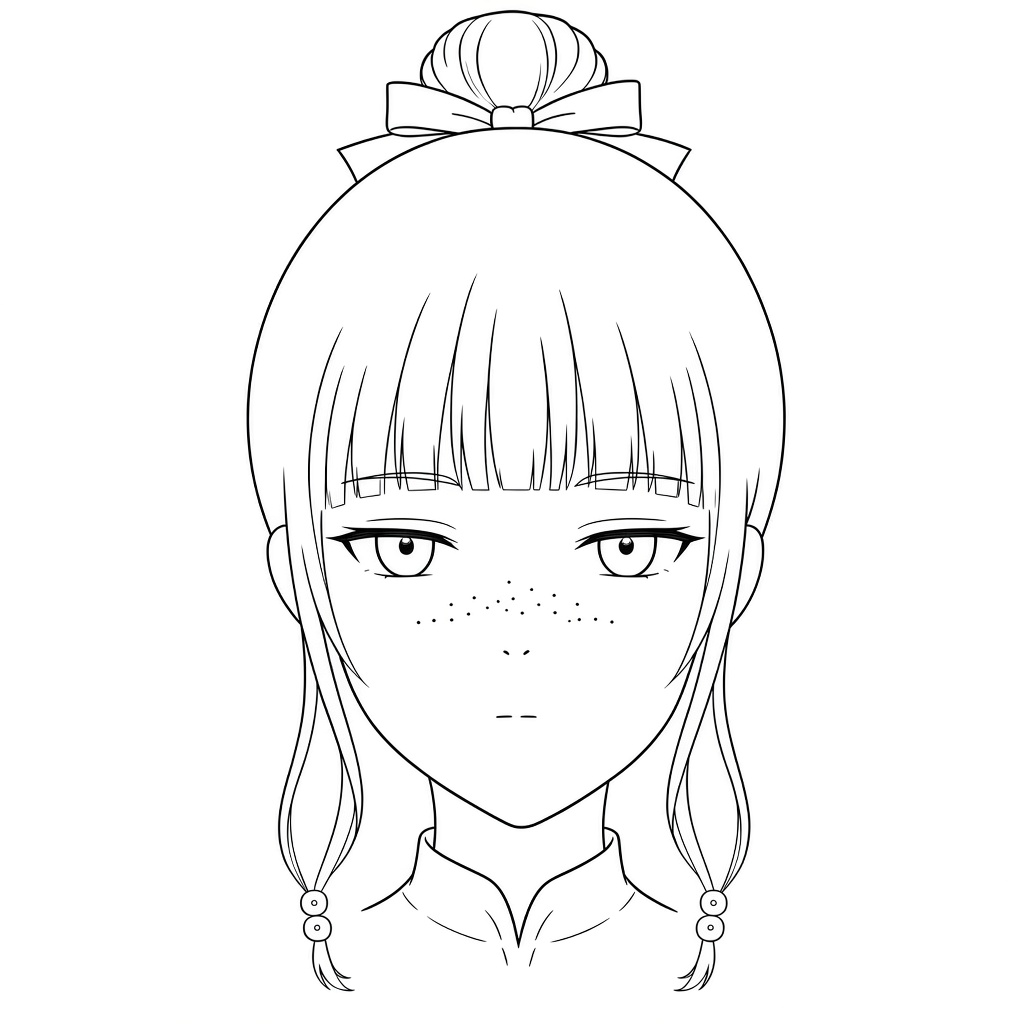
Key Pro Tips
- Lower the upper lid. Maomao’s expression depends on heavy, half-lidded eyes. If the iris shows as a full circle, she looks surprised instead of unimpressed.
- Keep the bun small. A bun wider than about a quarter of the head makes her look like a different character. Measure it against the head before inking.
- Scatter the freckles lightly. Use tiny dots of different sizes and keep them on the nose bridge and upper cheeks. Large or evenly spaced dots read as a pattern instead of freckles.
- Match the side locks. Draw both locks and their beads at the same height so the face stays symmetrical, then add small waves so they do not look stiff.
- Keep the mouth short. A small, flat mouth line suits her deadpan personality. Save open mouths for when you draw her excited about a new poison.