
This guide shows you how to draw Trunks face in eight steps, from a simple head oval to clean black line art. Trunks is the son of Vegeta and Bulma in Dragon Ball, and the version drawn here is his Future Trunks look: a teenage swordsman who wears a cropped Capsule Corporation jacket.
His face is easy to recognise once you know what to look for. Soft, straight hair splits from a part at the center of his head and frames both sides of his face, with loose strands falling over the forehead. Under it sit sharp, narrow eyes and a serious brow, features he takes after his father. All you need is a pencil, an eraser and some patience.
Materials Needed
- HB or 2B pencil for light sketching
- Soft eraser (a kneaded eraser works well for guidelines)
- Fine black liner, 0.3 mm and 0.5 mm, or a dark 4B pencil
- Smooth drawing paper, or a tablet with a pencil and an ink brush
How to Draw Trunks Face: Step-by-Step Drawing Guide
Keep every line light until Step 8. In each picture below, grey lines come from earlier steps and black lines are the new ones for that step.
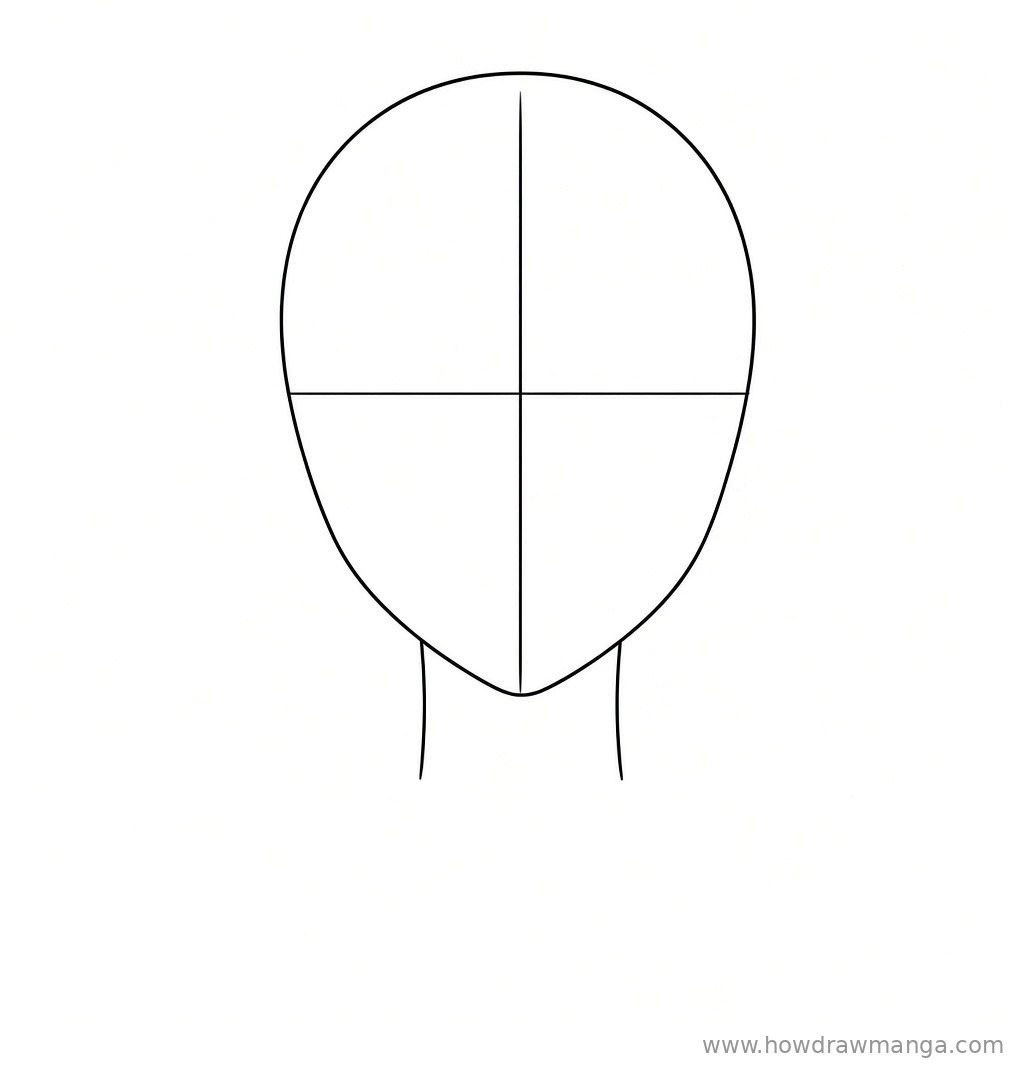
Step 1: Draw the Head Oval and Guidelines
Draw an egg shape that is wider at the top and narrows to a soft point at the bottom. Run a light vertical center line from the top of the oval to the chin. Cross it with a horizontal eye line at mid-height, halfway between the crown and the chin. Below the chin, add two short, almost straight neck lines, each set close to one-third of the head width in from the sides.
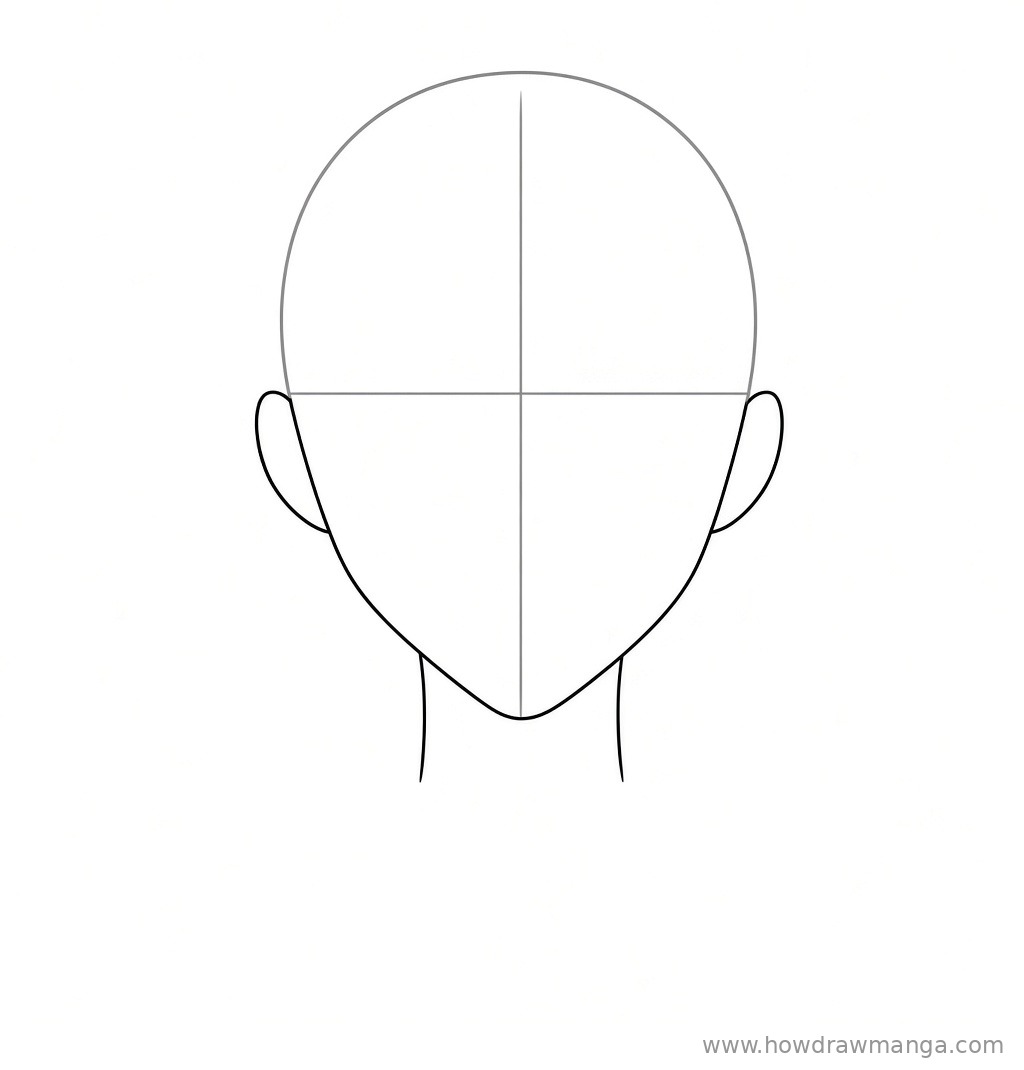
Step 2: Shape the Jaw and Add the Ears
Firm up the lower half of the oval into an angular jaw: two fairly straight lines that slant inward from the cheeks and meet in a slightly pointed chin on the center line. Add one C-shaped ear on each side of the head. The top of each ear sits on the eye line, and each ear is a little less than half as tall as the face below that line.
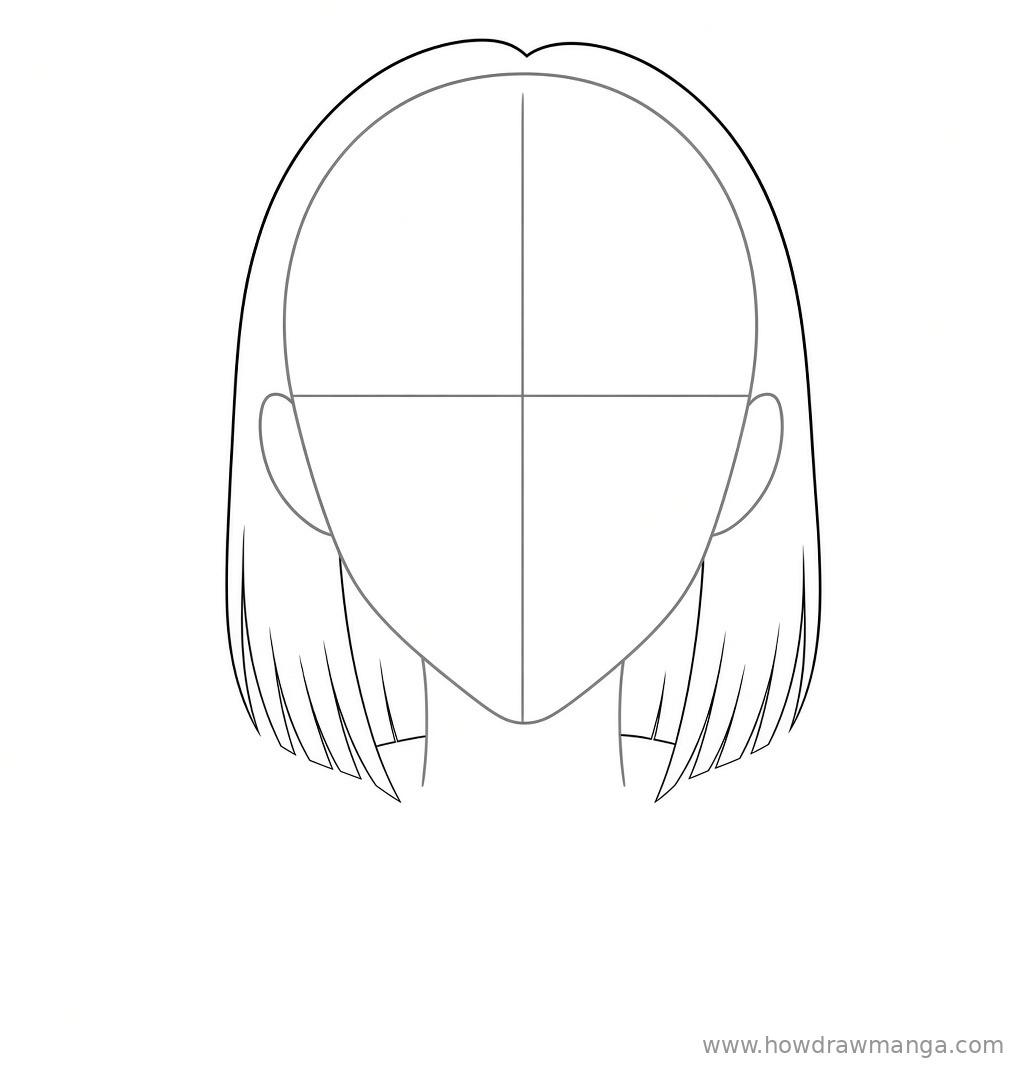
Step 3: Sketch the Outer Hair Shape
Draw the hair as one big silhouette before any strands. Start with a rounded crown a little above the skull line and pinch a small dip into it at the center, where the part will go. From there, let the outline drop straight down both sides, wide enough to cover the ears. End each side a little below the chin with a row of straight, pointed tips.
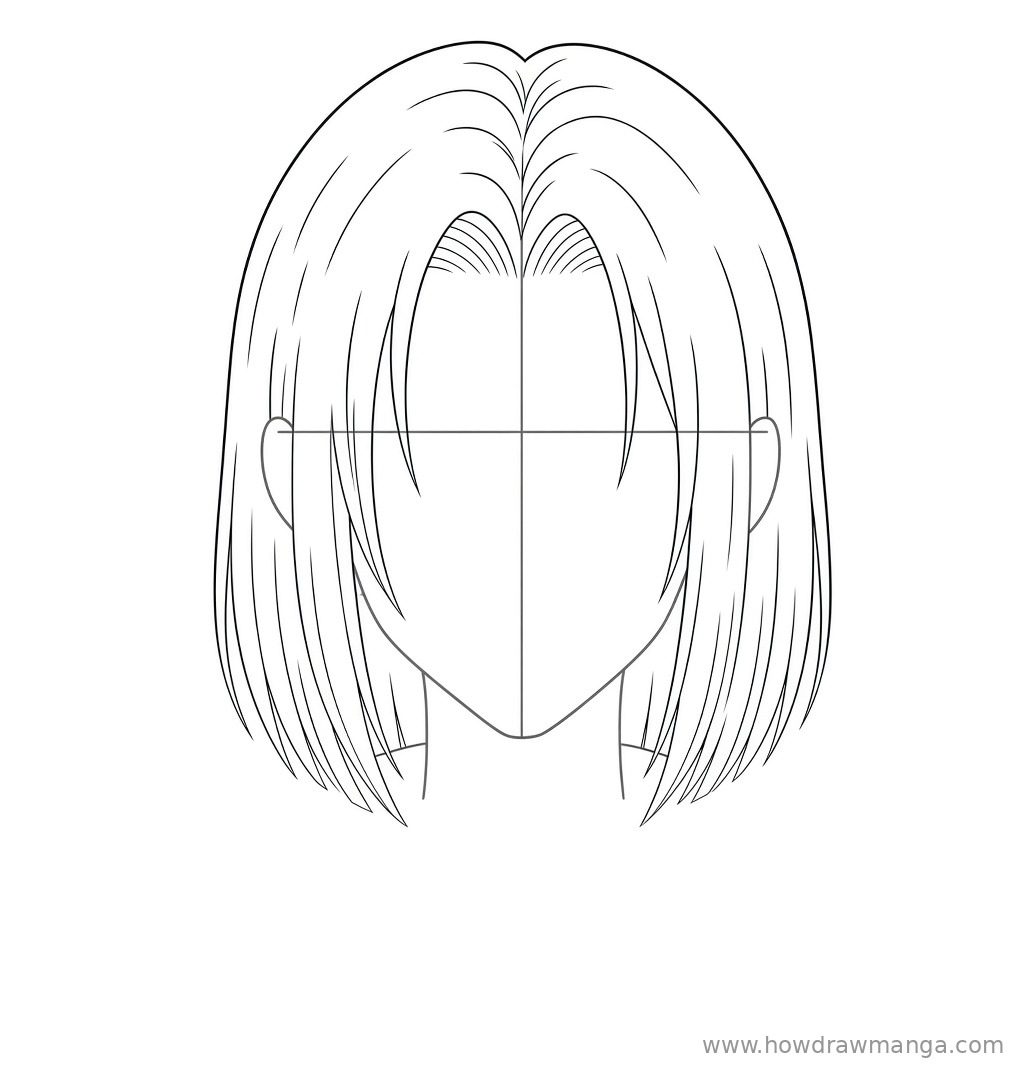
Step 4: Add the Center Part and Curtain Bangs
Mark the part with a short line from the dip in the crown down to the top of the forehead. Fan fine, curved strands out to the left and right of it, plus a cluster of short arcs at each upper corner of the forehead. Draw two long curtain bangs that split at mid-forehead and fall along each side of the face, ending around eye level and the upper cheeks. Finish the side hair with long vertical strand lines that follow the outline down to the tips.
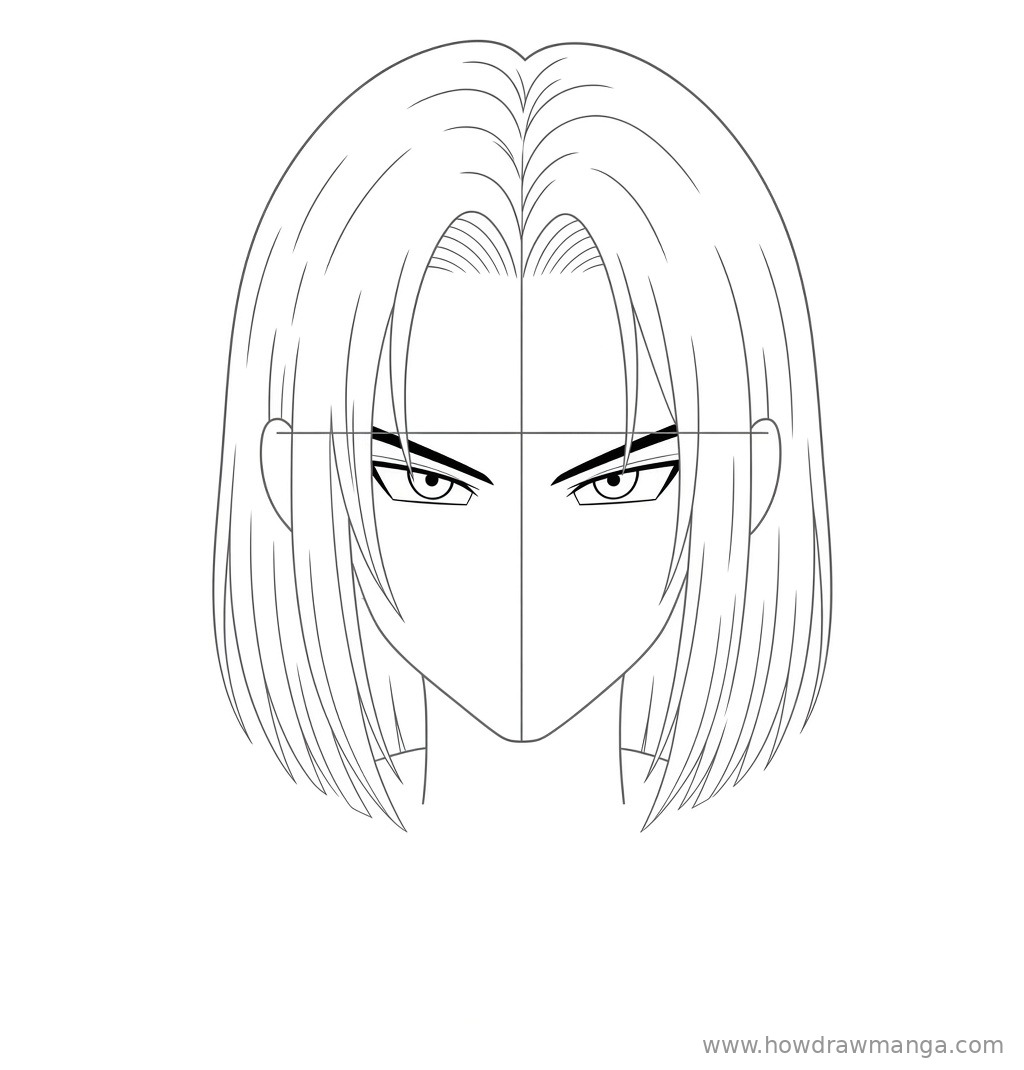
Step 5: Draw the Eyes and Eyebrows
Place the eyes just below the eye line, one on each side of the center line, with a gap of about one eye width between them. Make each eye a narrow, angled shape with a heavy, thick upper lid and a thin lower lid. Inside, draw a round iris that touches the upper lid, with a small dark pupil. Above each eye, on the eye line, draw a thick, straight eyebrow that angles down toward the nose to give him a firm frown.
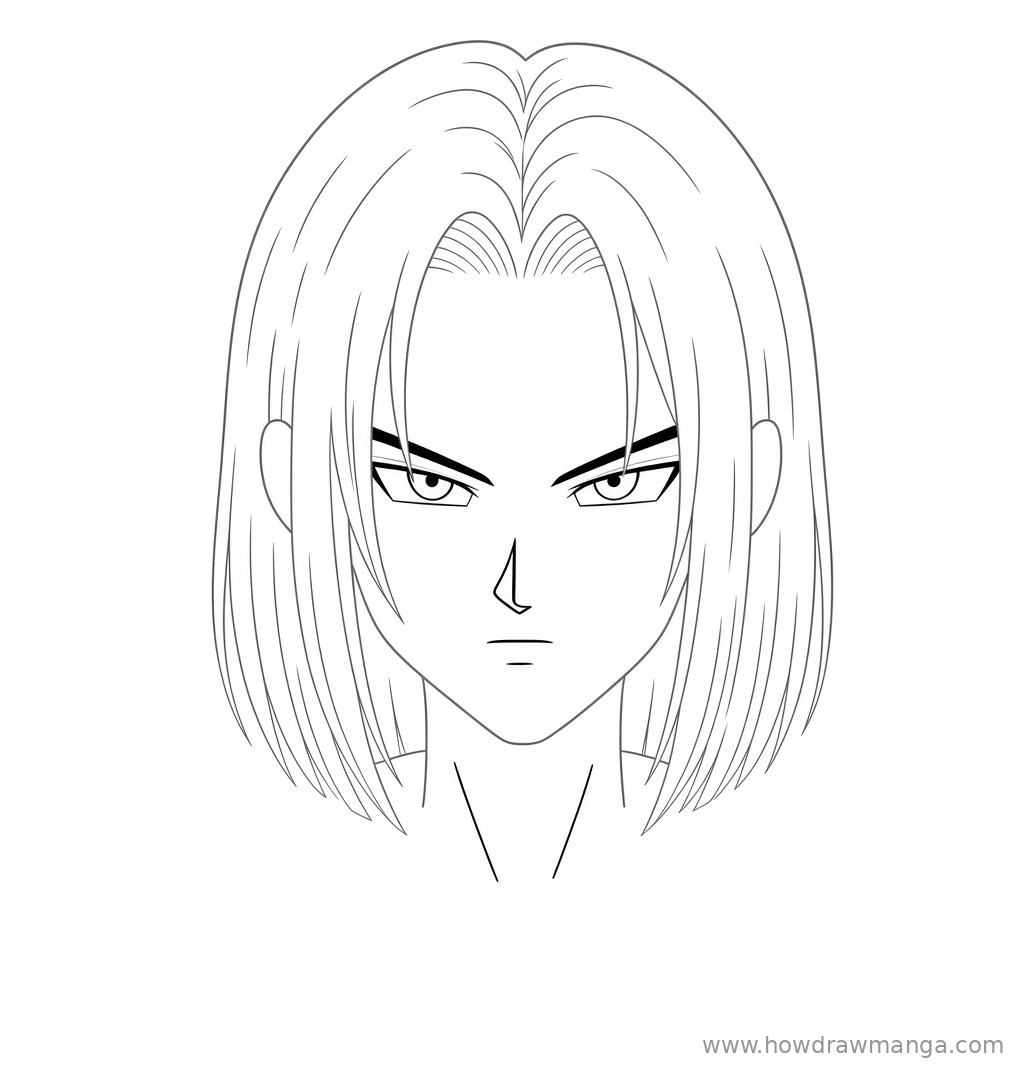
Step 6: Add the Nose, Mouth and Neck Lines
Erase the center line and eye line now. Halfway between the eyes and the chin, draw an angular nose: one slanted line with a small hook at the bottom. Below it, add a short, flat mouth line about as wide as the nose is long, with a tiny lip line underneath. Draw two longer lines inside the neck that run down and slightly outward from below the jaw.
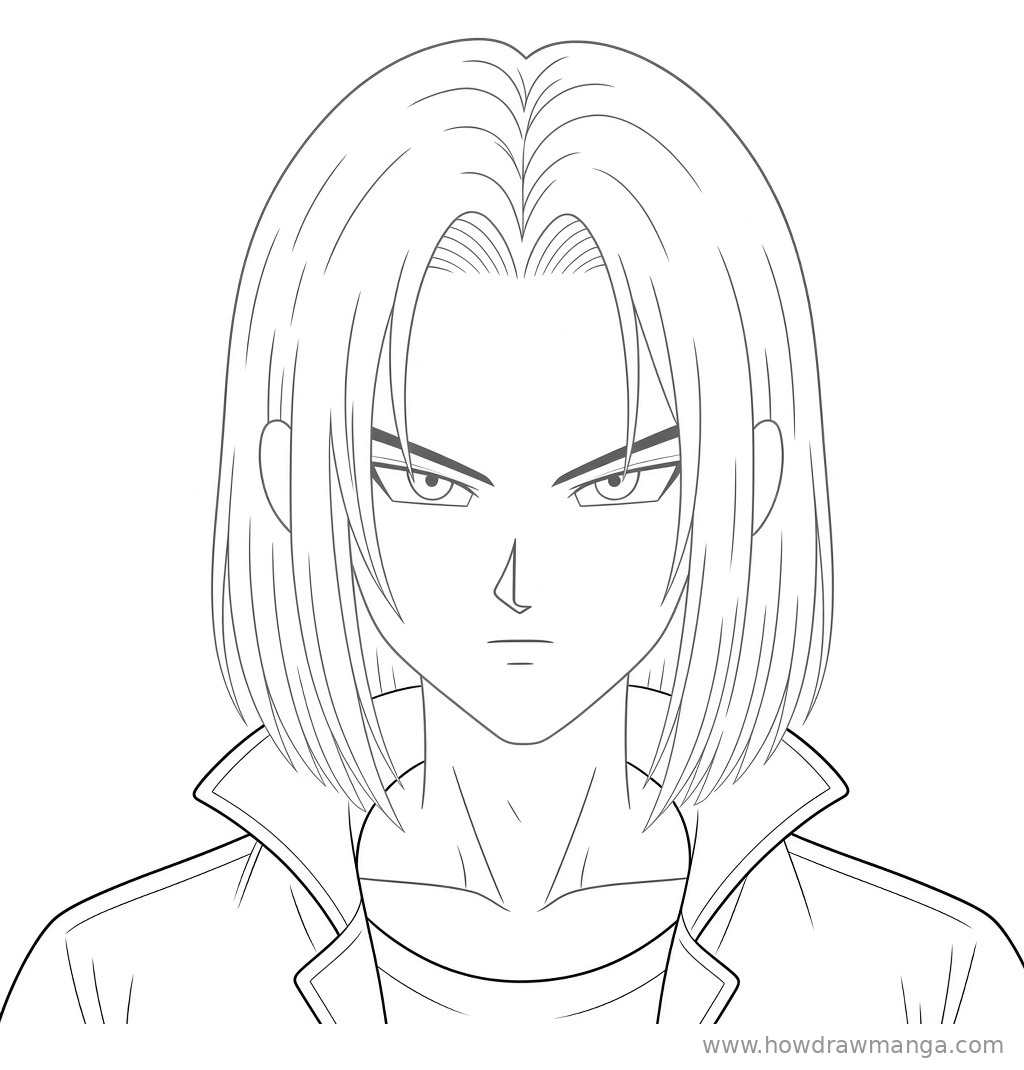
Step 7: Draw the Shoulders and Jacket Collar
Sketch the shoulders sloping out to the edges of the page, more than twice as wide as the head. Add a round shirt neckline below the neck and refine the neck with a soft collarbone line. Then draw a cropped jacket over the shoulders: a tall collar that stands up behind the hair tips on both sides, with lapels that open down toward the chest.
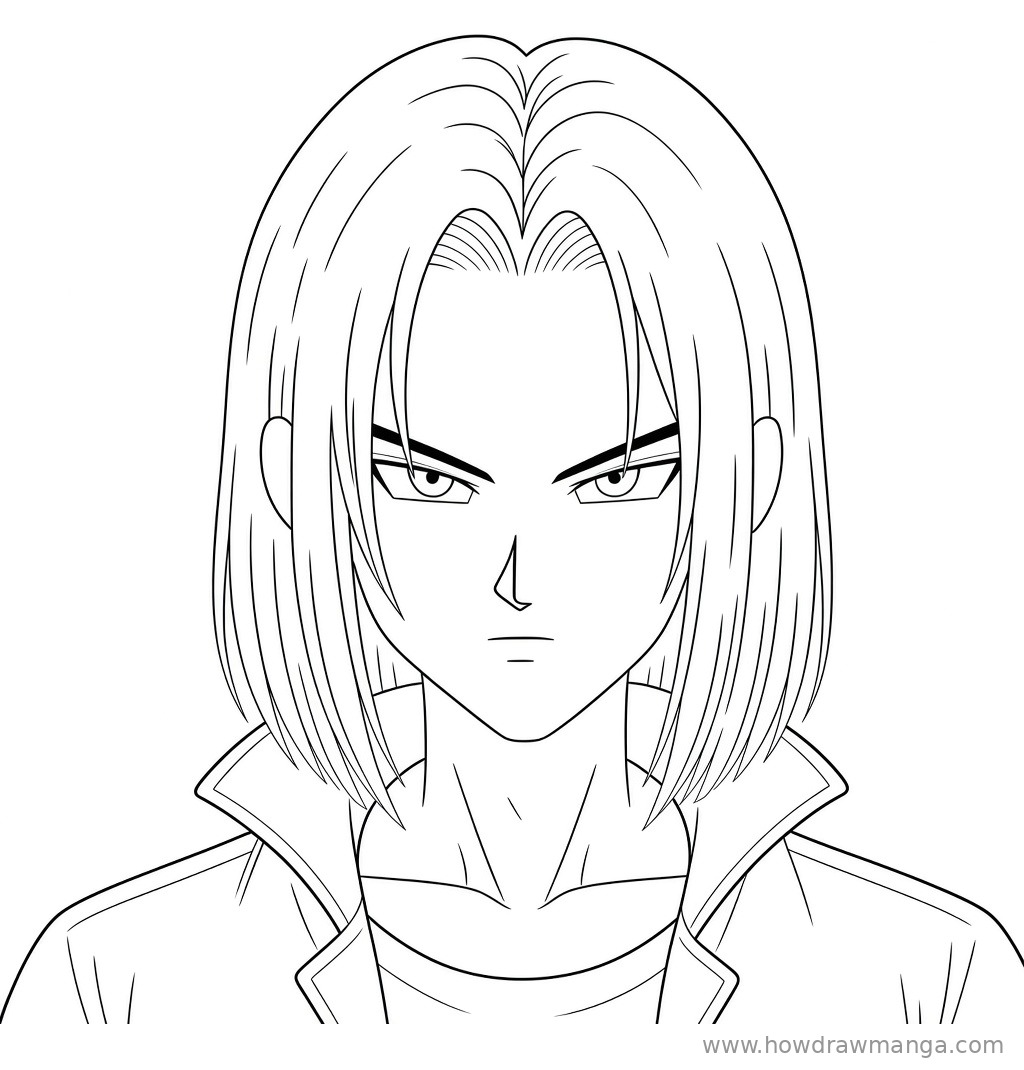
Step 8: Ink the Final Line Art
Trace over every pencil line you want to keep with a fine liner or a dark pencil. Use a thicker line for the outer contours: the hair outline, the jaw, the ears and the jacket edges. Use a thinner line for the inner hair strands, the eyes, the nose and the mouth. Erase any leftover pencil marks once the ink is dry. Nothing new is added in this step.
Key Pro Tips for Drawing Trunks
- Keep the part in the middle. As a teenager his hair parts at the center of his head. Shift the part to one side and he starts to look like someone else.
- Draw the hair straight, not spiky. His hair is soft and straight. Long, smooth strand lines with only slight curves read better than zigzags.
- Let the brows do the acting. Thick brows that tilt down toward the nose and heavy upper eyelids give him his serious look. Raise the brows and the face turns soft and surprised.
- Pick a hair length on purpose. This drawing lets the side hair fall a little below the chin. For his first appearance, keep it closer to ear level; after his time-chamber training he wears it past the shoulders.
- Colour by series. His hair is lavender or purple in most Dragon Ball Z media and blue in Dragon Ball Super, and his eyes are blue. Choose one reference and stay consistent.
FAQ
Can I add his sword?
Yes. Trunks carries a longsword in a sheath on his back, with the hilt over his right shoulder. On a face drawing, show a short piece of the hilt rising behind that shoulder.
Draw More Dragon Ball Characters
- How to Draw Vegeta Face: draw Trunks’ father and compare their brows and eyes.
- How to Draw Son Goku Face from DBZ: practise another Dragon Ball face with a very different hair shape.