
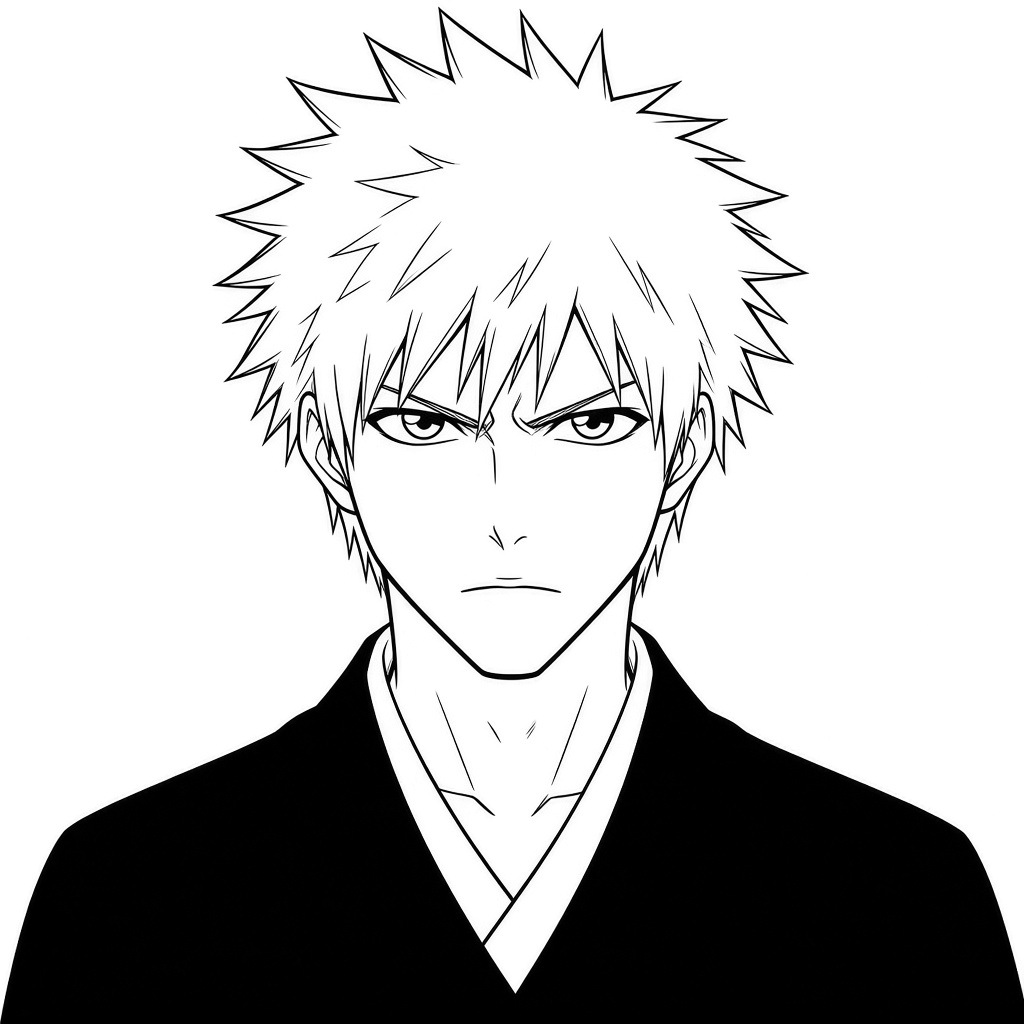
Ichigo Kurosaki is the hero of Tite Kubo’s Bleach: a high school student who can see ghosts and becomes a Substitute Soul Reaper after meeting Rukia Kuchiki. In this guide you will learn how to draw ichigo kurosaki face in 7 steps, from the first circle to his spiky hair, trademark scowl and Soul Reaper robe.
Kubo gave Ichigo his spiky orange hair and constant frown to contrast with Rukia, and those two features do most of the work in making him recognisable. In every picture, the lines for the current step are black and earlier lines are grey, so you can follow along one layer at a time.
Materials Needed
- Paper or a drawing tablet
- A light pencil (HB or 2H) for the guidelines
- A darker pencil (2B) or a fine liner for the final lines
- An eraser
- Optional: a black marker for the robe and an orange pencil or marker for the hair
Step-by-Step Ichigo Kurosaki Face Drawing Guide
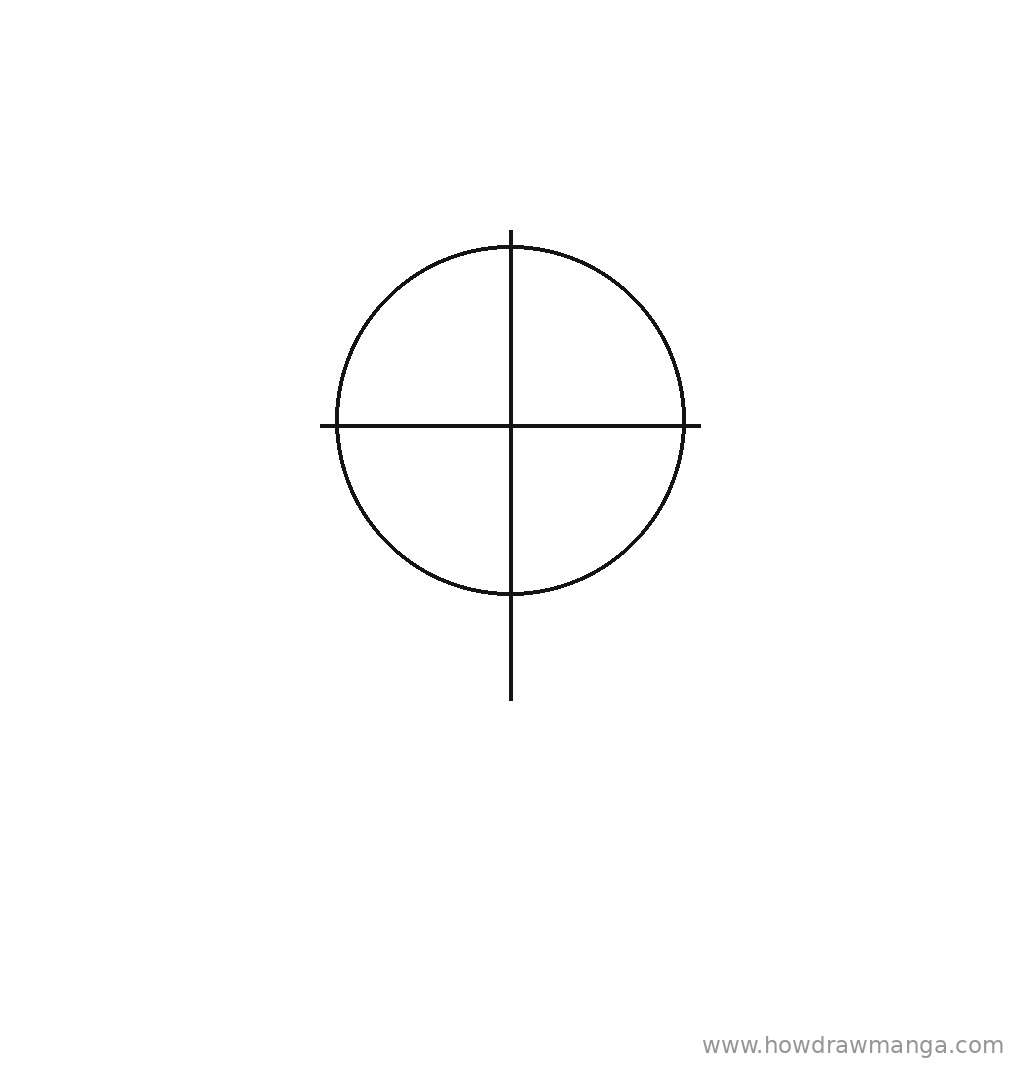
Step 1: Sketch the Head Circle and Guidelines
Draw a circle near the middle of the page, a little more than one-third of the page wide. Add a vertical centre line and extend it below the circle by about half the circle’s height to mark the chin; Ichigo’s face is long and narrow. Cross it with a horizontal eye line at the middle of the circle, slightly wider than the circle. Keep all three lines light.
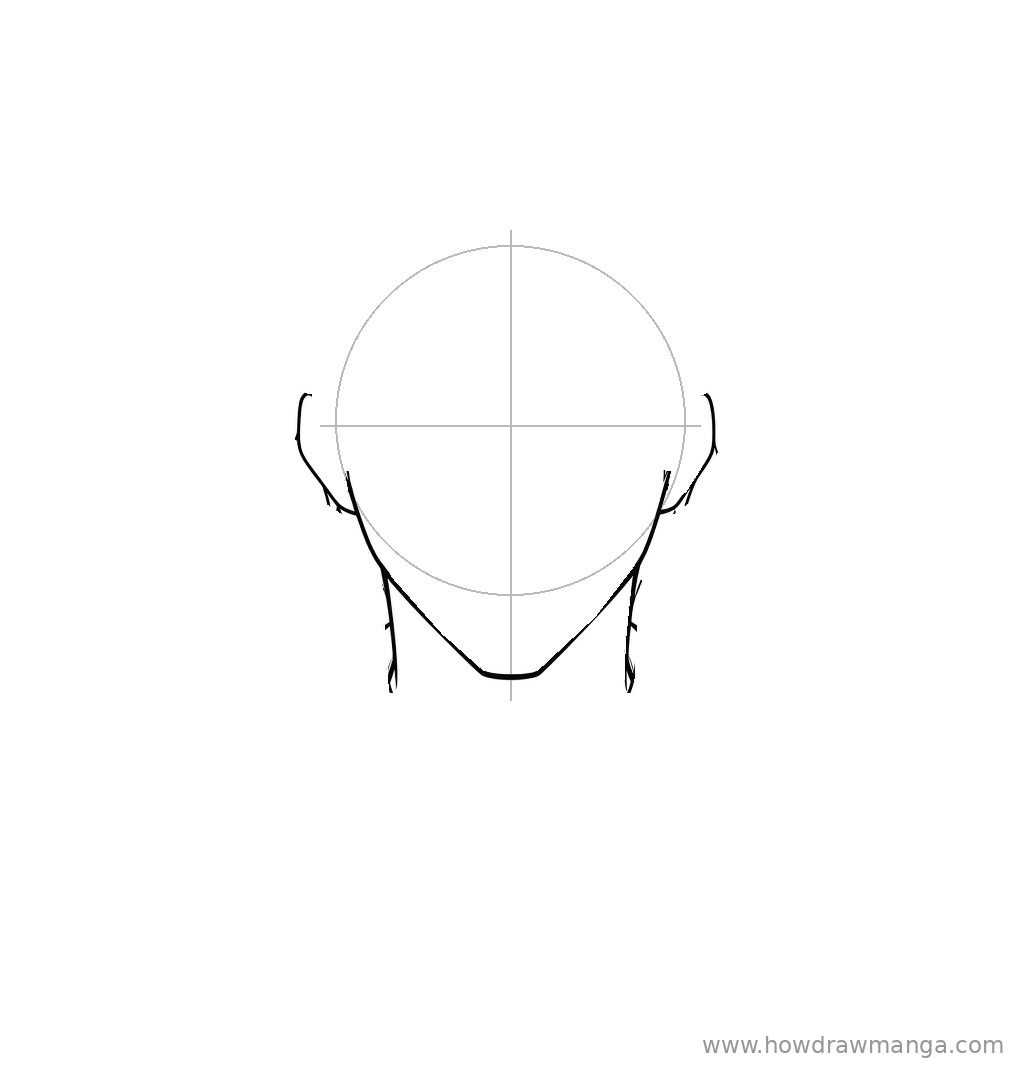
Step 2: Draw the Face Outline, Ears and Neck
Starting on the eye line, draw the sides of the face slightly inside the circle and bring them down past the circle’s bottom edge. Angle them in toward the centre line and join them with a short, flat chin at the end of the line. Outside the circle, draw a tall C-curve for each ear, from the eye line down to roughly halfway to the chin. Add two long neck lines below the jaw that are noticeably narrower than the face.
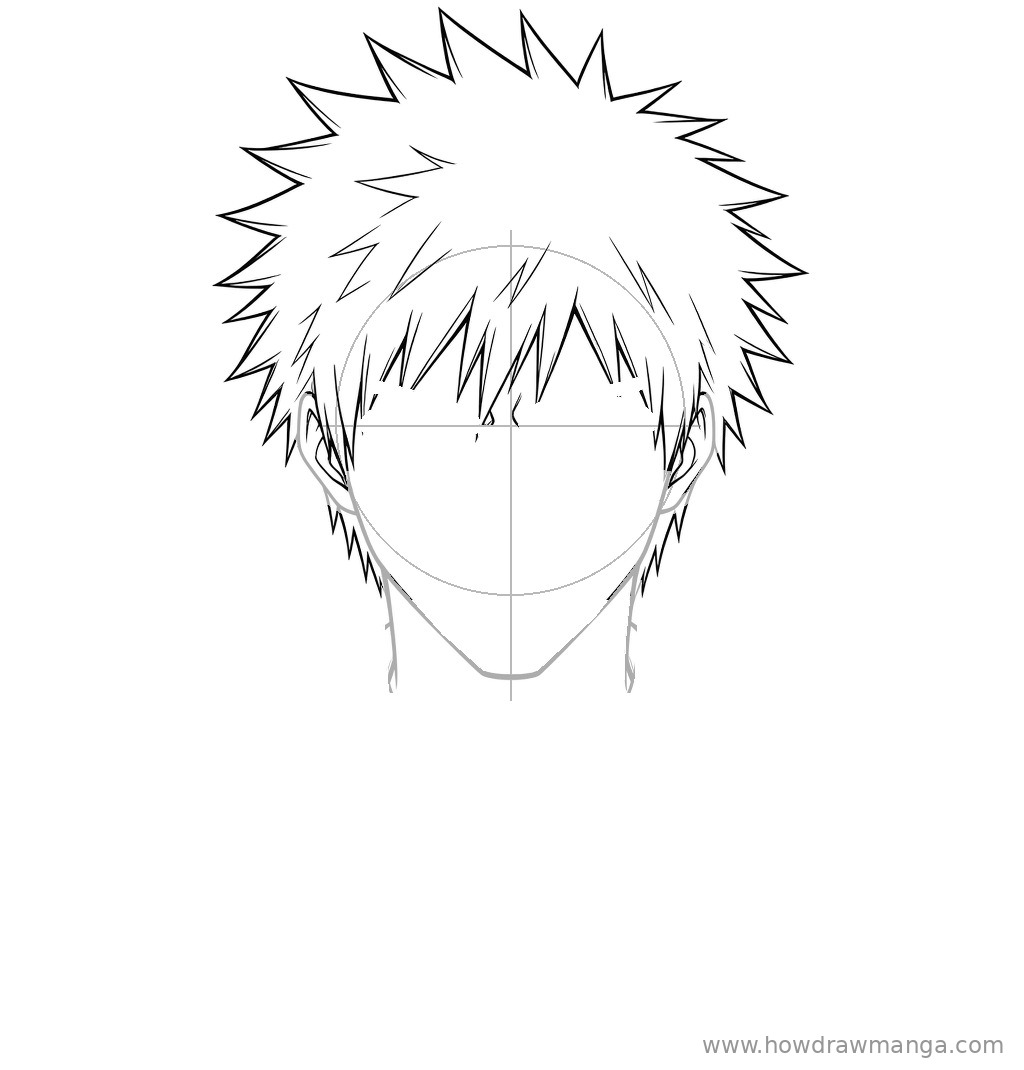
Step 3: Draw the Spiky Hair and Long Bangs
Draw a wide burst of sharp, triangular spikes around the top of the circle, pointing up and out in every direction; the hair should be about one and a half times as wide as the face. Keep the spikes as outlines and leave them white inside. Over the forehead, draw long, pointed bangs that come down to the eye line, with a few tips reaching between the eyes. On each side, let thin, pointed strands fall in front of the ears and past the jaw, and add a few inner strand lines to show the layers.
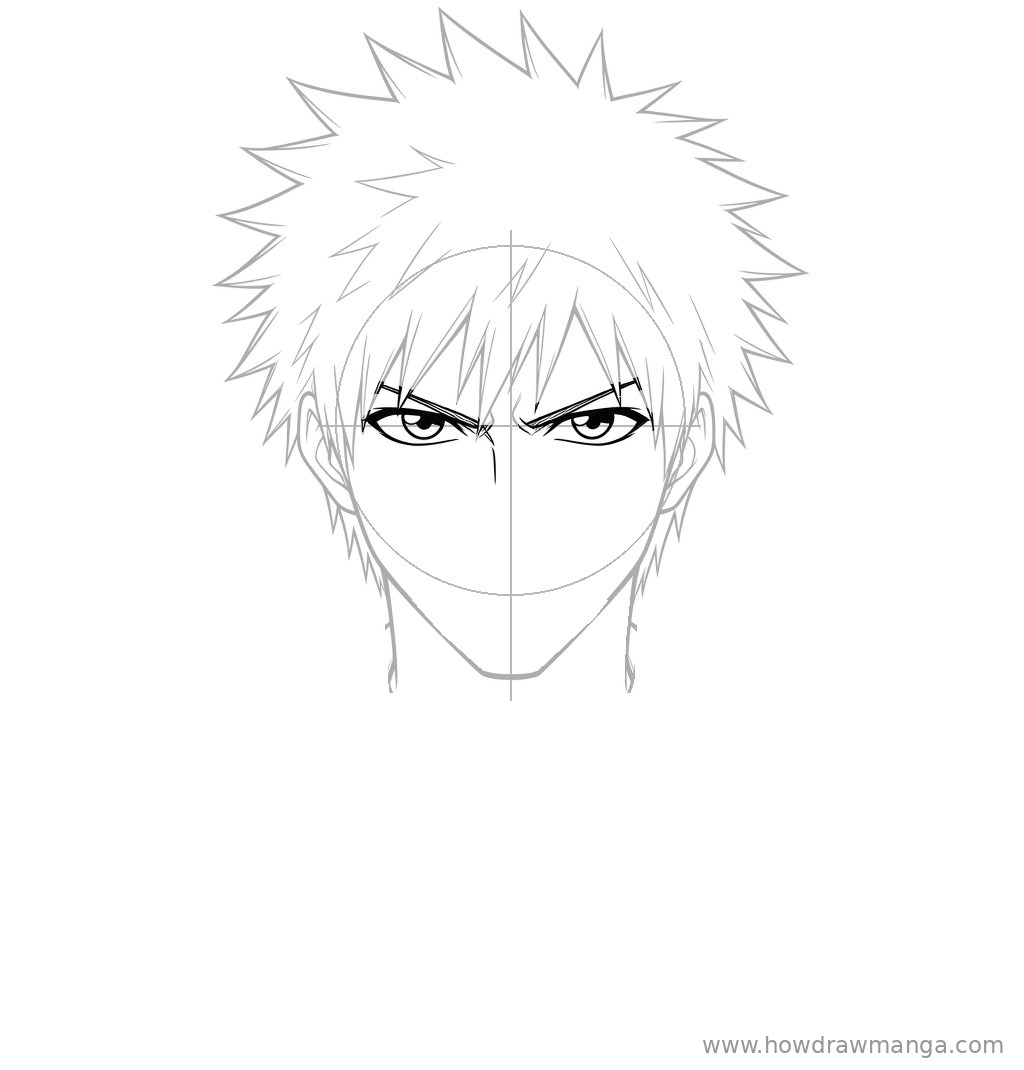
Step 4: Draw the Scowling Eyebrows and Eyes
Draw two thin, straight eyebrows that angle down toward the centre line, partly hidden behind the bangs. Under them, on the eye line, draw narrow almond-shaped eyes with a heavy upper lid and a thin lower line. Add a round iris with a dark pupil and a small highlight, with the top of the iris tucked under the upper lid. Place a few short vertical crease lines between the brows on the centre line; this frown is Ichigo’s signature expression.
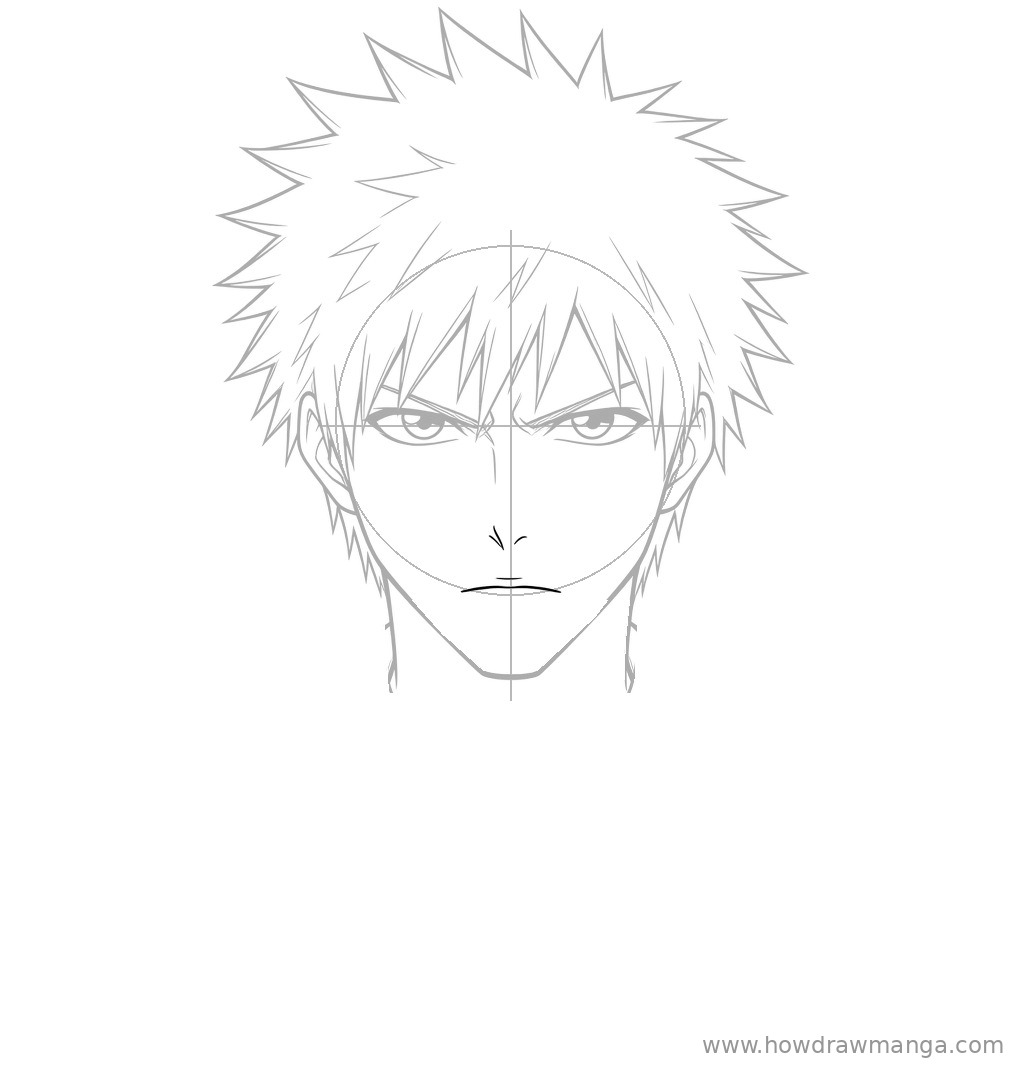
Step 5: Add the Small Nose and Flat Mouth
Draw the nose as two tiny strokes on the centre line, about halfway between the eye line and the chin. Below it, draw a flat mouth line about as wide as one eye, curving down very slightly at both ends. Add a short, thin line just above the mouth to shape the upper lip. Keep the mouth straight and serious, never smiling.
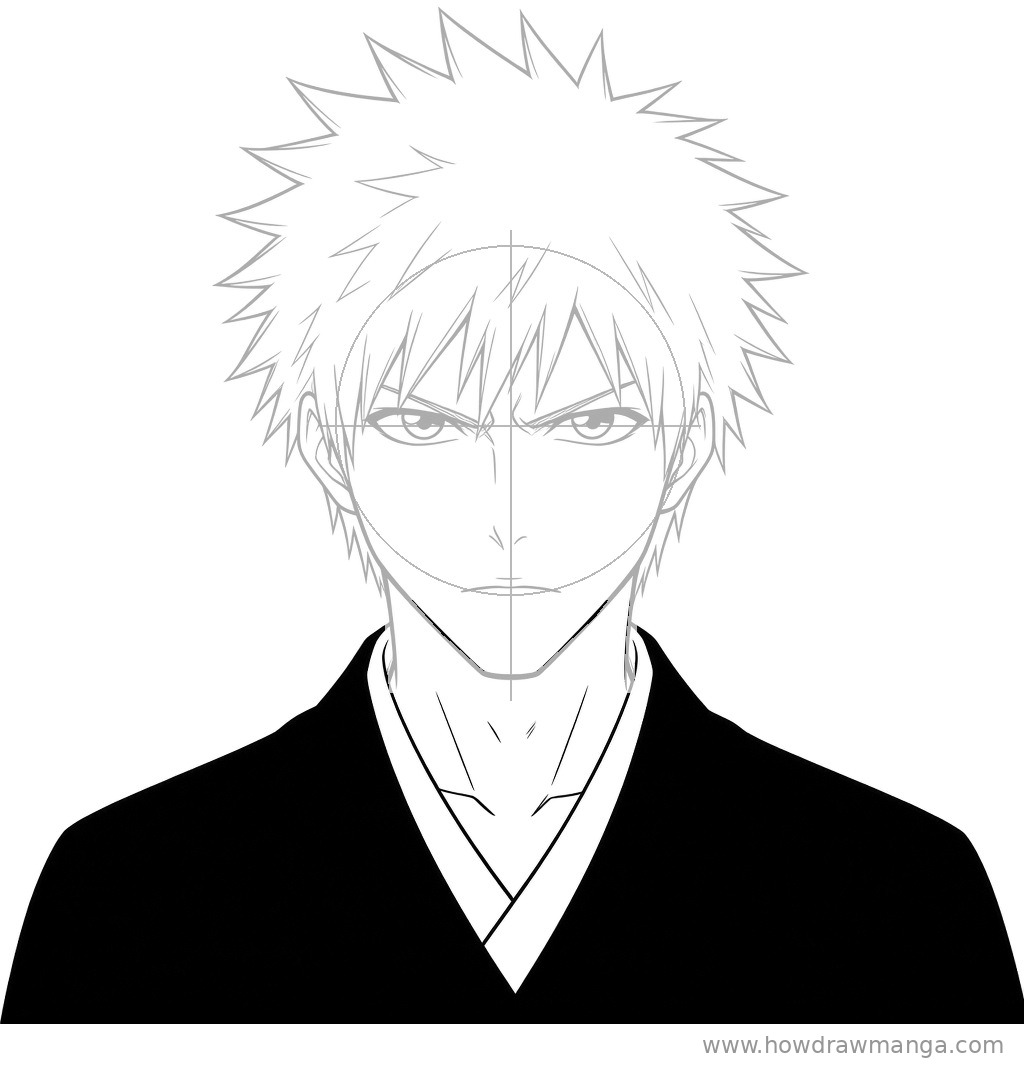
Step 6: Draw the Soul Reaper Robe
Below the neck, draw two white inner collar bands that start on either side of the neck and cross in a deep V in the middle of the chest. Outside them, draw the outer robe: its edges run parallel to the inner collar, and its shoulders slope out to both edges of the page. Fill the outer robe solid black and leave the inner collar white. Add a few thin lines inside the collar for the collarbones and neck.
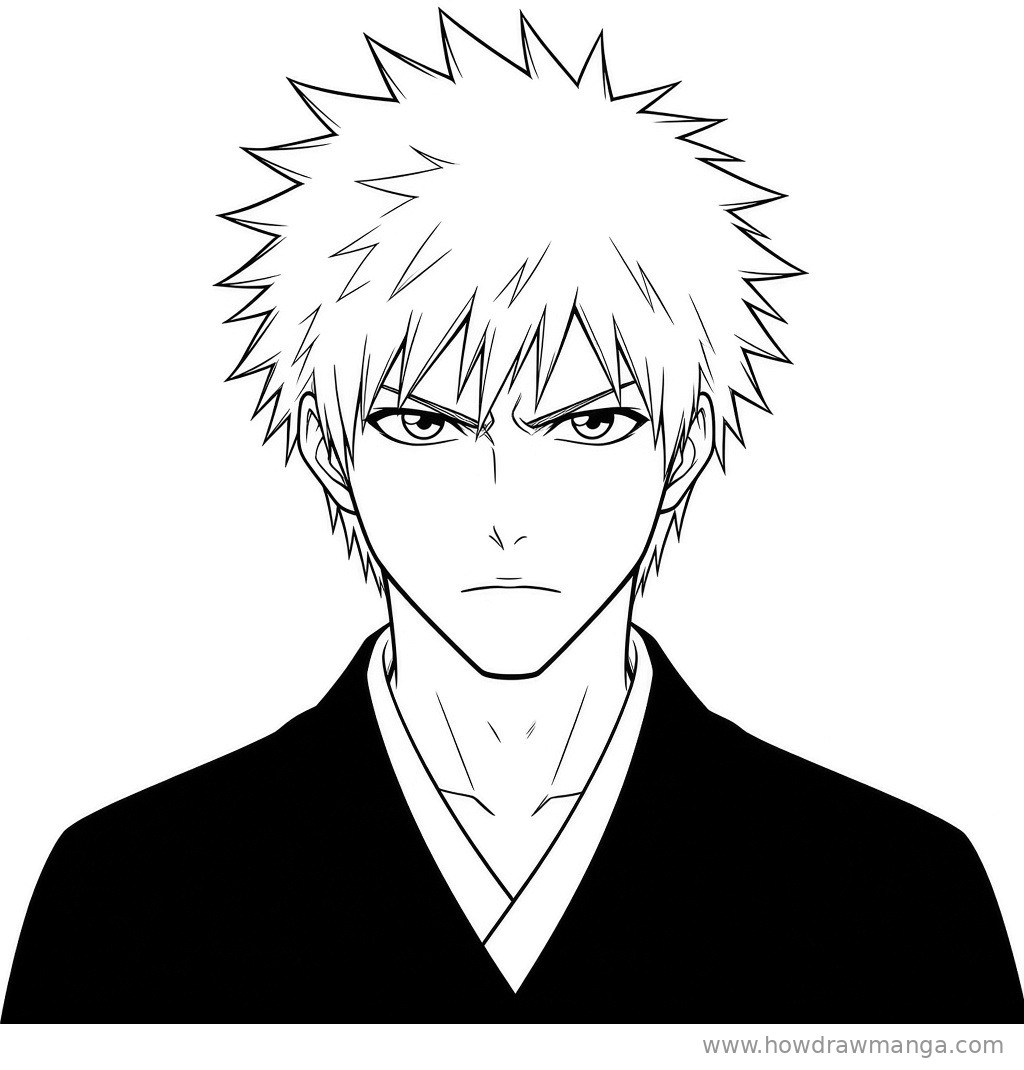
Step 7: Ink the Final Line Art
Trace the lines you want to keep with a fine liner or a soft, dark pencil. Use bold strokes for the outer hair spikes, the jaw and the robe edges, and thin strokes for inner hair strands, the brow creases and the collarbones. Erase the circle and guidelines once the ink is dry, and check that the robe fill is even. No new features are added in this step.
Key Pro Tips for Drawing Ichigo’s Face
- Make the scowl the focus. Kubo designed Ichigo with a trademark scowl and found it awkward to draw him smiling. Low, angled brows and crease lines between them keep him in character.
- Vary the spike lengths. Mix long and short spikes around the head. Spikes that are all the same size look like a crown rather than messy hair.
- Leave the hair white in line art. His hair is orange, so outlines with white inside read better than a black fill. Colour it orange later if you like.
- Keep the face long and narrow. Placing the chin well below the circle gives Ichigo his older, sharper look compared with rounder shonen faces.
- Use the black robe for contrast. A solid black robe against the white collar and light hair makes the whole drawing pop.
FAQ
Why does Ichigo always look angry?
When Tite Kubo designed Rukia, he reworked Ichigo so the two would contrast, giving him orange hair and a trademark scowl. The frown is part of his look rather than a sign that he is always angry, so keep it in every drawing.