
Learning how to draw Yuji Itadori face is a good way to practise a bold, energetic shonen look built from simple shapes. Yuji is the hero of Jujutsu Kaisen, and his face is easy to recognise once you know what to look for: short spiky hair on top, a two-block undercut with dark, short sides, large friendly eyes, and a small groove line under the outer corner of each eye. This guide splits his face into seven steps, and every step tells you which shape to draw, where it goes and how big it should be.
We are drawing Yuji as he looks early in the series, before the Shibuya Incident, so his face has no scars yet. Keep your pencil light for the first six steps and ink everything in the last one.
Materials Needed
- HB or 2B pencil for light construction lines
- Kneaded eraser for lifting guidelines without smudging
- Fine-liner pens, 0.3 mm for details and 0.5 mm for outer contours
- A brush pen or marker for filling the dark undercut and collar
- Smooth drawing paper, or a tablet if you work digitally
Step-by-Step Yuji Itadori Face Drawing Guide
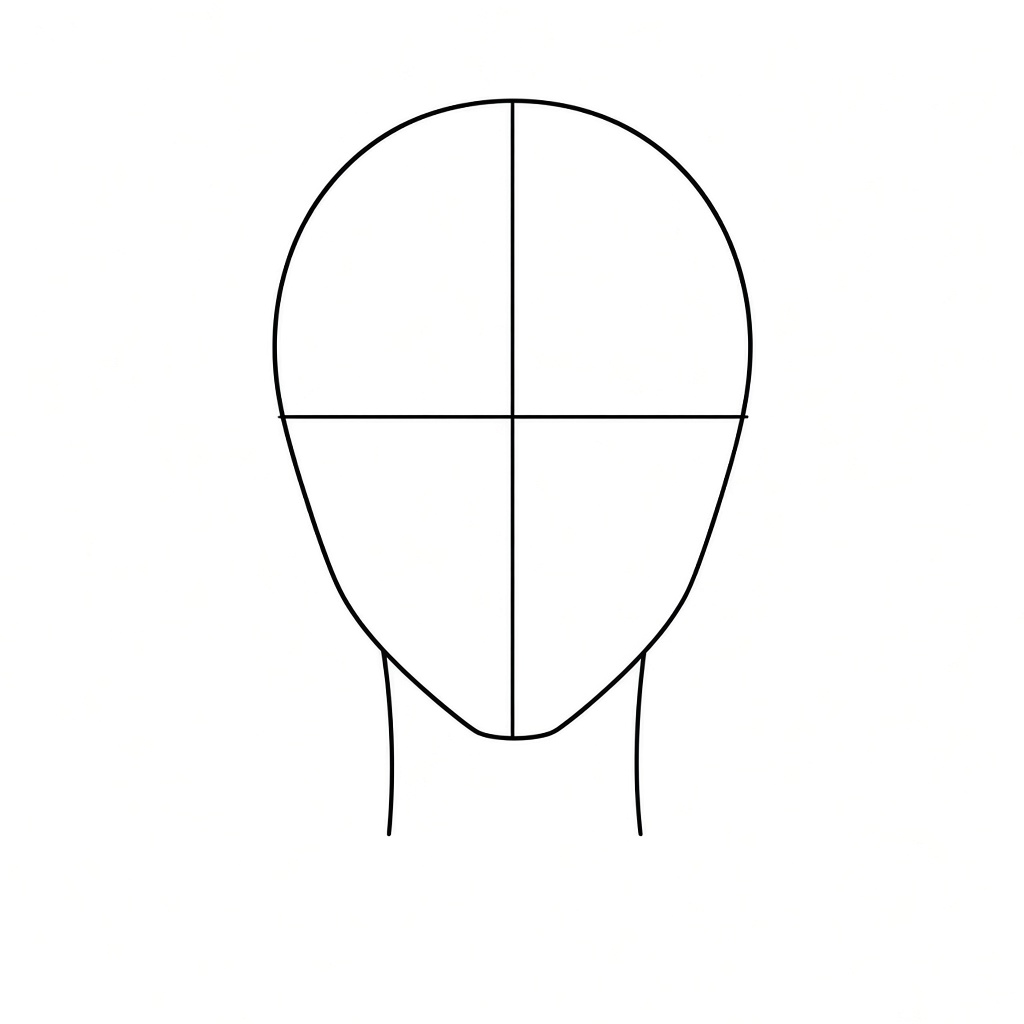
Step 1: Sketch the Head Shape and Guidelines
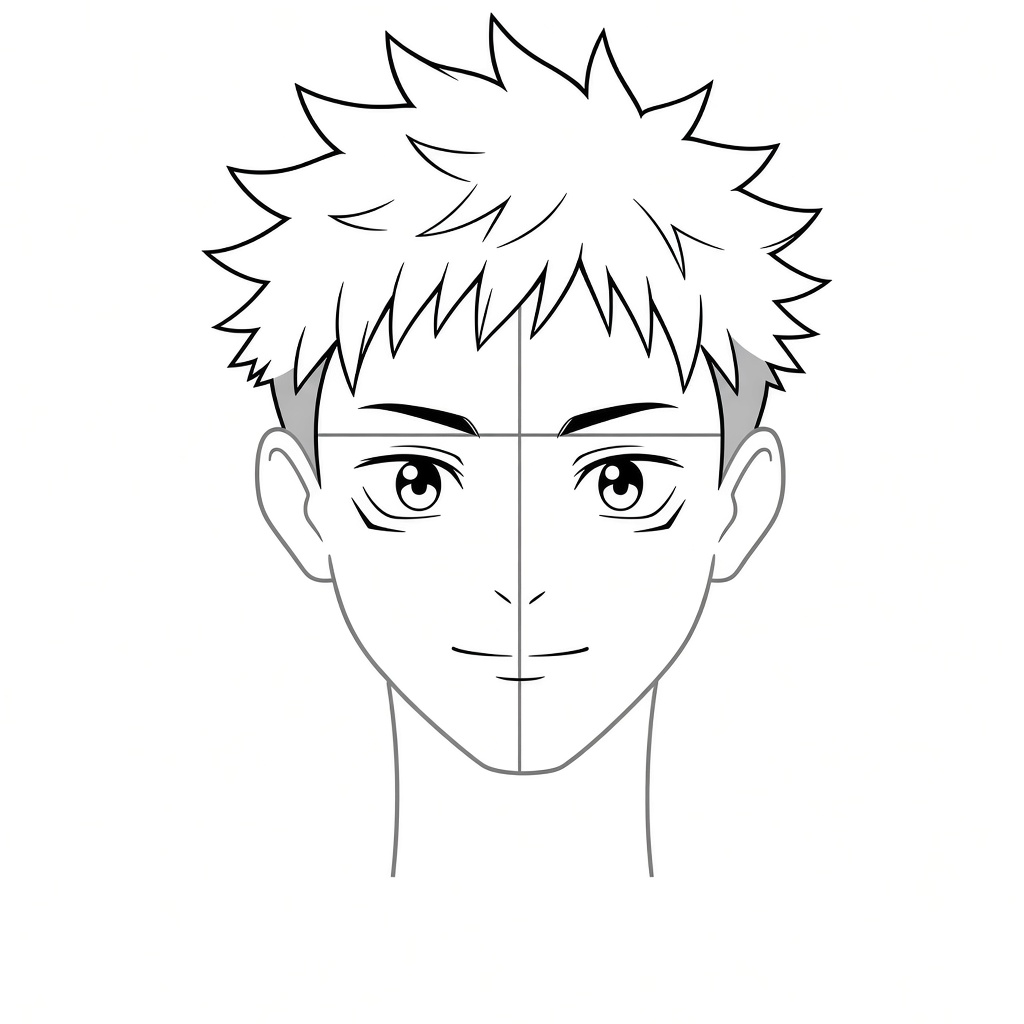
Draw a rounded egg shape that is wide at the top and narrows to a firm, slightly squared chin. Run a vertical centre line from the top of the head to the chin. Cross it with a horizontal eye guideline at the halfway point of the head. Then drop two straight neck lines from under the jaw, about half the width of the head apart, because Yuji has a solid, athletic neck.
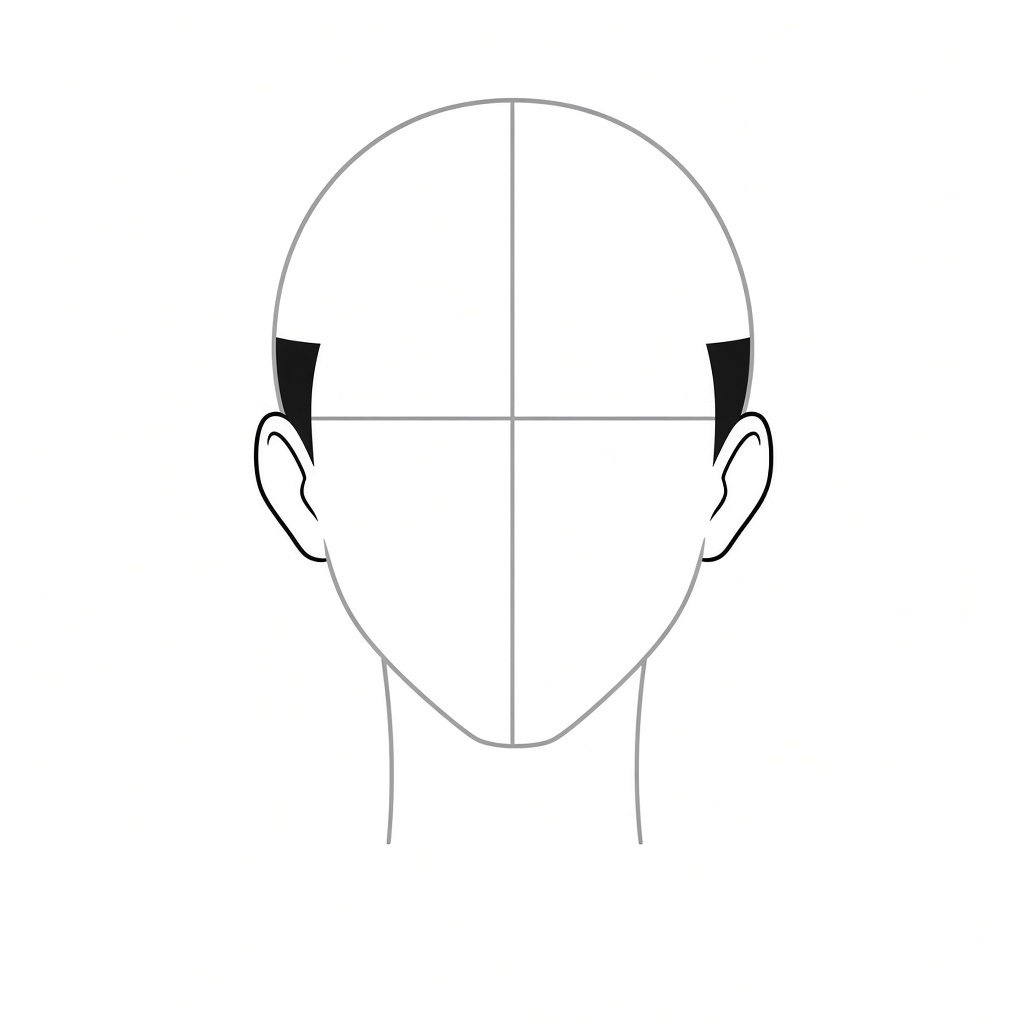
Step 2: Add the Ears and the Undercut Sides
Draw a C-shaped ear on each side of the head. The top of each ear sits level with the eye guideline, and the bottom reaches a little less than halfway down to the chin. Above each ear, draw a narrow wedge that starts at the temple and tapers down to the top of the ear, then fill it in solid. These dark wedges are the short, shaved sides of his two-block haircut.
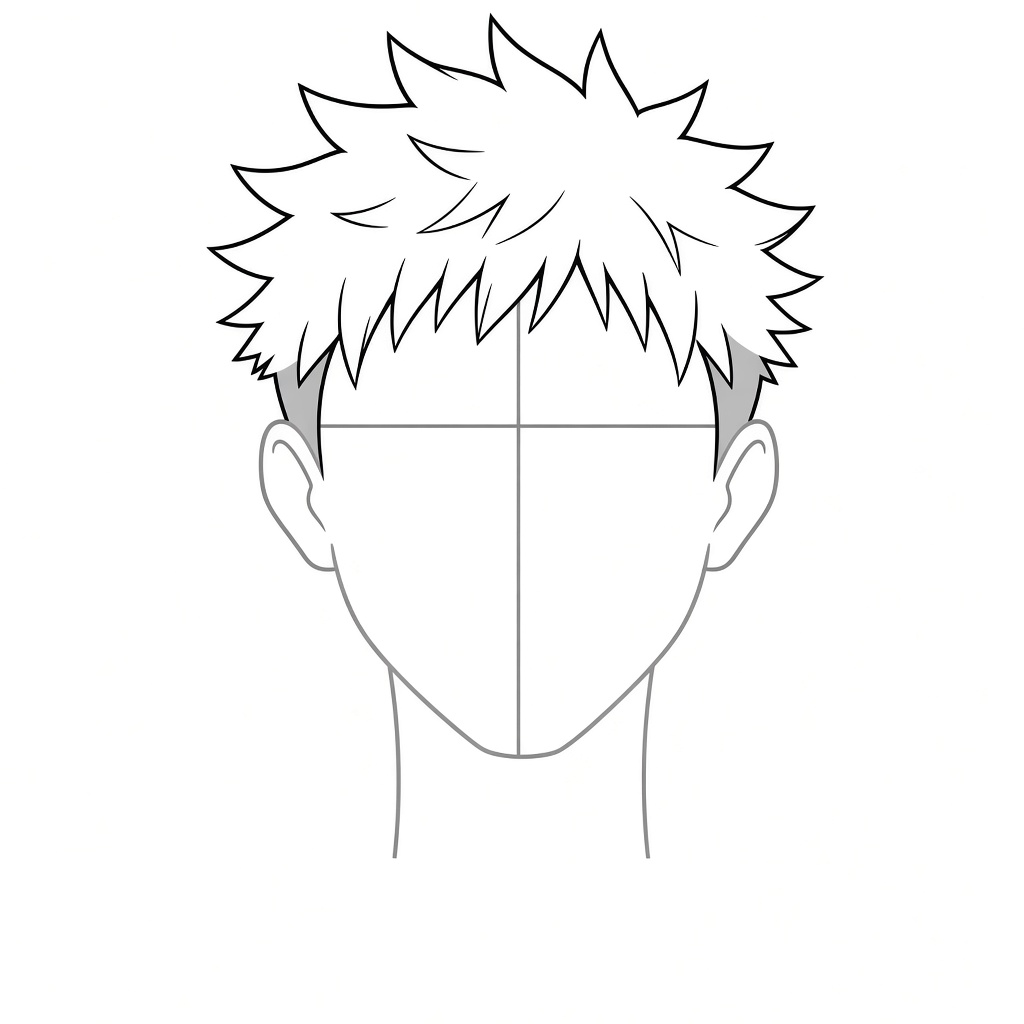
Step 3: Draw the Spiky Top Hair
Outline a large hair mass that sits on top of the head and sticks out a little past the head shape on each side, by about one seventh of the head width. Build its edge from eight or nine sharp, triangular spikes that point up and outward. Along the front, draw a row of short, pointed locks that hang over the forehead, with their tips stopping a little above the eye guideline. Add a few curved strand lines inside the mass so it reads as layered hair.
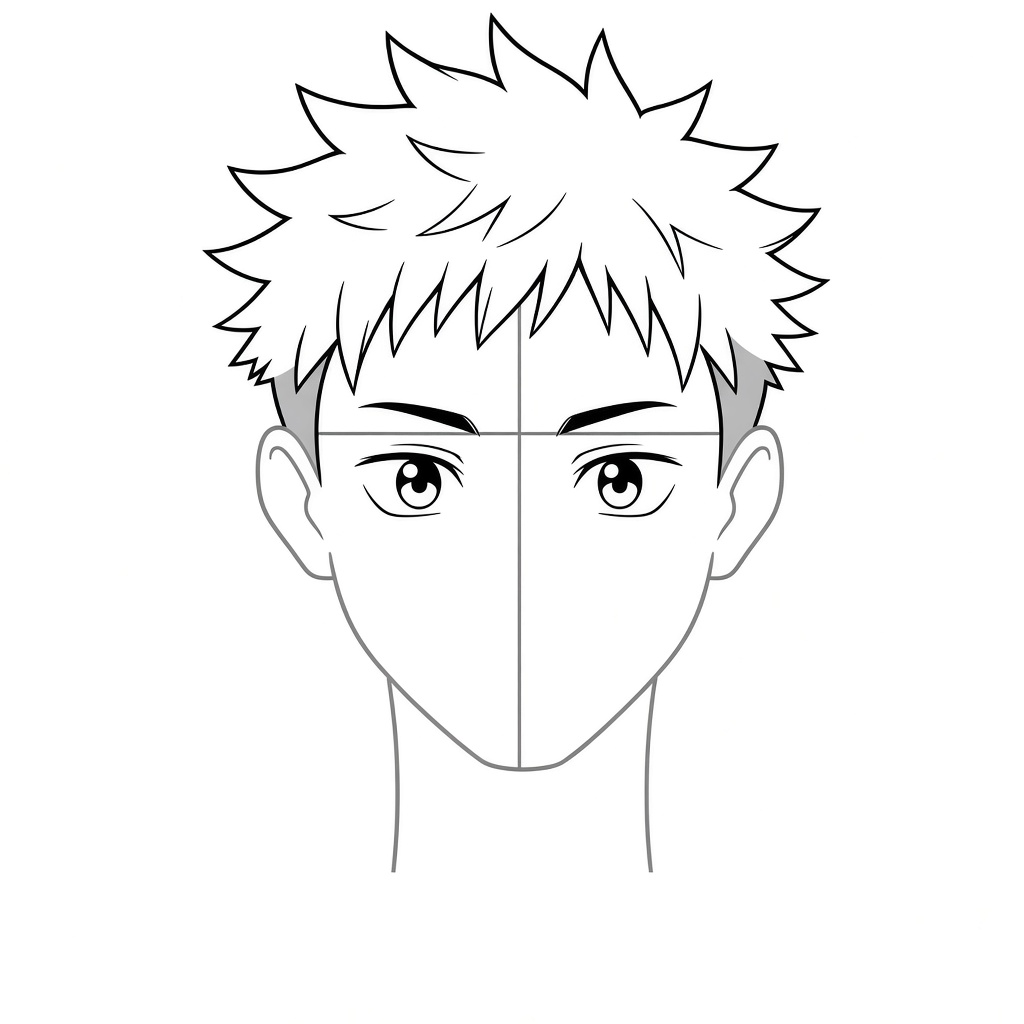
Step 4: Draw the Eyes and Eyebrows
Draw two thick, slightly angled eyebrows resting on the eye guideline, each about as wide as one eye. Just below them, place two large eyes about one eye-width apart. Give each eye a thick upper lash line, a thin lower lid line, a round iris that fills most of the opening, a small pupil and a tiny circle for the highlight. Large, open eyes keep Yuji looking friendly instead of fierce.
Step 5: Add the Under-Eye Lines, Nose and Mouth
Under the outer corner of each eye, draw a short curved groove line, about half as wide as the eye, with a fainter second curve just below it if you like. These small lines are a signature part of his design. On the centre line, roughly halfway between the eyes and the chin, draw a tiny angled nose mark. Halfway between the nose and the chin, add a short, nearly straight mouth line with a slight upward curve, plus a small dash below it for the lower lip.
Step 6: Draw the High Collar and Hood
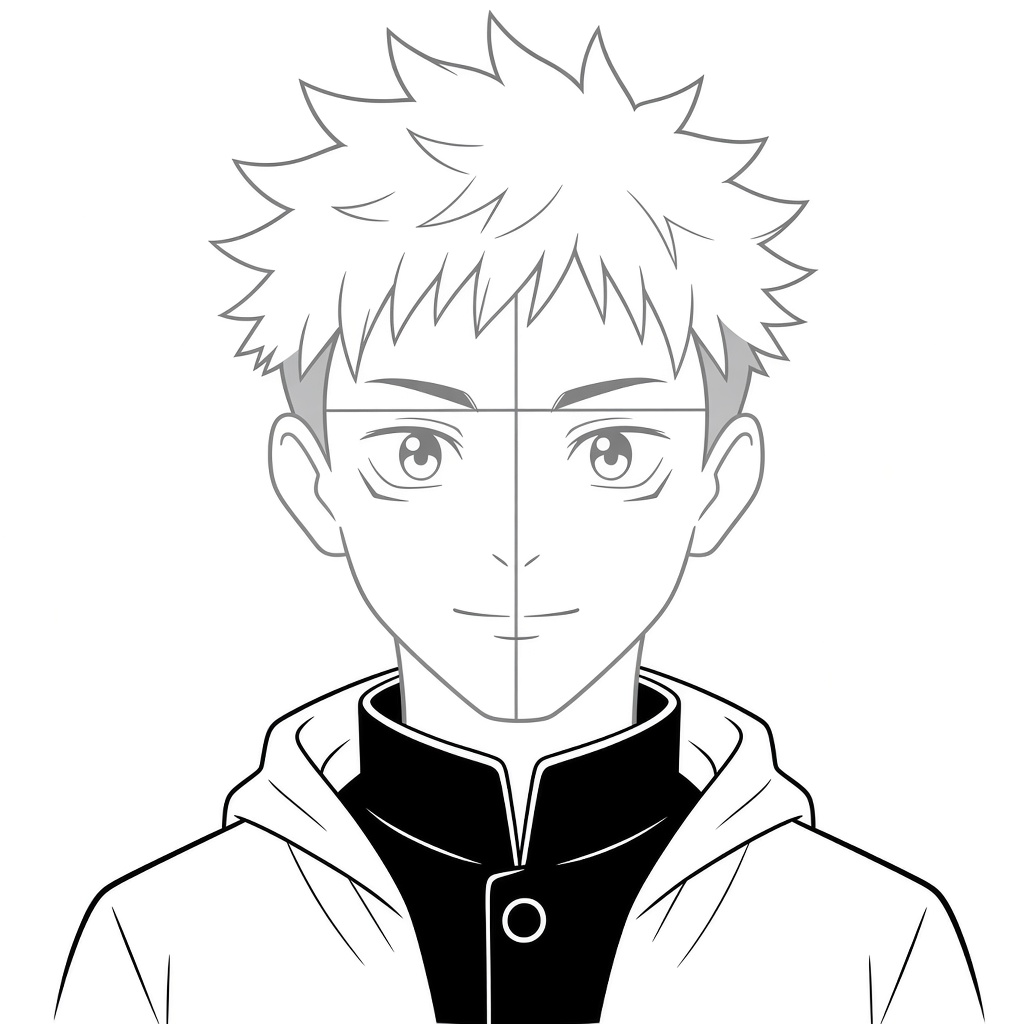
Wrap a tall stand-up collar around the base of the neck, rising almost to the jaw at the back, and fill it in solid black. Draw a vertical opening line down its front and one round button below it. Around the collar, draw the soft, folded outline of a hood lying over both shoulders. Finish with sloping shoulder lines that run to the edges of the page and a few short fold lines.
Step 7: Ink the Lines and Erase the Guidelines
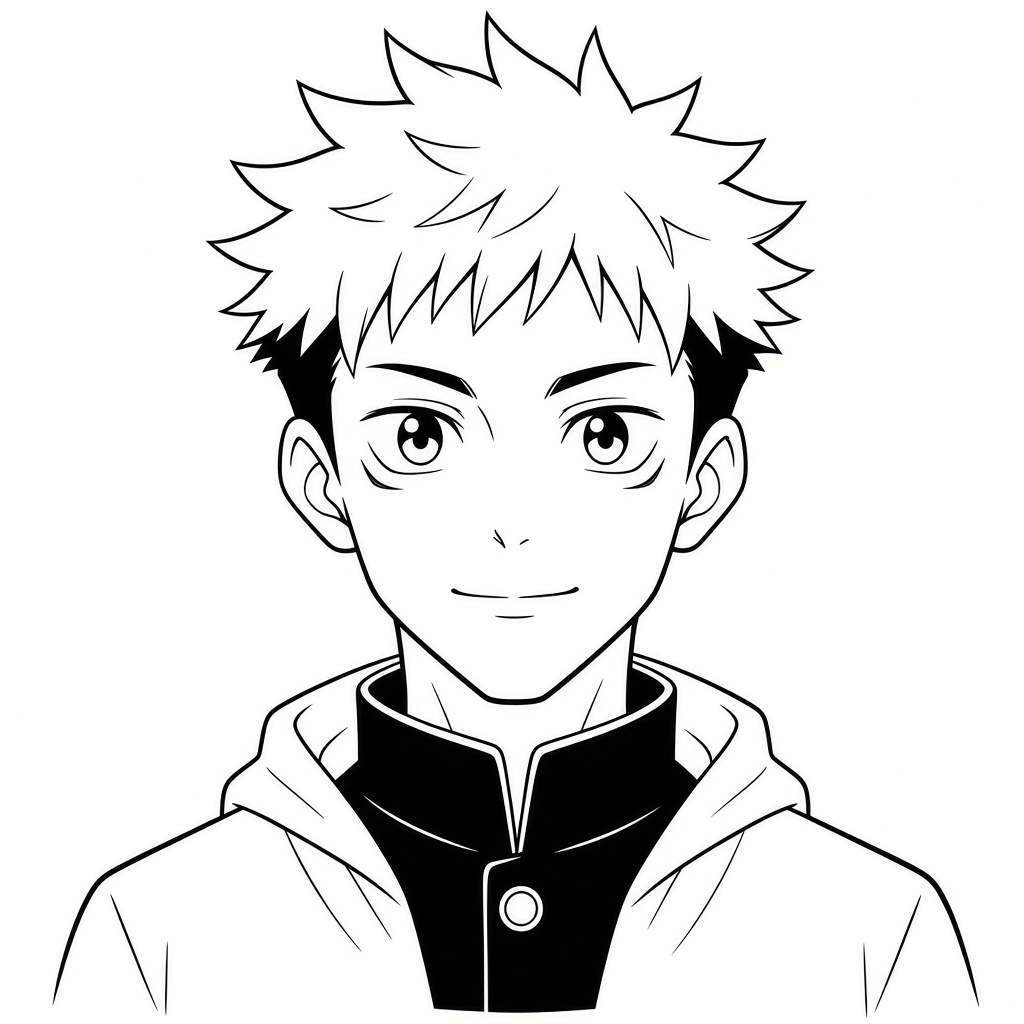
Trace every line you want to keep with a fine-liner. Use the 0.5 mm pen for the outer edges of the hair, face, hood and shoulders, and the 0.3 mm pen for strands, eyes and the under-eye lines. Fill the undercut wedges and the collar in solid black. When the ink is dry, erase the centre line, the eye guideline and the parts of the head shape hidden by the hair. You now have clean line art of Yuji Itadori, ready for shading or colour.
Key Pro Tips
- Keep the sides dark and short. The undercut is what separates Yuji from other spiky-haired heroes. If you skip the dark wedges above the ears, the hairstyle loses its two-block look.
- Make the spikes uneven. Vary the length and angle of each spike a little. Identical spikes look like a crown instead of messy hair.
- Draw the under-eye lines small. Keep the curves under each outer eye corner short and thin. Long, heavy lines make him look tired rather than cheerful.
- Leave out the scars for this version. Yuji only gains the scar between his eyes and the one at the corner of his mouth during the Shibuya Incident, so early-series art keeps his face clear.
- Colour tip: his anime hair is pink on top with dark sides, his eyes are light brown, and his school uniform pairs a black high-collar top with a red hood.
More Jujutsu Kaisen Tutorials
Once you are comfortable with Yuji, try the Ryomen Sukuna face tutorial to see how his look changes, or practise his teacher with how to draw Gojo face with his eyes.