
Jinshi from The Apothecary Diaries is known for a delicate, almost androgynous face, long silky hair and a half-up style held with a cloth or a hairpin. In this guide you will learn how to draw jinshi face in 7 clear steps, from a simple circle to clean line art of his head, long hair and court robe.
In each picture the new lines are black and the lines from earlier steps fade to grey, so you can see exactly what changed. Keep the circle and guides light so you can erase them before inking. The focus here is a calm, smiling portrait in his usual court-official look.
Materials Needed
- Paper or a drawing tablet
- A light pencil (HB or 2H) for the circle and guidelines
- A darker pencil (2B) or a fine liner pen for the final lines
- An eraser
- Optional: colored pencils or markers for black hair and a dark blue court robe
Step-by-Step Jinshi Face Drawing Guide
Step 1: Sketch the Cranial Circle and Guidelines
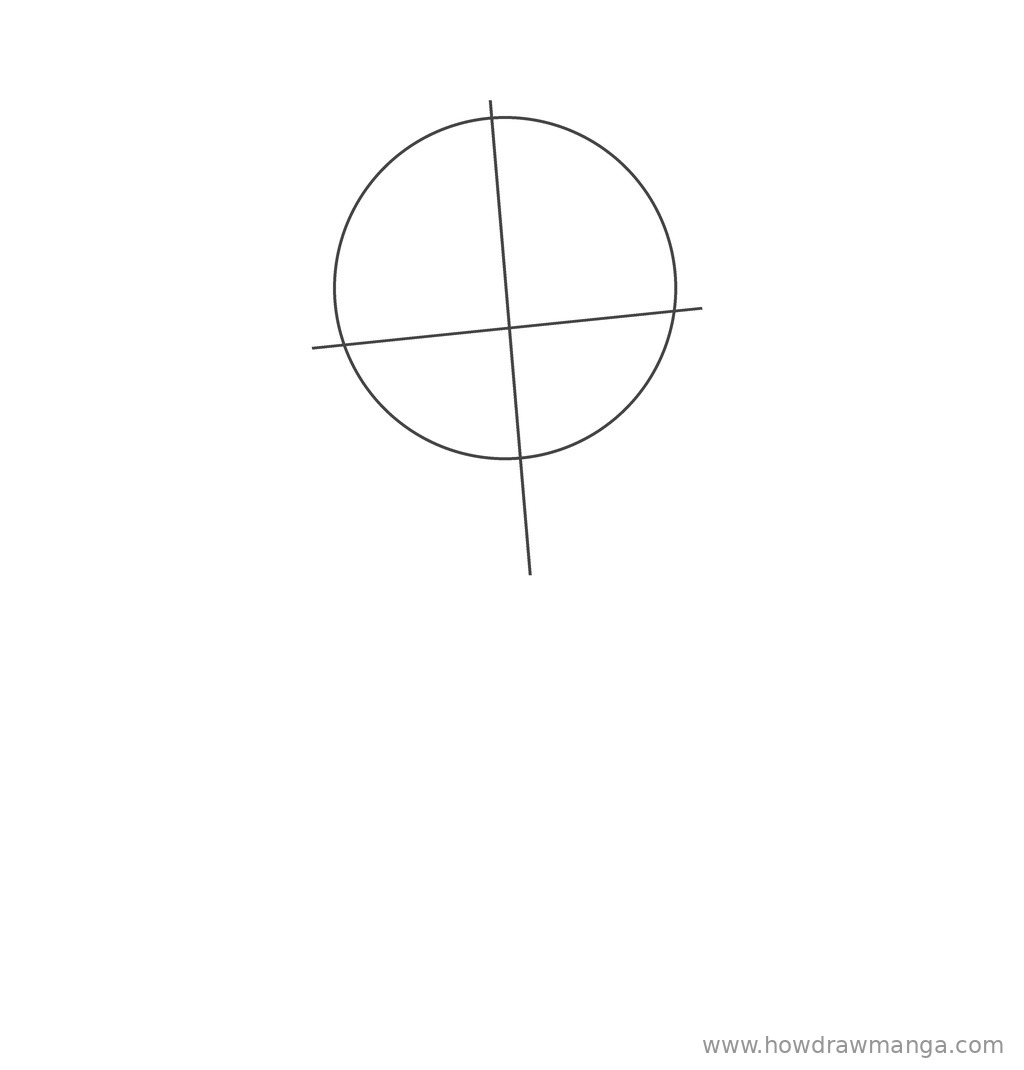
Draw a circle in the upper-middle of the page for the cranium. Leave room above it for a topknot and plenty of space below it for the jaw, neck and shoulders. Add a vertical centre line through the circle and let it run below the circle by about half the circle’s height. Then draw a horizontal eye line across the circle a little below its midpoint, extending slightly past both sides. Keep all three marks light so they erase easily.
Step 2: Shape the Jaw, Chin and Neck
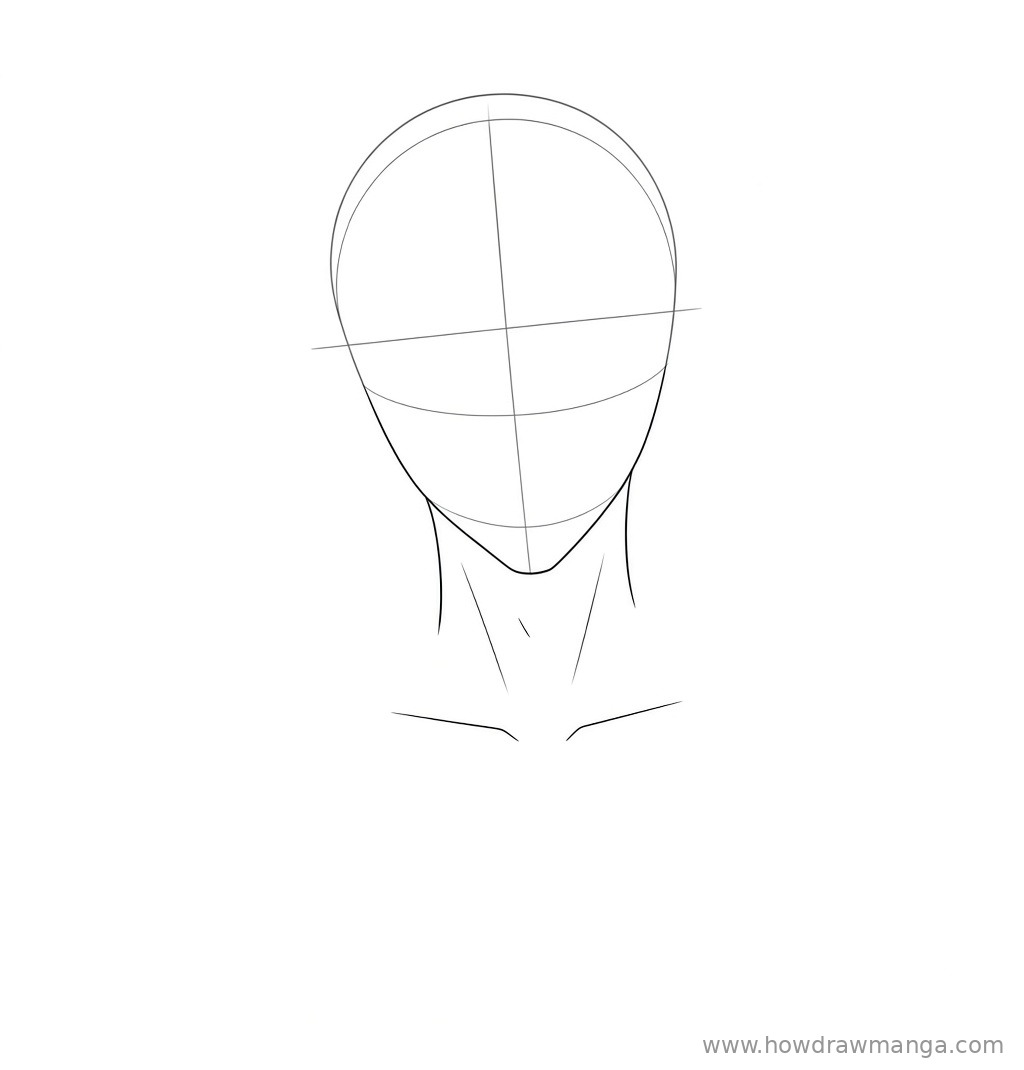
From each side of the circle, just below the eye line, draw a smooth line that slopes down and inward. Both lines meet in a soft, slightly pointed chin on the centre line, about one-third of the circle’s width below the bottom of the circle. Jinshi’s face is long and slender, so keep the jaw narrow. From the jaw corners, drop two neck lines that are a little more than half as far apart as the head is wide. Finish with two short slanted strokes at the base of the neck for the collarbones.
Step 3: Sketch the Almond Eyes, Willowy Brows, Nose and Smile
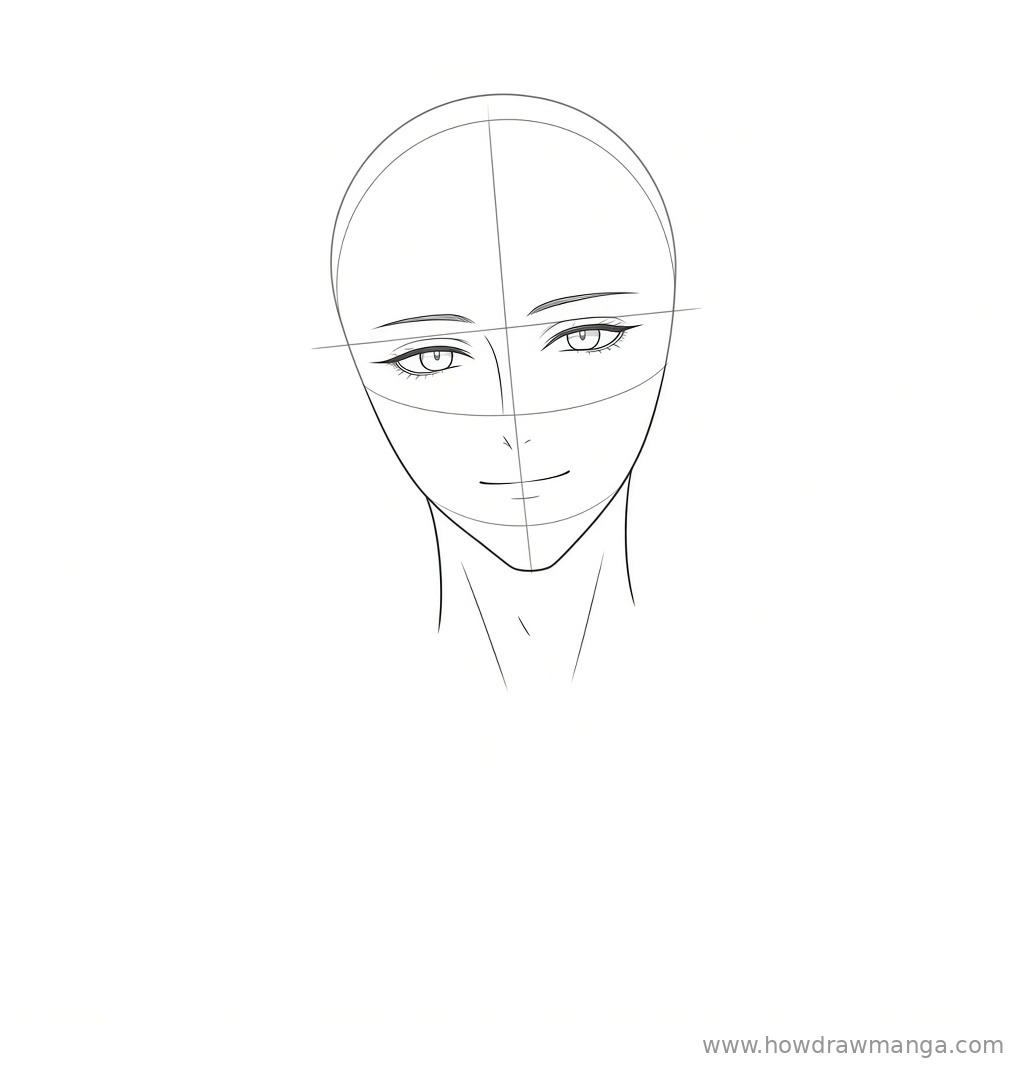
Draw two almond-shaped eyes just under the eye line, with about one eye-width of space between them. Make each upper lid a curved line that ends in a small flick, and add a round iris with a tiny highlight. Above each eye, draw a thin, gently arched brow that rests right on the eye line. On the centre line, about halfway between the eye line and the chin, add a tiny nose mark. Below it, draw a small closed-lip smile roughly one eye-width wide.
Step 4: Add the Side Bangs, Topknot and Hairpin
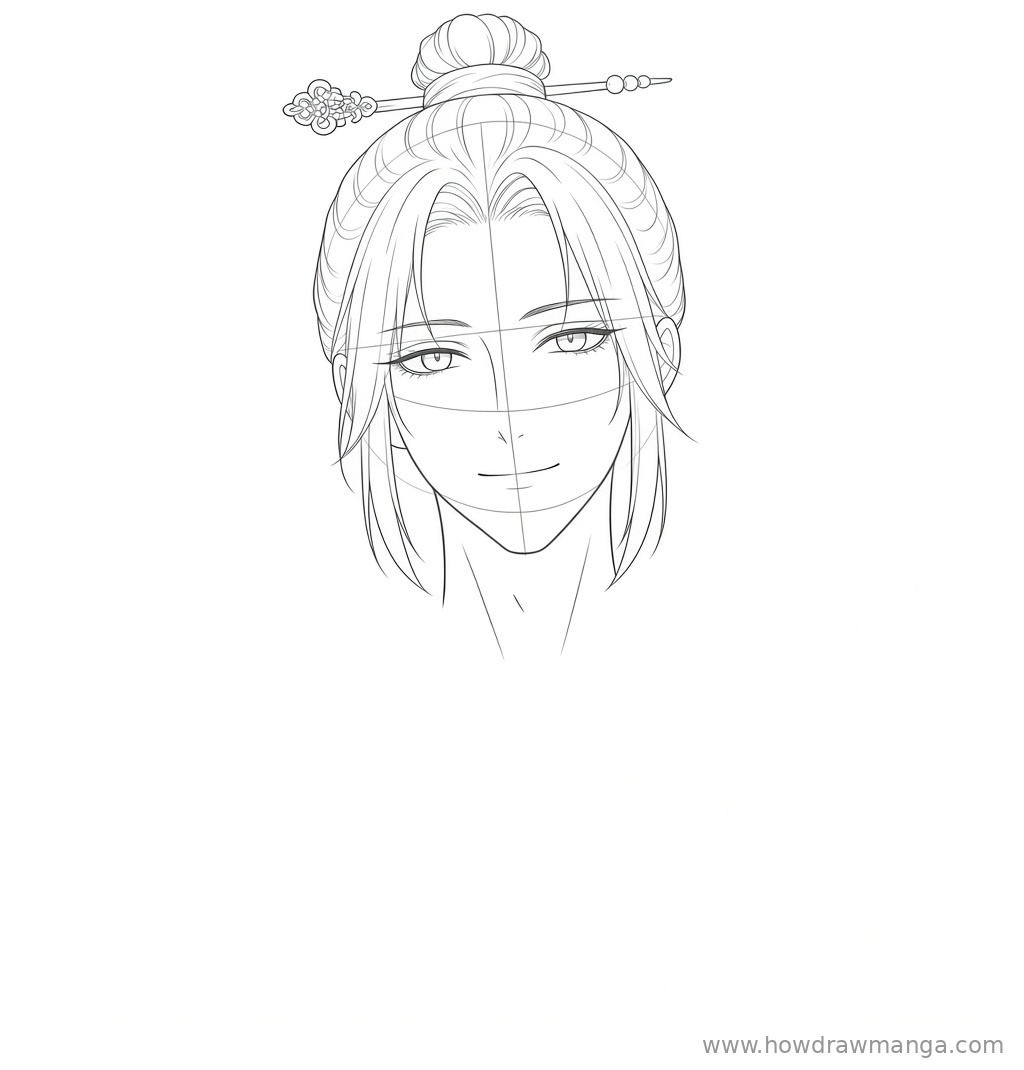
Mark a centre part at the top of the forehead and draw the hairline curving down from it on both sides. Add one long bang on each side of the face that hangs in front of the ear and ends near the chin. Over the skull, draw the smooth hair mass with a few curved strand lines, and sketch a small ear on each side, half hidden by hair. On top of the head, draw a small round topknot about one-third of the head’s width. Slide a thin hairpin horizontally through the base of the knot, with an ornate ornament on one end and a short row of round beads near the pointed tip on the other.
Step 5: Draw the Long Straight Hair
Behind the head, draw long straight strands that fall from the sides of the skull outside the bangs. Let them hang past the jaw, over the shoulder line, and taper to soft points near the bottom of the page. Use three or four long lines per side instead of one thick edge, and keep them nearly parallel so the hair looks silky. The strands should frame the face and neck without touching the chin.
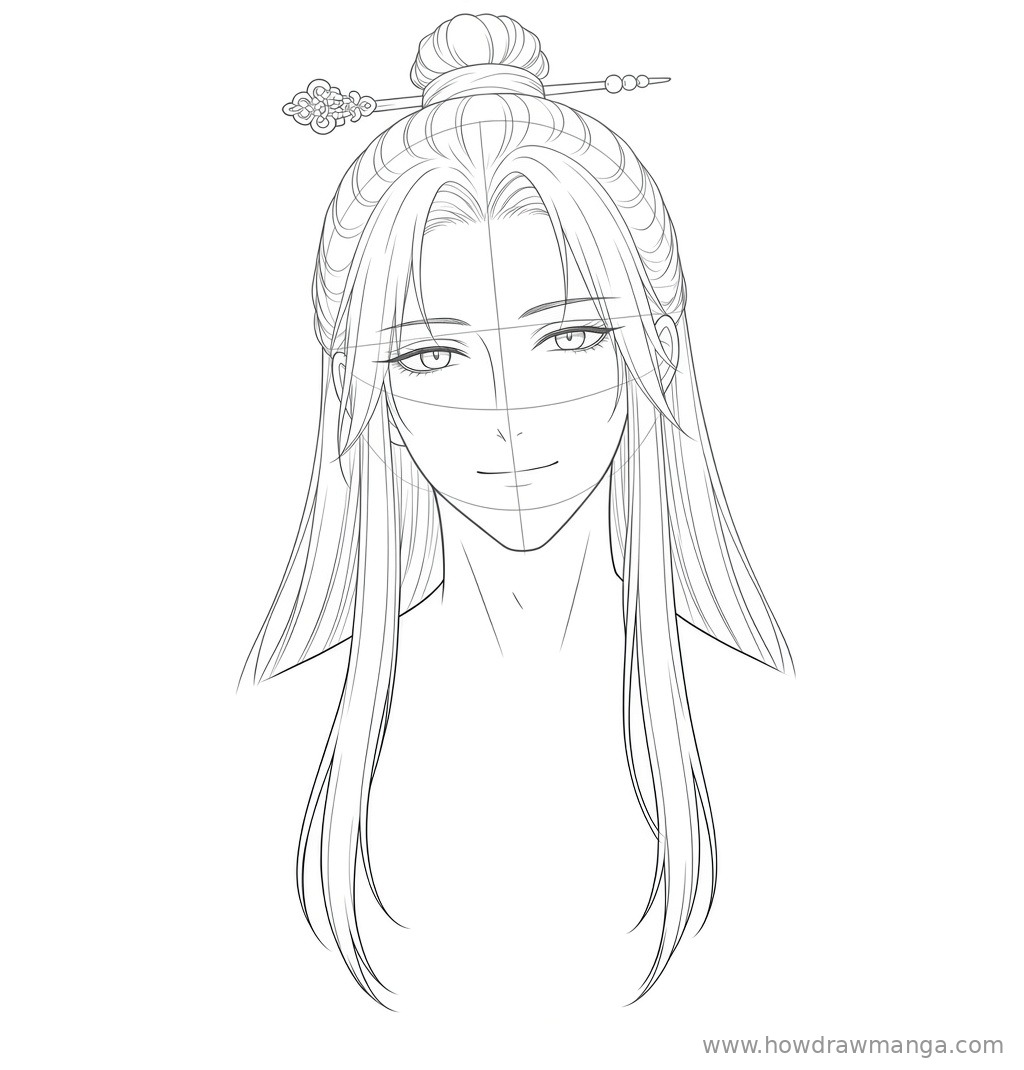
Step 6: Add the Crossed Collar Court Robe and Shoulders
Below the neck, draw two collar bands that cross over each other in a deep V, with each band drawn as a pair of parallel lines. From the neck, let the shoulder lines slope outward and downward, ending in wide, loose sleeves at the edges of the page. Add two or three long fold lines on each sleeve. Let the long hair fall in front of the robe on both sides, so the strands overlap the fabric instead of disappearing behind it.
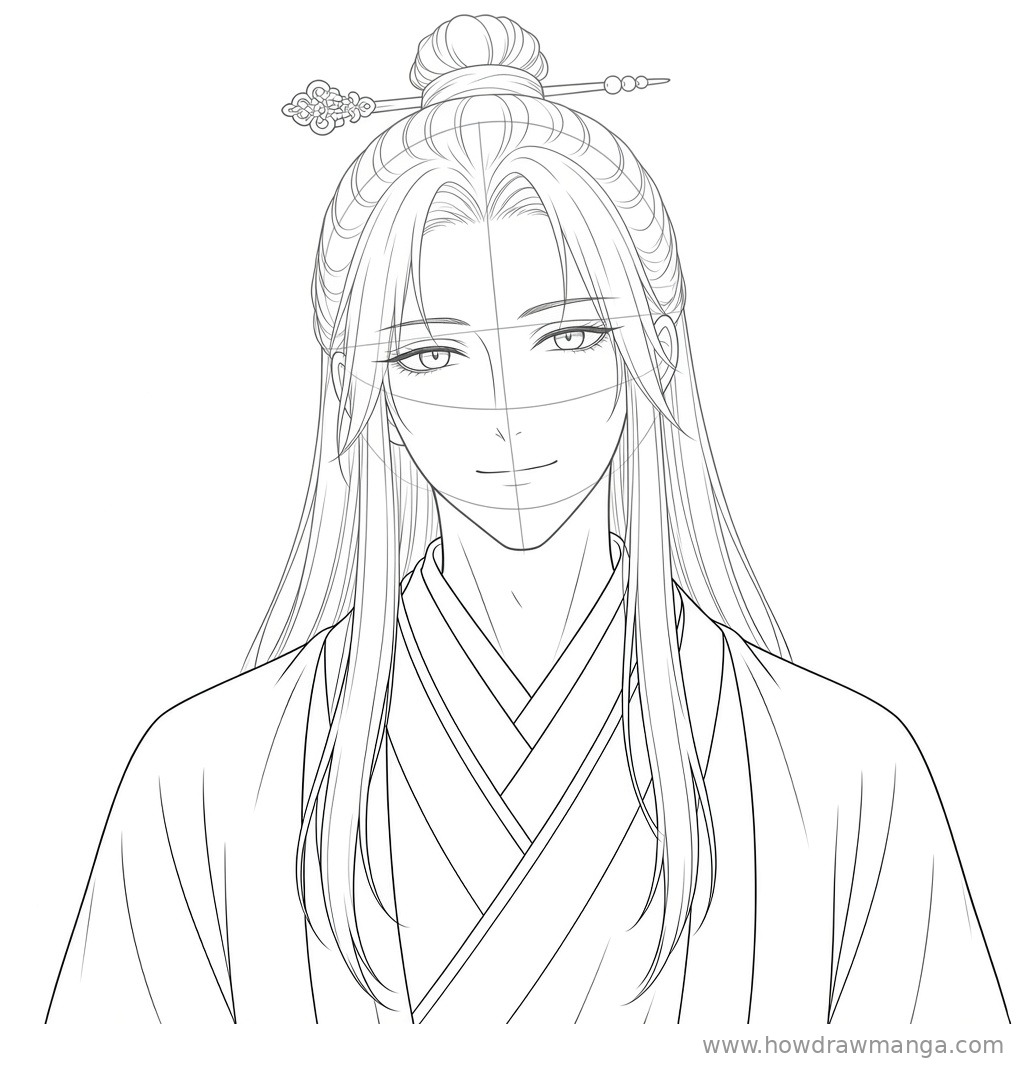
Step 7: Ink the Final Line Art
Trace your best lines with a fine liner or a darker pencil. Make the head outline, the bun, the outer robe edges and the outer edge of the long hair the boldest lines. Keep the strand lines, the eyelashes and the fold lines thinner. Erase the circle, the centre line and the eye line once the ink is dry. This step only cleans up the drawing, so do not add new shapes.
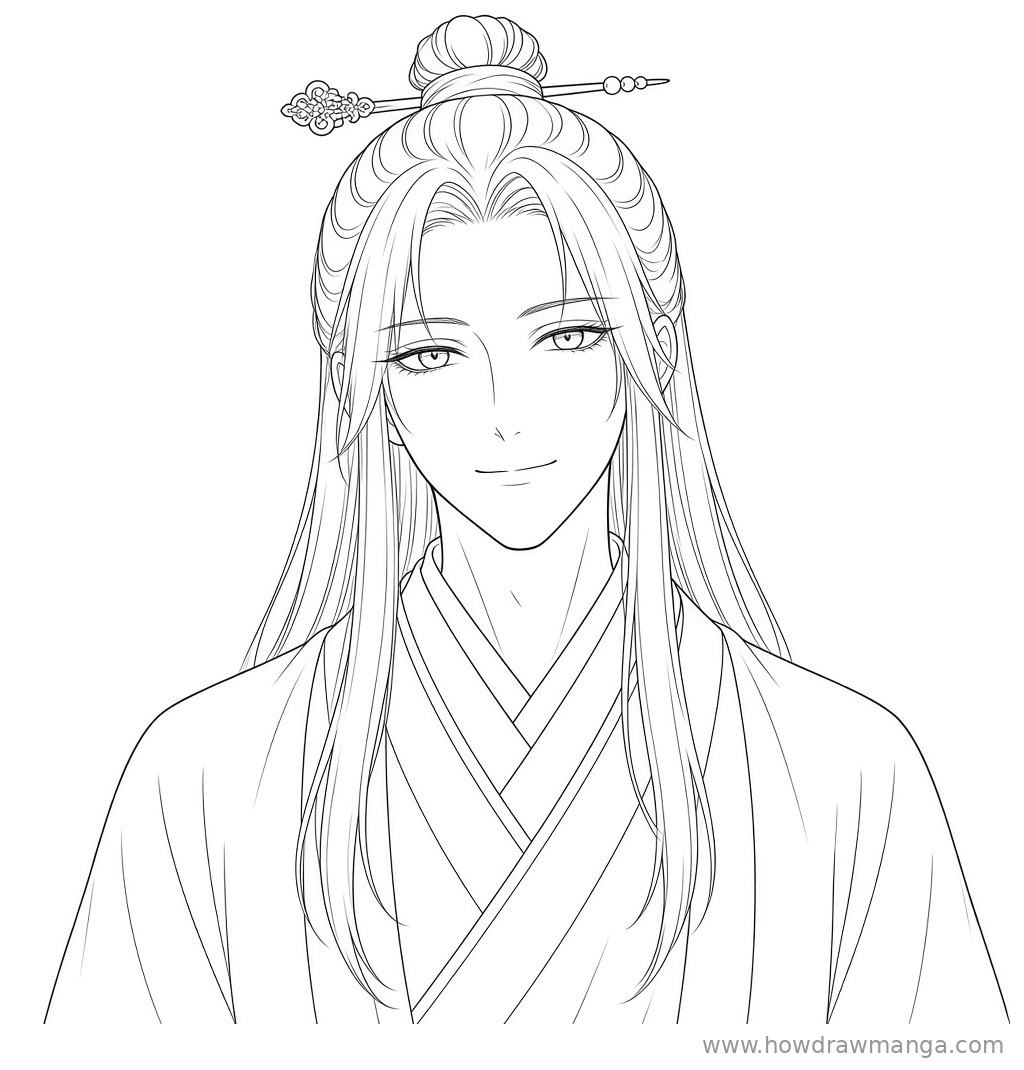
Key Pro Tips for Drawing Jinshi’s Face
- Keep the face long and slender. Sources describe slender features and a feminine, elegant look, so a round, wide jaw makes him look like a different character.
- Make the brows thin and arched. Thick, flat brows read as a harsher, more rugged face. Light, willowy curves keep the soft expression.
- Shape the eyes as almonds. Aim for calm, slightly narrowed eyes with a flicked upper lid rather than big round ones.
- Do not skip the hairpin or the half-up knot. His half-back hair, tied with cloth or a hairpin, is what separates him from other long-haired characters. A simple ornament with a few round beads is enough.
- Draw hair with a handful of long strands. Counting out three or four lines per side gives the silky look without filling the page with fine hairs.
FAQ
What color is Jinshi’s hair?
The series wiki lists black hair for the web novel and anime design, and dark purple for the light novel. This line-art lesson works for either, so you can pick the color when you shade.
Why is his hair tied half up?
Fan-wiki notes say he usually wears it half-back with a cloth or a hairpin, unlike most other court officials. That detail is why this lesson includes the topknot and pin.
Draw More Anime Faces
- How to Draw Maomao Face (his co-lead in The Apothecary Diaries)
- How to Draw Kafka Hibino Kaiju Face
- How to Draw Boruto Uzumaki Face