
Learn how to draw Hikaru Makiba from the original 1975 mecha anime classic UFO Robot Grendizer (famously known as Goldrake in Europe and the West)!
While modern anime styles have evolved over the decades, classic 1970s Go Nagai characters feature timeless design elements: sharp eyes, bold lash lines, structured facial proportions, and iconic retro hair volume. This beginner-friendly step-by-step tutorial breaks down drawing Hikaru’s face from basic guidelines to clean final line art.
Materials Recommended
- Traditional: Graphic pencil (HB and 2B), eraser, fine-liner pen, smooth drawing paper.
- Digital: Canvas size 2000x2000px, brush with medium pressure sensitivity (e.g., Clip Studio Paint G-Pen or Procreate Studio Brush).
Step-by-Step Tutorial: How to Draw Hikaru Makiba’s Face
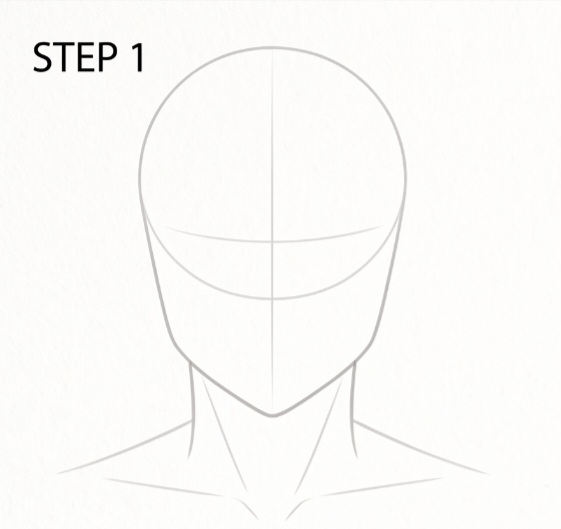
Step 1: Head Guidelines & Construction Base
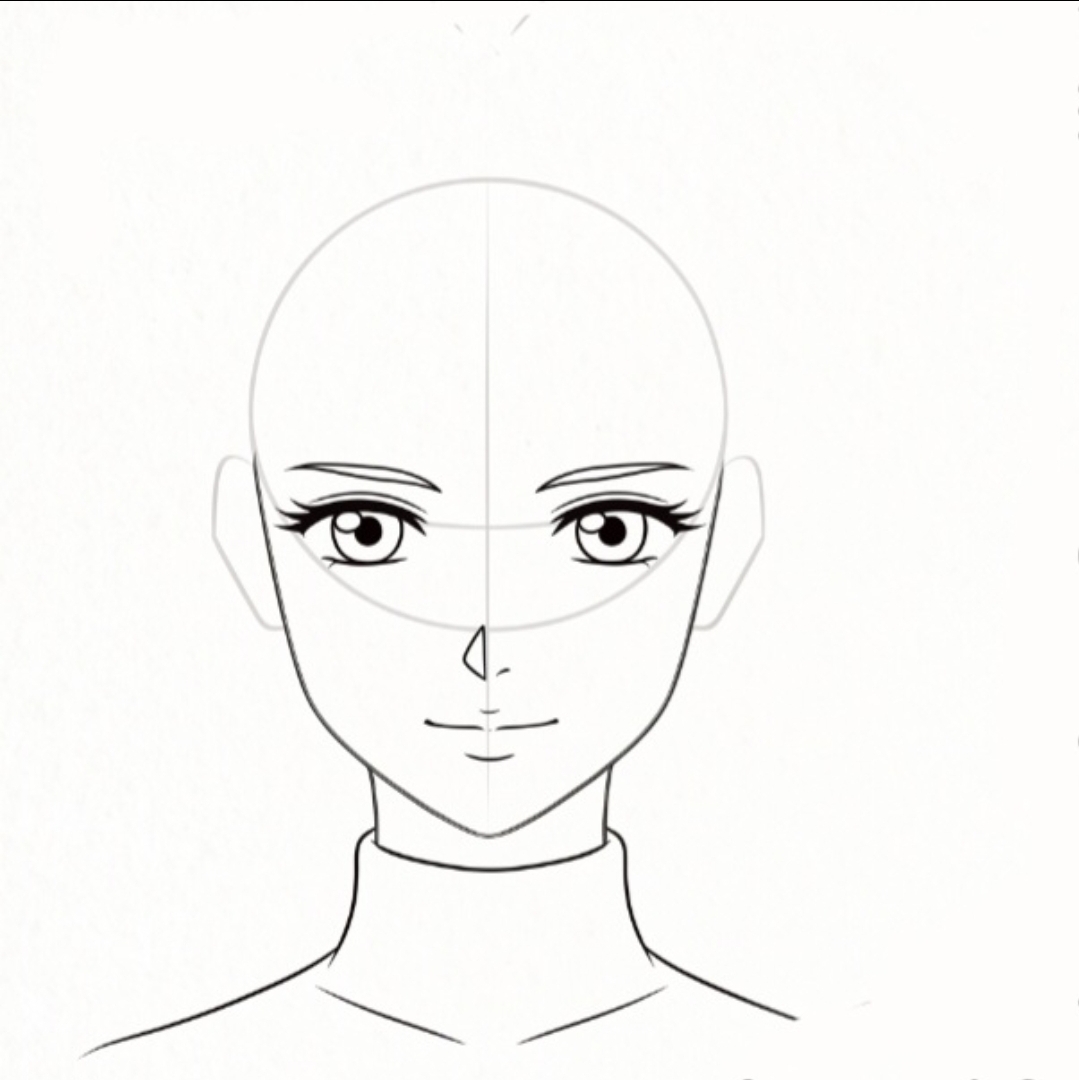
Start by sketching a basic circle for the top half of the head, divided by a vertical center line to keep features balanced. Extend the lower jaw down to a sharp, tapered chin, and draft a subtle horizontal curved line across the lower third of the circle to mark eye level. Draw two vertical lines extending downward for the neck and collar lines.
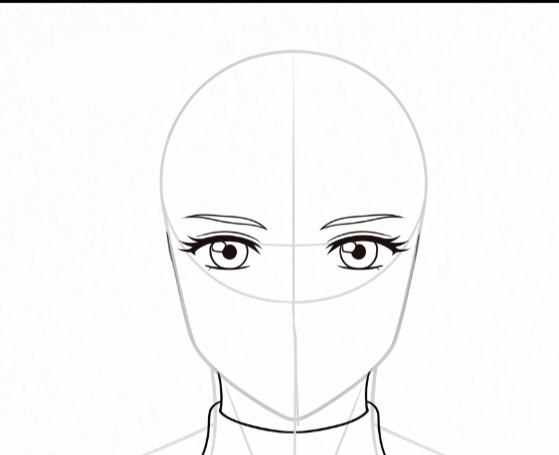
Step 2: Expressive Retro Anime Eyes & Eyelashes
Using the horizontal guideline, draw Hikaru’s large, classic 70s-style eyes. Focus on thick, dark upper lash lines tapering outward into stylized lashes. Draw circular irises inside with distinct circular catchlights (pupil highlights), and position long, gently arched eyebrows just above the eyes. Add the top rim of her high-collared shirt below.
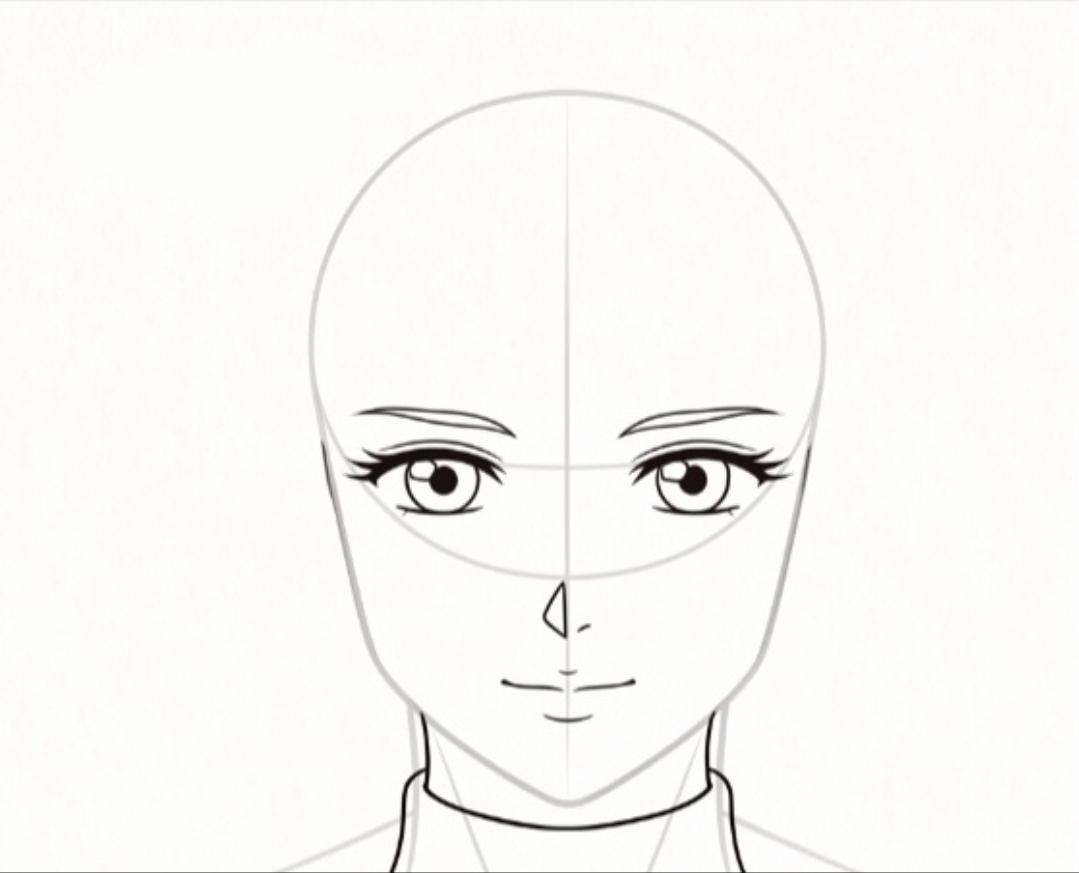
Step 3: Nose and Mouth Placement
Along the vertical center line, draw a sharp, small triangular shadow for the nose tip, with a tiny stroke for the nostril. Below the nose, sketch a clean, horizontal line for her subtle smile, adding a tiny chin accent stroke directly beneath it to define facial depth.
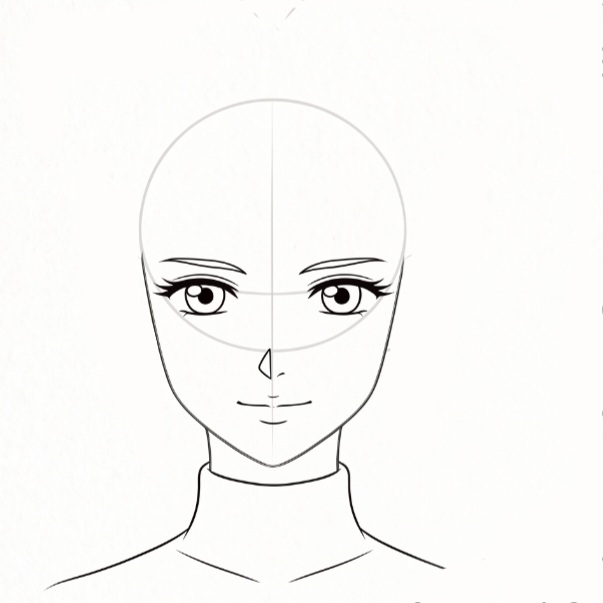
Step 4: Refining Neck, Collar, and Jawline
Darken and smooth out the jawline outline from the ears down to the chin. Refine the neck contours and finalize the high turtle-neck collar shape so it fits naturally around her neck base.
Step 5: Ear Guidelines
Draw simple ears on both sides of the head, aligned vertically between the eye line and the tip of the nose. These serve as anchor points for layering her retro hairstyle in the next step.
Step 6: Drawing the Voluminous 70s Hairstyle
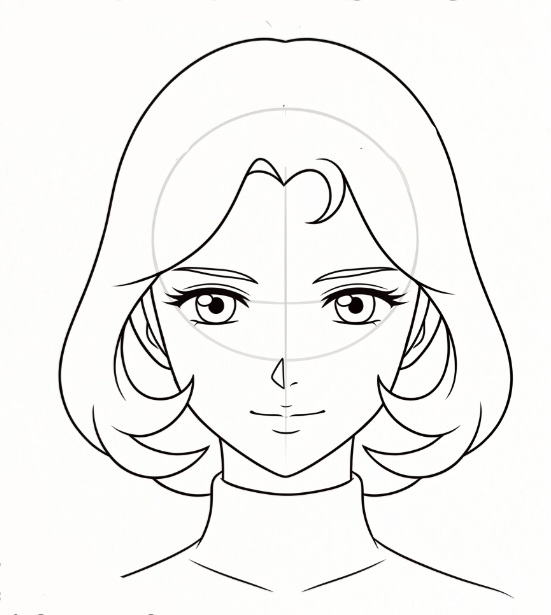
Hikaru features a classic 1970s feathered bob haircut. Draw her center bangs parting cleanly down the middle with a small, stylized curl flicking inward on the right side. Frame her face with sweeping side bangs that curve outward above the shoulders, and add flared, winged ends along the lower edges of her hair mass.
Step 7: Final Line Art, Hair Highlights & Clean-up
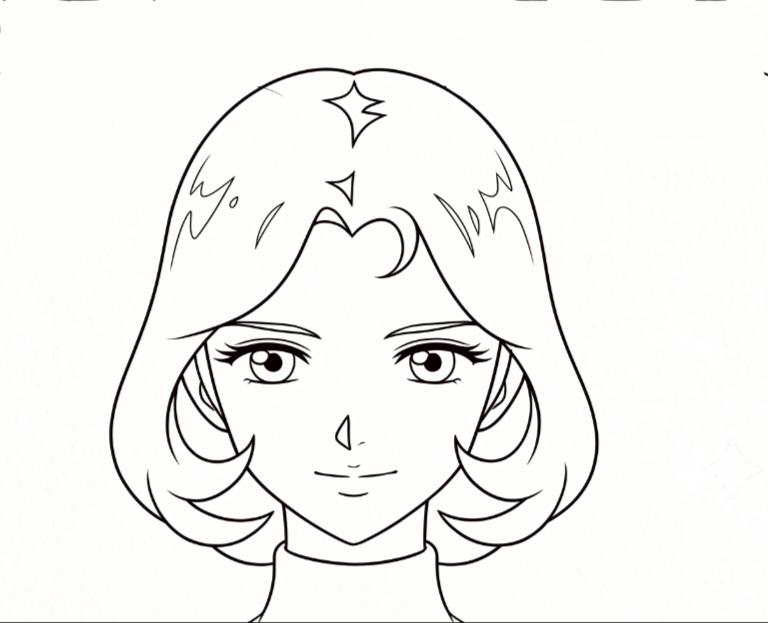
Erase all remaining light construction circle lines and center guides. Carefully ink or darken your final outer lines. Add crisp retro shine highlights along the top curve of her hair, including small star-burst light accents to give her hair that iconic classic anime shine!
Tips to Master Original 70s Mecha Anime Art Style
- Keep Jawlines Delicate: Classic female leads in Go Nagai series (like Grendizer, Mazinger Z, and Getter Robo) feature sharp, narrow chins compared to rounder modern styles.
- Focus on Bold Upper Eyelashes: The heavy upper eyelash line is key to capturing that distinct mid-70s Toei Animation aesthetic.
- Flared Hair Ends: Don’t be afraid to flick out the bottom tips of the hair outward—volume and outward flares defined anime character designs of that era!