
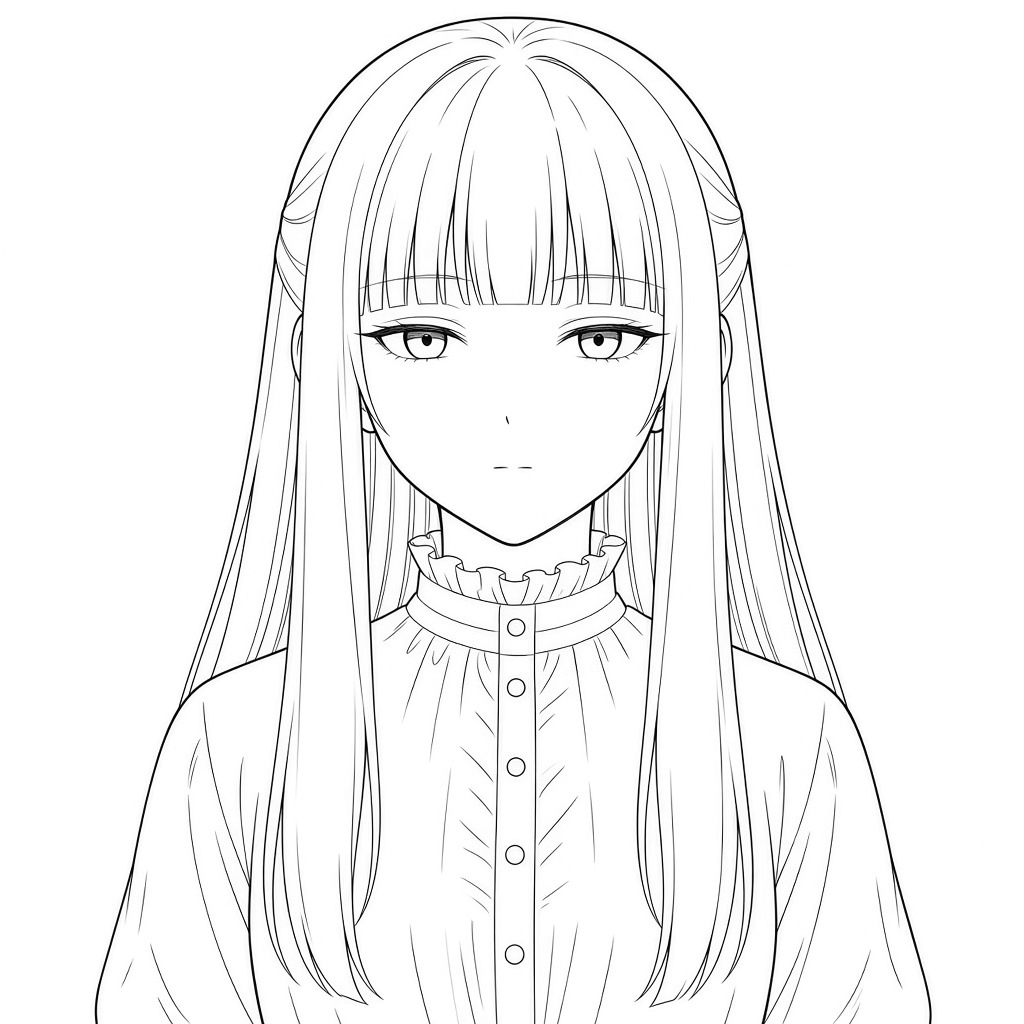
Fern, the young mage who travels with Frieren in Frieren: Beyond Journey’s End, is a great character for practising long, straight hair and a quiet expression. In this guide you will learn how to draw fern face in 7 steps, from the first guidelines to the inked line art, with her waist-length hair, blunt bangs and frilled collar.
Her look is calm and tidy, so the drawing depends on clean, straight lines rather than a lot of detail. In every picture, the new lines for that step are black and the earlier ones are grey, so you always know what to add next.
Materials Needed
- Paper or a drawing tablet
- A light pencil (HB or 2H) for the guidelines
- A darker pencil (2B) or a fine liner for the final lines
- An eraser
- Optional: coloured pencils or markers in purple and white
Step-by-Step Fern Face Drawing Guide
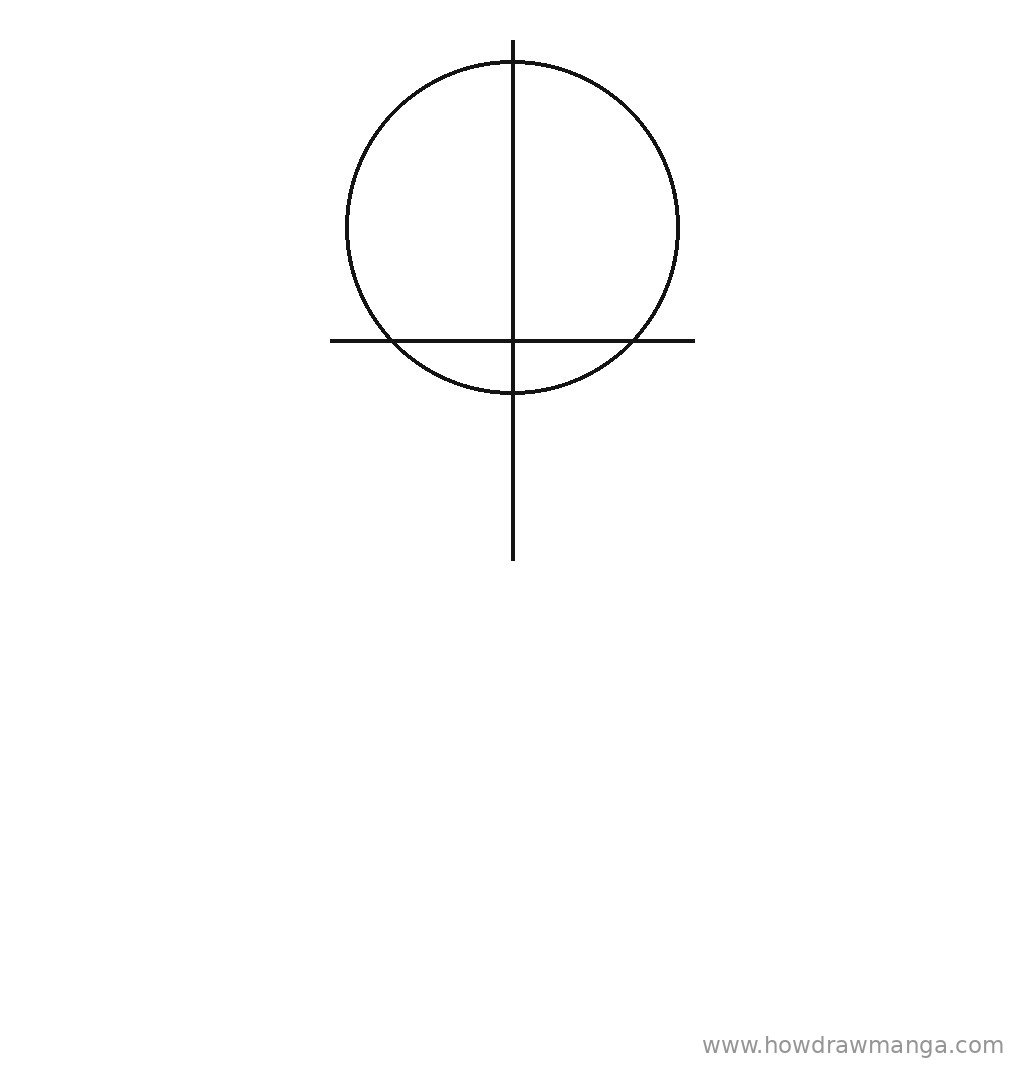
Step 1: Sketch the Head Circle and Guidelines
Draw a circle in the upper middle of the page, about one-third of the page wide, for the skull. Run a vertical centre line through it and extend it below the circle by about half the circle’s height; the chin will sit near the bottom of that line. Cross it with a horizontal eye line about two-thirds of the way down the circle, a little wider than the circle on both sides. Keep the pencil light so the guidelines are easy to erase.
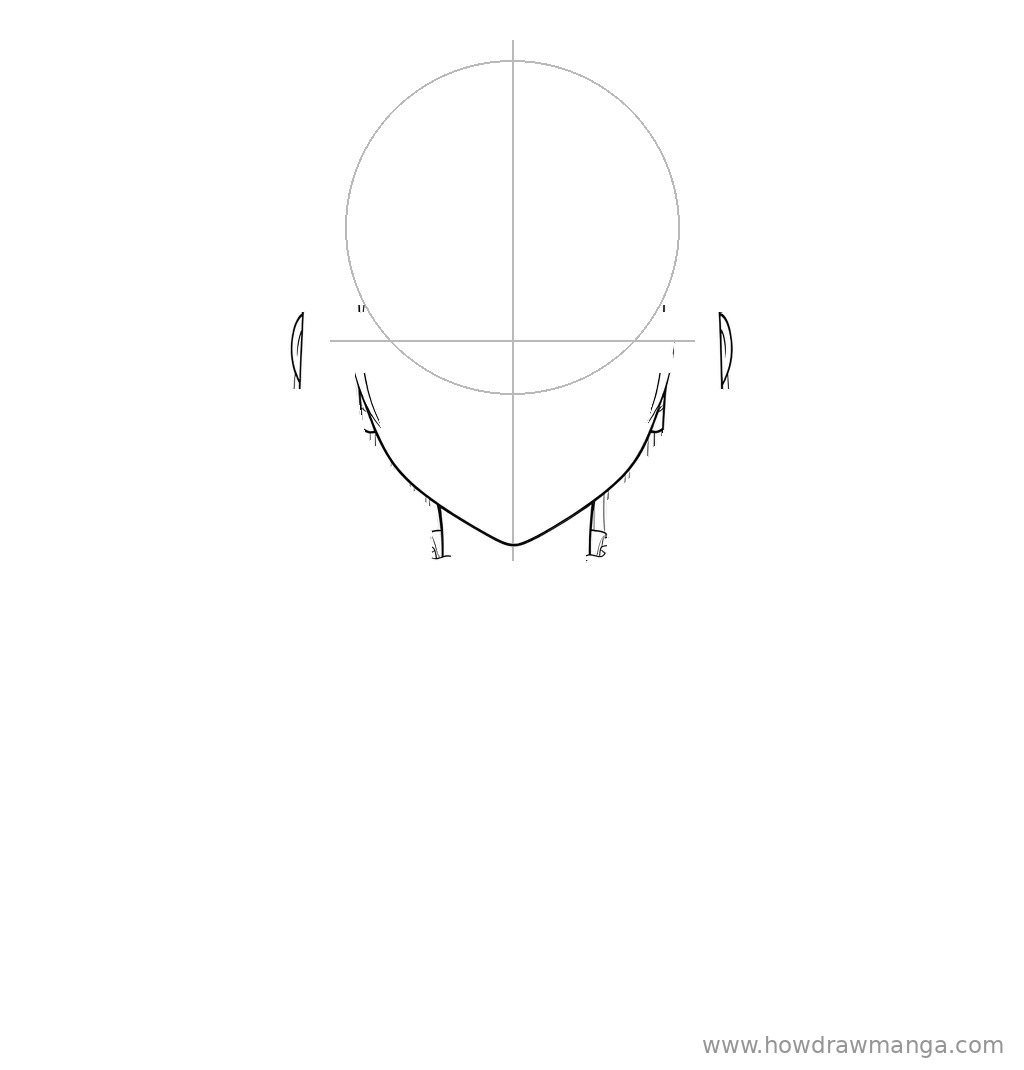
Step 2: Draw the Face Outline, Ears and Neck
Start each side of the face just above the eye line, a little inside the edge of the circle. Drop the sides almost straight down, then angle them in so they meet in a narrow, softly pointed chin on the centre line, well below the circle. Add a small C-shaped ear on each side, level with the eyes and set a little out from the face, where the hair will frame it. Finish with two short, straight neck lines under the jaw, closer together than the width of the face.
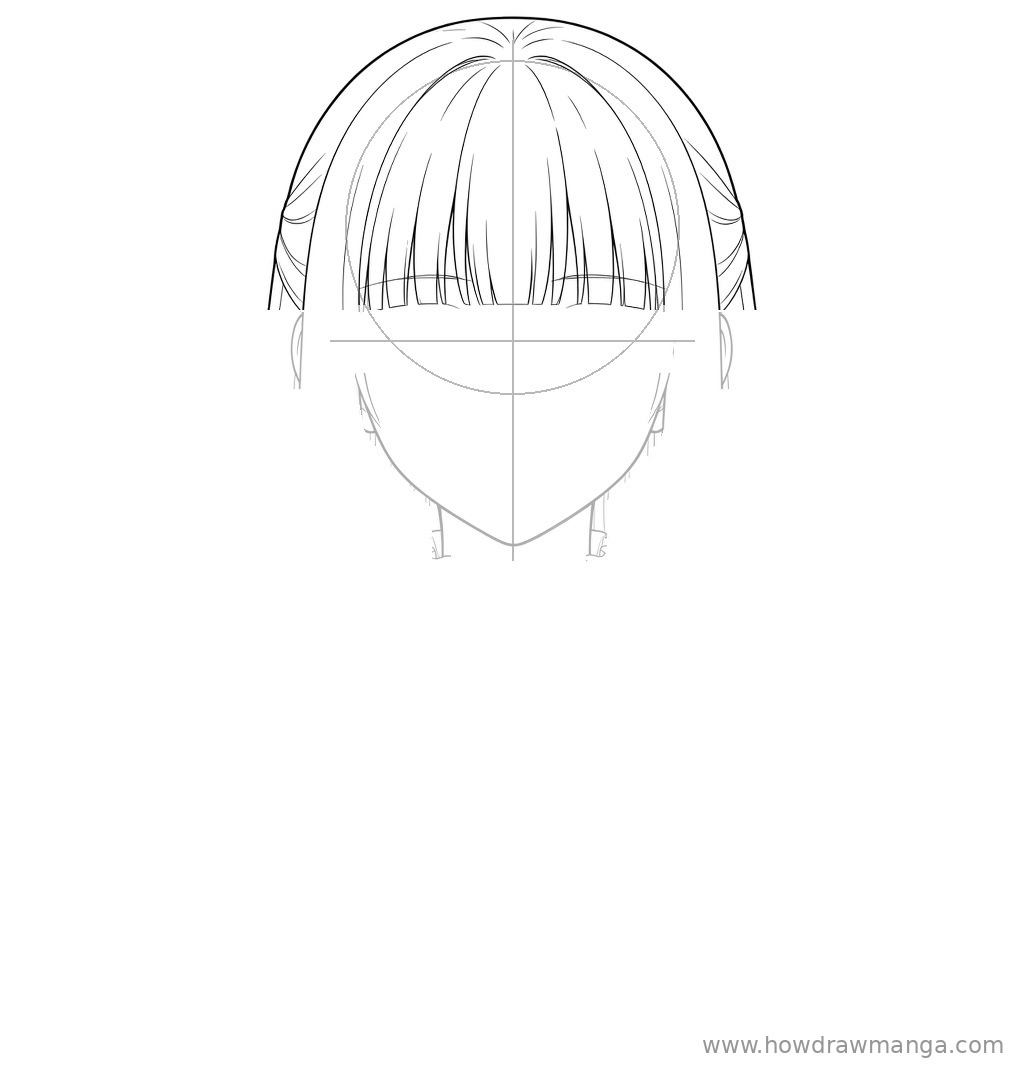
Step 3: Draw the Rounded Crown and Blunt Bangs
Draw a smooth dome for the top of the hair, sitting well above the circle and reaching a little past it on both sides. Inside it, fill the forehead with long, straight strands that all end in one level, blunt line just above the eye line, so the bangs hide the eyebrows. Add a few curved lines at both sides of the head near the top, where part of the hair is pulled back. Let the outer hair lines continue down past the ears; you will finish them in the next step.
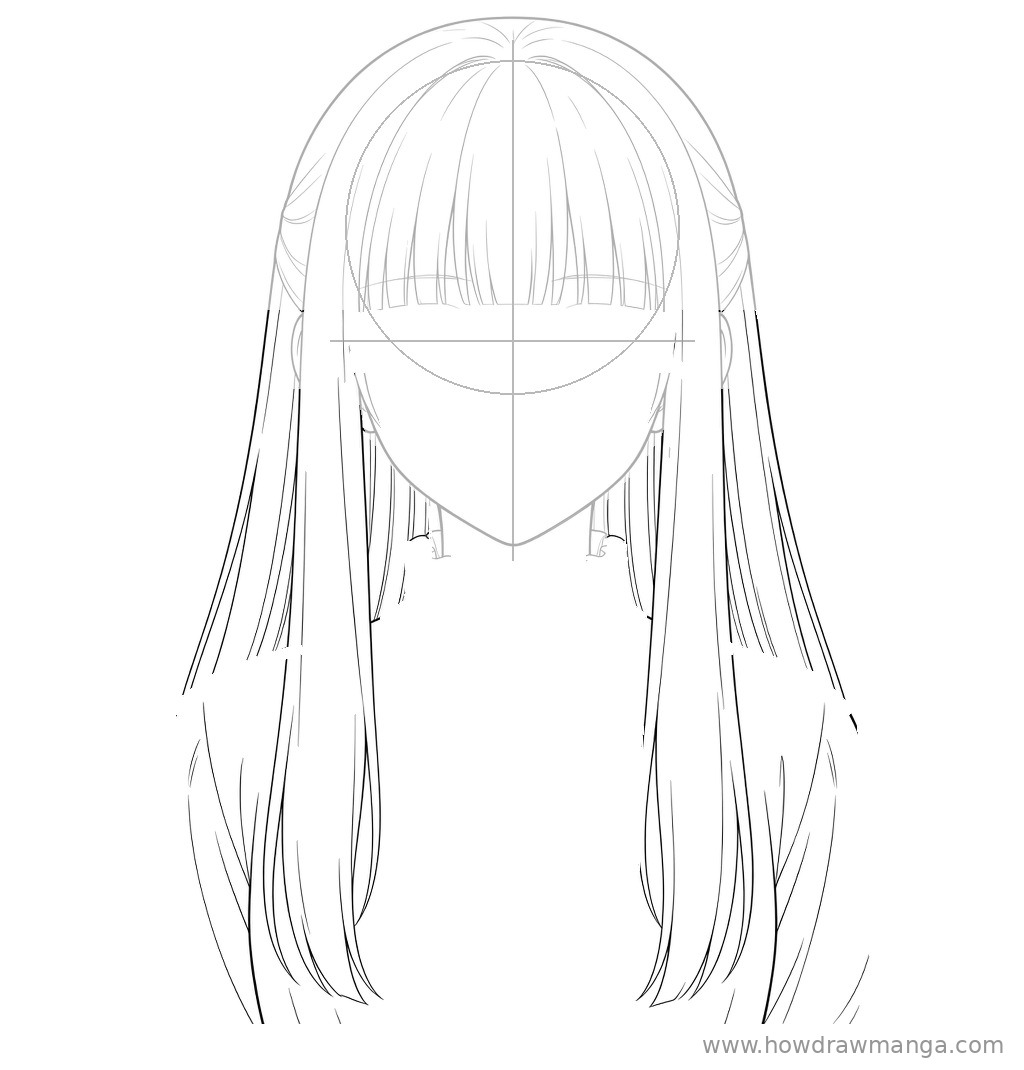
Step 4: Draw the Long Hair and Side Locks
Extend the outer hair lines straight down past the shoulders and off the bottom of the page, so the hair looks waist-length. Next to each cheek, draw a narrower side lock that hangs straight down in front of the shoulder, about as wide as one eye. Fill both hair sections with long, parallel strand lines and keep them almost vertical; this straight fall is what gives Fern her neat hime-cut look.
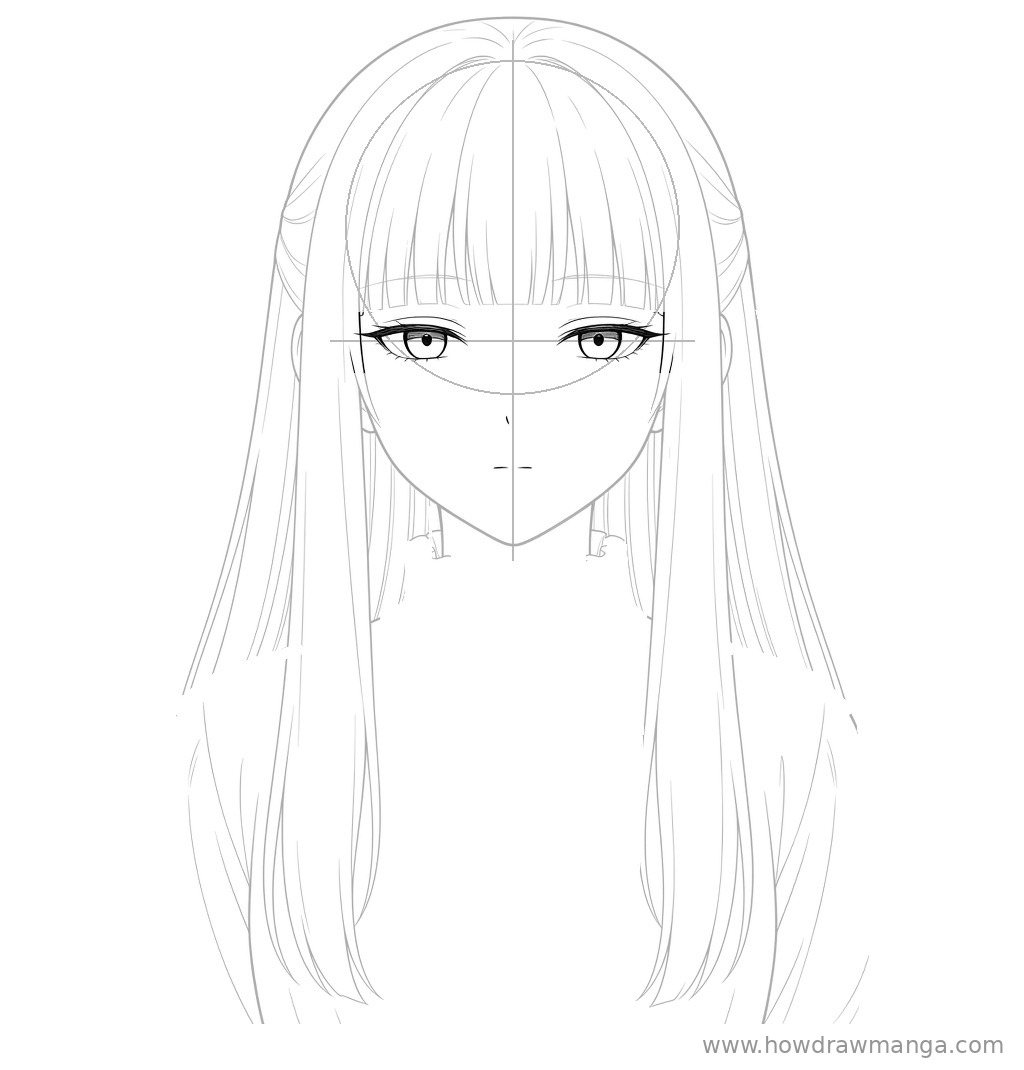
Step 5: Draw the Calm Eyes, Nose and Mouth
Place two wide, almond-shaped eyes on the eye line, about one eye-width apart. Make the upper lid a heavy, nearly straight line that flicks out at the outer corner, and let it cover the top of the iris for a half-lidded, calm look. Draw a round iris with a small dark pupil and a light lower lid. Mark the nose with one tiny stroke on the centre line, and the mouth with a short flat line about halfway between the nose and the chin.
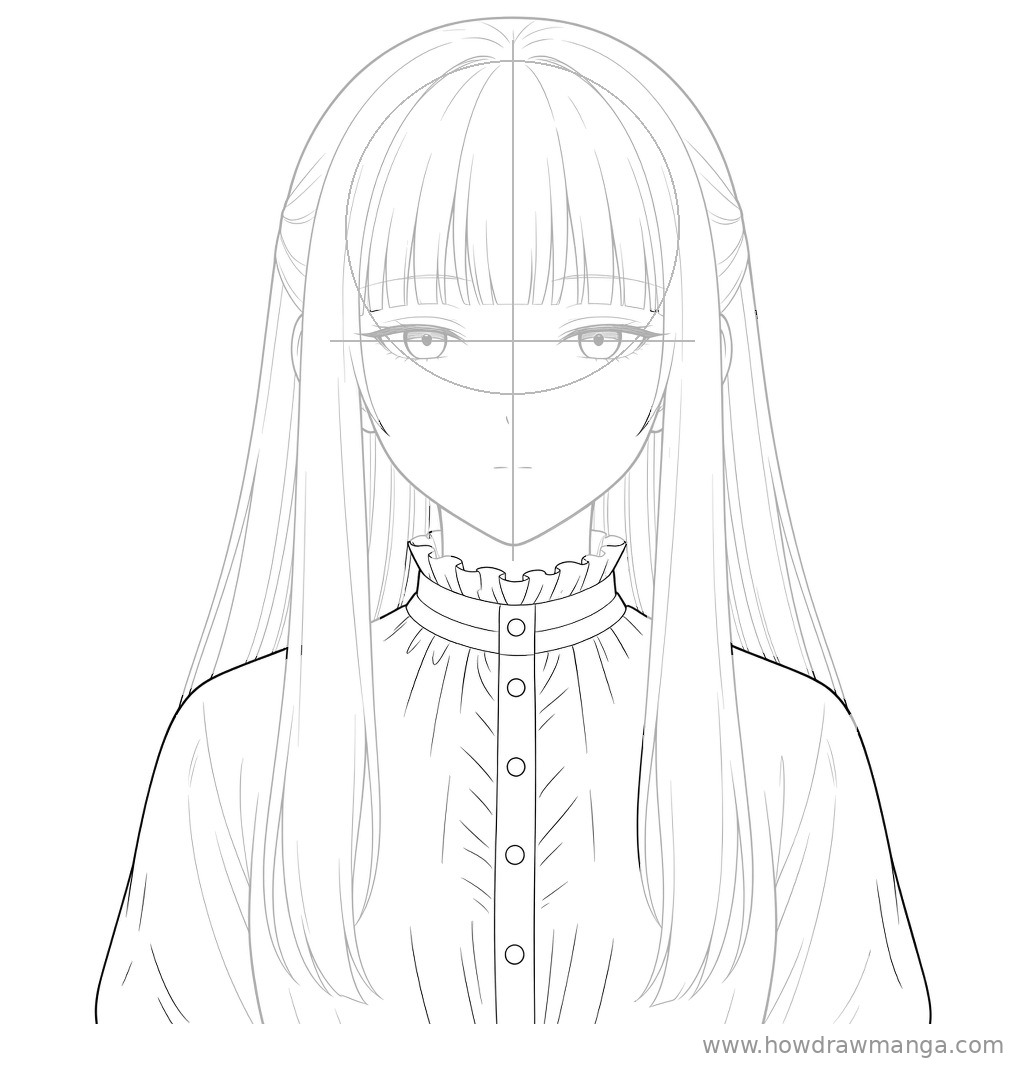
Step 6: Draw the Frilled Collar and White Dress
Wrap a band around the neck just below the chin and top it with a wavy, ruffled frill. Below it, draw the collar band, then a straight vertical placket down the middle of the chest with four or five small circles for buttons. Slope the shoulders out from behind the hair and give them a soft, puffy curve. Add short, light fold lines that fan out from the collar.
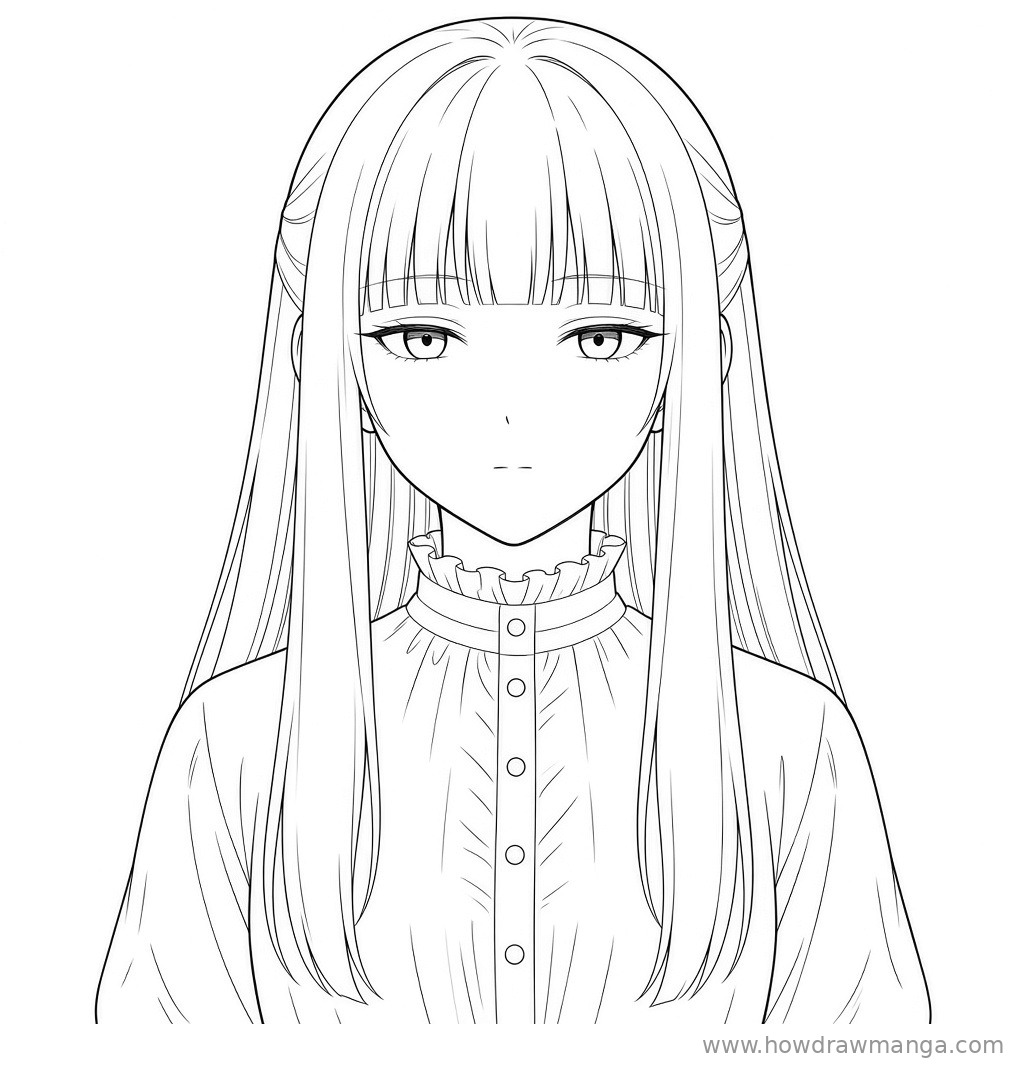
Step 7: Ink the Final Line Art
Trace the lines you are keeping with a fine liner or a soft, dark pencil. Make the outer edge of the hair, the face outline and the shoulders the boldest lines, and keep the hair strands, lashes and dress folds thin. Once the ink is dry, erase the circle and both guidelines. Nothing new appears in this step; it only cleans up the drawing.
Key Pro Tips for Drawing Fern’s Face
- Keep the hair lines straight. Fern’s hair is long and smooth. Pull each strand in one confident stroke instead of many short, sketchy ones.
- Get the hime cut right. Her look combines level bangs with two side locks that hang down in front of the shoulders. If the side locks are missing, she can look like a different character.
- Keep the expression neutral. She usually looks calm and stoic, so use a heavy, flat upper lid and a short, straight mouth rather than a big smile.
- Remember the butterfly ornament. Her butterfly hair ornament, a birthday gift from Frieren, sits at the back of her head, so it is hidden in this front view. Add it if you draw her from the side or back.
- Colour her in purple. She has purple hair and purple eyes, and the dress she usually travels in is white.
FAQ
Where is Fern’s butterfly hair ornament?
She wears it on the back of her head to tie part of her hair back. From the front, you only see the hair that it pulls back at the sides of her head.