
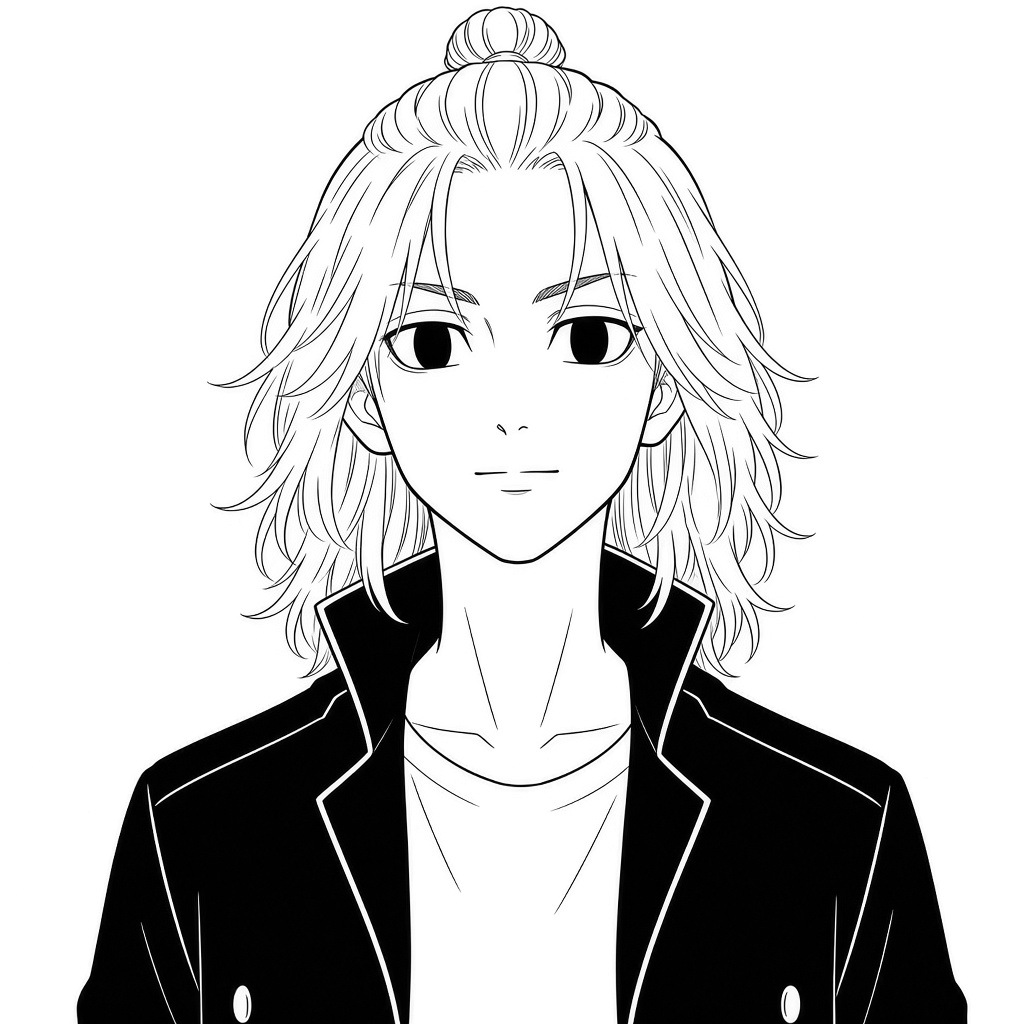
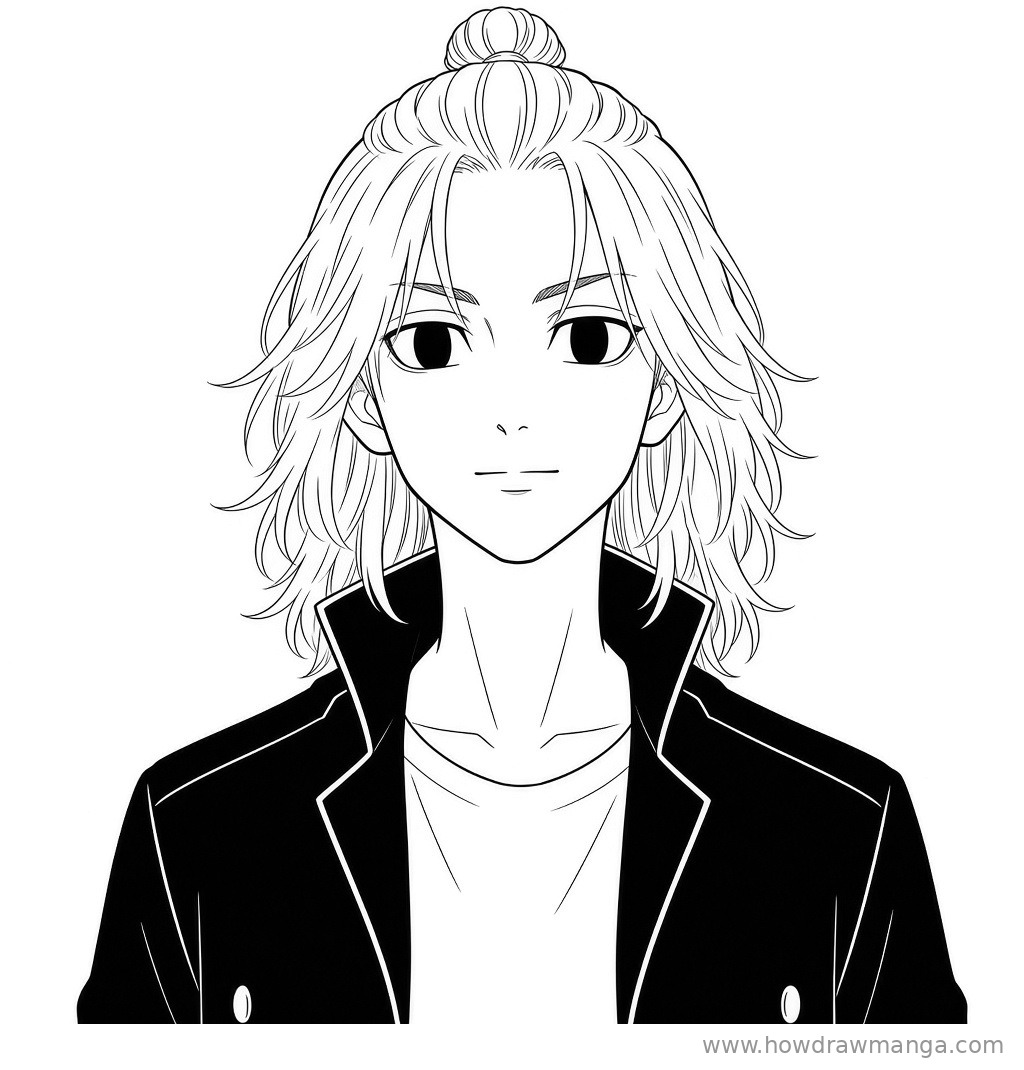
Manjiro Sano, better known as Mikey, is the leader of the Tokyo Manji Gang in Tokyo Revengers. In this guide you will learn how to draw mikey face in 8 steps, using his teenage look: long blonde hair with only the top tied up and dark eyes. In this drawing he also wears a black coat with a tall, stand-up collar.
Most of his look comes from the hair, so a large part of the tutorial is about the knot on top and the loose, layered locks around his face. In each picture, the new lines for that step are black and the earlier ones are grey.
Materials Needed
- Paper or a drawing tablet
- A light pencil (HB or 2H) for the guidelines
- A darker pencil (2B) or a fine liner for the final lines
- A black marker or brush pen for the coat
- An eraser
Step-by-Step Mikey Face Drawing Guide
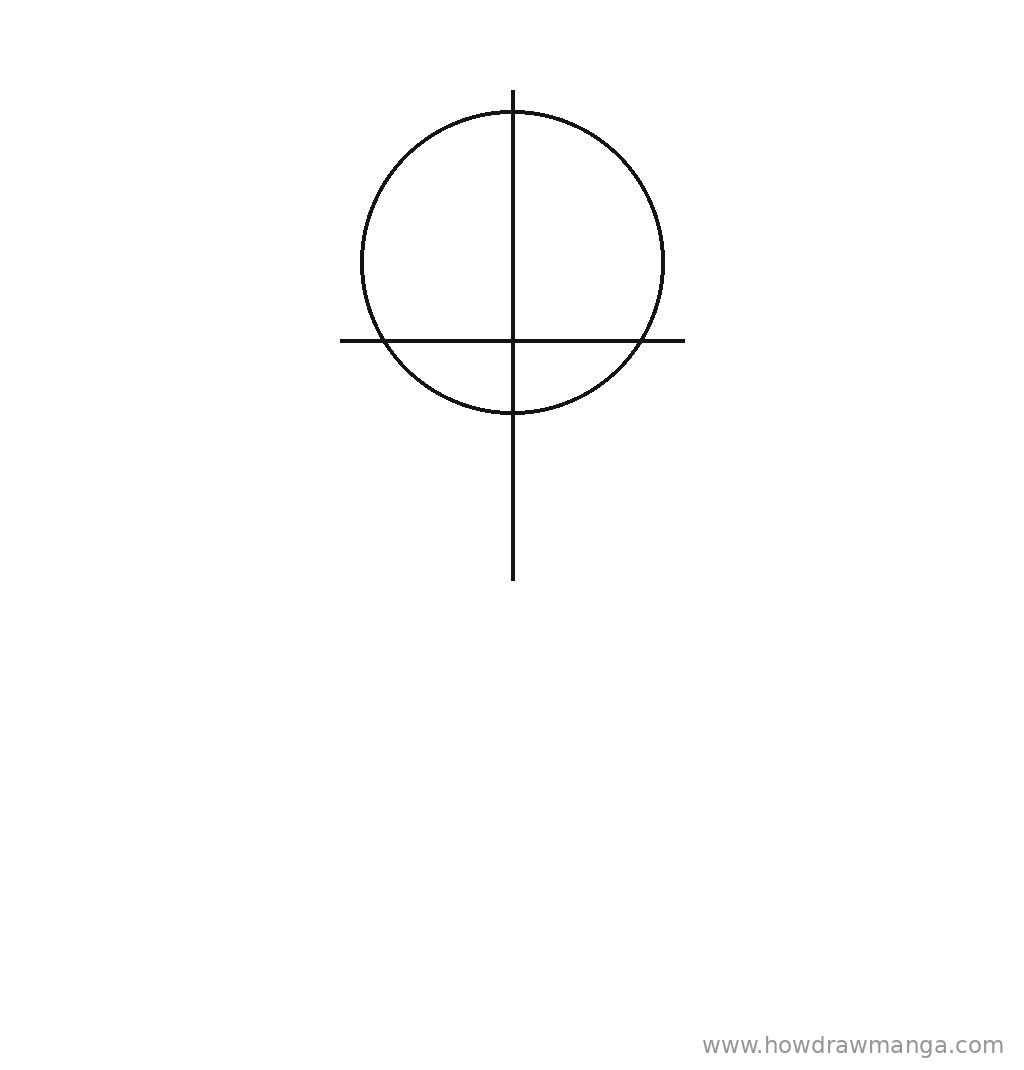
Step 1: Sketch the Head Circle and Guidelines
Draw a circle a little below the top of the page, about one-third of the page wide; leave room above it for the hair knot. Run a vertical centre line through the circle and let it continue below it by about half the circle’s height. Cross it with a horizontal eye line roughly three-quarters of the way down the circle, slightly wider than the circle. Use light pressure, since these lines are erased later.
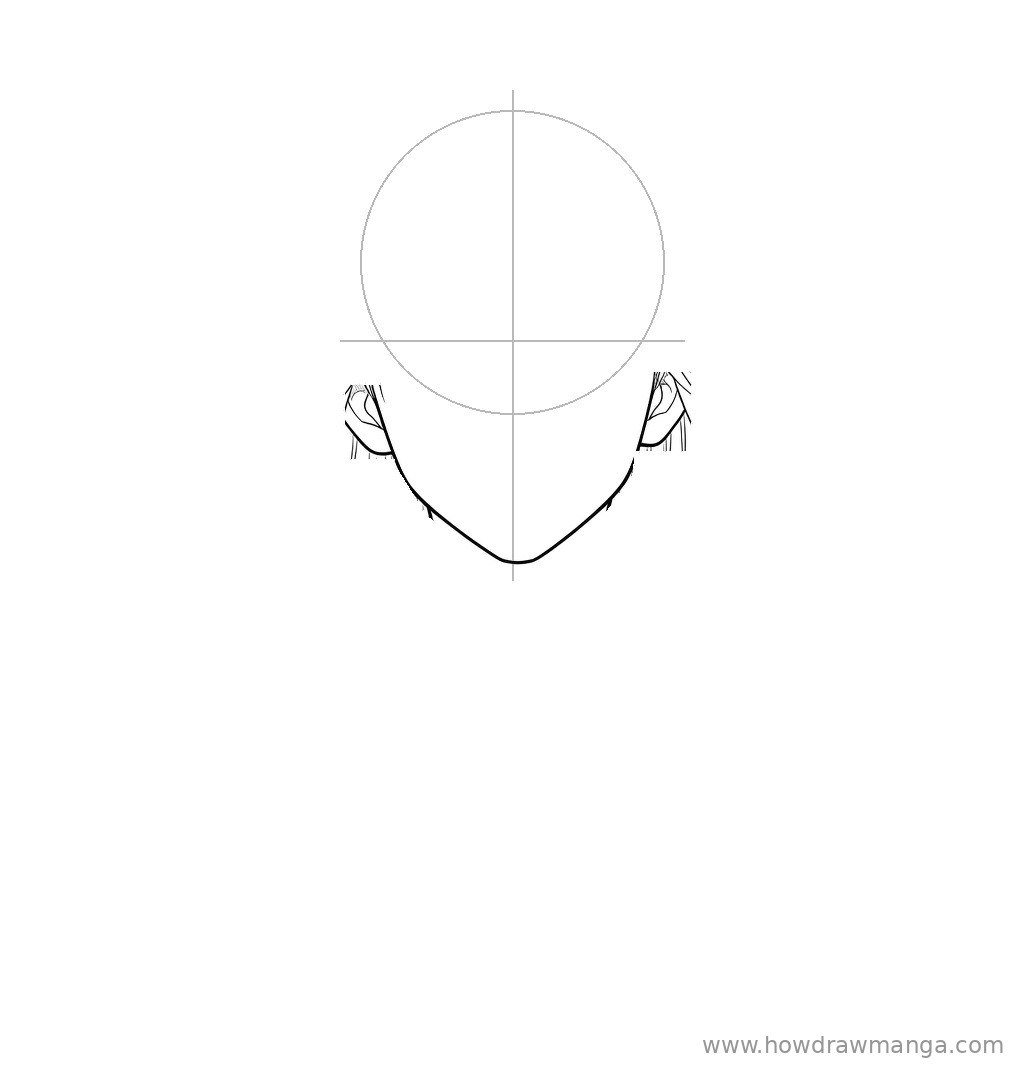
Step 2: Draw the Face Outline and Ears
Start each side of the face on the eye line, just inside the edge of the circle. Bring the sides down fairly straight to about nose level, then angle them in to a slim, pointed chin on the centre line, well below the circle. Add a C-shaped ear on each side, starting a little under the eye line and ending about level with the nose.
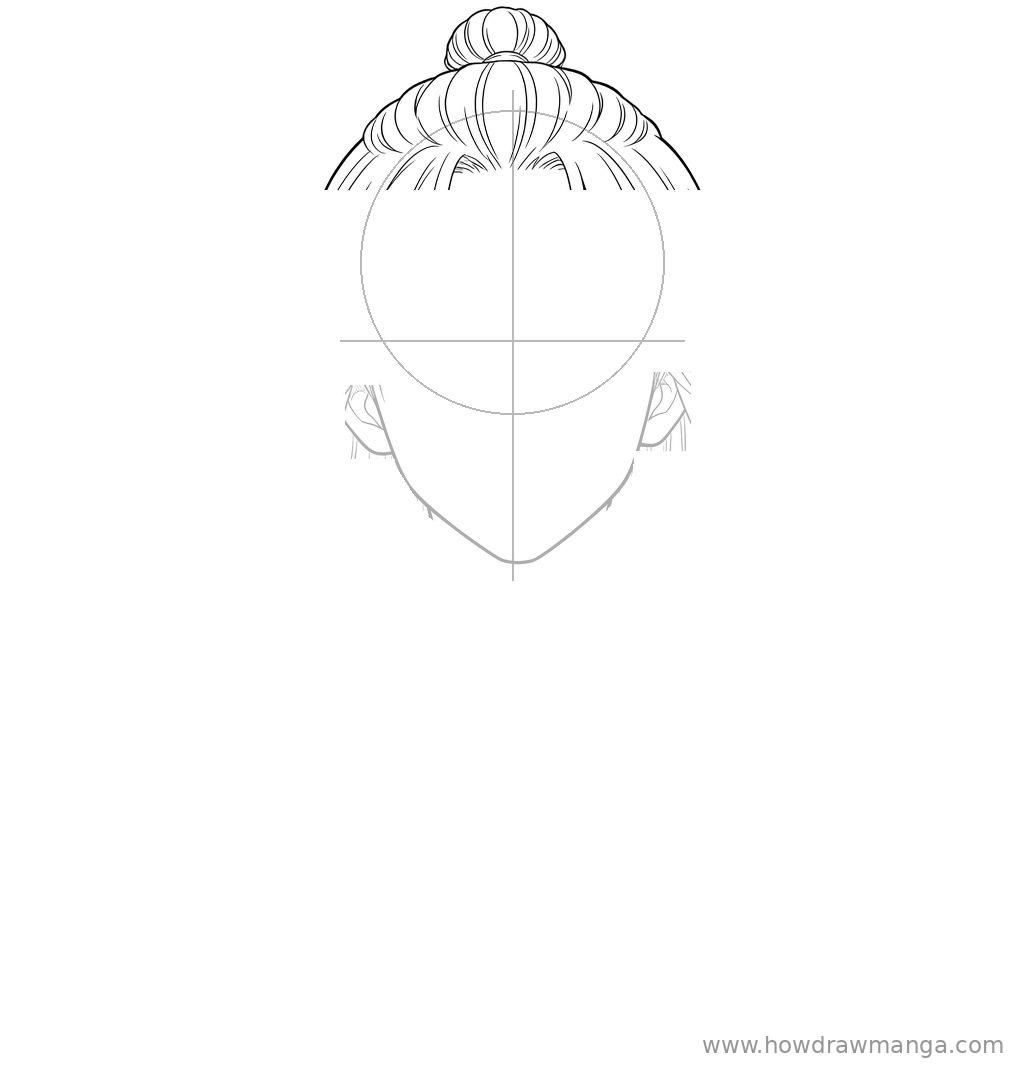
Step 3: Draw the Topknot and Pulled-Back Crown
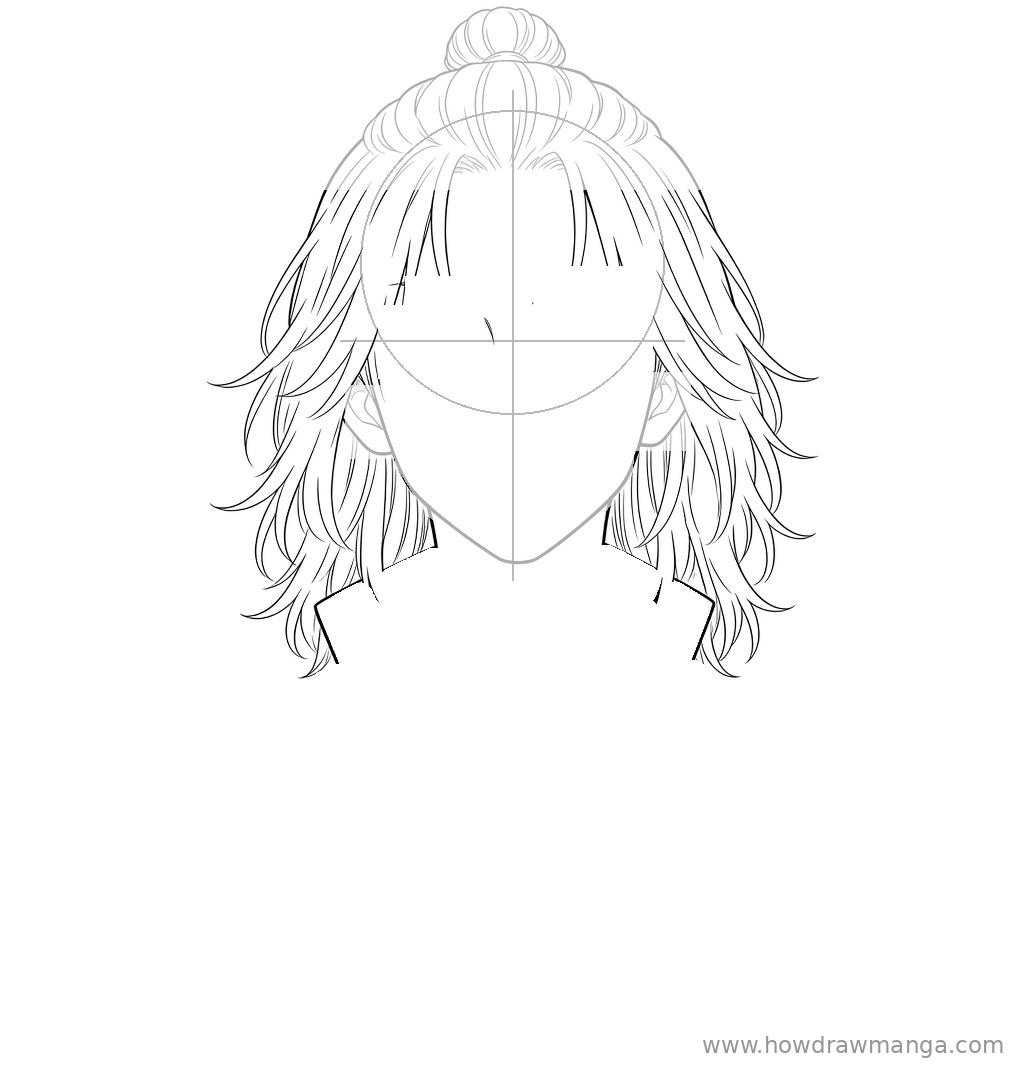
On top of the head, draw a small round bun on the centre line, about one-third of the circle’s width, with curved lines wrapping around it. Below the bun, draw the crown as a wide dome that sits just above the circle. Fill it with curved strand lines that all sweep up and back toward the bun, so the hair on top clearly looks tied up. Let two long strands part on the forehead and fall to each side of the face.
Step 4: Draw the Layered Side Hair
From the sides of the crown, let loose hair fall down past the ears to about shoulder height. Build it from many layered, pointed locks instead of one outline, and flick some of the tips outward at cheek level and at the bottom. Let a few thin strands cross the forehead and the outer edge of each eye. This loose, untied side hair is what separates Mikey’s look from a plain ponytail.
Step 5: Draw the Eyes, Eyebrows, Nose and Mouth
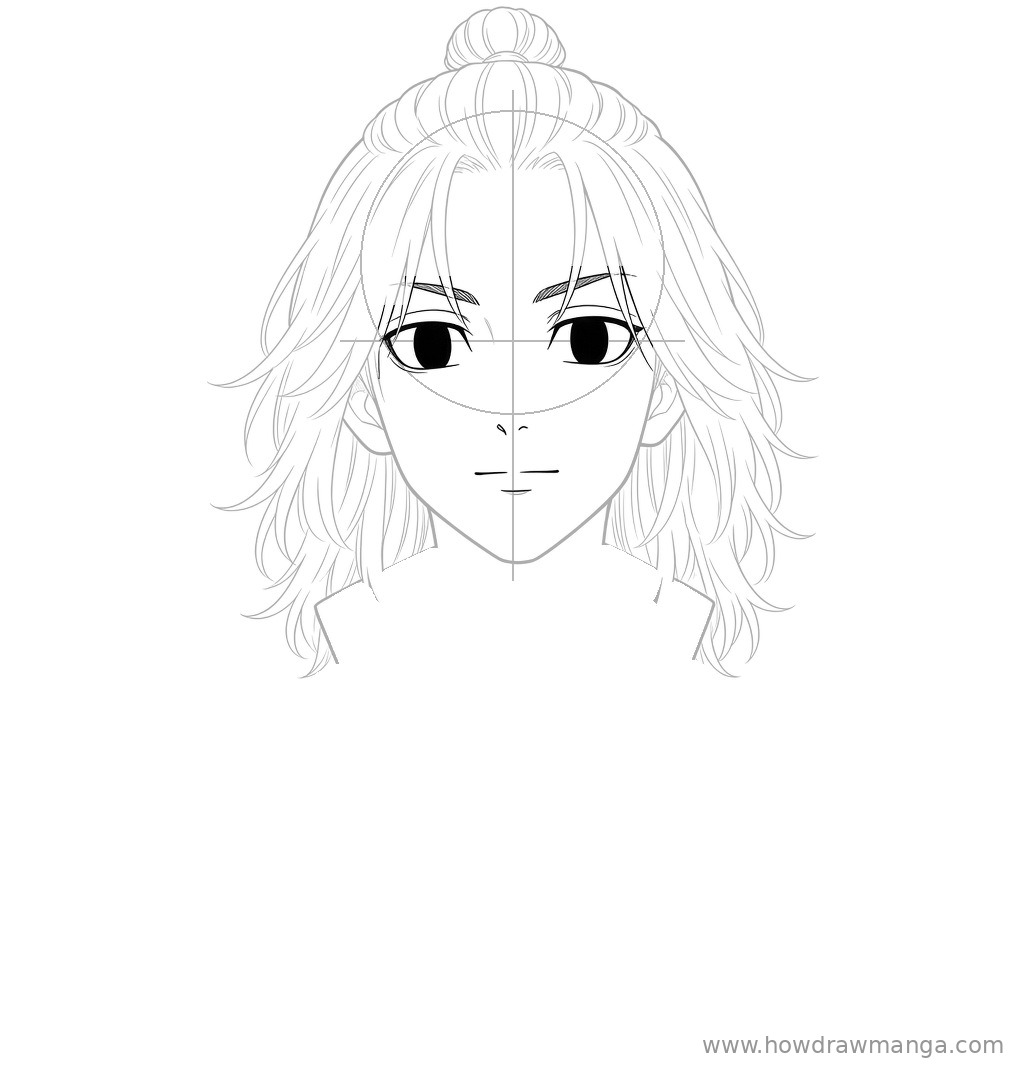
Place two wide, slightly narrowed eyes on the eye line, about one eye-width apart. Draw a thick upper lid for each and fill the round irises completely black, leaving only a tiny highlight. Add thin, straight eyebrows above them, angled down slightly toward the nose, with light hatching inside. Mark the nose with two tiny strokes just below the circle, and draw the mouth as a short flat line with a small curve under it for the lower lip.
Step 6: Draw the Coat Collar and Fill It Black
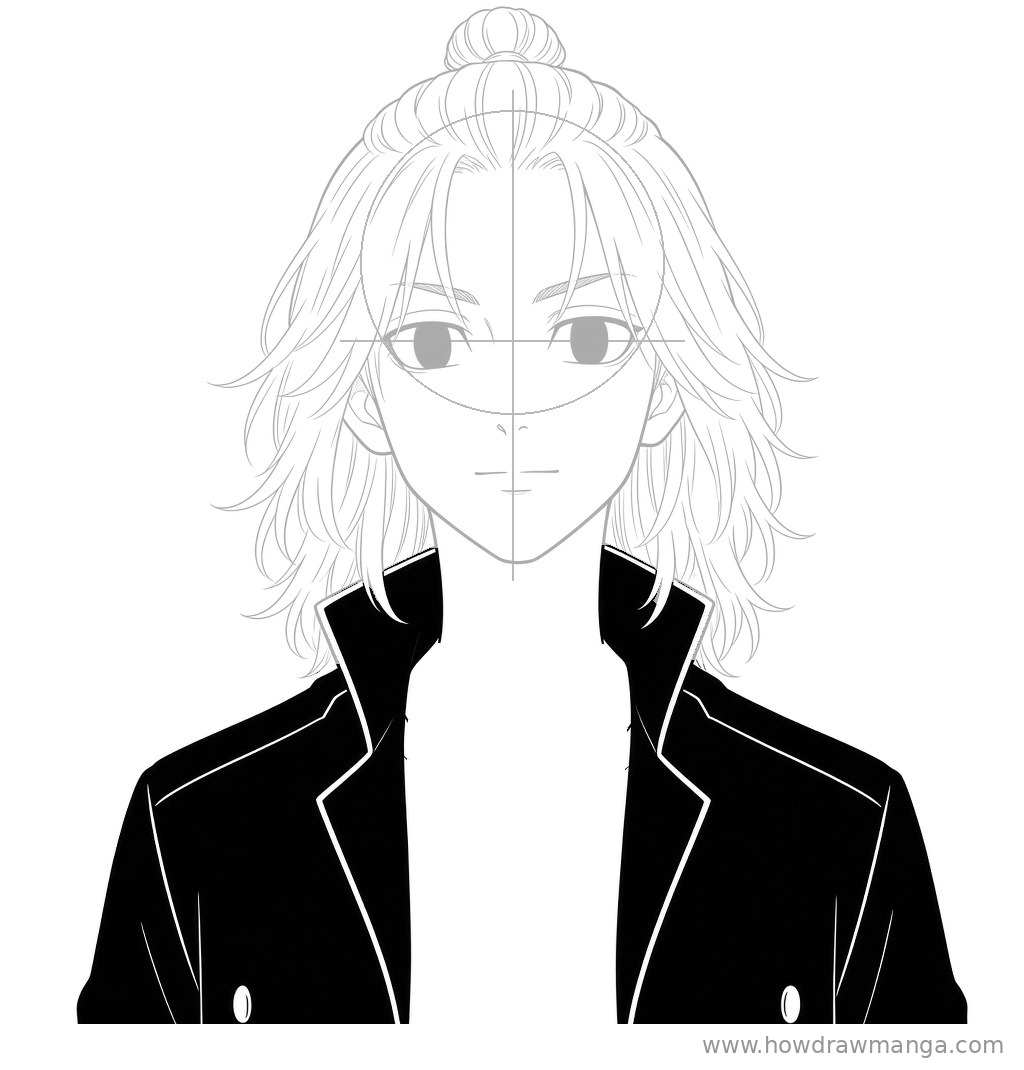
Draw a tall, stand-up collar on each side of the neck that rises to just under the jaw and flares out at the top. Run the lapels down from the collar in long, angled lines that leave an open V in the middle. Extend the shoulders out to the page edges and add two small buttons near the bottom. Fill the coat with solid black, leaving thin white lines along the collar, lapels and shoulder seams.
Step 7: Draw the Neck, Collarbones and Shirt
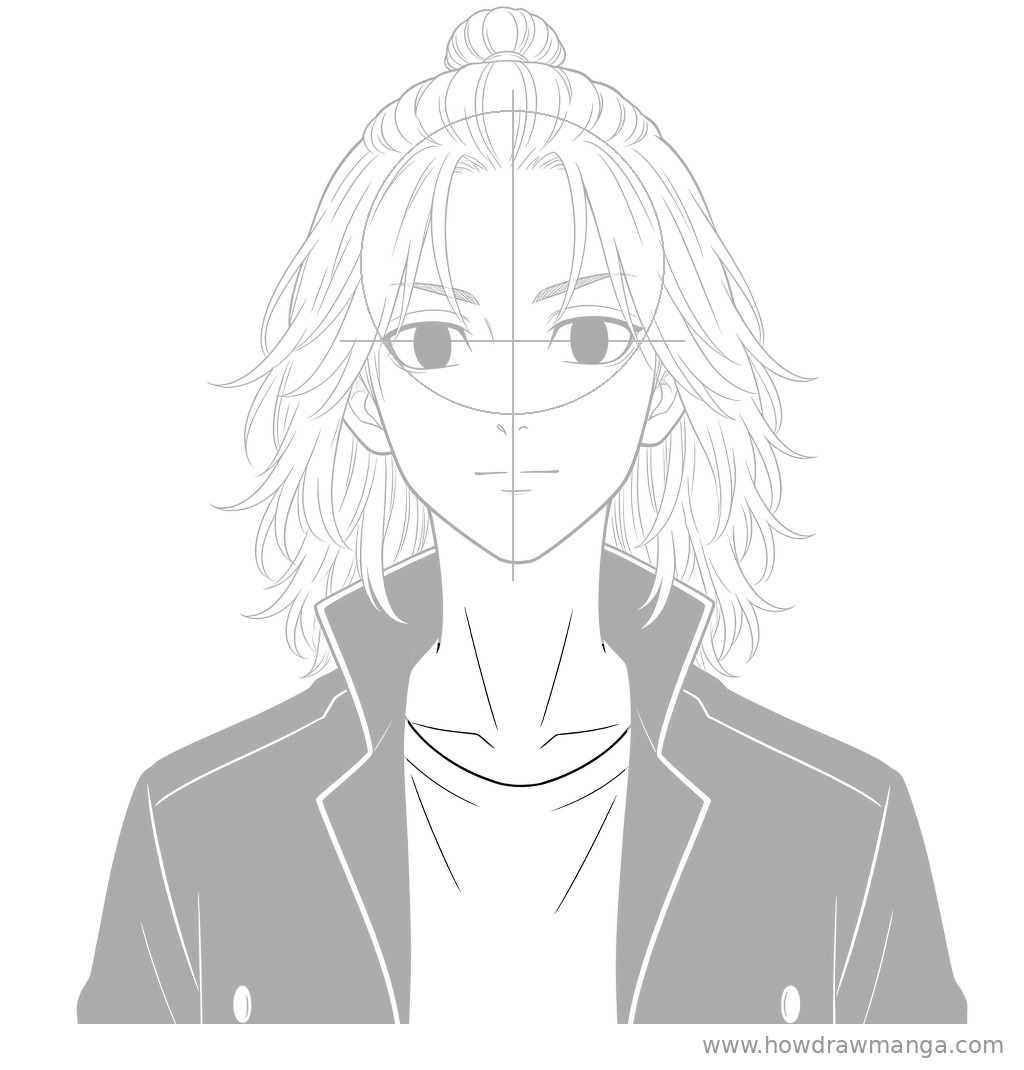
Inside the open collar, draw two diagonal neck lines that run from under each ear toward the centre. Below them, add two short collarbone strokes and a round neckline for the shirt, about as wide as the face. Finish with a few light, angled fold lines on the shirt.
Step 8: Ink the Final Line Art
Trace the lines you are keeping with a fine liner or a dark pencil. Make the outer edge of the hair, the face outline and the coat edges the boldest lines, and keep the hair strands and shirt folds thin. When the ink is dry, erase the circle and both guidelines. This step does not add anything new; it only cleans up the drawing.
Key Pro Tips for Drawing Mikey’s Face
- Tie only the top. In his teenage look, only the top of Mikey’s hair is tied, and the hair on the sides hangs loose. Keep the sides free and messy.
- Make the eyes dark. His eyes are pitch-black, so a solid black iris with a tiny highlight reads better than a detailed, sparkly eye.
- Use pointed, layered locks. Draw the side hair as many separate locks with sharp tips, not one smooth helmet shape.
- Pick one era. His hair changes a lot in the adult timelines (short black hair, or short white hair with an undercut). This guide shows the long blonde teenage version, so don’t mix them.
- Colour the hair blonde. Leave the coat black and use a light yellow or golden blonde for his hair.