
Itachi Uchiha from Naruto has some of the most recognisable eyes in anime: narrow, stern eyes with the three-tomoe Sharingan, framed by long tear-trough lines and centre-parted bangs. In this guide you will learn how to draw itachi uchiha sharingan eyes in 7 clear steps, from two simple almond shapes to clean close-up line art.
In each picture, new lines are black and lines from earlier steps fade to grey, so you can see what changed. This lesson focuses on the eyes and the area around them, not the whole head. Keep your guidelines light so they are easy to erase before you ink.
Materials Needed
- Paper or a drawing tablet
- A light pencil (HB or 2H) for the guidelines
- A darker pencil (2B) or a fine liner pen for the final lines
- An eraser
- A circle template or coin for even irises (optional)
- Optional: a red marker or coloured pencil for the Sharingan
Step-by-Step Itachi Uchiha Sharingan Eyes Drawing Guide
Step 1: Sketch the Guidelines and Eye Shapes
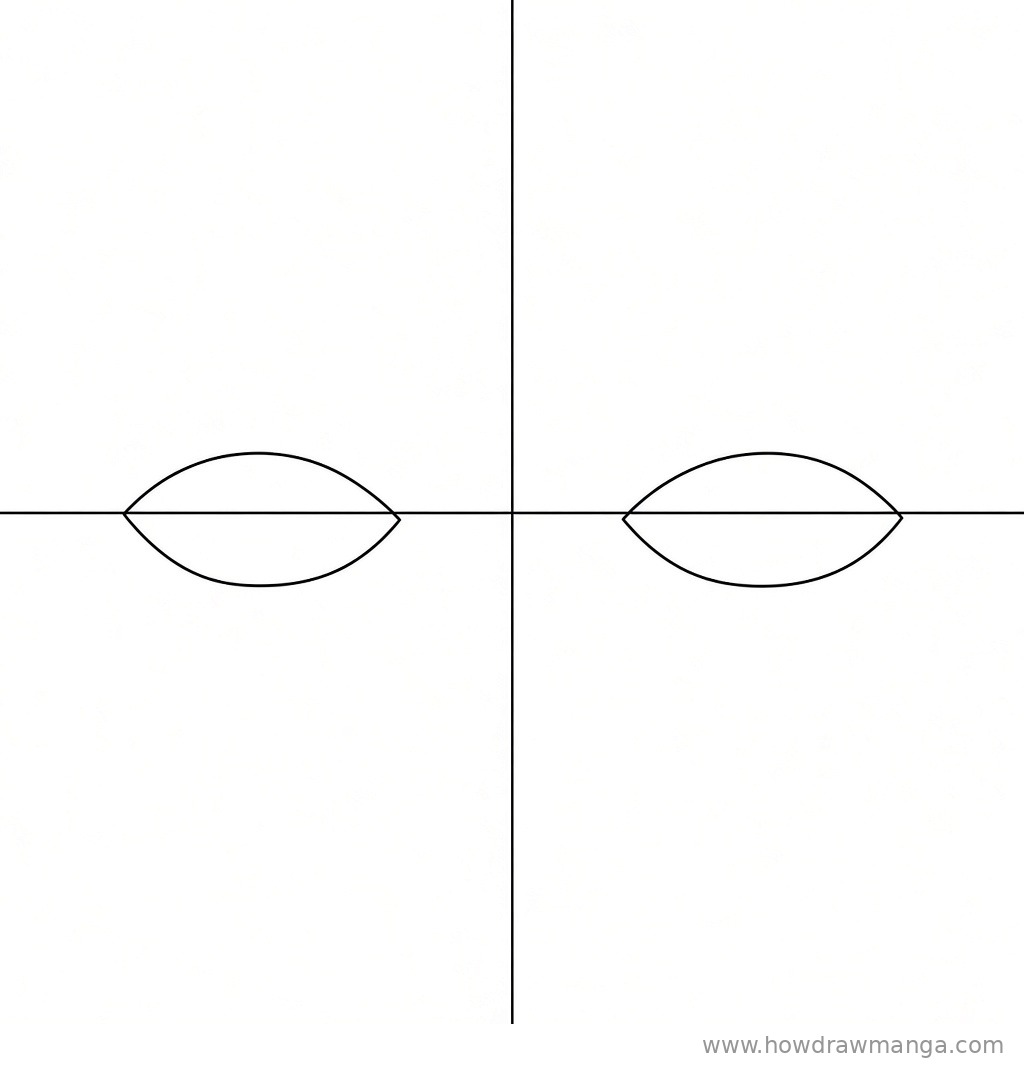
Draw a vertical centre line down the middle of the page and a horizontal eye line across it, a little below the middle. On the eye line, sketch two wide almond shapes, one on each side of the centre line. Make each almond about a quarter of the page wide, and leave a gap between them slightly smaller than one eye. These rough shapes only set the size and spacing, so keep them light.
Step 2: Draw the Sharp Eye Outlines
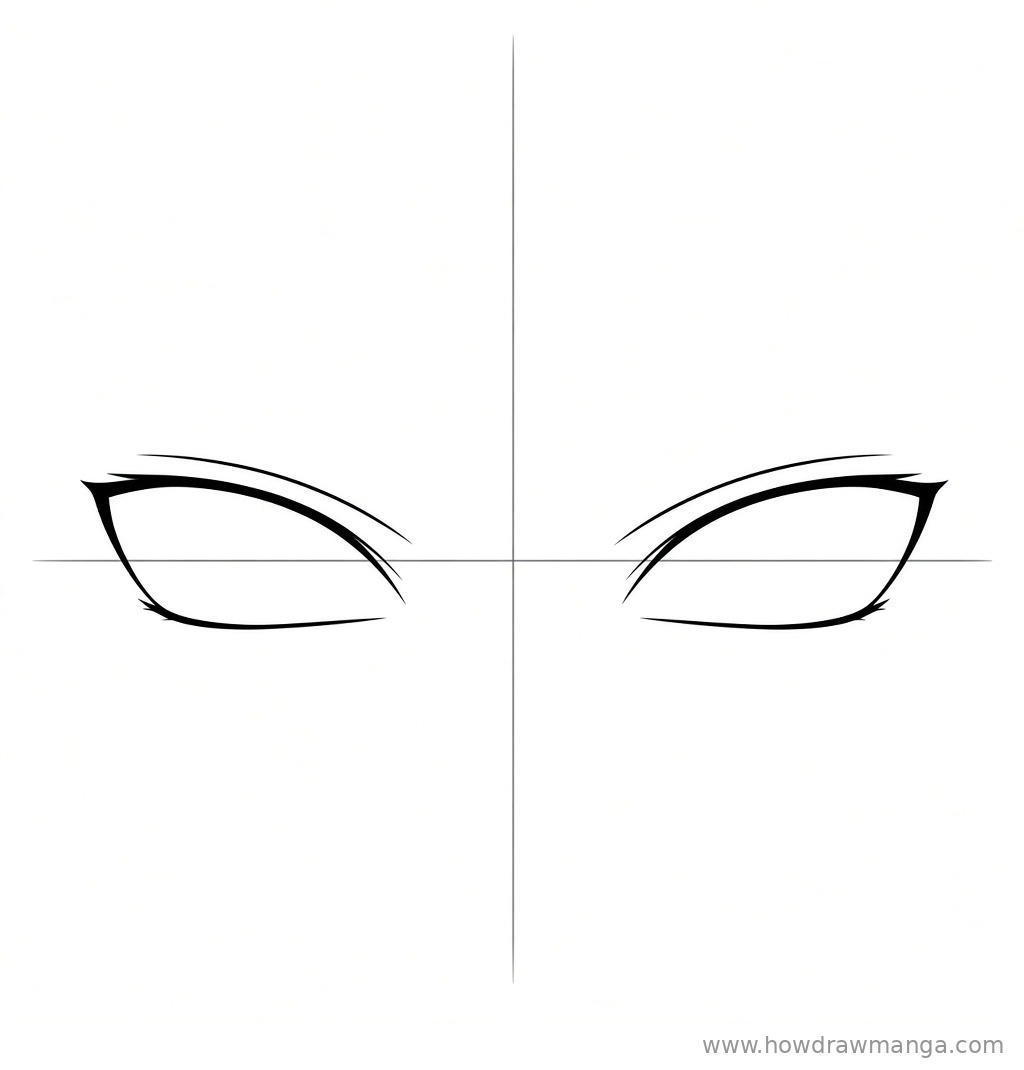
Go over each almond with the real eye shape. Draw the upper lid as a thick, dark curve that rises from the inner corner and ends in a sharp point at the outer corner. Add a thin crease line just above it. Then draw the lower lid as a thinner, flatter line that tapers out before it reaches the inner corner. The heavy, angled upper lids are what make the eyes look narrow and serious.
Step 3: Add the Irises and Pupils
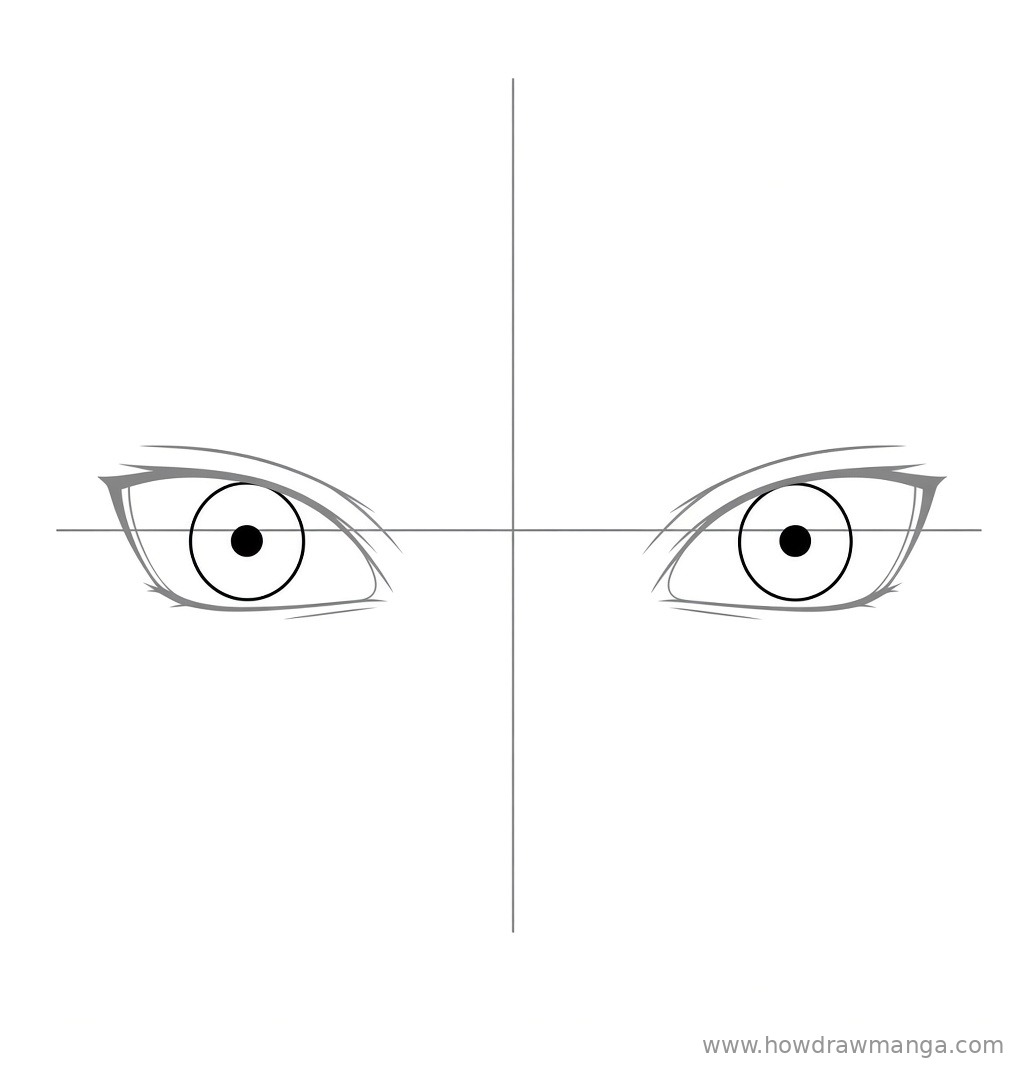
Inside each eye, draw a large circle for the iris. It should nearly fill the height of the eye, from the upper lid down to the lower lid. In the exact centre of each iris, draw a small solid black dot for the pupil, about one-eighth as wide as the iris. Check that both irises sit at the same height and look in the same direction.
Step 4: Draw the Sharingan Ring and Three Tomoe
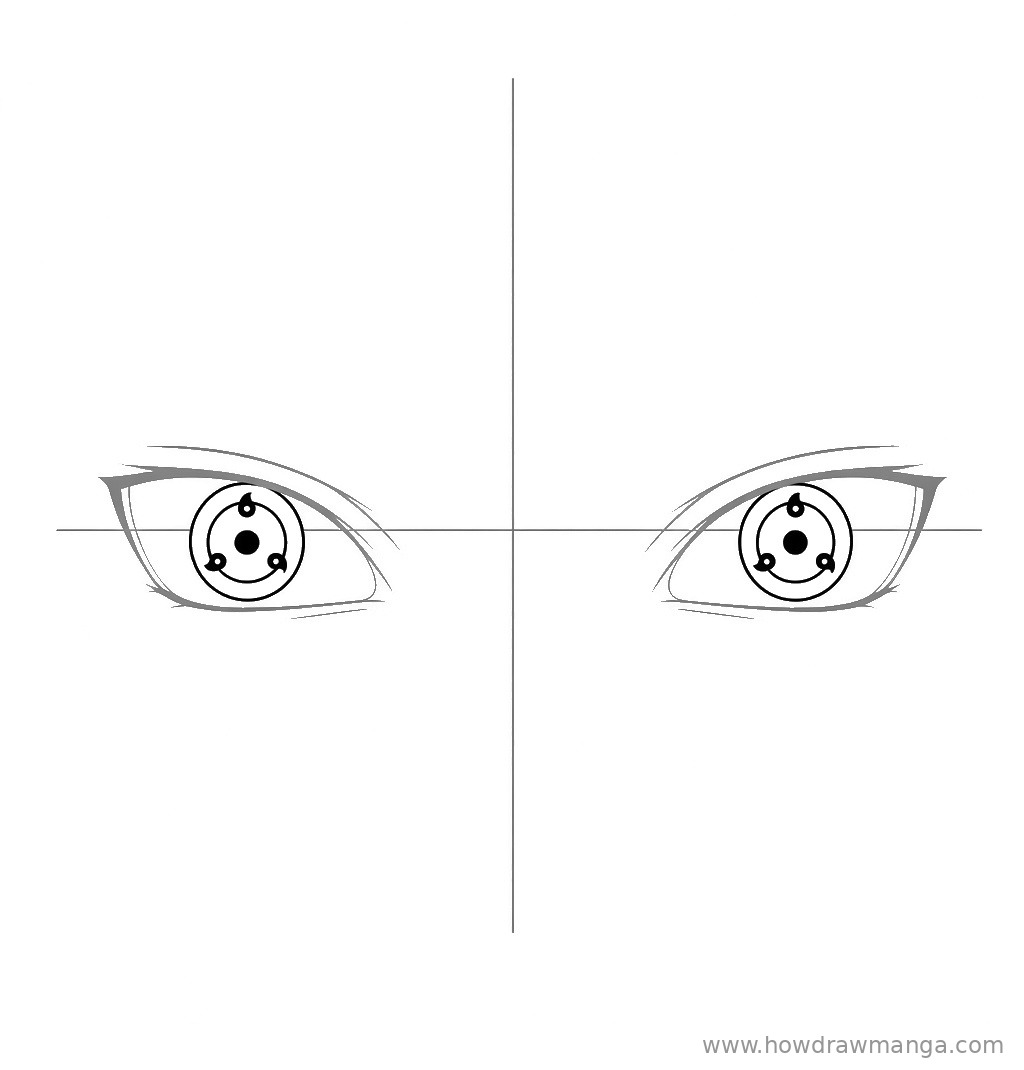
Inside each iris, draw a thin circle around the pupil, about halfway between the pupil and the iris edge. Place three small tomoe on this ring, spaced evenly like the points of a triangle: one at the top and two lower down on each side. Draw each tomoe as a small round dot with a short curved tail that hooks along the ring. Make all six tails curve the same way so the pattern looks like it is spinning.
Step 5: Add the Stern Brows, Tear Troughs and Nose
Above each eye, draw a thick, straight eyebrow that slants down toward the nose, which gives the frown. Under each eye, start a long thin line near the inner corner and run it diagonally down and outward toward the cheek. These tear troughs are a key part of Itachi’s face. Finish with a short nose bridge line beside the inner corner of one eye and two small curved strokes near the bottom of the page for the tip of the nose.
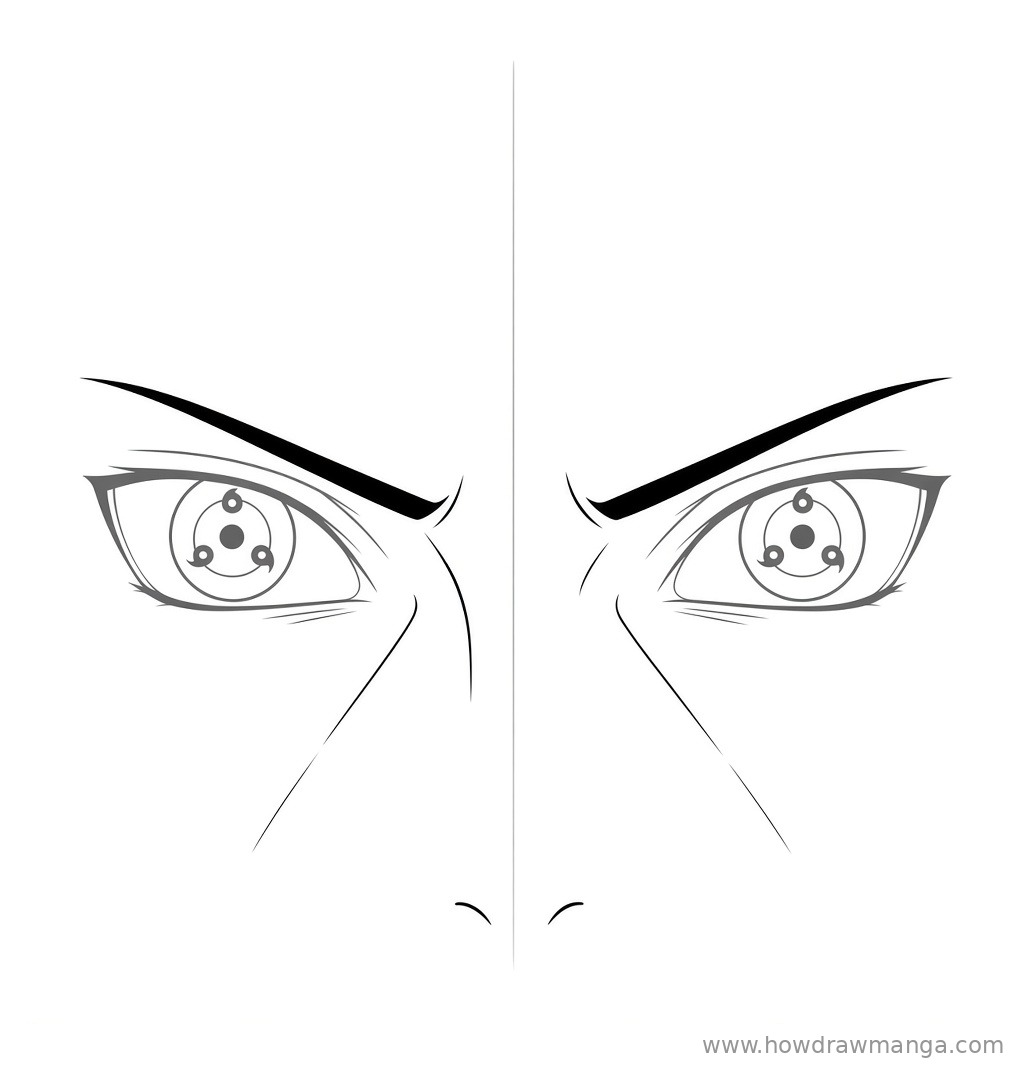
Step 6: Draw the Centre-Parted Bangs
Mark a small part at the top centre of the page. From it, draw long, straight locks of hair that fall down and outward and end in sharp points around eyebrow level. Add longer locks along both sides of the page so the bangs frame the eyes and run past the bottom of the drawing. Use a few thin strand lines inside each lock. Leave the hair as an outline instead of filling it black, so the eyes stay the focus.
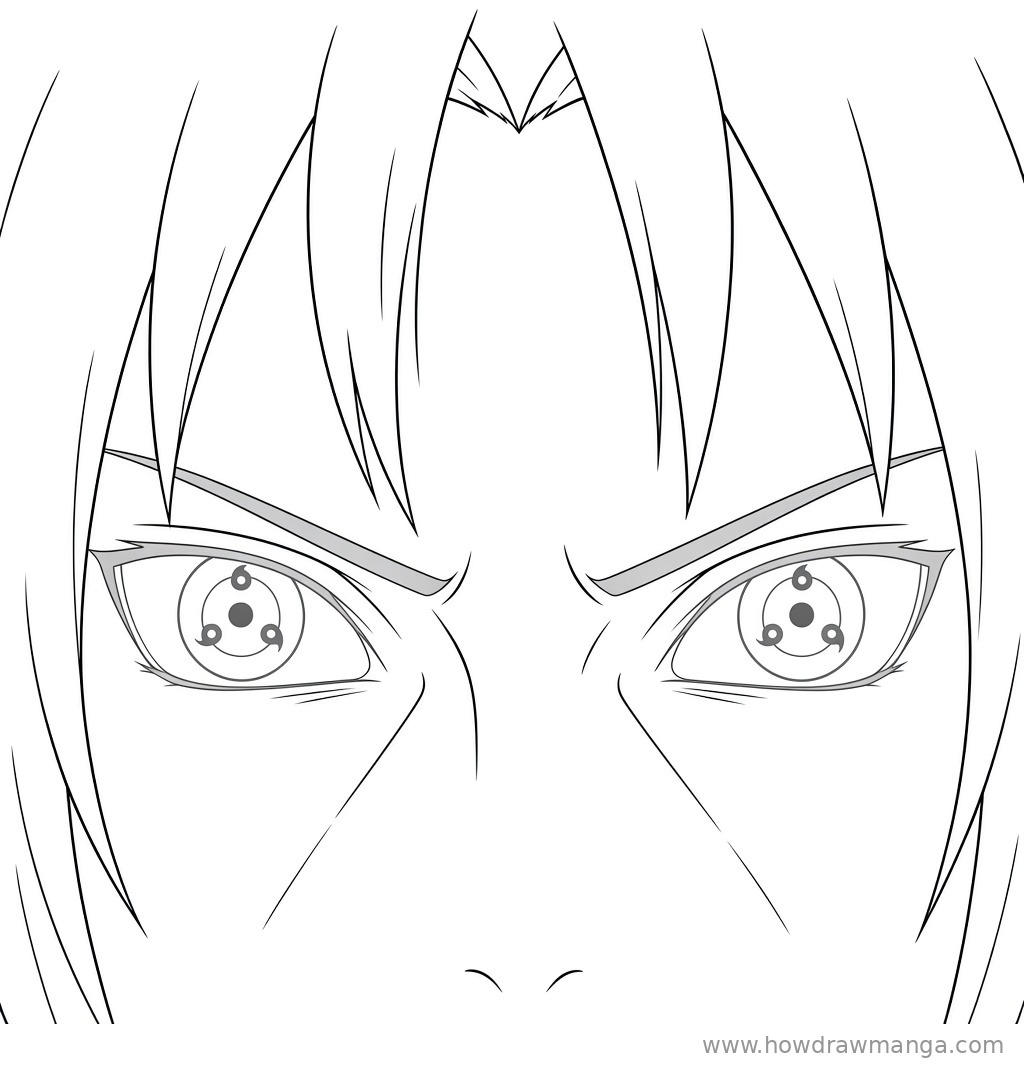
Step 7: Ink the Final Line Art
Trace the lines you want to keep with a fine liner or a darker pencil. Make the upper lids, brows and outer hair edges the boldest lines, and keep the tomoe ring, tear troughs and strand lines thinner. When the ink is dry, erase the centre line and the eye line. This step only cleans up the drawing, so do not add new shapes.
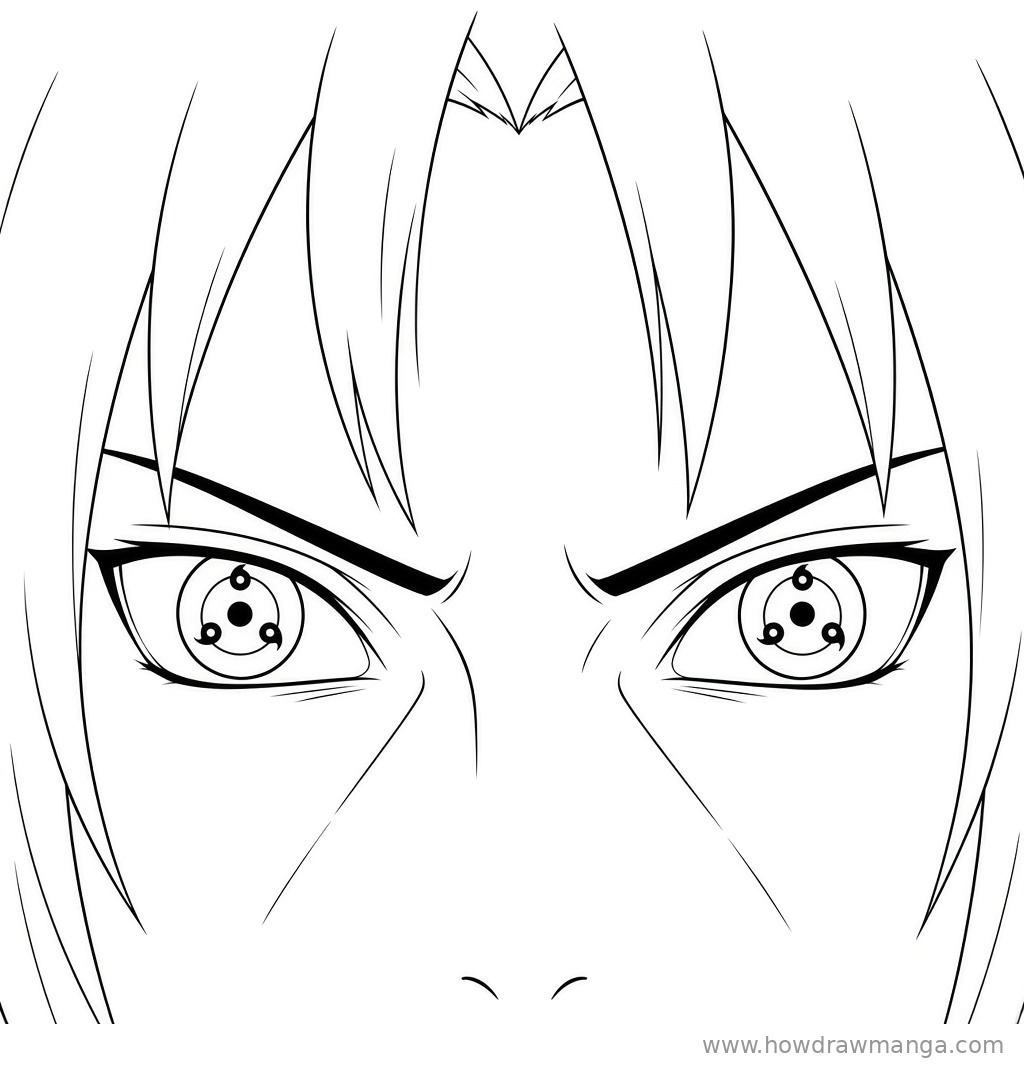
Key Pro Tips for Drawing Itachi’s Sharingan Eyes
- Always draw three tomoe. A fully matured Sharingan has three tomoe around the pupil; one or two tomoe show an earlier stage. Itachi’s Sharingan is fully matured.
- Do not skip the tear troughs. Character notes describe long, pronounced tear troughs under his eyes. Without them, the same eyes could pass for Sasuke’s.
- Space the tomoe evenly. Lightly mark three points on the ring, like a clock at roughly 12, 4 and 8, before you draw the tomoe. Uneven spacing is the most common mistake.
- Frame with centre-parted bangs. His face is framed by bangs parted in the middle, so split the hair at the top centre instead of sweeping it to one side.
- Colour it red. The Sharingan is red, and Itachi’s normal eyes are black. Colour the iris red, leave the tomoe and pupil black, and keep a small white highlight if you like.
FAQ
Is this the Mangekyō Sharingan?
No. This lesson draws his three-tomoe Sharingan. His Mangekyō Sharingan has a different pattern of three curves spiralling around the pupil, so it needs its own lesson.
Why draw only the eyes?
The eyes are the hardest and most recognisable part of the character. Once they look right, you can add them to a full face, using the face guide for his brother below as a starting point.