
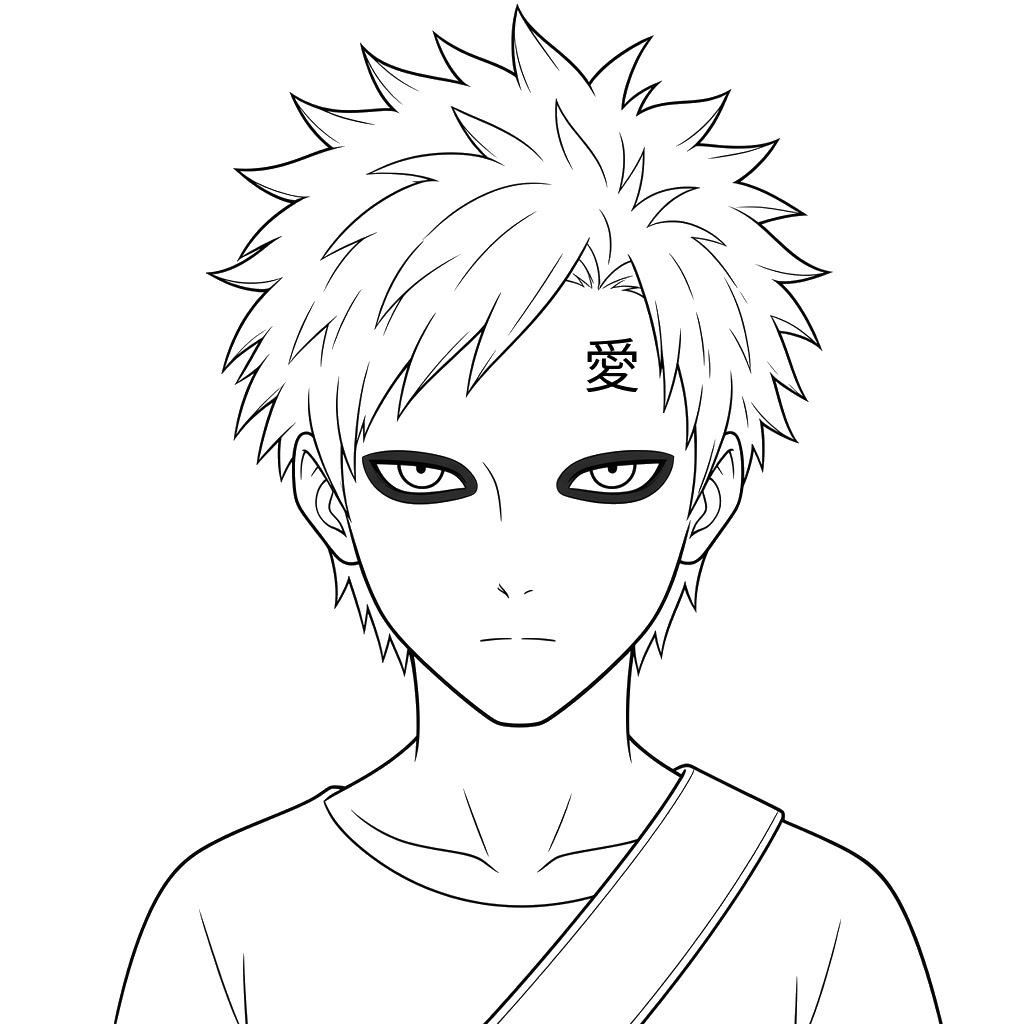
Gaara of the Sand is one of the most striking characters in Naruto, and his face is easy to recognise even in simple line art. In this guide you will learn how to draw gaara face in 7 steps: the narrow jaw, the spiky hair, the dark rings around his eyes and the love kanji on his forehead.
The drawing is based on his teenage look. The new lines for each step appear in black and the earlier lines in grey, so you can see exactly what to add each time. Take it slowly at the eyes, because that is where most of his personality shows.
Materials Needed
- Paper or a drawing tablet
- A light pencil (HB or 2H) for the guidelines
- A darker pencil (2B) or a fine liner for the final lines
- An eraser
- Optional: red, green and black markers or coloured pencils
Step-by-Step Gaara Face Drawing Guide
Step 1: Sketch the Head Circle and Guidelines
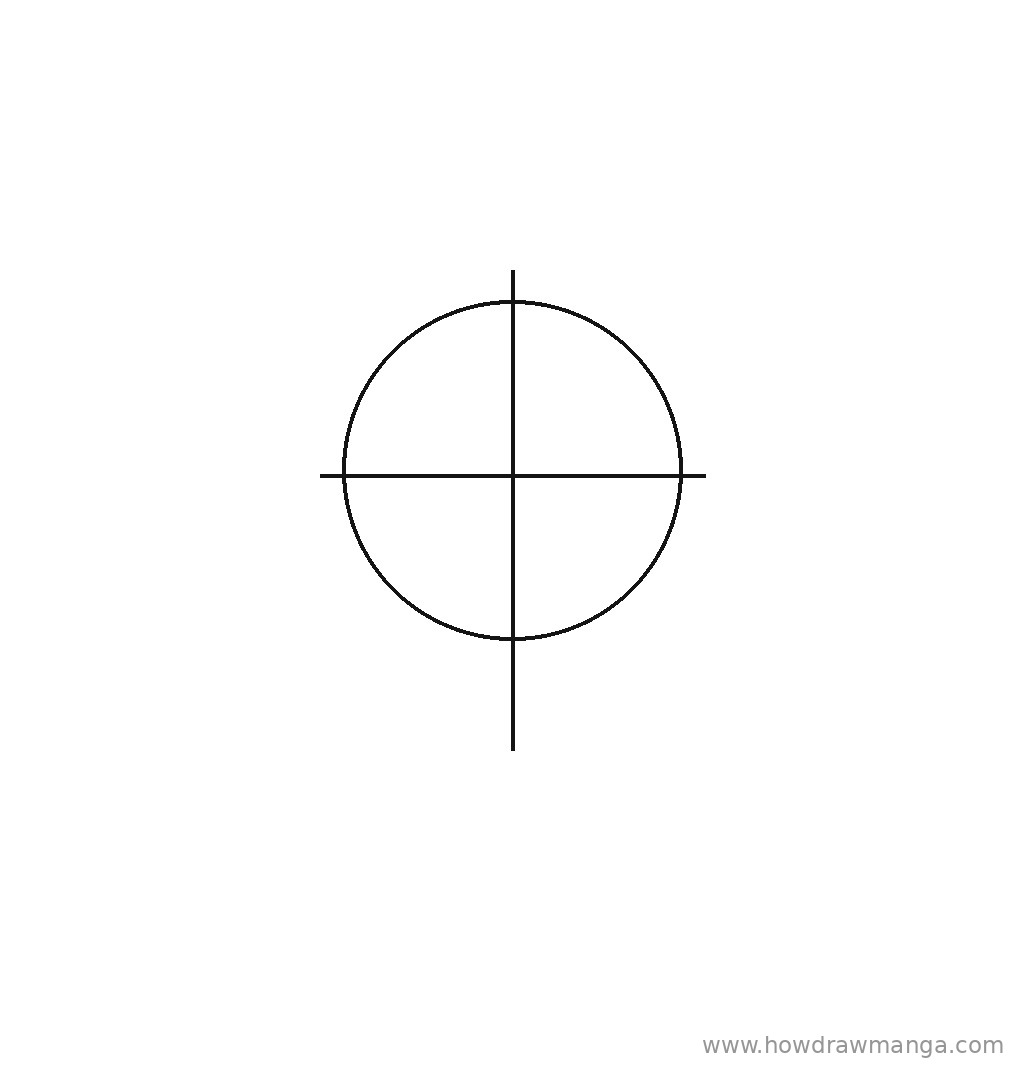
Draw a circle in the middle of the upper half of the page, about one-third of the page wide. Run a vertical centre line through it and let it continue below the circle by about a third of the circle’s height, so you know where the chin goes. Cross it with a horizontal eye line a little below the middle of the circle. Press lightly; all three lines get erased at the end.
Step 2: Draw the Narrow Jaw, Ears and Neck
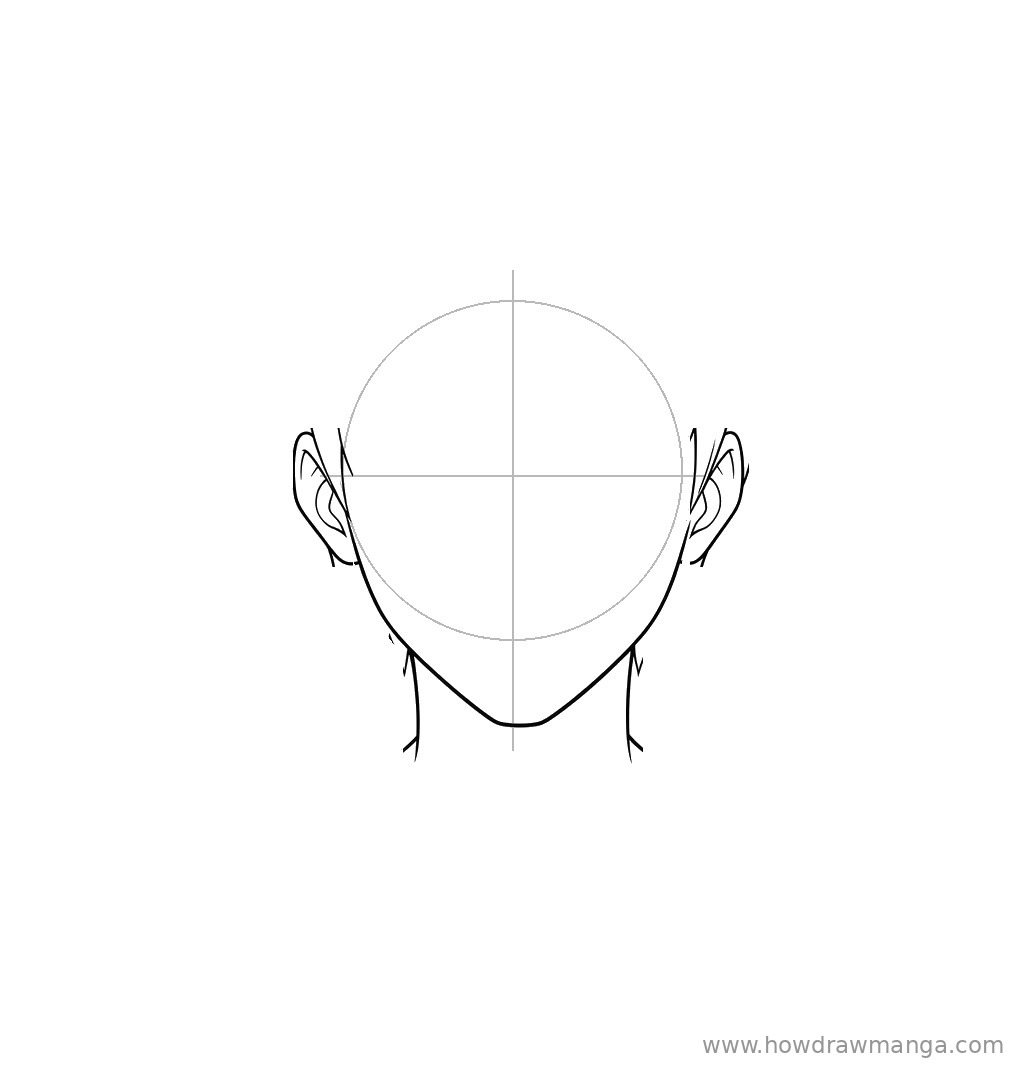
Begin each side of the face on the eye line, just inside the circle. Bring both sides down and inward in long, gentle diagonals so they meet in a small, slightly pointed chin on the centre line, below the circle. Add a C-shaped ear on each side of the circle, from the eye line down to about halfway to the chin, with one curved line inside for the inner ear. Drop two straight neck lines from under the jaw, each starting about a quarter of the face width in from the cheek.
Step 3: Draw the Spiky Hair and Side-Swept Bangs
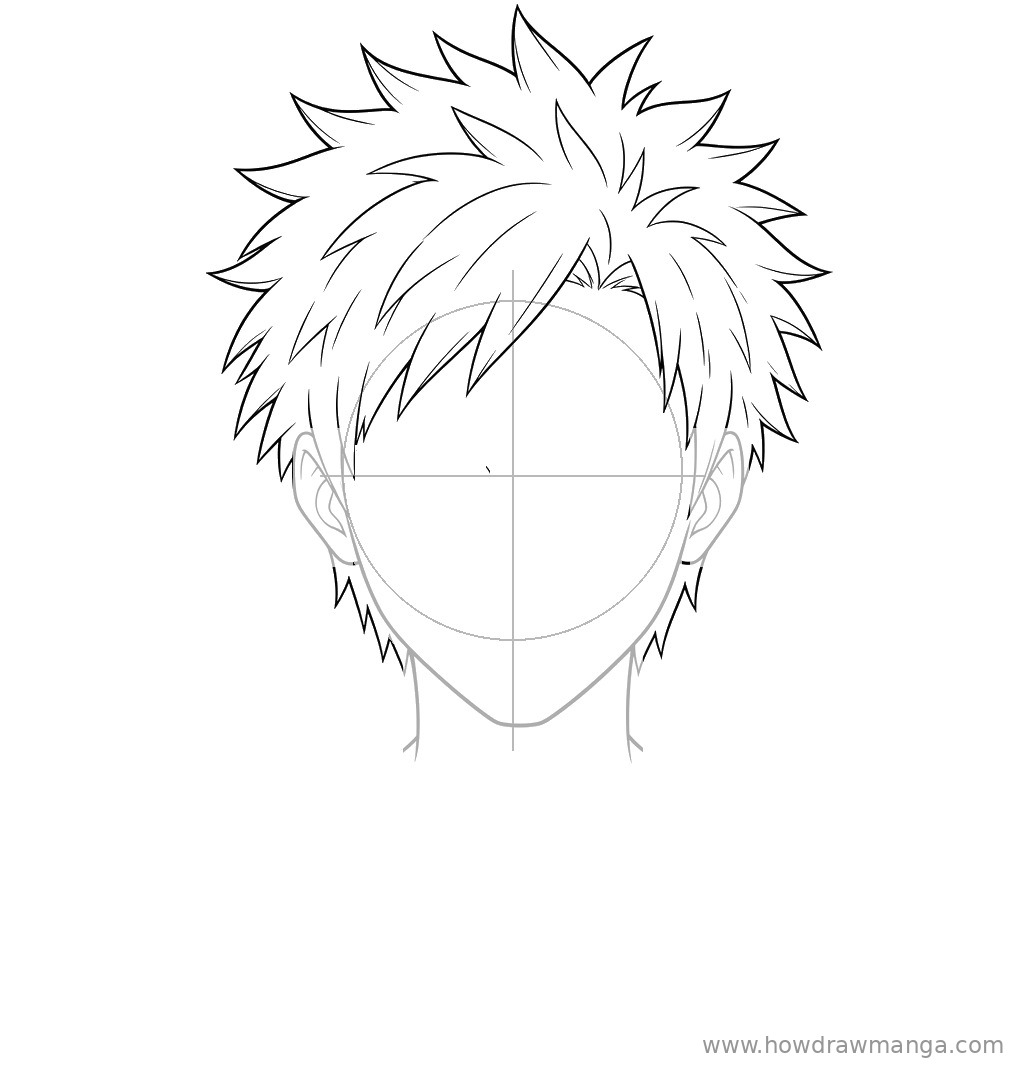
Build a wide, jagged outline around the top of the circle, well above it and about one and a half times as wide as the face. Make every spike a sharp triangle and point them out and up in different directions. Sweep a group of long, pointed bangs from the top centre down to the left side of the drawing, so they cover most of that side of the forehead. On the other side, part the hair so a patch of forehead stays bare, and finish with smaller spiky tufts that hang beside the ears down to about chin height.
Step 4: Draw the Eyes with Thick Dark Rings
Place two narrow, almond-shaped eyes on the eye line, with a gap of about one eye-width between them. Wrap each eye in a thick black ring that is wider at the top and tapers at the corners; this heavy ring is the most recognisable part of Gaara’s face. Inside, draw a round iris that touches the upper edge and a tiny dot for the pupil. Leave the brow area above the rings completely empty, because Gaara has no eyebrows.
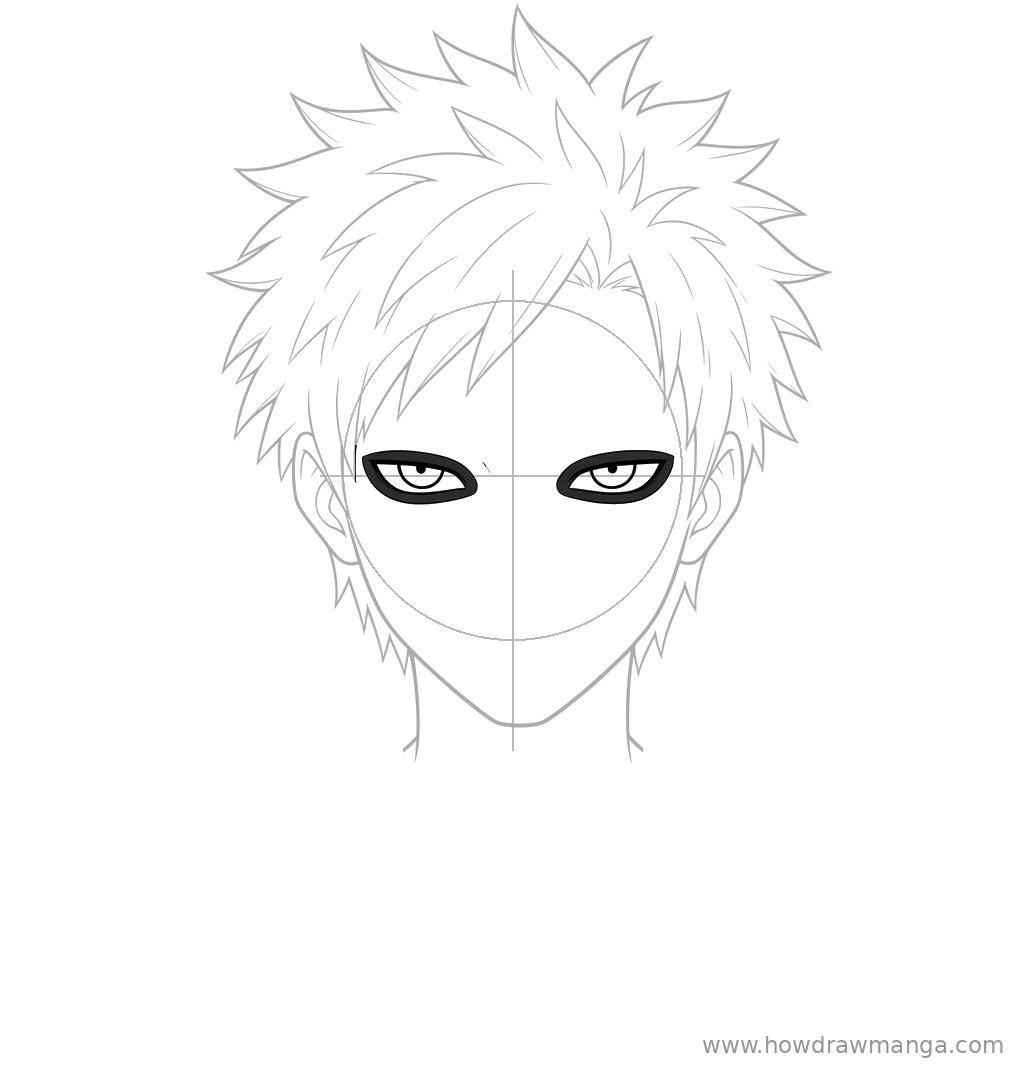
Step 5: Add the Love Kanji, Nose and Mouth
On the bare patch of forehead above the eye on the right side of the drawing, which is Gaara’s left side, write the kanji 愛 (love). Keep it about as wide as the gap between the eyes. Mark the nose with two tiny strokes on the centre line, roughly halfway between the eyes and the chin, and a faint, short line for the bridge between the eyes. Draw the mouth as a short, flat line about a third of the way from the nose to the chin to keep his calm, blank expression.
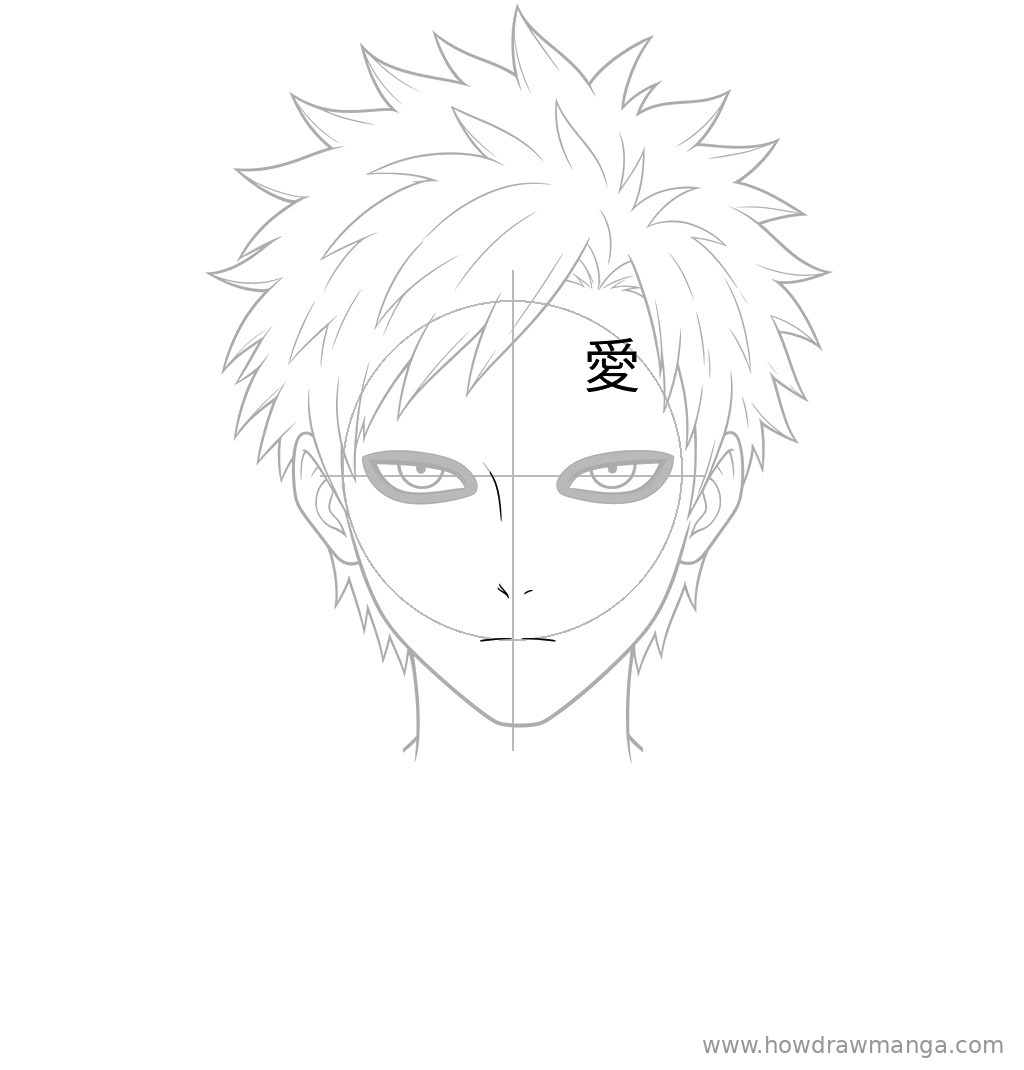
Step 6: Draw the Open Neckline and Diagonal Strap
Curve a wide, round neckline below the neck with a few short lines for the collarbones. Slope the shoulders out from the neck to the edges of the page and add a couple of light fold lines on the sleeves. Then draw a wide band as two parallel lines, starting at the shoulder on the right side of the drawing and running diagonally down across the chest to the bottom left corner.
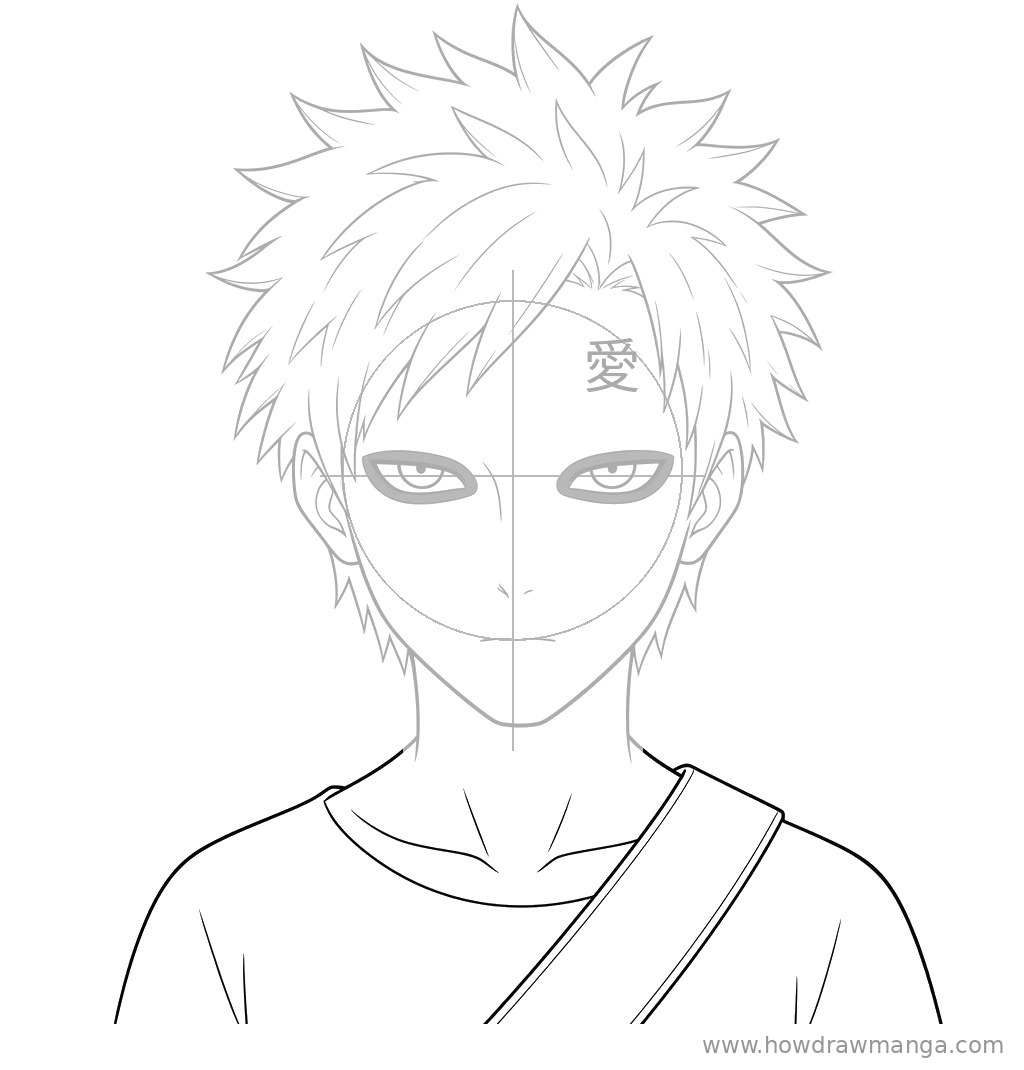
Step 7: Ink the Final Line Art
Trace the lines you are keeping with a fine liner or a soft, dark pencil. Use the boldest strokes on the outer hair spikes, the jaw and the shoulders, keep hair texture and neck lines thinner, and fill the eye rings solid black. When the ink is dry, erase the circle and both guidelines. Nothing new is added here; this step only cleans up the drawing.
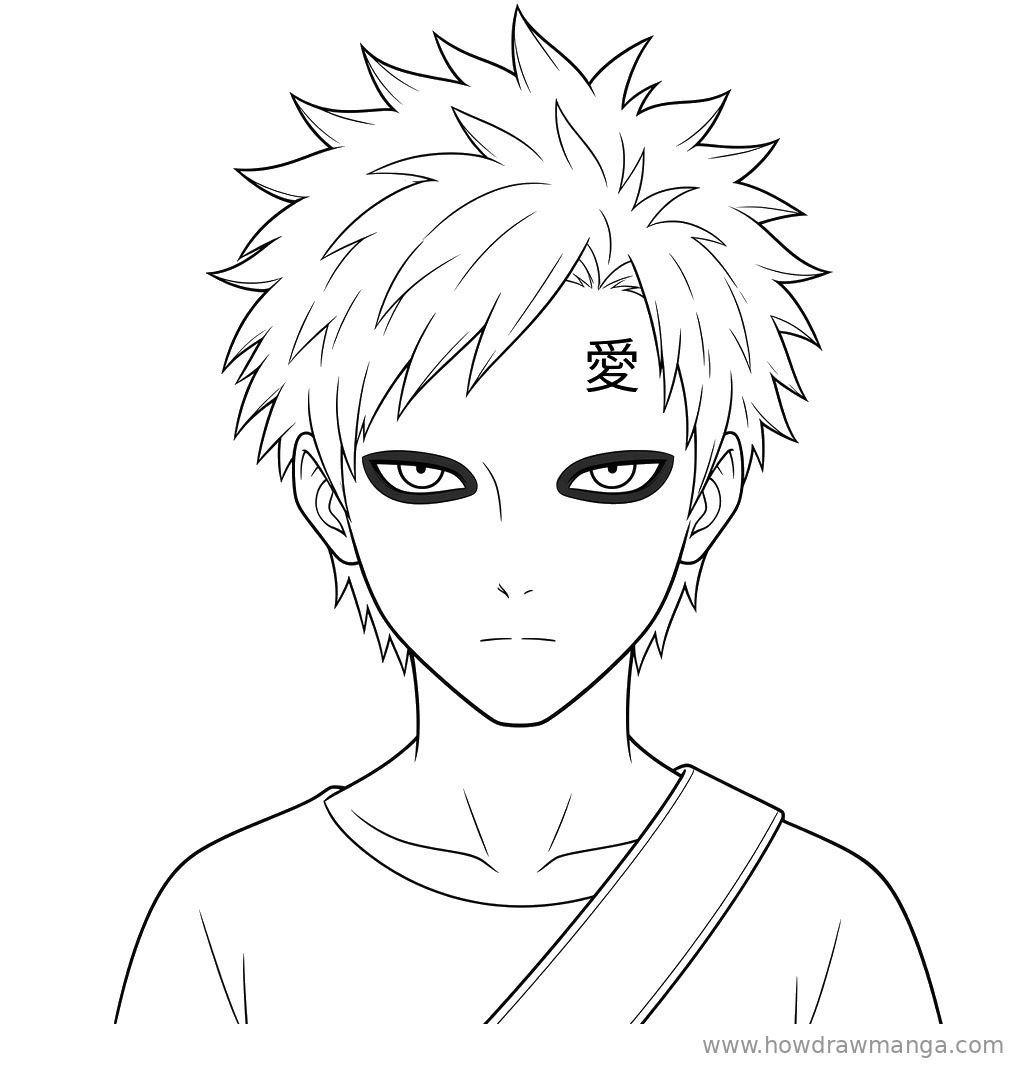
Key Pro Tips for Drawing Gaara’s Face
- Skip the eyebrows. Gaara has no eyebrows, so any line above the rings changes his look. Let the thick rings do all the work.
- Put the kanji on the correct side. The love kanji sits on Gaara’s left side of the forehead. In a front view that is the right side of your page, and his hair is parted so it stays visible.
- Make the rings bold and even. Draw both rings with the same thickness. If one is thinner, the face looks lopsided.
- Keep the pupils tiny. His pupils are barely visible, which gives him his intense stare. A large pupil makes him look like a different character.
- Colour tips. Use red for the hair (sources describe it as auburn or brick red), pale green for the eyes, black for the rings and red for the kanji.
FAQ
Why does Gaara have dark rings around his eyes?
He has had the tanuki-like rings his whole life. In the story they are linked to insomnia caused by Shukaku, the tailed beast sealed inside him.
What does the symbol on Gaara’s forehead mean?
It is the kanji 愛, which means love. He carved it on the left side of his forehead as a child.