
Boruto Uzumaki in Boruto: Two Blue Vortex looks sharper and older than the Academy kid fans met first. Unruly spiky blond hair, two whisker marks on each cheek, and a diagonal scar across his right eye make the teen face easy to recognise at a glance. In this guide you will learn how to draw boruto uzumaki face in 8 clear steps, from a plain head oval to finished line art with his open cloak collar.
Every picture shows the new lines in black and the earlier lines in grey, so you can follow exactly what changes from one step to the next. Keep your guidelines light; you will erase them before the final ink pass.
Materials Needed
- Paper or a drawing tablet
- A light pencil (HB or 2H) for guidelines
- A darker pencil (2B) or a fine liner pen for final lines
- An eraser
- Optional: colored pencils or markers for blond hair, bright blue eyes and a black cloak collar
How to Draw Boruto Uzumaki Face: Step-by-Step Drawing Guide
This how to draw boruto uzumaki face sequence builds the Two Blue Vortex teen look, not the short-haired Part I design. Work in order so the scar, whiskers and hair silhouette stay consistent.
Step 1: Sketch the Head Oval and Guidelines
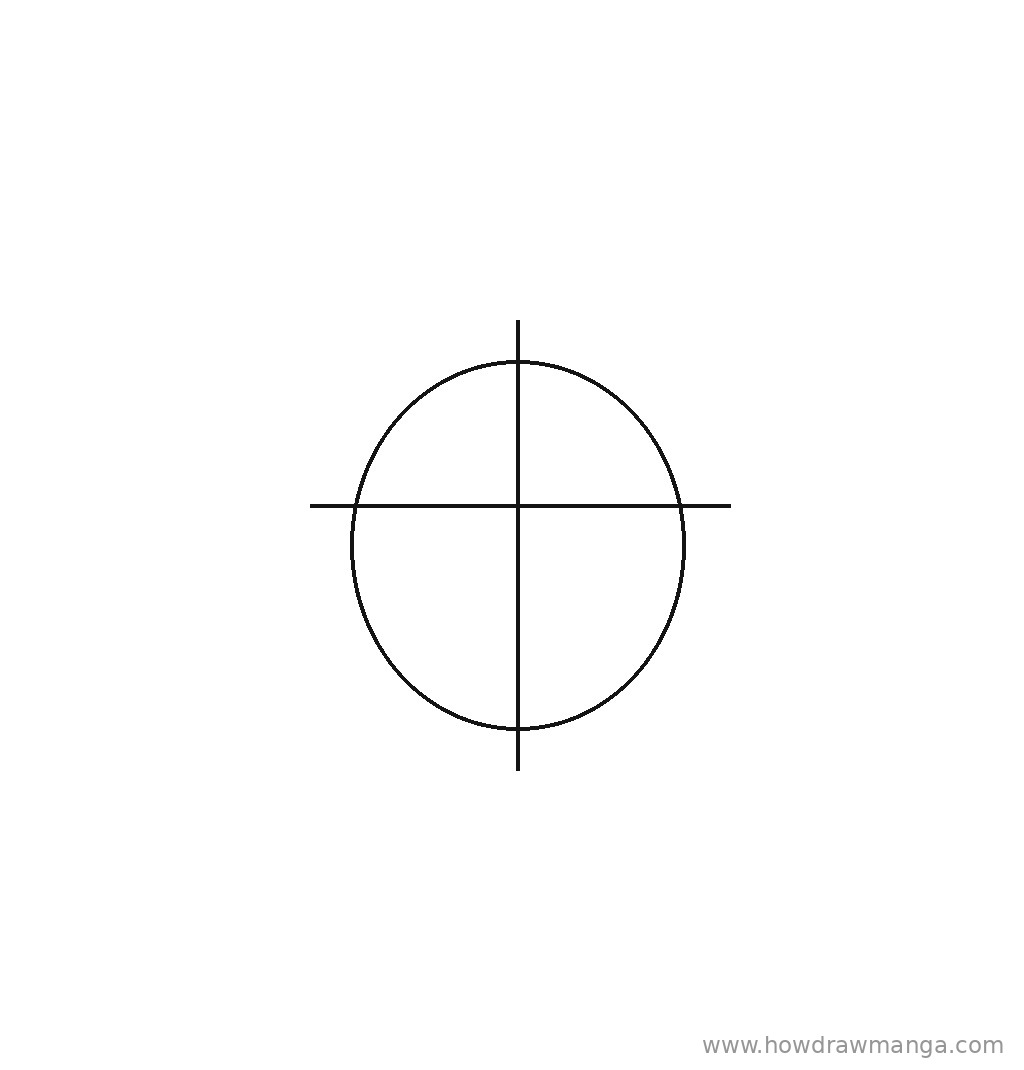
Draw a tall egg-shaped oval in the upper two-thirds of the page, a little taller than it is wide, with the narrow end at the bottom. Leave empty space above the oval about half to two-thirds of its height for the hair spikes, and leave room below for the neck and collar. Add a vertical centre line through the middle of the oval. Then draw a horizontal eye line across it at about half its height. Press lightly so these guides are easy to erase later.
Step 2: Shape the Jaw, Chin and Ears
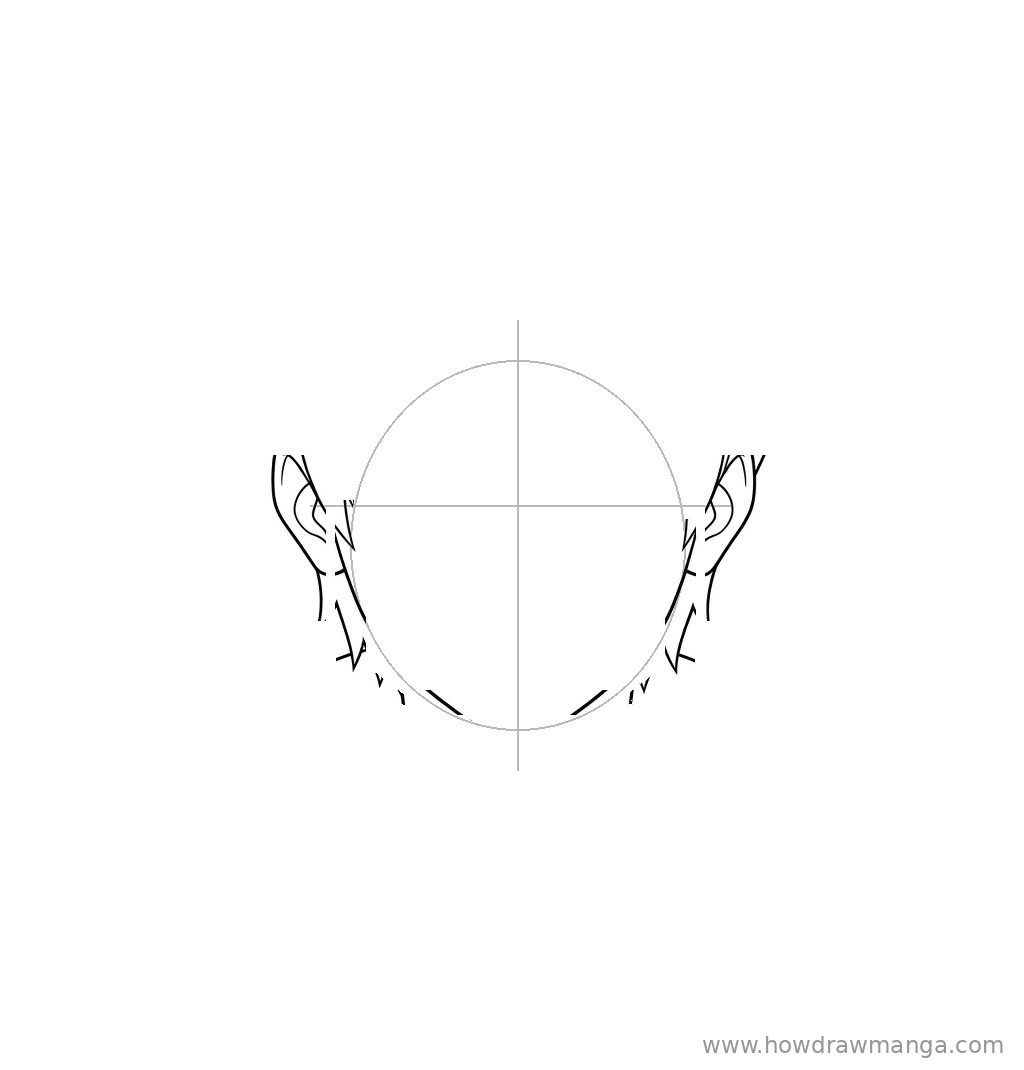
From about eye-line height on each side of the oval, pull slightly inward-slanting cheek lines down to a rounded teen chin on the vertical guide. Keep the chin a little narrower than a child’s round jaw so the face reads older. On each side, add a small C-shaped ear with the top level with the eye line and the bottom about one-third of the way down to the chin. Put a short fold mark inside each ear.
Step 3: Draw the Unruly Spiky Hair
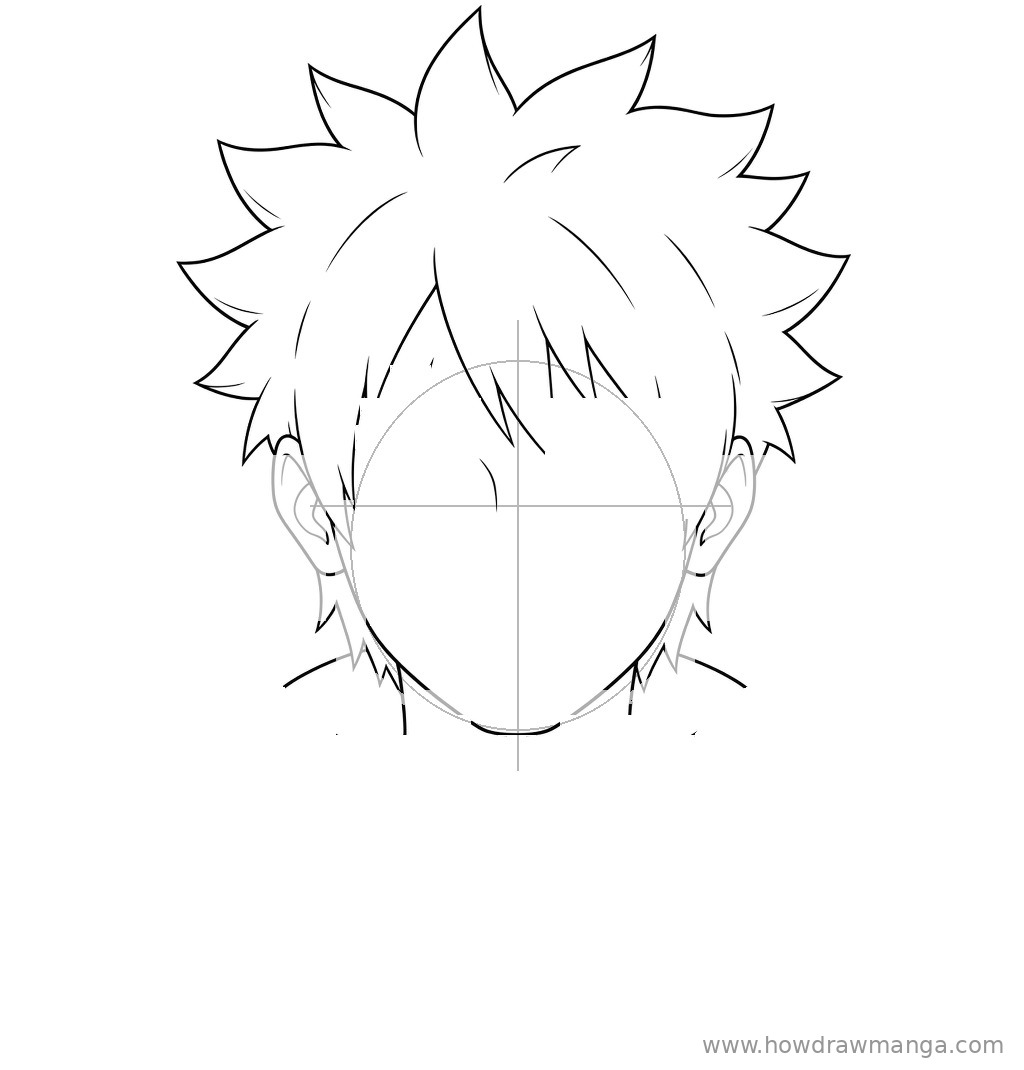
Above the forehead, build a mass of pointed, uneven spikes. The whole silhouette should feel leaf-like, with one taller near-centre spike acting like a stem, and the tallest spikes rising about half to two-thirds of the oval’s height above the head. Fan shorter spikes left and right so the cut looks trimmed but unruly. Add two long pointed locks framing each side of the face down to near jaw level. Drop several pointed bangs down over the forehead toward the bridge of the nose, denser in the middle than a neat fringe, without covering the eyes. Leave small gaps of forehead visible between the bang clumps.
Step 4: Add the Whisker Marks
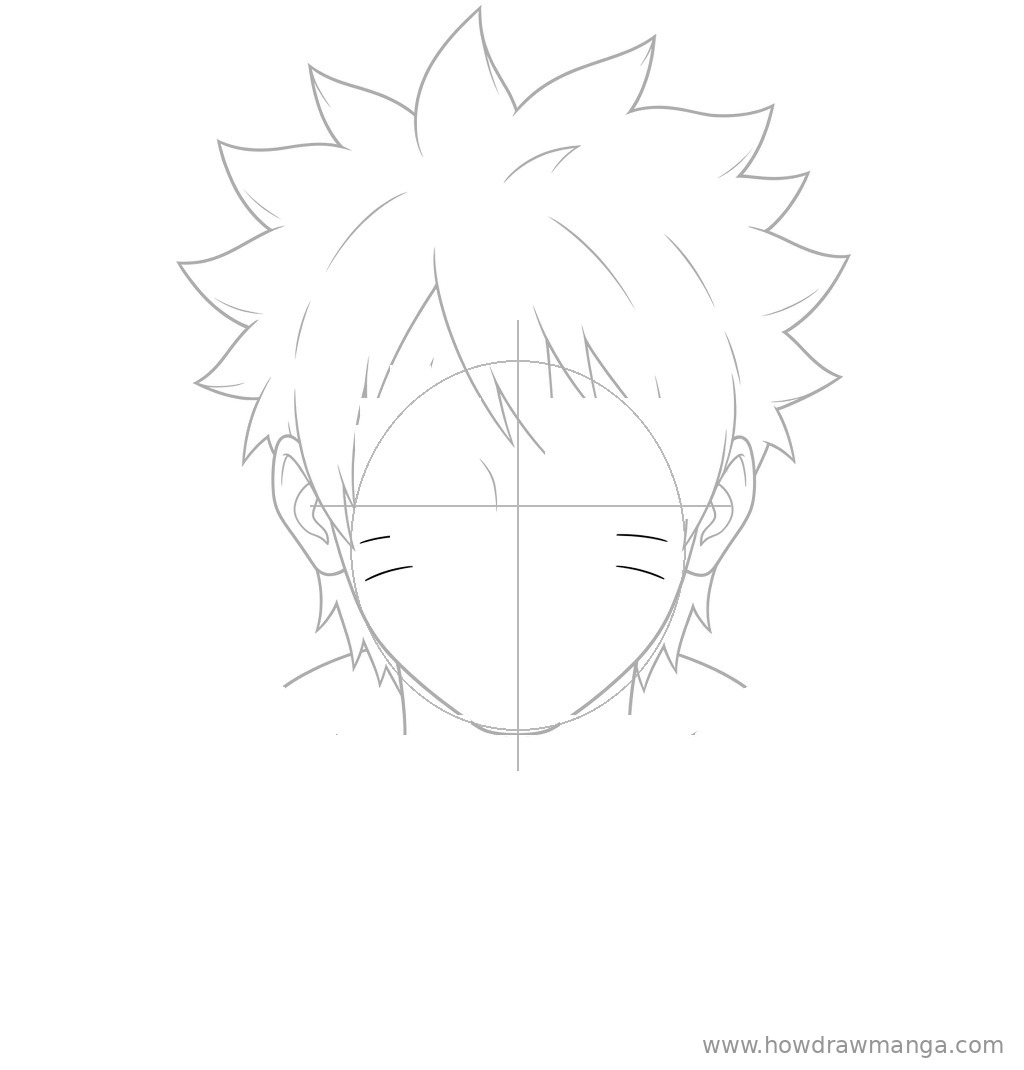
On each cheek, draw two short, nearly horizontal parallel line marks. Place them on the mid-cheek below the eye line, roughly where the nose will sit. Each mark should be about one-third as long as an eye is wide. Use only two marks per cheek — Boruto does not have Naruto’s sets of three. Keep the upper mark on his right cheek (the left side of your picture) ready for the scar to cross it in the next step.
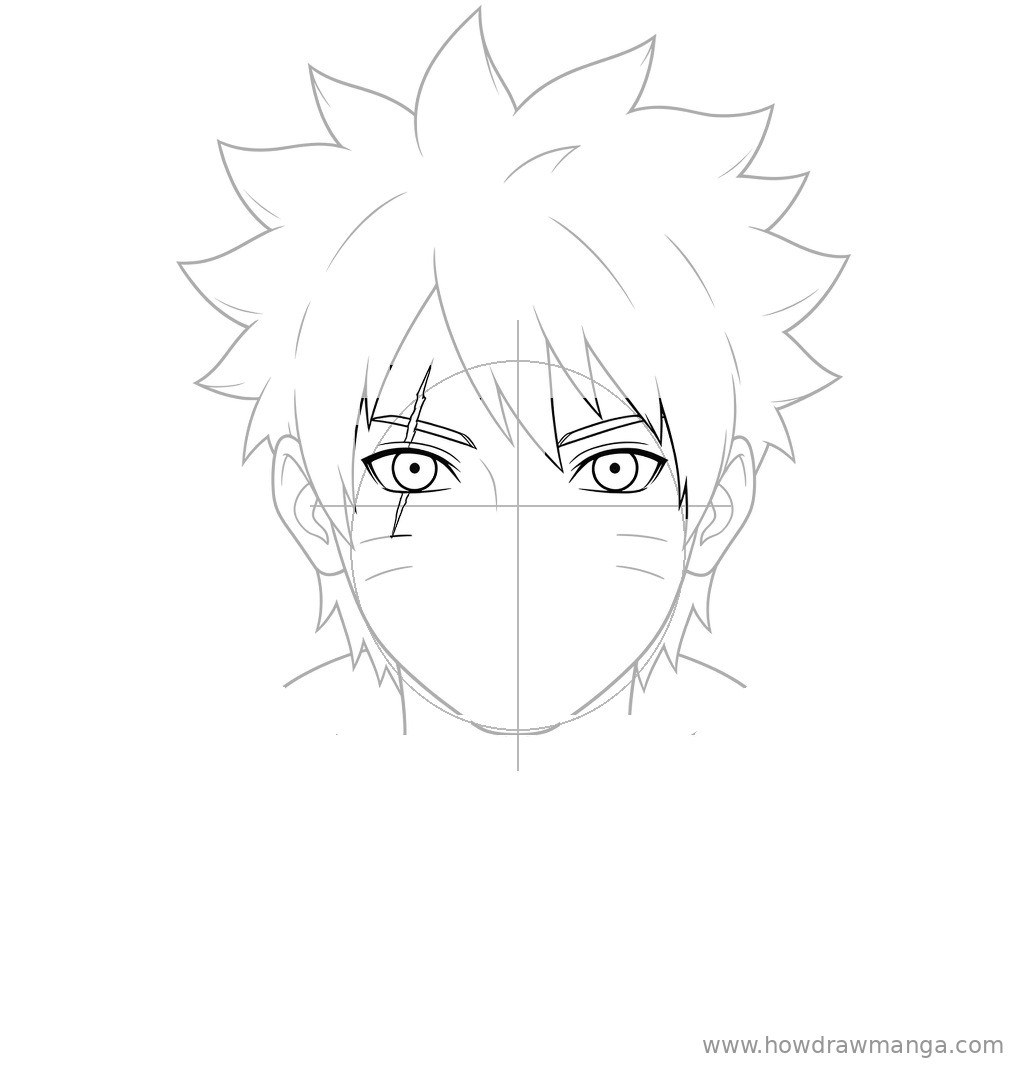
Step 5: Draw the Eyes, Brows and Right-Eye Scar
On the eye line, draw two almond-shaped eyes about one eye-width apart, each roughly one-fifth of the head width. Add a round iris and a small pupil highlight in both eyes so they stay open in the resting Two Blue Vortex look. Place a short angled brow above each eye. Then draw a thin diagonal scar on Boruto’s right eye (viewer’s left): start just above that eyebrow, cut down through the brow and across the eye, and continue onto the cheek until the line intersects the top whisker mark. Keep the scar thin and clean, not a wide gouge.
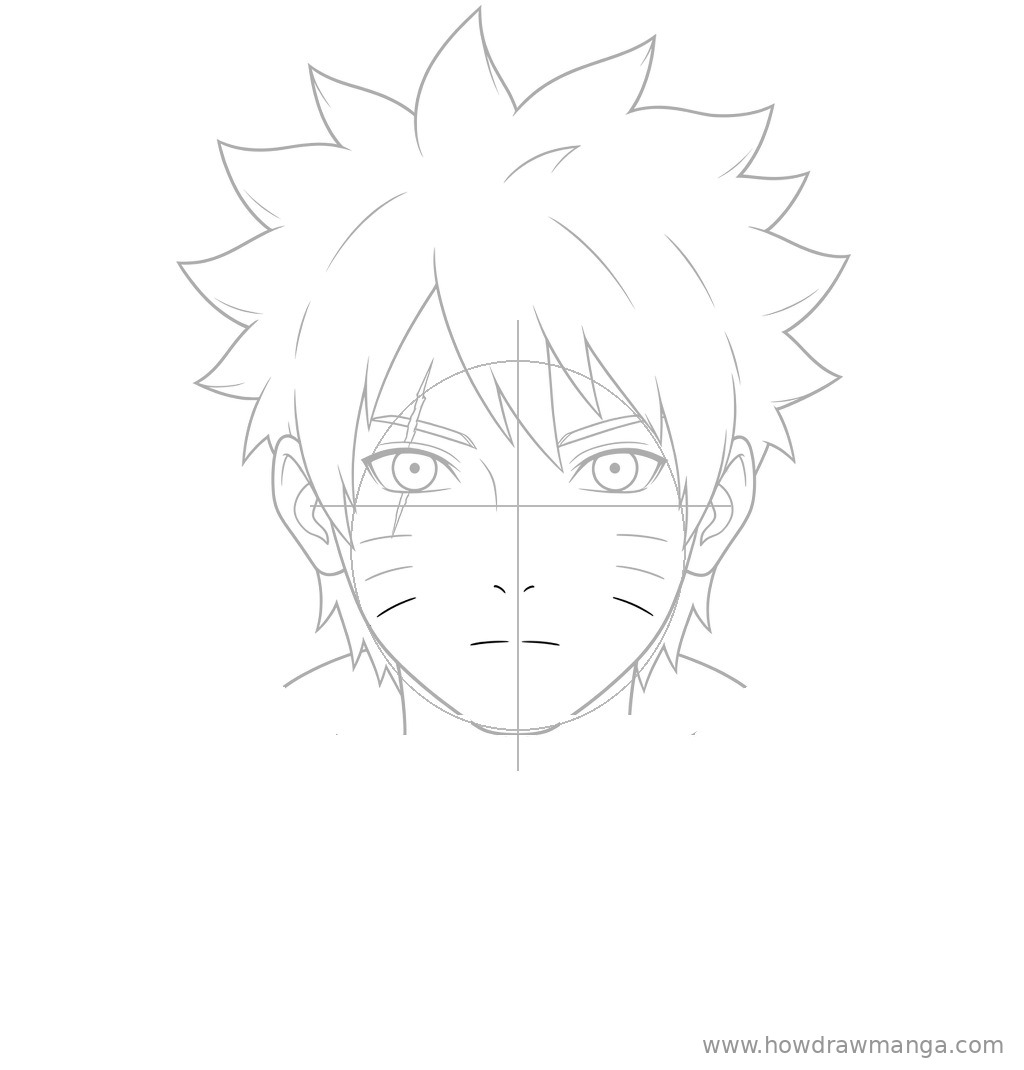
Step 6: Add the Nose and Mouth
On the centre line, place a small angled nose mark about halfway from the eye line to the chin — two tiny nostril ticks work well. Below it, draw a short, nearly flat mouth line about one-third of the way from the nose down to the chin. Keep the mouth about as wide as the gap between the inner corners of the eyes. Add a short soft crease tick on each cheek just outside the mouth corners, lower than the whiskers. These small shapes finish the teen face without adding extra detail.
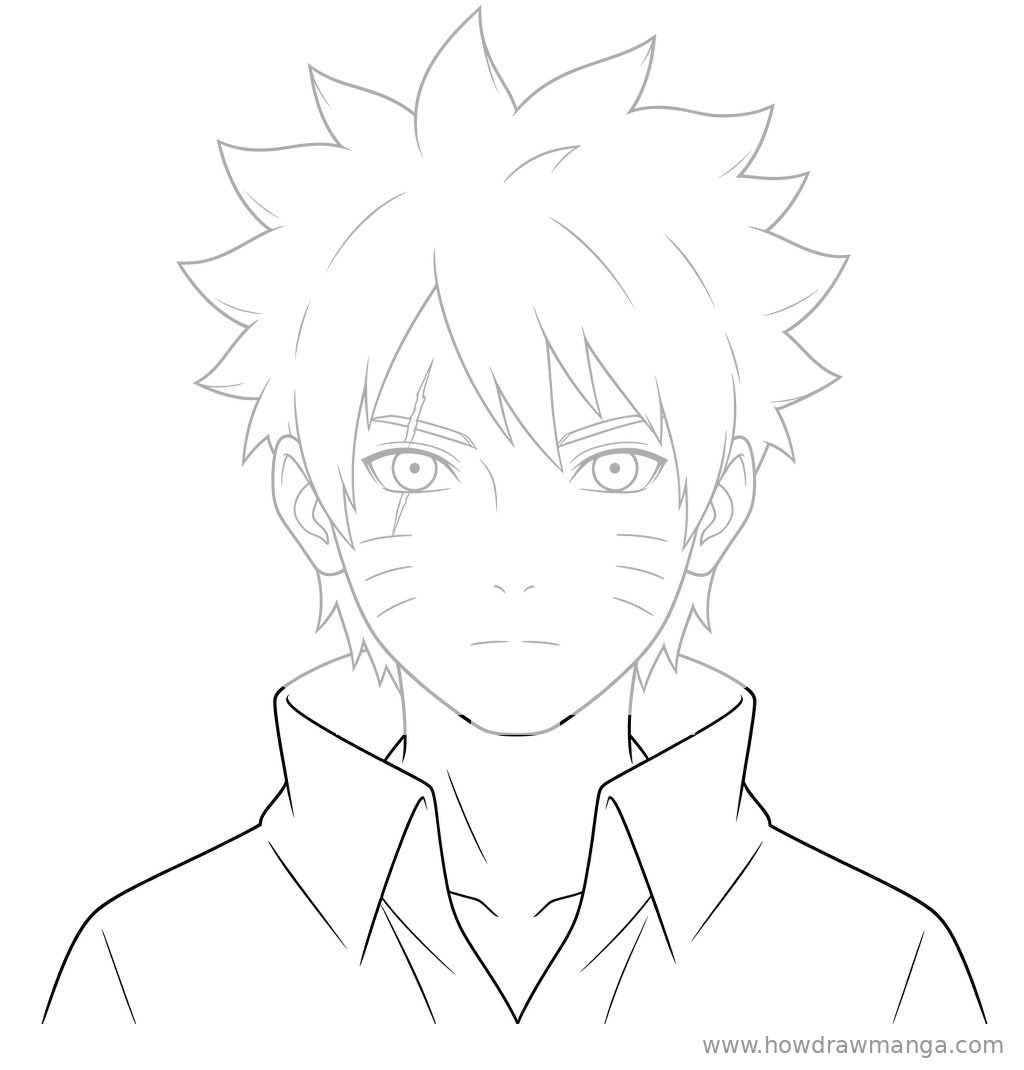
Step 7: Draw the Neck and Open Cloak Collar
From under the jaw, drop two short neck lines about two-thirds as wide as the face. Around them, add an open high cloak collar: tall flaps or lapels rising beside the neck almost to jaw or ear level, with a clear V-shaped gap at the front and a simple inner edge on each side. Finish with two short shoulder lines sloping out toward the edges of the page. This collar frames the face the way Boruto’s Two Blue Vortex cloak outfits do.
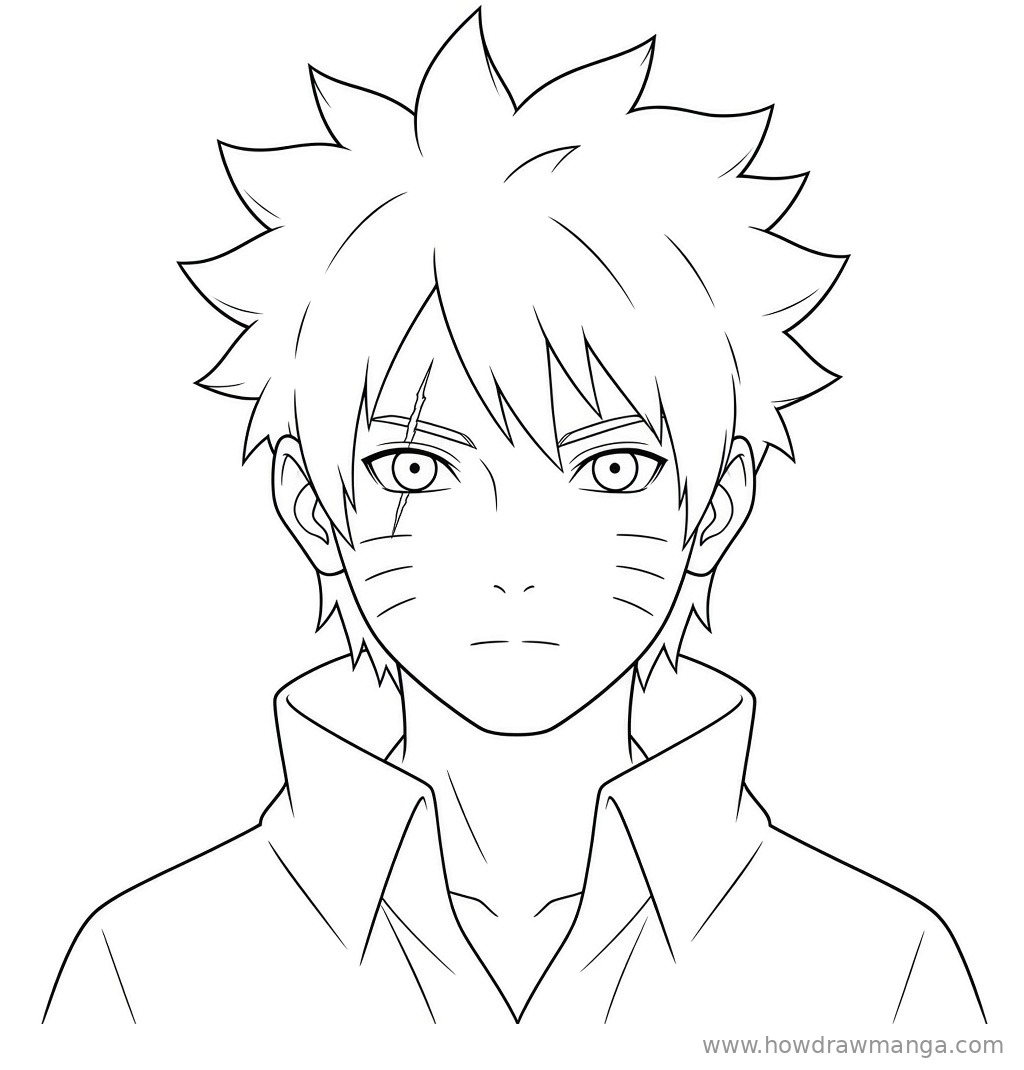
Step 8: Ink the Final Line Art
Trace your best lines with a darker pencil or pen. Make the hair outline, jaw and collar the boldest strokes. Keep the whiskers, scar, brows and inner ear folds thinner. Erase the head oval, centre line and eye line once the ink is dry. Do not invent new shapes in this step — only clean up what you already drew. Your Boruto Uzumaki face is finished.
Key Pro Tips for Drawing Boruto Uzumaki
- Count the whiskers. Two marks on each cheek. Three per side accidentally turns him into Naruto.
- Put the scar on the correct eye. It belongs on Boruto’s right eye (left side of the picture when he faces you), running from above the brow through the eye onto the cheek.
- Keep the hair unruly, not neat. A short tidy Academy cut reads as Part I Boruto. Uneven spikes, a leaf-like peak and side framing locks sell the Two Blue Vortex teen silhouette.
- Leave both eyes open. The resting face shows a scarred open eye, not a glowing dōjutsu. Save special eye effects for a separate drawing if you want them.
- Coloring tip: use light blond for the hair, bright blue for the irises, skin tone for the face, and near-black for the cloak collar. Keep the scar a thin darker skin line.