
Kakashi Hatake, the laid-back teacher of Team 7 in Naruto, has one of the most recognisable faces in anime, even though you barely see it. A tilted forehead protector hides one eye, a dark mask covers everything from the nose down, and a tall crown of spiky hair leans to one side. In this guide you will learn how to draw Kakashi Hatake face in 8 clear steps, from a plain head oval to finished line art with his high vest collar.
The trick with Kakashi is that most of his personality comes from a few shapes: the slanted headband, the sleepy half-closed eye and the clean outline of the mask. In every picture the new lines are black and the earlier lines are grey, so you can see exactly what changes from one step to the next.
Materials Needed
- Paper or a drawing tablet
- A light pencil (HB or 2H) for the guidelines
- A darker pencil (2B) or a fine liner pen for the final lines
- An eraser
- Optional: colored pencils or markers for silver hair, a dark blue mask and a green vest
How to Draw Kakashi Hatake Face: Step-by-Step Drawing Guide
Step 1: Draw the Head Oval and Guidelines
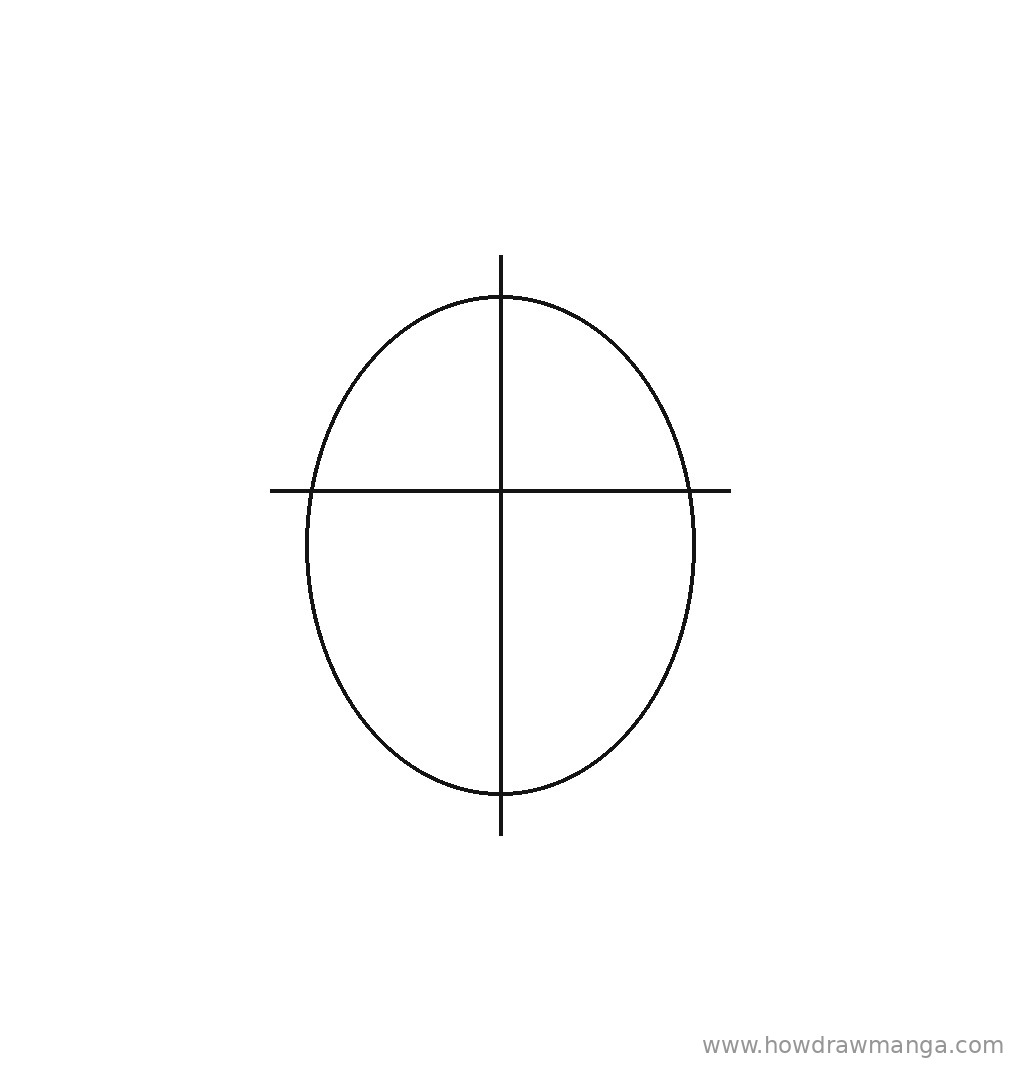
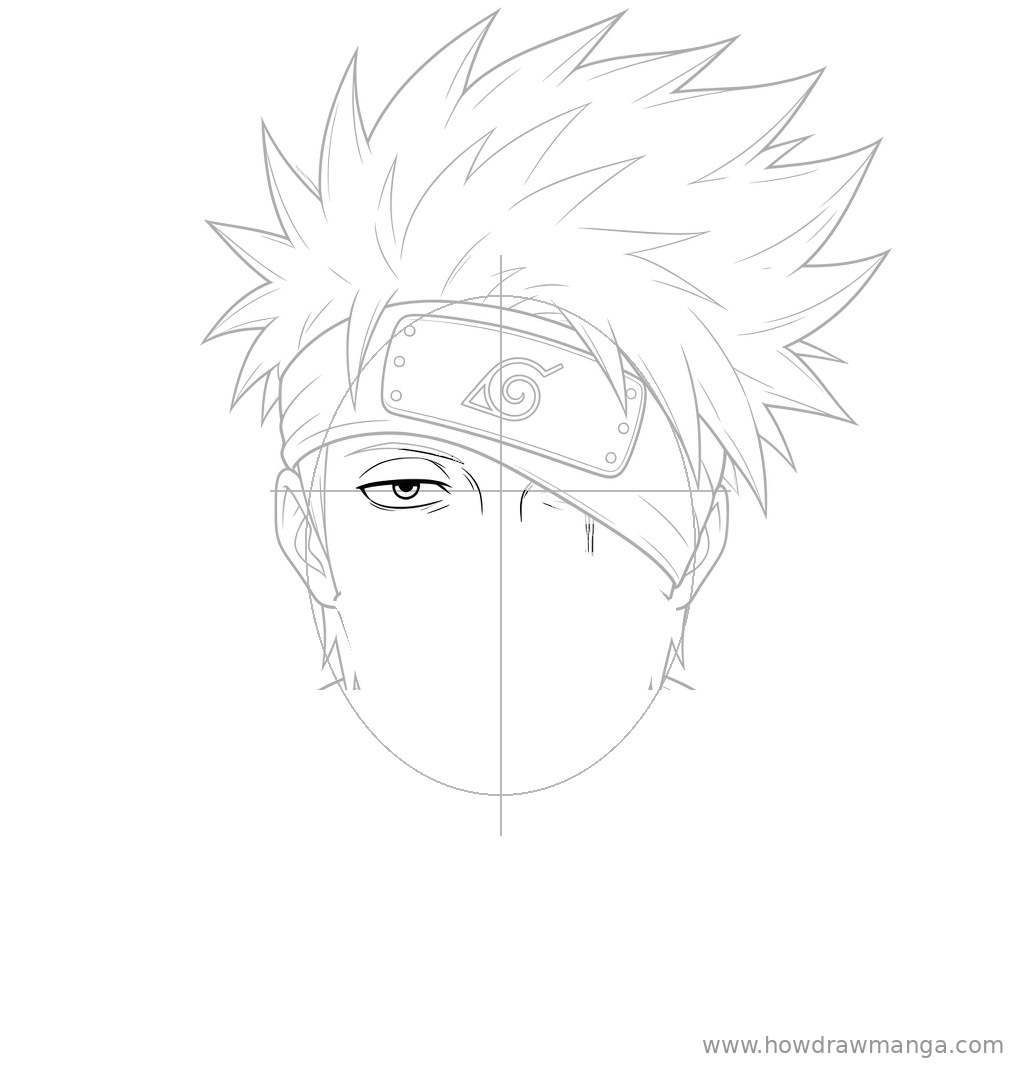
Draw an egg-shaped oval in the middle of the page, a little taller than it is wide, with the narrow end at the bottom. Keep plenty of room above and to the right, because the hair will rise almost a full head-height over the oval and lean that way. Add a vertical center line through the middle of the oval. Then draw a horizontal eye line across it at about half its height. Press lightly so these guides are easy to erase.
Step 2: Draw the Tilted Forehead Protector
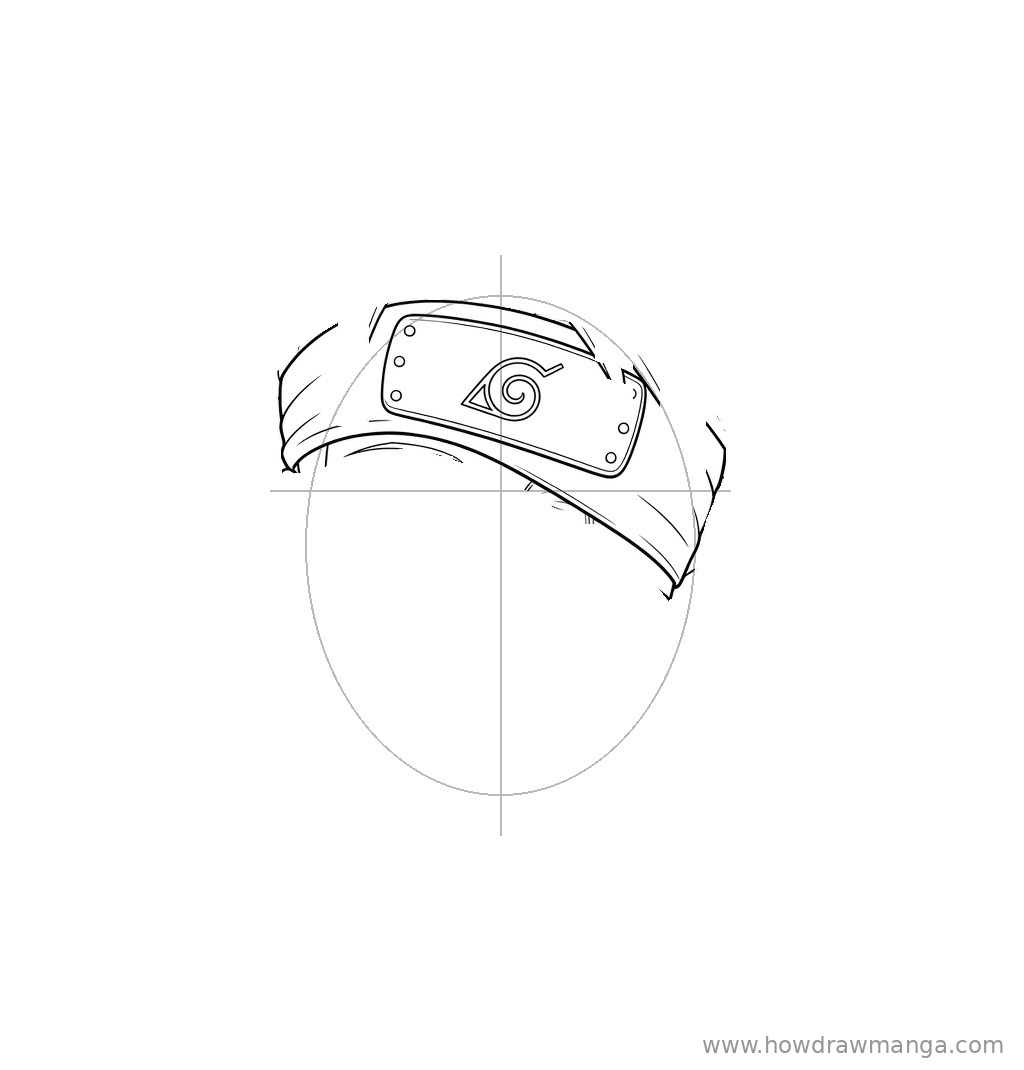
Wrap a wide band around the upper part of the head, above the eye line, so it pokes out slightly past the oval on both sides. Inside the band, draw a rectangular metal plate with rounded corners that tilts upward toward the left side of the picture. Put three small rivet circles near each short end of the plate and a leaf swirl symbol in the middle. On the right side of the picture, let the band slope down across the face and over that eye, ending just below the eye line at the edge of the head. This slanted band is the first thing people recognise about Kakashi.
Step 3: Sketch the Tall Spiky Hair
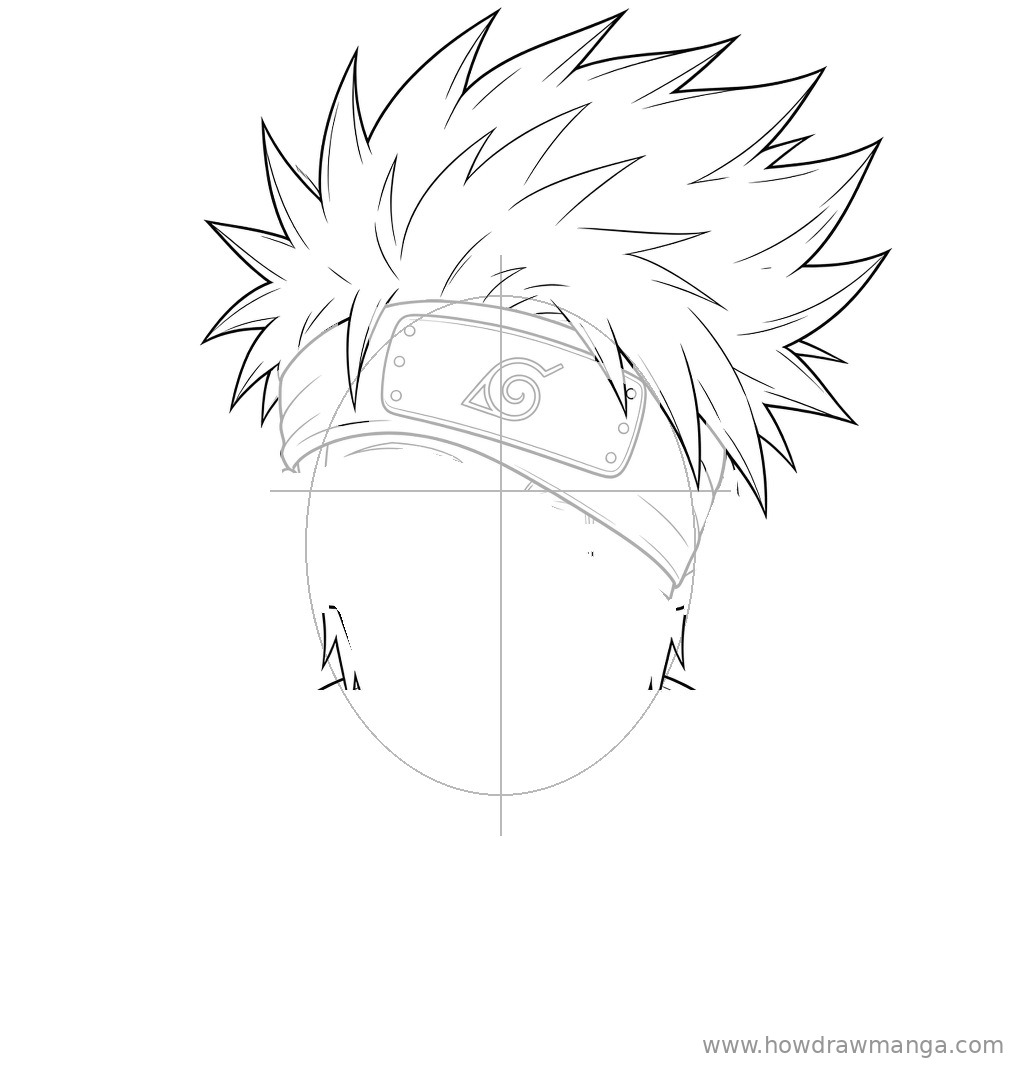
Above the band, draw a big mass of long, pointed spikes. The tallest spikes rise almost a full head-height above the oval, and the whole shape leans and sweeps toward the right side of the picture, where the spikes stretch out well past the face. Make the spikes on the left shorter and pointing outward. Let a few thin strands fall over the edges of the band, and add two or three short pointed locks hanging down beside each side of the jaw, below the ears.
Step 4: Add the Ears and Cheek Line
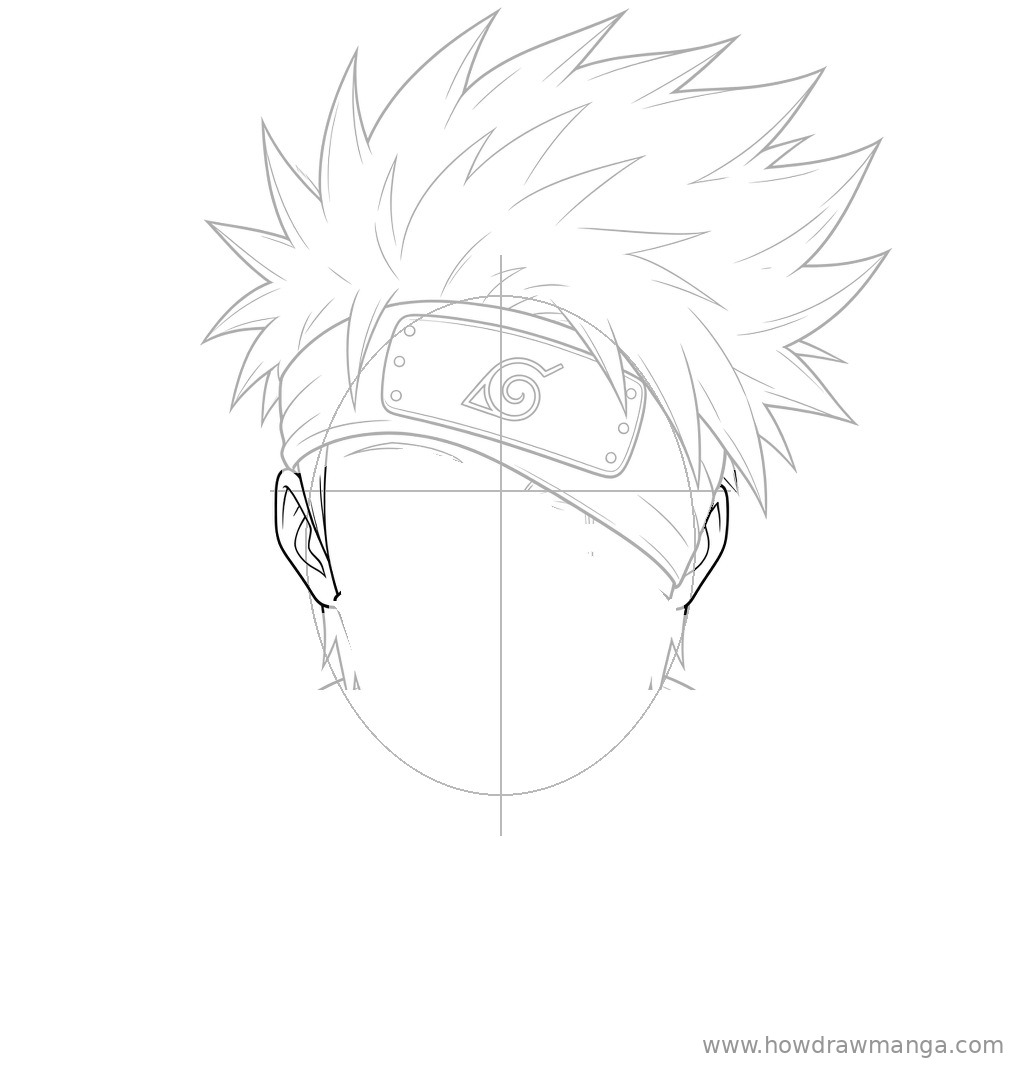
Draw a C-shaped ear on each side of the head. The top of each ear sits level with the eye line and the bottom reaches about a third of the way down to the chin. Add a short line inside each ear for the inner fold. Then draw a slightly curved line down the left side of the face, from just below the band to the level of the ear bottom, to show the edge of the cheek.
Step 5: Draw the Visible Eye and Scar
On the left side of the center line, sitting on the eye line, draw one narrow almond-shaped eye about as wide as a fifth of the head. Make the upper lid a heavy, almost flat line that covers the top of the iris, so the eye looks half closed and relaxed. Add a small round iris with a dark pupil under the lid, a thin lower lid line and two short creases below the eye. Above it, draw a thin, slightly curved brow just under the band. On the other side, add a small curve for the eye socket at the band’s edge, and draw a very short, thin vertical line on the cheek just below the band for the end of his scar.
Step 6: Draw the Mask and Erase the Guides
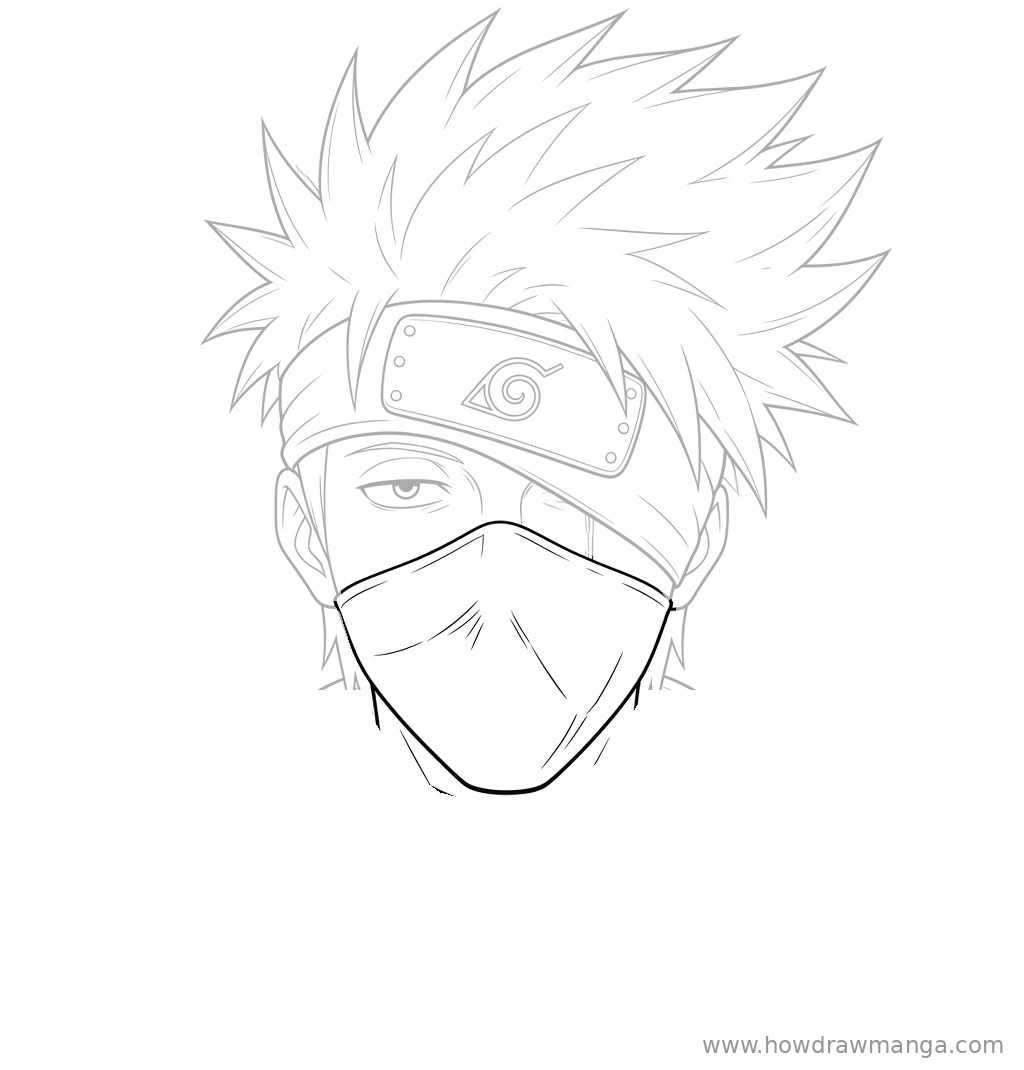
Start the mask’s top edge across the bridge of the nose, just below the visible eye. It rises to a small point over the nose and slopes down to each side of the face. From there, follow the cheeks down into a rounded, slightly pointed chin a little below the bottom of the oval. Add a soft line down the center for the nose ridge and a few short fold lines on the cheeks so the fabric looks fitted. Now erase the head oval, the center line and the eye line.
Step 7: Add the Neck, Vest Collar and Shoulders
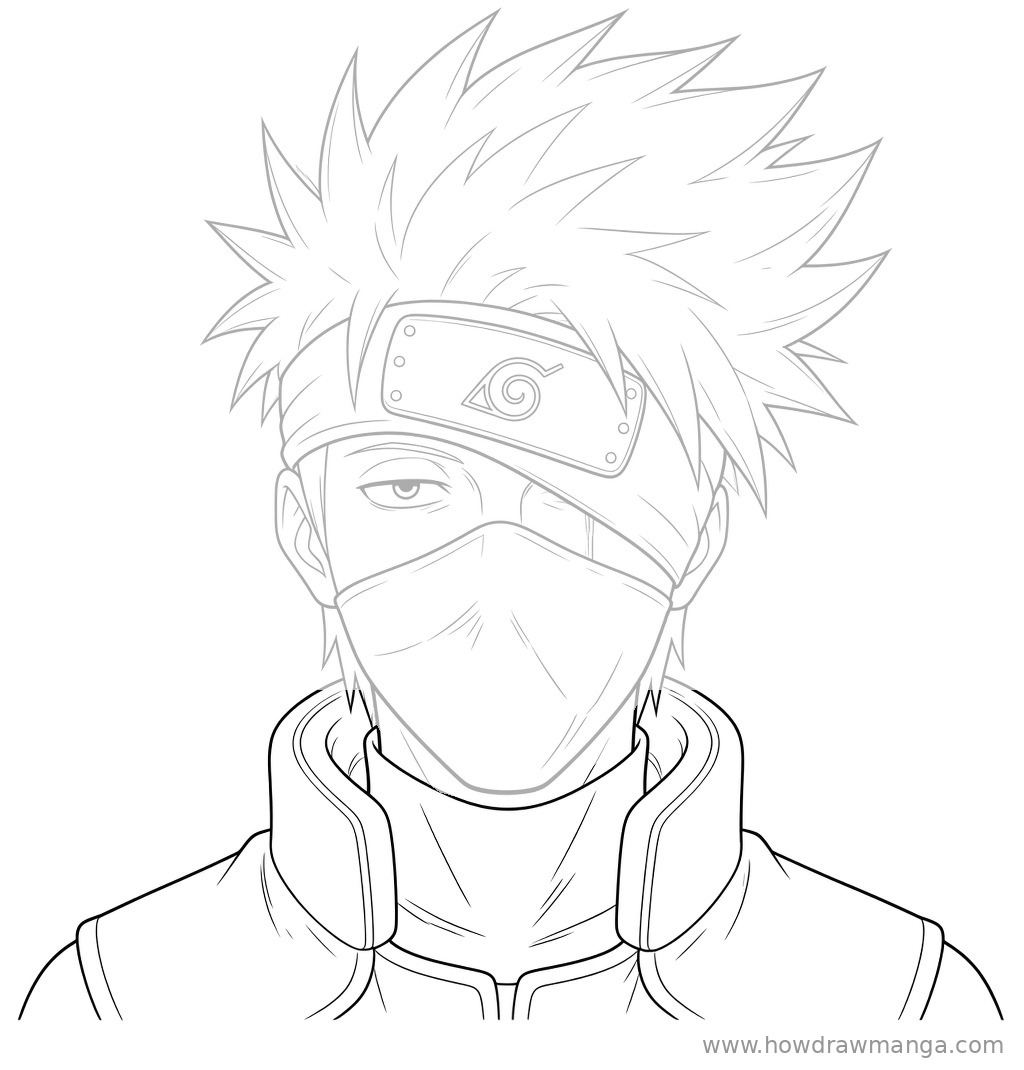
Below the chin, draw a fitted turtleneck that runs straight down, about two-thirds as wide as the face. Around it, add the thick, rounded collar of his flak vest. It stands up high on both sides of the neck, almost reaching the bottom of the ears, and leaves a gap at the front. Finish with two shoulder lines that slope down and out toward the edges of the picture.
Step 8: Ink the Final Line Art
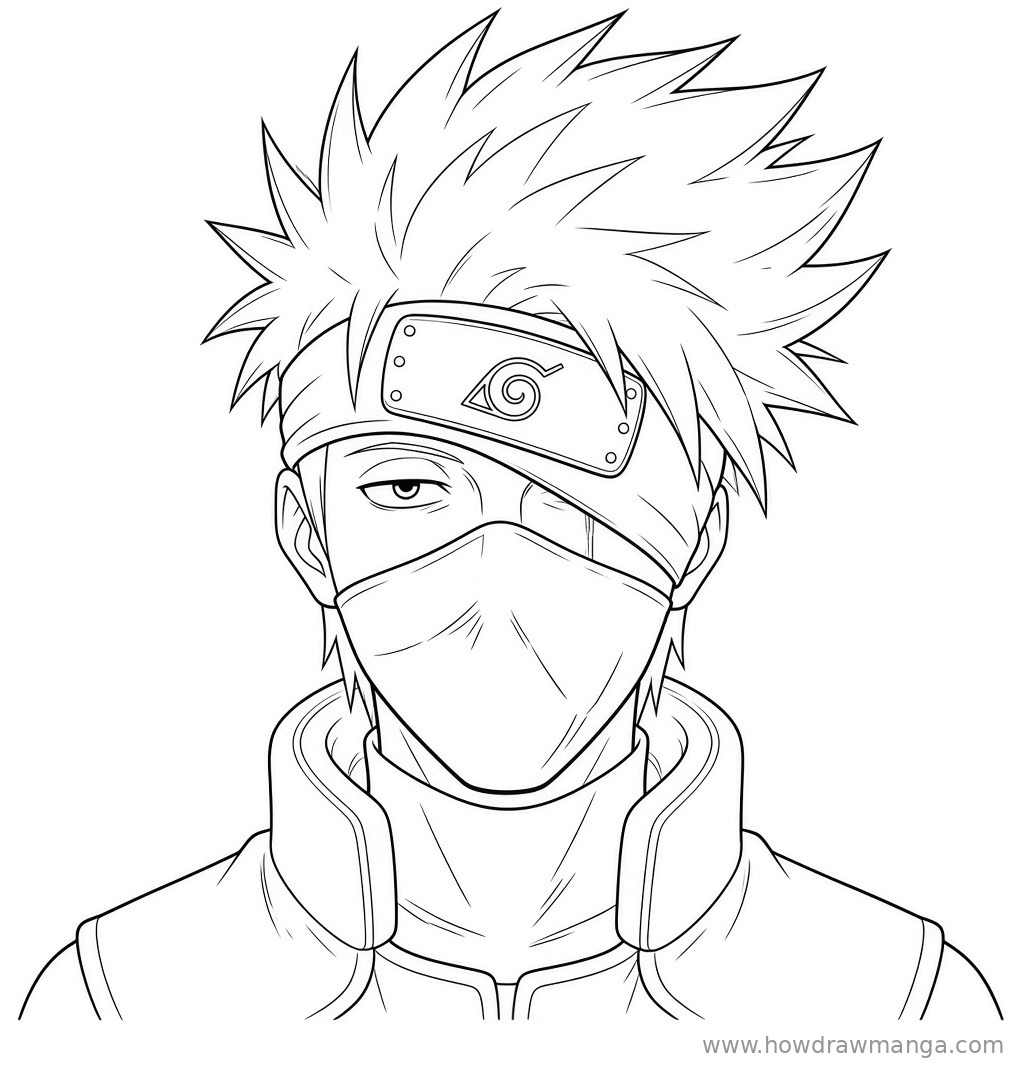
Trace over your best lines with a darker pencil or pen. Make the hair outline, the band, the mask edge and the vest collar the boldest lines, and keep the hair strands, eye creases, scar and mask folds thin. This step only cleans up what you already drew, so no new shapes are added. Once the ink is dry, erase any pencil marks that are left and your Kakashi Hatake face is finished.
Key Pro Tips for Drawing Kakashi
- Get the tilt right first. If the forehead protector is level, the drawing stops looking like Kakashi. Check the angle of the band before you move on to the hair.
- Keep the visible eye sleepy. A low, flat upper lid that cuts across the iris gives him his calm, bored look. A wide-open eye makes him look like a different character.
- Remember which eye is covered. The band hides his left eye, which is on the right side of the picture when he faces you. That hidden eye is where his scar and his Sharingan are.
- Lean the hair to one side. His silver hair is spiky but not symmetrical. Pushing the biggest spikes toward one side keeps the silhouette readable at a glance.
- Coloring tip: use light grey or silver for the hair and dark grey for the visible eye, then a dark navy for the mask and turtleneck and olive green for the vest.
FAQ
Why is Kakashi’s eye covered by his headband?
His left eye holds a Sharingan he received from his teammate Obito. He keeps it covered with his forehead protector when he is not using it, which is why most drawings show only one eye.
Can I draw Kakashi with both eyes showing?
Yes. Lift the band so it sits level above both eyes, draw the second eye as a mirror of the first, and run a vertical scar line from above the brow down through that eye onto the cheek.